Model Railway Electrics -
How to build a operational railway crossing
This is the most difficult project on this site. It
takes a lot of work but it is worth it. This project shows you how to make a
working railway crossing which is activated by the train, making the amber light
come on first followed by the flashing red lights. The train then cancels the
lights.
Click here to see it in action (Movie) (4mb)

Railway Crossing Barrier

1. All the
shapes (A to D) can be cut out of 1mm - 0.5mm card. For part A
it might be best to print them onto photo card and then stick
them onto thicker card. The other option is to paint on the
detail.
3. The tabs at the bottom of part C
are to hold up the barrier when it is installed on your layout. It will require
two small holes in your baseboard.
4. Make a small hole in all the parts.
Use a small piece of paperclip and thread it through. This will act as a hinge.
To stop it from falling out, you can bend over the ends with pliers. This is not
the easiest thing to do.
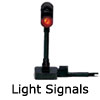
Railway Crossing Sign

Save this image and then print it onto glossy photo
card.
1. To take the 3mm LED's you will
need to make 3 X 3mm holes in the card where the lights will be pushed through.
Tread the wires through a thin straw, they will
require some bending to bring them in to the middle.
2. The back of the strip board
will be very bumpy from the soldering. I used a glue gun to put a layer of glue
over the strip board and before it cooled I flattened it and made it square. You
could also use Polly Filler to flatten the back. Both methods have the added
benefit of permanently fixing the wires in place. Test the lights before you do
this task.
3. Paint the light unit a medium
grey colour and glue on the printed off sign front.
4. Add some light shads to the
lights. Use small pieces of straw cut to the correct shape and painted black.

Shopping list
-
Resistors: 680 ×3, 1k ×3, 33k, 47k, 82k,
270k
-
Capacitors: 0.1µF ×3, 10µF radial ×2
-
Red LED (3mm best) ×2
-
Amber LED (3mm best)
-
555 timer IC ×3
-
8-pin DIL socket for IC ×3
-
on/off switch
-
Battery clip
-
Reed switch ×2
-
Miniature magnet - each locomotive needs one
-
Stripboard
Circuit Diagram
© J Hewes 2005
Enlarge
Stripboard Layout

Enlarge
Layout for mounting the LED's (strips going down)

Assembly
For this project step by step instructions would be
too long and unhelpful. Instead I have a some advice below. If you haven't got
much soldering or electronic experience I would recommend you try one of the
simpler projects first like the flashing light or signal.
1. Position the 8-pin DIL
socket for the IC (555 timer) first and then work around fitting components to
the board in pin order. This will stop you misplacing any of the components or
missing them out al together.
2. Only fit the IC (555 Timer)
in the 8-pin DIL socket after all the soldering is done. Remember to remove it
before making any modification as they are heat sensitive and may be damaged if
they are heated by a soldering iron.

© J Hewes 2005
3. The X on the strip board
indicate holes where the strip needs to be broken. There is a special tool to do
this or you can use a drill with a 3mm drill bit. You only need to drill in
enough to break the copper strip.
4. You can mount the resisters
and the capacitors vertically if they do not fit horizontally. This is slightly
weaker but it also reduces the amount of strip board you need. See the picture
below:

© J Hewes 2005
5. The trigger and cancel
switch can be normal switches or reed switches that can be placed in-between the
rail and be activated by a magnet under the train.
6. If at first the circuit does
not work, check to see if any solder has crossed to another strip. Also check to
make sure that the breaks you made in the strips with the drill have completely
severed the copper strip. It only takes a small strand to make a connection and
short the circuit.
7. Buy enough parts to build
more than one of these circuits as it might take more than one attempt to build
this Circuit. I know it did for me.
My Experience
It took me two attempts to build this circuit. It
took me over 2 and a half hours to build my first circuit mainly because I was
writing the stripboard layout using Mr Hewes circuit diagram. The flashing red
light part of this circuit just would not work. So I built the flashing light
part separate making sure it worked. I then built the first part of the crossing
circuit and attached the out put from pin 3 to the positive terminal of the
flashing light circuit and the negative side to the battery. This worked!!! And
I was very happy.
Acknowledgement
If you need any additional
information
The Electronics Club website
is a wealth of information and advice.
The circuit diagram is copyright of © J Hewes 2005,
Electronics Club, Kelsey Park School,
www.kpsec.freeuk.com


|