Model Railway Grass


Method 1:
Grass Mats
Method 2:
Grass Scatter
Method 3: Grass Scatter Mats
Method 4:
Static Grass
by Pete M
Method 1: Hairy Grass
/ Static Grass Mats.
Hairy Grass Mats (also called static Grass Mats) comes in sheets of
4ft X 2ft (1220mm x 610mm) and as the
name suggests is made up of hundreds of green fibres creating a fury / hairy
mat. It can be used as whole sheets or cut to fit
any flat area of your layout with the application of a little glue to hold
it down. A roll of this mat can cost from £5 to £10 but there are a few
speciality versions which retail for more than £20. Its main advantage over
scatter is that it
allows you to cover a large area quickly with no mess and is also more
resilient than using scatterings. Additionally, for most mats you can also
buy additional colour matched loose scatter to fill in any gaps or uneven
ground. There're currently 3 scenery brands on the market for Static Grass
Mats; Javis,
Noch, and
Gaugemaster
(Noch mats rebranded as Gaugemaster) This is what I used.

Grass cut, and glued in to place

Grass Sheet
[back to the top]
Method 2:
Scatterings
They come in all shapes sizes and colours including grass.
First you spread glue over the area you want to cover. Use a lot of glue as
this stuff often falls off if you don't. Then spread the scatterings over
the glue. It is a good idea to use a sieve to control the amount you use
and/or a brush to move it in to all the gaps. Neither are essential but are
useful. Once dried use a clean dustpan and brush to collect all the lose
scatterings so they can be re used. Don't use a Hoover as this can pull of a
lot of the glued down material. It is my advise to paint the board under the
scattering the desired colour so that any fall of due to wear and tear will
not show through.
[back to the top]
Method 3: Scatter
Mats
See ballast mat laying method.
[back to the top]
Method 4:
Static Grass
Author:
Pete M
If you want that 3 dimensional grass effect, go for static grass,
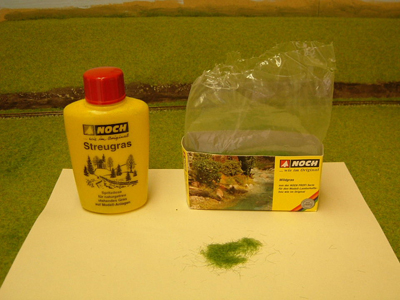
it's simple and effective. The grass is in the form of tiny synthetic fibres, in
various lengths and colours. Using a simple puffer bottle* you apply it to neat
PVA glue, it becomes charged with static electricity and stands on end, giving
that 3D effect, the procedure is as follows:
1.
Work on an area about 300mm square at a time. Paint the area you want to grass a
suitable under-colour, a mix of greens and browns is best.
2. Sieve some of the grass fibres to
remove any clumps, and fill the puffer bottle about half way up (don't fill it
to the top the stuff just becomes a tightly bunched mass and won't come out).
3. Apply a coat of neat PVA glue to the
area you want to grass, ensure the area is totally covered but don't worry about
the odd blob as this just adds texture (unless your laying a bowling green in
which case brush it smooth!).

4. Holding the puffer bottle about 100-150mm
from the surface start puffing gently. Build the grass up slowly working around
the area, puffing from different angles.

5. As you go along give the bottle a gentle
shake every so often to loosen clumps.
6. Build the grass up to the thickness you
want, don't worry if the glue still shows through, it dries transparent and you
won't see it.
7. Every so often gently blow over the grass
to loosen any stray particles, and to check your coverage. Some recommend
passing a vacuum cleaner with a piece of cloth over the nozzle over the area, to
lift the particles a bit, but take care not to suck it all off!
8. Once dry (best to be patient leave it a
few hours) suck or blow off the excess.


That's the basic principle. The grass is
available in many colours and lengths. It's best to experiment before starting
on your layout. A good technique is to lay down some long grass, and then over
lay with short grass. Any bald patches that appear can be touched in after, and
laying one layer on top of another is good for a 'scrubby grass effect'. The key
is to experiment!
*The puffer bottle is essential as it's the driving force behind the static,
they are available from
Noch and cost about £3.99 (they seem to last for ever
too!). Powered devices that look like a small hairdryer (Gras-Master
Electrostatic Flocking Device) are available but are
very expensive and probably not worth the outlay. Static grass is also available
from Noch,
Javis, Woodland
Scenic's and other manufacturers.
(Static grass is great if you want to represent a detailed scene, or small
areas, if instead your trying to achieve a sweeping landscape for your train to
whiz through at speed, traditional scatter is probably best as it wont be
distracting to the eye.)
[back to the top]
|