
Pawford 00 New Trainee engine driver saves layout
-
Rail_Fan 15
- Posts: 57
- Joined: Sat Apr 21, 2007 12:02 am
- Location: Manawatu, New Zealand
Greta photos Aidan !!!!
That Linka warehous looks splendid. Bet there was some work in that.
My Very Best Regards
BILL.
That Linka warehous looks splendid. Bet there was some work in that.
My Very Best Regards
BILL.
Website: http://www.freewebs.com/thumbsupfilms
HOW TO-Coach Lighting http://www.newrailwaymodellers.co.uk/Fo ... 55&start=0
HOW TO-Coach Lighting http://www.newrailwaymodellers.co.uk/Fo ... 55&start=0
I used 1/2 round wood mouldings from B&Q Scribing joints in with a dremmel cutting disc for straight lengths, on curved sections I cut individual copings from the moulding.bsa77 wrote:Superb! What are the stone wall caps (tops) made from? Are they scratch built or part of a kit? T
Thanks Bill, the warehouse still needs to be finished, I'm not happy with the painting, it did take a bit of time to put together all the Linka Parts, how ever I made moulds of the finished sections, as there will be a few of these warehouse's around the docks. I can cast them very quickly and a full warehouse is made from 4 cast sections plus the roof.
You can see in this picture the original warehouse side I made on the right, I then used meltable PVC to make a mould of the side, on the left is a cast from the mould. The result is I can make several very quickly and easily now.
For more information on Cheating with Linka take a look at the NRM Article Here
Click on the picture to make it bigger.

Well it seems my layout wants to drive me up the wall lately, every time I decided to have a running session it plays up.
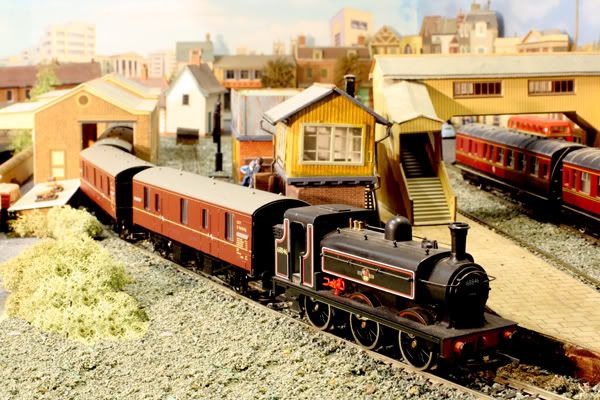
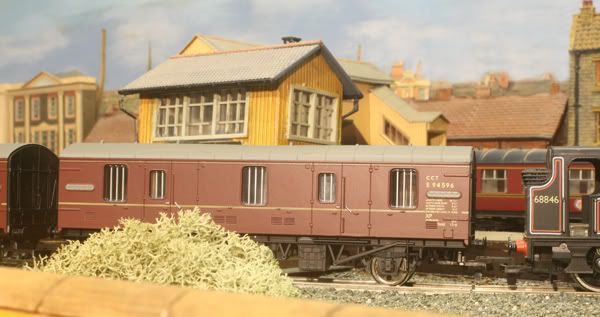
Thought I'd just try out the new Utility vans I'd bought from Hattons, do a bit of shunting between the docks and Arthonpew Goods yards, I had not got them out of the docks before they came off the rails shunting them back-wards round the first radius curve on the upper dock wall, not just the one, they all did it.
Moved them forward then shunted them back wards to-wards the branch-line, at the 3 way point they derailed again same thing happened at all the points that involved a slight bend.
The wheels are fixed to the the chassis yet the couplings pivot, the wheel gauges look OK so I'm at a loss.
I'm going to try changing the wheels to see if that helps, any suggestions as to how to cure the problem will be greatly received
They do look good though at the Arthonpew Goods Sheds
Hi Aidan !!
Bit of a bummer with the new coaches .
.
I have had similar probs at times. You say that the wheel guages seem okay but it may not be so. I hope you don't mind me making a couple of suggestions if you are still having the prob.
The part of the couplings that are in contact with one another when pushing. Try just smearing a bit of WD40 or similar on them. There may be some resistance when they turn against one another.
Or- reduce the wheel guage by just a fraction so the wheels don't ride up the rails when turning a bend in reverse.
No doubt you will have it sorted by now anyway.
My Very Best Regards
BILL.
Bit of a bummer with the new coaches
I have had similar probs at times. You say that the wheel guages seem okay but it may not be so. I hope you don't mind me making a couple of suggestions if you are still having the prob.
The part of the couplings that are in contact with one another when pushing. Try just smearing a bit of WD40 or similar on them. There may be some resistance when they turn against one another.
Or- reduce the wheel guage by just a fraction so the wheels don't ride up the rails when turning a bend in reverse.
No doubt you will have it sorted by now anyway.
My Very Best Regards
BILL.
Website: http://www.freewebs.com/thumbsupfilms
HOW TO-Coach Lighting http://www.newrailwaymodellers.co.uk/Fo ... 55&start=0
HOW TO-Coach Lighting http://www.newrailwaymodellers.co.uk/Fo ... 55&start=0
Thanks Bill, your right about the wheel gauges and couplings that's where after a lot of messing about and doing as you suggested I've managed to get them to stay on the tracks.
But it's typical Hornby in my experience, their stock is rubbish straight out of the box you have to spend time and effort trying to get them to run properly, just look at the trouble I had to go to re the tanks and their traction wheels. I just don't get these problems with Bachmann, the box arrives I unpack it put it on the layout and off it runs around the layout whilst I sit back and enjoy it.
I'm afraid Hornby are off my buying list once again.
Hi Aidan !!!
That's great news. Hope you didn't mind me sticking my two penneth in.
I had alot of probs with a set of wagons I got of eBay a couple of years ago so I didn't use them. Then I had to replace some wheels on some coaches with the new type. Same probs. So I messed about and struck lucky. Had the same prob yesterday with a coach, the wheels must have moved, so it got sorted as they say. And of course, the said wagons, now run a treat as well.
Take care,
My Very Best Regards
BILL.
Website: http://www.freewebs.com/thumbsupfilms
HOW TO-Coach Lighting http://www.newrailwaymodellers.co.uk/Fo ... 55&start=0
HOW TO-Coach Lighting http://www.newrailwaymodellers.co.uk/Fo ... 55&start=0
Took time out from running trains (or what's been the norm lately, maintenance) to play about with some of the photos in photoshop.
I'm a true novice with Photoshop but I did like the end result, of course there's a lot wrong with it and I'll probably do a lot better once I've learnt more, but for now I've managed to get what I was aiming for, which surprised me
Arthonpew Incline by Moonlight
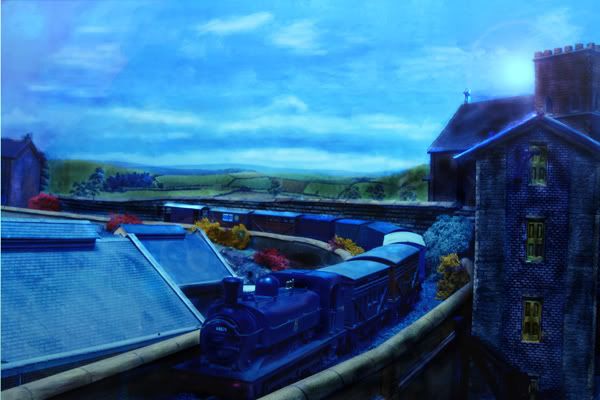
I'm a true novice with Photoshop but I did like the end result, of course there's a lot wrong with it and I'll probably do a lot better once I've learnt more, but for now I've managed to get what I was aiming for, which surprised me
Arthonpew Incline by Moonlight
-
SouthernBoy

- Posts: 1753
- Joined: Sun Oct 08, 2006 11:01 pm
- Location: The past: We do things differently there
Nice picture Sanctuary, that really has the feel of a moonlit night to it (either that or it's a Picasso from his Blue Period  )
)
If you're new to Photoshop there are two key adjustments you'll find useful: Curves, which by tweaking the curve about one third from the left you'll find can bring out details often lost in dark or shadowy areas .... and Hue/Saturation, which you can use to adjust the degree of colour intensity of your pictures. Both are under the 'Image > Adjustments' menu.
Another useful set of tools are under the 'Filter > Sharpen' menu ... these help compensate for detail lost when resolution is reduced for web viewing by increasing the degree of contrast.
Anyway - have fun playing with all the other filters - the best way to learn is to play
post subject
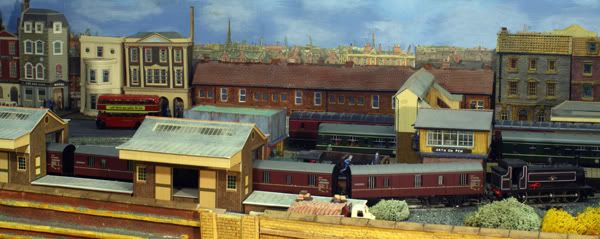
being looking at your layout aidan. fantastic
Bit slow on the post here.. but,
I too have had lots of problems with de-railing Hornby stock, espscialy the brand new stuff straight out the box.
Ive ended up replacing the wheel sets on nearly all my newer stock!!
Bit frustrating really as youd expect them to run properly over points etc.. without having to "fix" them first
I too have had lots of problems with de-railing Hornby stock, espscialy the brand new stuff straight out the box.
Ive ended up replacing the wheel sets on nearly all my newer stock!!
Bit frustrating really as youd expect them to run properly over points etc.. without having to "fix" them first
Re: PAWFORD Automated/Manual 00 scale update 9-6-2008
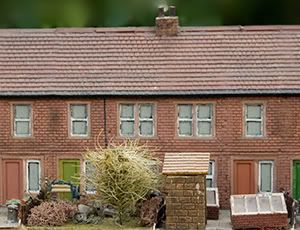
It was such a lovely day yesterday that the residents of Alston came out in to their Gardens
Jim got stuck into tyding up the garden admiring the blossom on the fruit trees
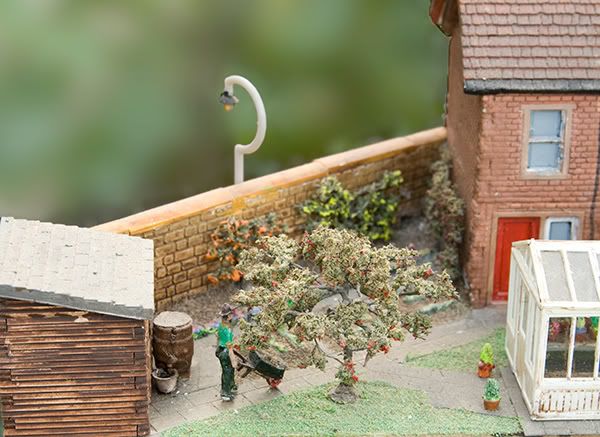
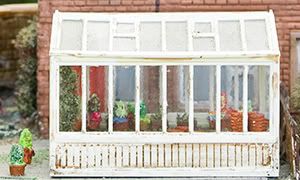
He'd earlier been working in his Greenhouse
Margaret next door but one had been to the Garden centre for summer bedding then instructed Ralf where he is to plant them, whilst Steve takes the oportunity to mow his lawn
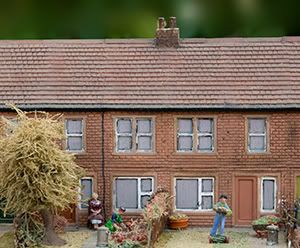
Nothing gets the Clampets in to their garden unless it's to dump something thats broken they spend their time watching TV
Bob getting the motor bike he nicked the day before ready for a picture to post on Thieve Bay
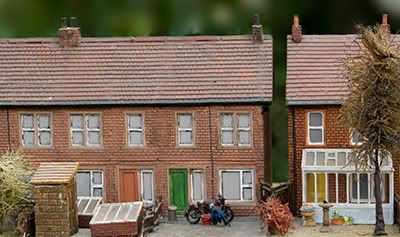
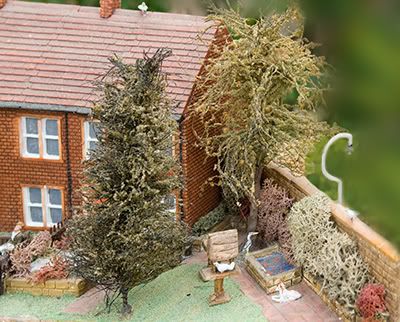
2 Doors down Bert snoozes in the sun, whilst Carla the dog eyes up the pigeon on the bird table, the Heron takes the oportunity to weigh up the chances of snatching a Goldfish
I'd been inspired by BrianT's pictures but failed with the lighting in the Garage so poped them outside on a workmate to try and get the right light.
Jim got stuck into tyding up the garden admiring the blossom on the fruit trees
He'd earlier been working in his Greenhouse
Margaret next door but one had been to the Garden centre for summer bedding then instructed Ralf where he is to plant them, whilst Steve takes the oportunity to mow his lawn
Nothing gets the Clampets in to their garden unless it's to dump something thats broken they spend their time watching TV
Bob getting the motor bike he nicked the day before ready for a picture to post on Thieve Bay
2 Doors down Bert snoozes in the sun, whilst Carla the dog eyes up the pigeon on the bird table, the Heron takes the oportunity to weigh up the chances of snatching a Goldfish
I'd been inspired by BrianT's pictures but failed with the lighting in the Garage so poped them outside on a workmate to try and get the right light.
Re: PAWFORD Automated/Manual 00 scale update 9-6-2008
Lovely lovely details there young Aiden.
Re the moonlight picture, WOW looks more like a fifties disaster movie
To succeed with Photoshop remember less is best.

And a slightly different version.

Trouble is I'm not allowed out after dark.
I have now uninstalled about £1500 worth of PS 6,7 CS2,and CS3 Oh and Lightroom and a host of 'plug- ins'.. Modern digital cameras are getting so good that the days of spending hours getting the image right has now largely gone. Some simple software such as Elements 5 is plenty. All the rest IMO are totally OTT and for amusement and discussion amongst experts . Well I don't pretend to be an expert and it all makes me very confused, then my head hurts.
The 'unsharp mask' is a case in point, whole volumes have been written on this single fuction and I kid you not. My advice?. One click. Well two initially to be accurate. Set the camera sharpness to 'Auto' or 'normal' then in your editing software just click ' Auto Sharpening' as I said I like KISS. It works for me. Half the trouble with digital is that it opens up a whole universe for the 'expert' well it's not my bag.
I am a firm believer in KISS, so for me Elements 5 and mostly 'Auto' functions suit me fine. 'Nail it in the camera is my recommendation.
Sorry for the interuption Aiden.
Brian. ( Well into his third childhood mode)
Re the moonlight picture, WOW looks more like a fifties disaster movie
To succeed with Photoshop remember less is best.
And a slightly different version.
Trouble is I'm not allowed out after dark.
I have now uninstalled about £1500 worth of PS 6,7 CS2,and CS3 Oh and Lightroom and a host of 'plug- ins'.. Modern digital cameras are getting so good that the days of spending hours getting the image right has now largely gone. Some simple software such as Elements 5 is plenty. All the rest IMO are totally OTT and for amusement and discussion amongst experts
The 'unsharp mask' is a case in point, whole volumes have been written on this single fuction and I kid you not. My advice?. One click. Well two initially to be accurate. Set the camera sharpness to 'Auto' or 'normal' then in your editing software just click ' Auto Sharpening' as I said I like KISS. It works for me. Half the trouble with digital is that it opens up a whole universe for the 'expert' well it's not my bag.
I am a firm believer in KISS, so for me Elements 5 and mostly 'Auto' functions suit me fine. 'Nail it in the camera is my recommendation.
Sorry for the interuption Aiden.
Brian. ( Well into his third childhood mode)
Brian.
Re: PAWFORD Automated/Manual 00 scale update 9-6-2008
Sorry Brian only noticed your reply today, your right re-photoshop every expert has the correct way to do the same thing as there are so many ways to use photoshop to get the same result. It is handy when I'm getting every one's pictures ready for the Virtual Exhibitions so the levels are consistent.
Your 2 pictures have a great night time look, I was watching an old western film on channel 4 the other night and noticed they must have shot during day light and then processed it to look like night, as there were strong shadows cast on the ground a bit to strong to be cast by the moon.
I'm beginning to regret all this new knowledge, as I'm seeing fault in all the pictures I'm taking now, looking for perfection similar to the results you get, I'll just have to keep practising till I get it right, which is easier and a lot cheaper now with the digital camera.