Engineered wood flooring and progression of my board

Discussion of model railway baseboard design and construction
pmlondon
Posts: 145
Joined: Sun Sep 30, 2007 2:04 pm
Location: Troyes

Engineered wood flooring and progression of my board

Post by pmlondon »

Has anyone ever used this kind of material to build their baseboard?

Image

It's just crossed my mind as I just finished to replace the carpet in our living room and I have nearly enough sheets left to cover the surface of my layout.

I'm thinking about the advantage of the structure of the product, there is 3 layers and the core is perpendicular to the base and finish layer hence counteracting any variation of temperature and humidity movement.

I would like to know if anyone think of an issue about using this method,
Last edited by pmlondon on Tue Nov 14, 2017 8:52 pm, edited 2 times in total.
2017 : Back to the Hobby
pmlondon
Posts: 145
Joined: Sun Sep 30, 2007 2:04 pm
Location: Troyes

Re: Engineered wood flooring

Post by pmlondon »

Thanks for the advice, this is real wood, not laminate, here are the details of the product from the B&Q website :

http://www.diy.com/diy/jsp/bq/nav.jsp?a ... arch=false

This is only varnished Beech (for the decorative layer) and Pine wood all of this glued together. there is a small strip of MDF at the 20cm end of the core layer to secure the strips.

We bought our lot for a significantly lower price than the actual offer, we even ended up buying some more for half the price towards the end of the installation as I wasn't sure if we where going to have enough to finish the room.

I would screw the finished side to the frame and build the layout on the pine wood side.

I'm going to give it a try regarding the reaction to adhesives, they are stating in the instructions to use a mask while cutting the stuff but it seems it's only because like any treated wood some really fine particules of wood could fly off.
2017 : Back to the Hobby
User avatar
Flashbang
Posts: 4095
Joined: Thu Oct 18, 2007 1:07 pm
Location: SE United Kingdom
Contact:

Re: Engineered wood flooring

Post by Flashbang »

Hi
Largest disadvantage in IMO is the size of each panel, which would mean having glued seams every planks width - approx 6 inches or so where two or more planks are required for width.
Advantage might be that its base material is made up often of ply or laminated timbers which may well resist warping?
May be useful where open top construction is used.

Ordinary wood working PVA glue will be fine with it. Its an al timber product and no standard glue is going to effect it.
[Image << Click the Icon to go to my website
Broken? It was working correctly when I left it.
User avatar
Bufferstop
Posts: 13830
Joined: Thu Mar 11, 2010 12:06 pm
Location: Bottom end of N. Warks line

Re: Engineered wood flooring

Post by Bufferstop »

We have engineered bamboo flooring in our house. It has one positive advantage, it is exceedingly stable. Whereas the natural material moves with the seasons (and the underfloor heating) the engineered boards in the bathroom put up with huge variations in humidity and higher heat output from the underfloor pipes. It seems a little OTT but if you have spare lengths it would make a good trackbase in open top designs. PVA wood adhesive is the recommended way of joining the boards so should be ok for modelling use. I wouldn't suggest using it for a large rectangular board as the weight would be too great for easy movement.
John W
Bufferstop
Growing old, can't avoid it. Growing up, forget it!
My Layout, My Workbench Blog and My Opinions
pmlondon
Posts: 145
Joined: Sun Sep 30, 2007 2:04 pm
Location: Troyes

Re: Engineered wood flooring

Post by pmlondon »

I should have shown a complete plank, on the picture it's 2 cutouts, they are interlocking in all directions and I will only have to screw the finished board onto the frame.

Now what's worrying me is the size of my layout, it's a slightly smaller L shaped 6.5 x 8 foot board and there is 2 levels.

Image

The weight of the board was not an issue until recently but I had to promise to my half that the layout could be lifted to lie on a wall from time to time.
Last edited by pmlondon on Tue Nov 14, 2017 8:55 pm, edited 1 time in total.
2017 : Back to the Hobby
User avatar
Bufferstop
Posts: 13830
Joined: Thu Mar 11, 2010 12:06 pm
Location: Bottom end of N. Warks line

Re: Engineered wood flooring

Post by Bufferstop »

I wouldn't even attempt to build that board as a single moveable entity, but as a fixed framework on the T girder principal, with solid top boards only in the heavily tracked areas. It's an American system of construction which is used in their basement layouts. The test I apply to any baseboard design is "can I lift it by one corner without it flexing" whether or not that board would flex if lifted by one corner is hardly likely to be put to the test. Unless your daily consumption of Weetabix matches that of an Olympic weight lifter. :)
Growing old, can't avoid it. Growing up, forget it!
My Layout, My Workbench Blog and My Opinions
noel
Posts: 431
Joined: Sun Dec 23, 2007 1:27 pm

Re: Engineered wood flooring

Post by noel »

+

Because it is so dense, it is hard to push pins etc. into it.

+
whynot
Posts: 1946
Joined: Fri Jul 09, 2010 3:37 pm
Location: Nottingham

Re: Engineered wood flooring

Post by whynot »

"The weight of the board was not an issue until recently but I had to promise to my half that the layout could be lifted to lie on a wall from time to time."

With over 50 sq ft of that stuff I hope the wall is strong enough!
pmlondon
Posts: 145
Joined: Sun Sep 30, 2007 2:04 pm
Location: Troyes

RE: Engineered wood flooring and progression of my board

Post by pmlondon »

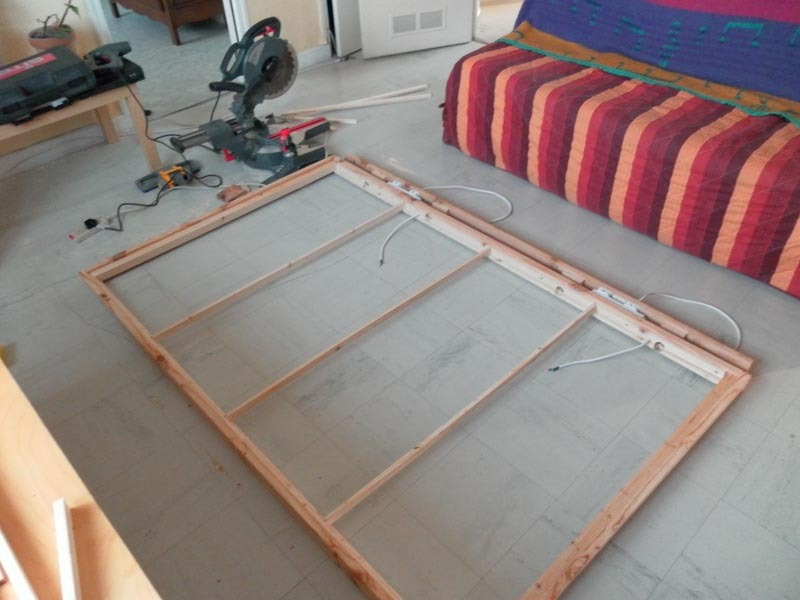
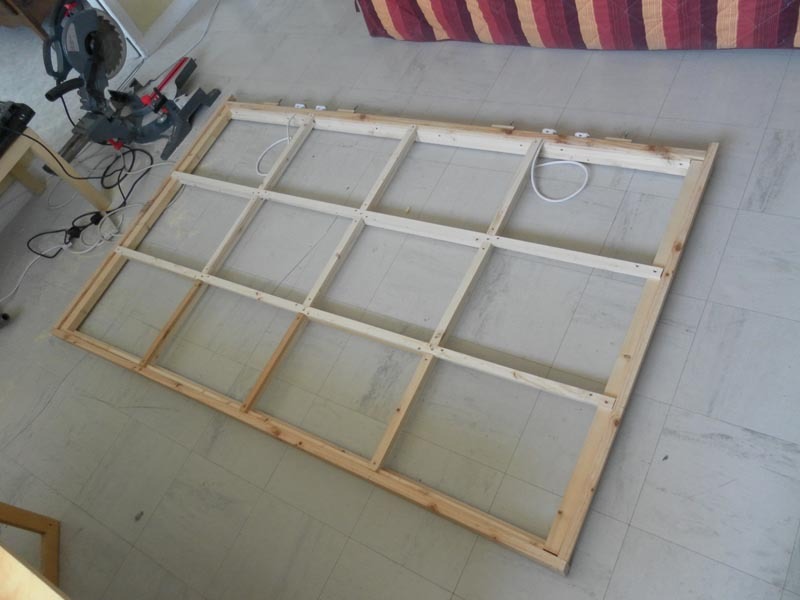
Eventually I have started to build the baseboard, to keep everything together I'm going to show the pictures of the progression on this topic even thought I am going to use some 3mm thick mdf.

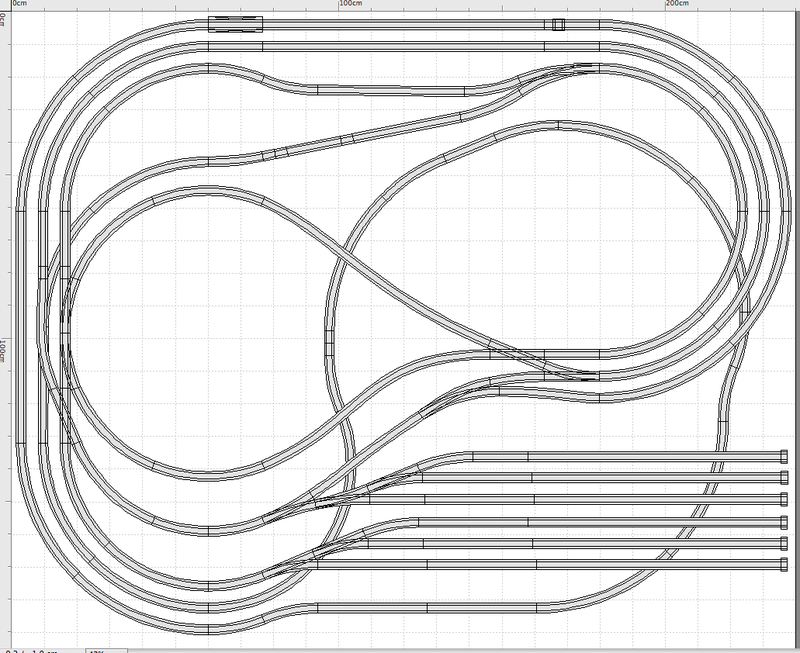
The final size of the layout is set at 195cm x 244cm but it is going to be 2 boards.

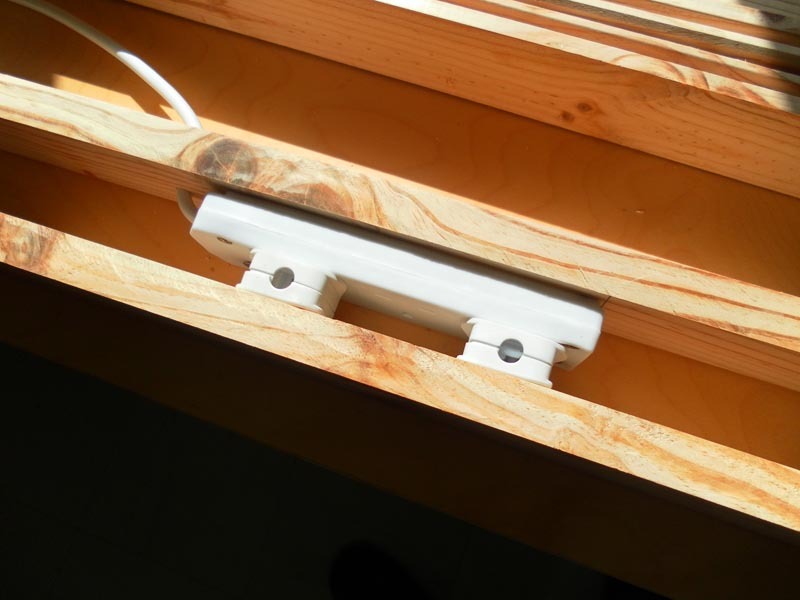
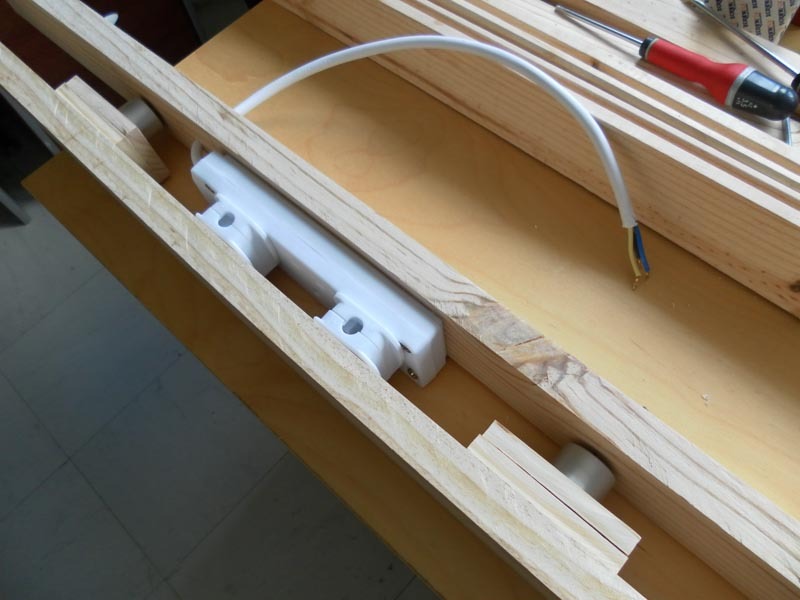
The last time I came back to the UK I bought 2 small extension leads at the Poundshop which are now used to establish the electrical connection between the 2 boards as well as the alignment.

Image

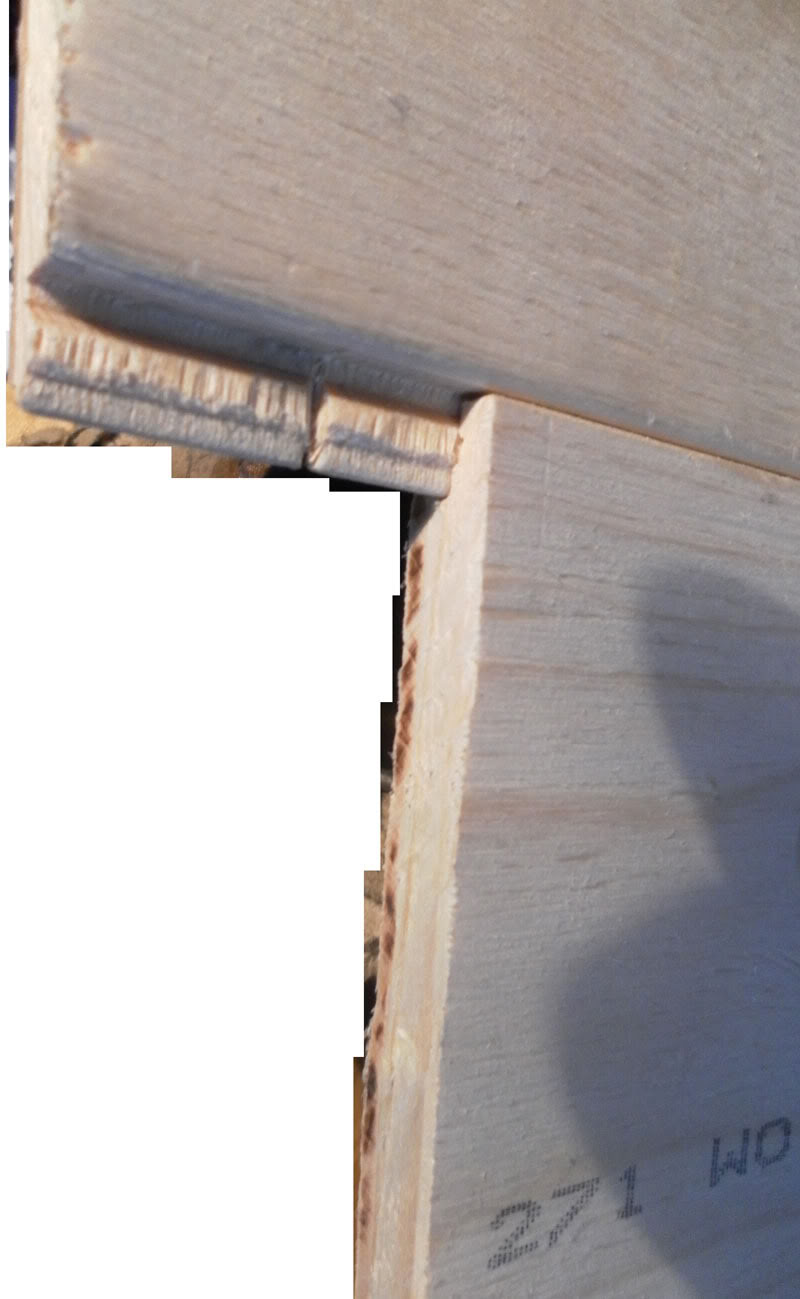
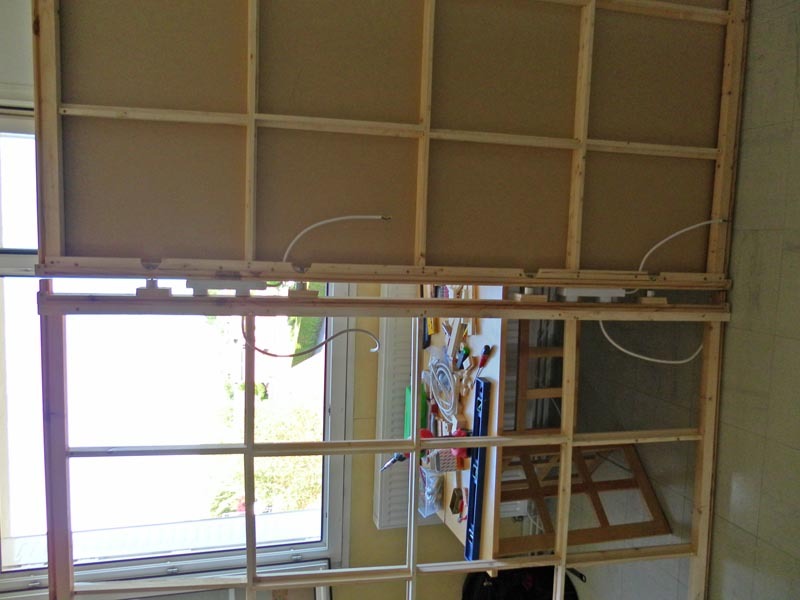
This looks like this once separated.

Image

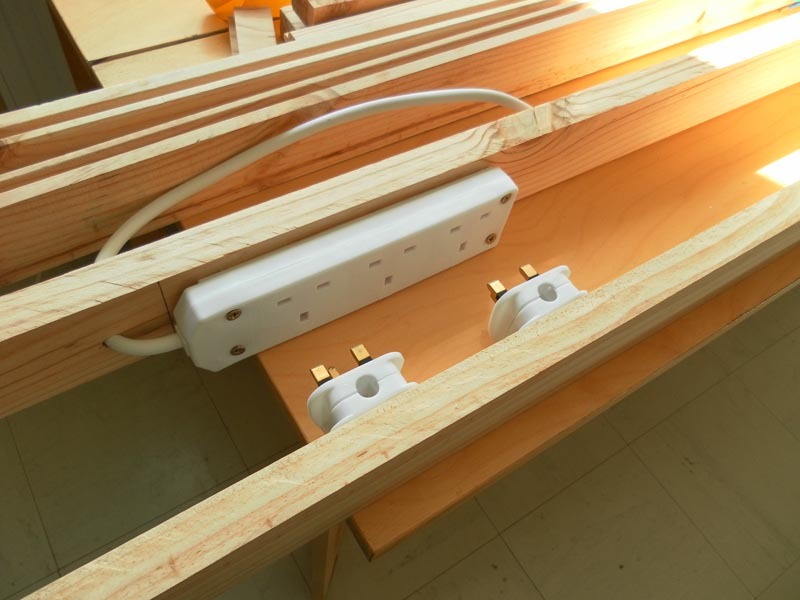
Here is how it looks like with the holding bolts.

Image

and again separated.

Image

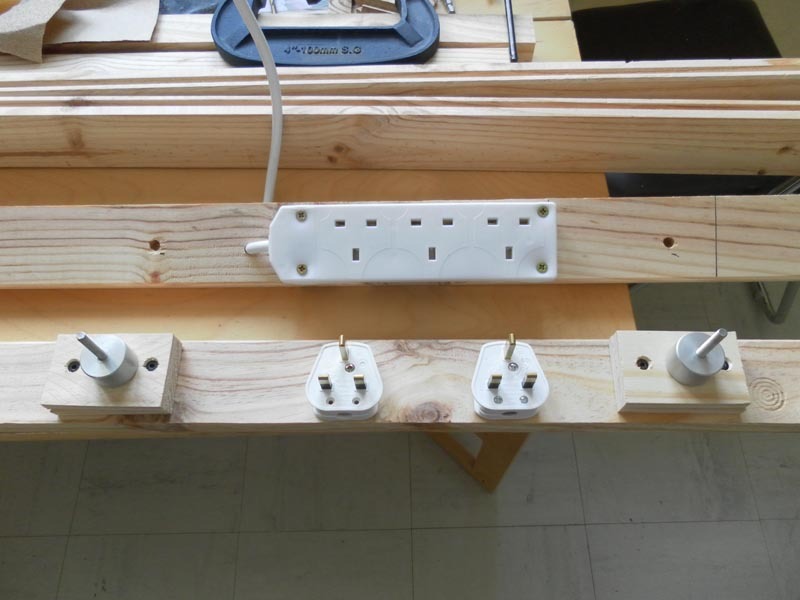
I have now drilled a hole behind the plugs and connected the cable as well as screwed together the first board frame which is going to be the next picture.

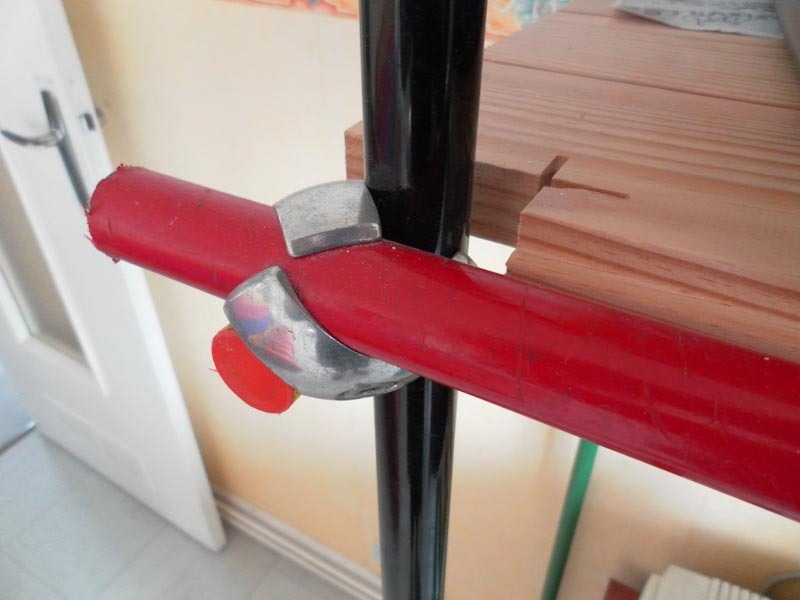
On the external part of the holding mechanism I intend to drill 2 25mm holes in the main frame all along the 4 pieces of wood to level the board as a single entity using 2 250cm long steel tube.

I have been using this kind of tubular structure to make some sturdy shelving

Image
Last edited by pmlondon on Tue Nov 14, 2017 8:57 pm, edited 1 time in total.
2017 : Back to the Hobby
User avatar
lozstlouis
Posts: 422
Joined: Fri Dec 28, 2007 6:54 pm
Location: London SW19

Re: Engineered wood flooring and progression of my board

Post by lozstlouis »

Neat plug contraption.
OO in the loft. Lenz 90 making it go.
pmlondon
Posts: 145
Joined: Sun Sep 30, 2007 2:04 pm
Location: Troyes

Re: Engineered wood flooring and progression of my board

Post by pmlondon »

Today I'm finishing the first board which was looking like this last night.

Image

And like this tonight.

Image

Tuesday 22nd May the first board is finished with a weight of 8.5 kg which is surprising me considering the number of screws.

Image
Last edited by pmlondon on Tue Nov 14, 2017 8:57 pm, edited 2 times in total.
2017 : Back to the Hobby
Pevensey Flyer
Posts: 188
Joined: Sun Dec 28, 2008 10:13 am

Re: Engineered wood flooring and progression of my board

Post by Pevensey Flyer »

The baseboards look very well constructed but it's the electrical connection bit that's confusing me.

Why are you putting 240volt plugs between the boards? Have I missed something here?
Visit my BOSHIP ABBEY layout
http://www.newrailwaymodellers.co.uk/Fo ... hp?t=28664
and my new BONNIE TOWN BY SEA 'T Gauge layout 'http://www.newrailwaymodellers.co.uk/Fo ... 22&t=35117
pmlondon
Posts: 145
Joined: Sun Sep 30, 2007 2:04 pm
Location: Troyes

Re: Engineered wood flooring and progression of my board

Post by pmlondon »

It's just because it was the cheapest option to establish the connectivity of the track and siding bus between the control and secondary board. Using oversized cables and plugs doesn't affect the current flow.

I am using the small Hornby DCC unit which should control the points motors and think of using a second one to control the trains. The 2 row of plugs will host respectively the track bus and points bus.

I had a few spare plugs removed from those small extension leads from the Poundshop replaced by continental plugs to connect my UK devices in my French flat and found that it will make a sturdy alternative to the dovels for aligning the boards.

More pictures should come today of the progression, hopefully I will finish the second board and start to glue down the layout printed mosaic.
2017 : Back to the Hobby
pmlondon
Posts: 145
Joined: Sun Sep 30, 2007 2:04 pm
Location: Troyes

Re: Engineered wood flooring and progression of my board

Post by pmlondon »

Nearly there, I just need to cut the MDF board from 244cm to 195cm long and fix it on the frame:

Image

I have read about protecting the base board with a coat of paint and was wondering if a spray of varnish would be fine?

Any suggestions welcomed.

The 2 boards joined before aligning the 2nd sheet:

Image
Last edited by pmlondon on Tue Nov 14, 2017 8:59 pm, edited 1 time in total.
2017 : Back to the Hobby
brit-in-bama
Posts: 214
Joined: Sun Dec 26, 2010 8:46 am
Location: Alabama U.S.A

Re: Engineered wood flooring and progression of my board

Post by brit-in-bama »

That is looking real "classy", love your ingenuity for the electrics, as far as protecting the mdf from moisture (which is its real enemy) we use mdf for lots of furniture and cabinets here in the USA, also for moldings and skirting boards, most or the time we simply use a good white wood primer, as its cheap, it seals the board, dries in a couple of hours, and is a good base for all other paints and finishes, we tend to paint both sides of a sheet before we fix it in place, Alabama can be real humid in the summer (and don't forget to paint the cut ends) varnish or a gloss paint does not tend to sink into the surface, and can be difficult to get other things to stick to it without sanding it down, also using a pencil to draw on the undercoat you can erase the pencil with an ordinary eraser, this helps a lot when trying out ideas for it acts like white paper, we spray as its quicker,and dries fast and smooth, but a brush could be easier if you don't like the smell, we usually only need one coat, but get it everywhere.
Post Reply