009 Narrow Gauge Winter Scene (Heavy Bandwidth Warning)

Post pictures and information about your own personal model railway layout that is under construction. Keep members up-to-date with what you are doing and discuss problems that you are having.
mumbles
Posts: 1802
Joined: Sun Nov 12, 2006 11:23 pm
Location: Kent
Contact:

009 Narrow Gauge Winter Scene (Heavy Bandwidth Warning)

Post by mumbles »

Welcome to another New Mumbles thread!!!

As you now know I entered the winter scene competition and for my entry I decided to do something I had been wanting to do for a while and build a narrow gauge layout.

Stupid choice for a competition on this forum, as far as I know there are no narrow gauge blue locos with yellow ends!

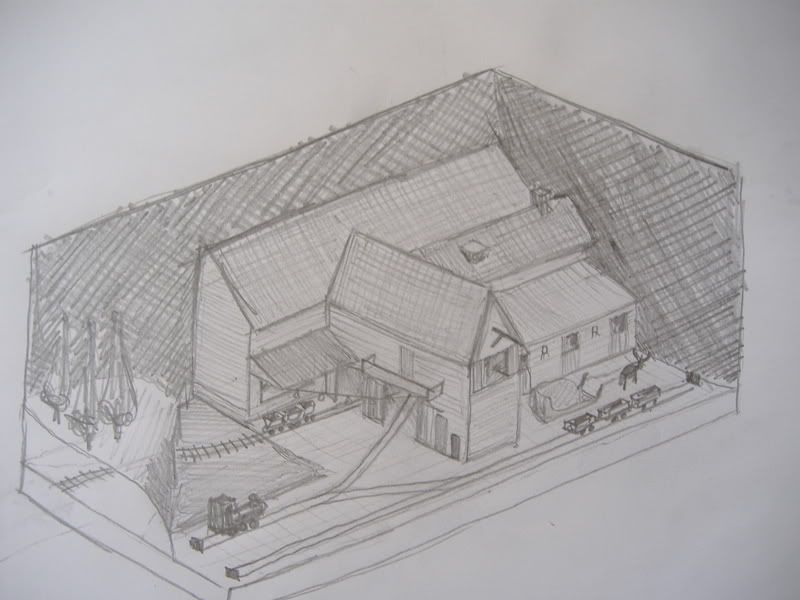
Anyway… I thought of a plan almost straight away so set to sketching what I was thinking of building.
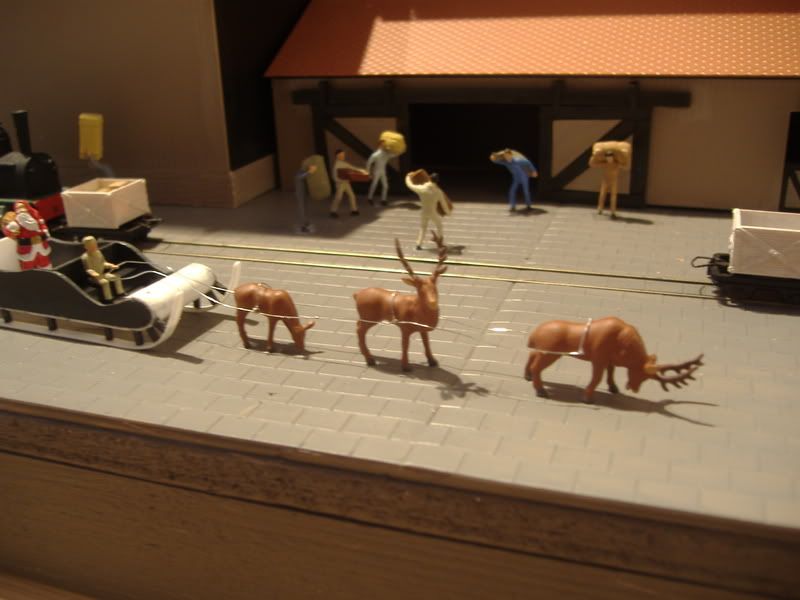
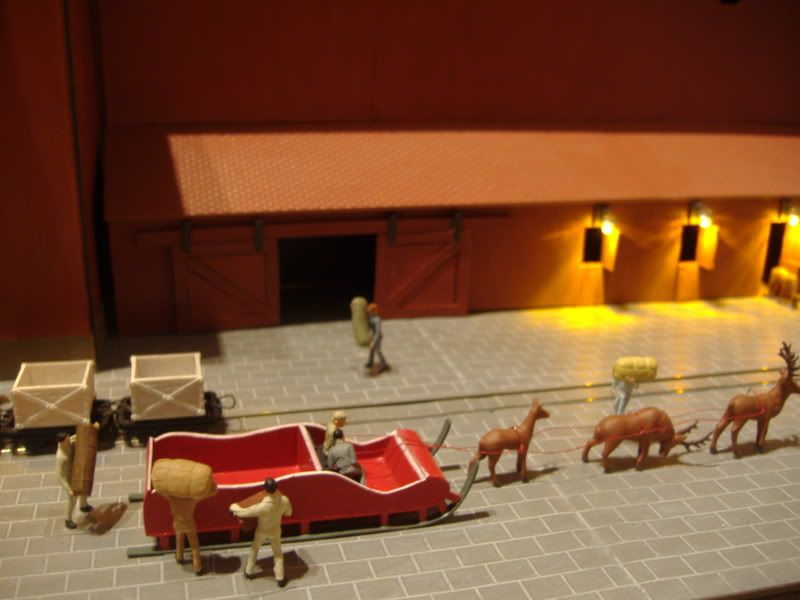
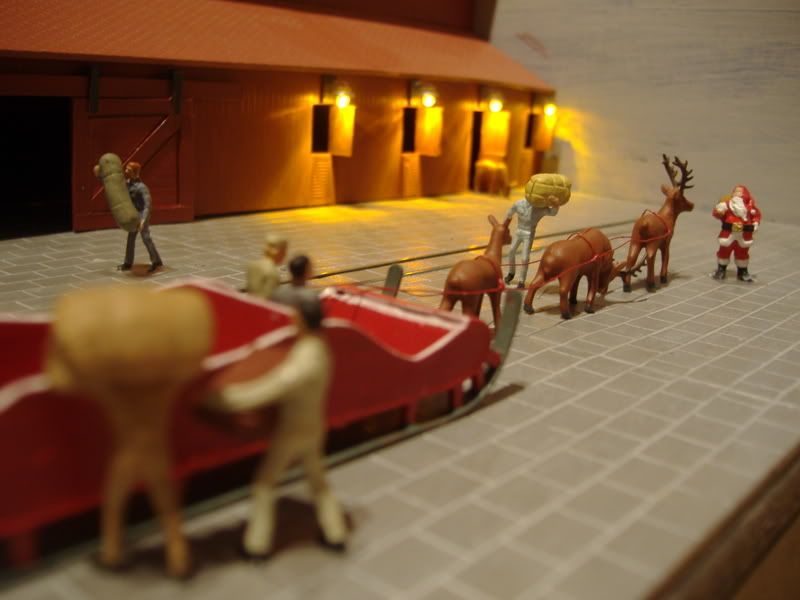
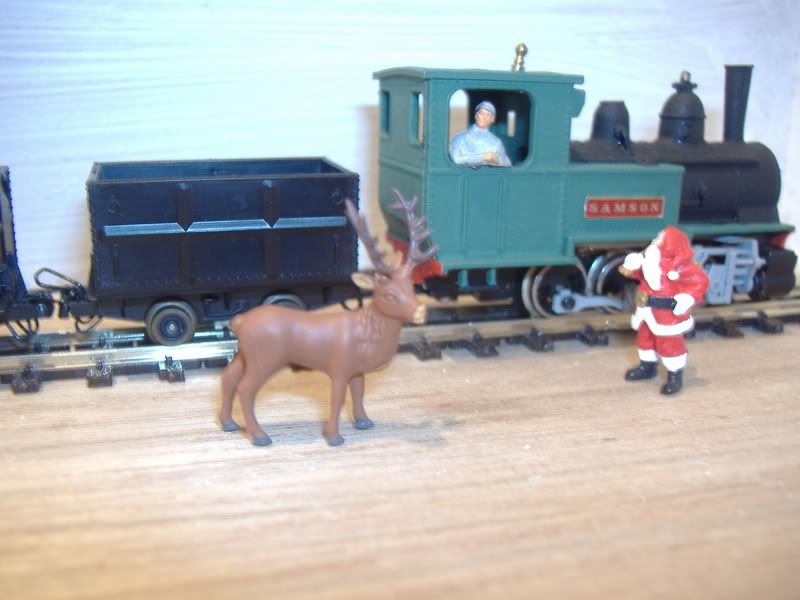
I was thinking of it being a Christmas fantasy themed layout that my kids would love and that I would enjoy building, learning new things and that I could convert after the competition to a more freelance realistic narrow gauge layout.

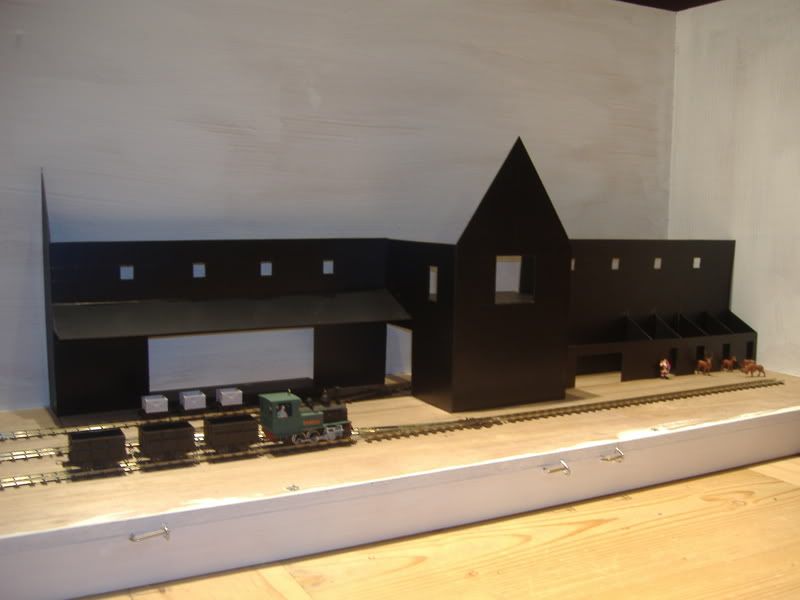
This was the pre production sketch I drew, and although the Santa Roof/Chimney training facility never made it to production, it is fairly accurate to the finished layout.
Image

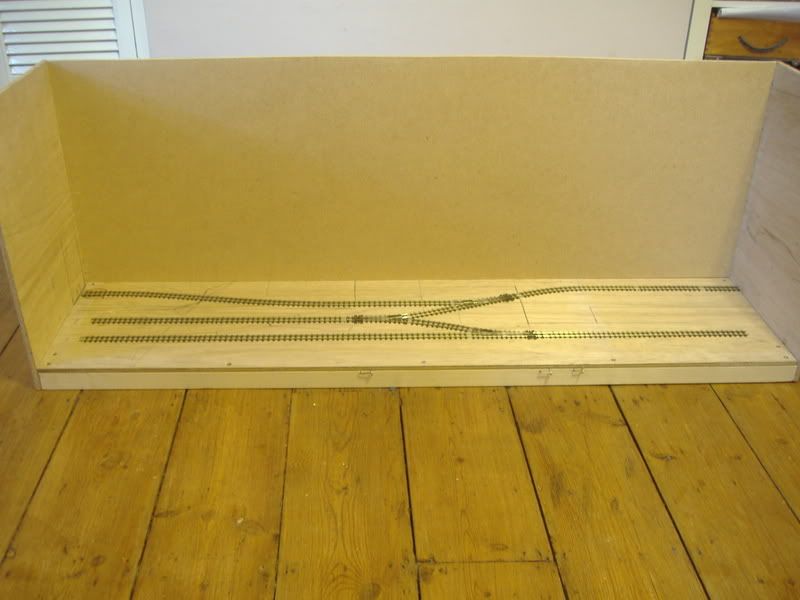
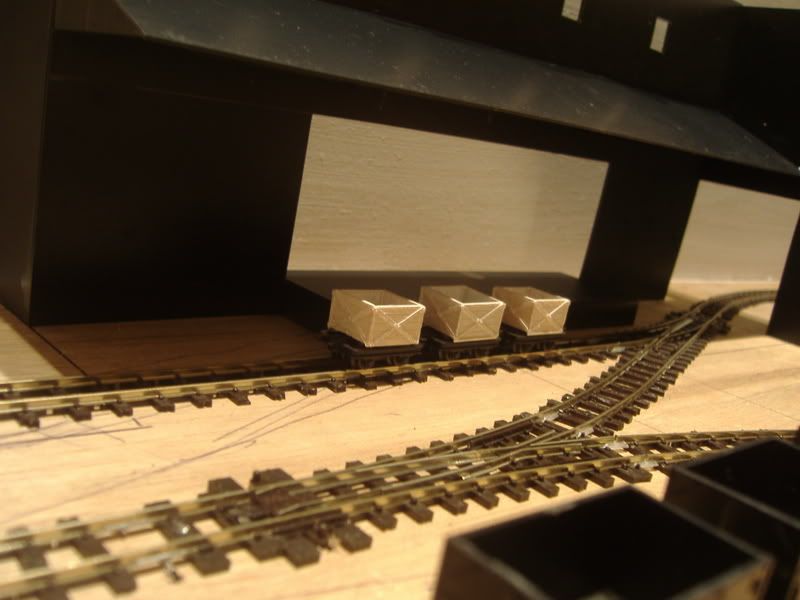
Track plan, which changed half way through to add a passing loop for better operational potential
Image

So I got to work… ordering some bits I would need.
009 crazy track and wood to get started... the basedboard was originally going to be 3x1 but I decide to extend it to 4x1 and I’m glad I did, just a bit more room for building on…
Image
Image

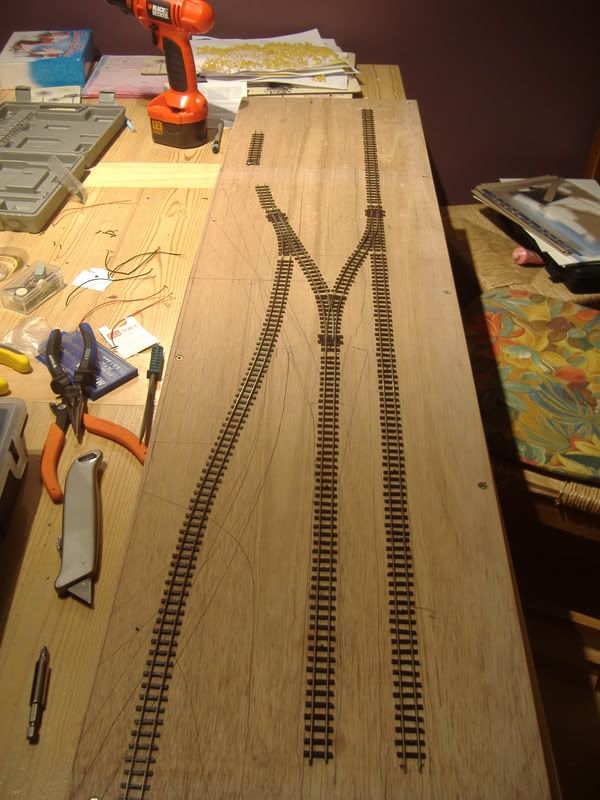
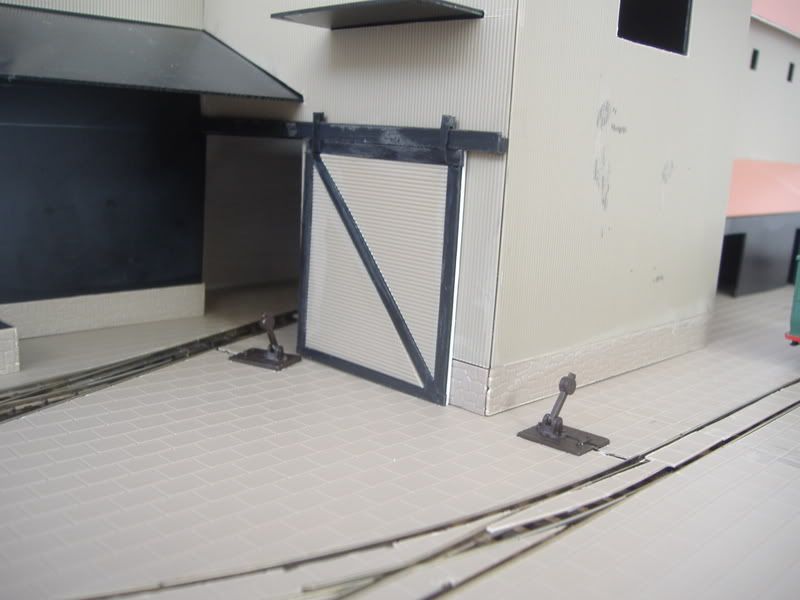
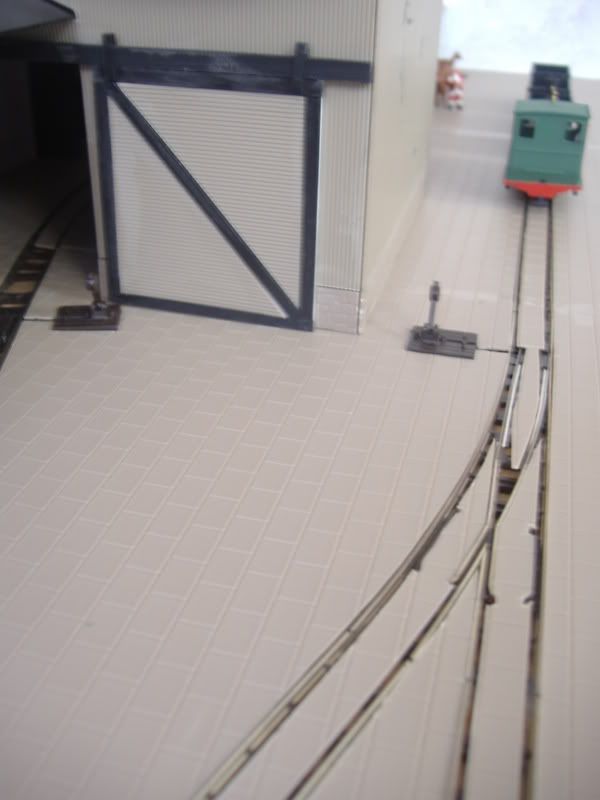
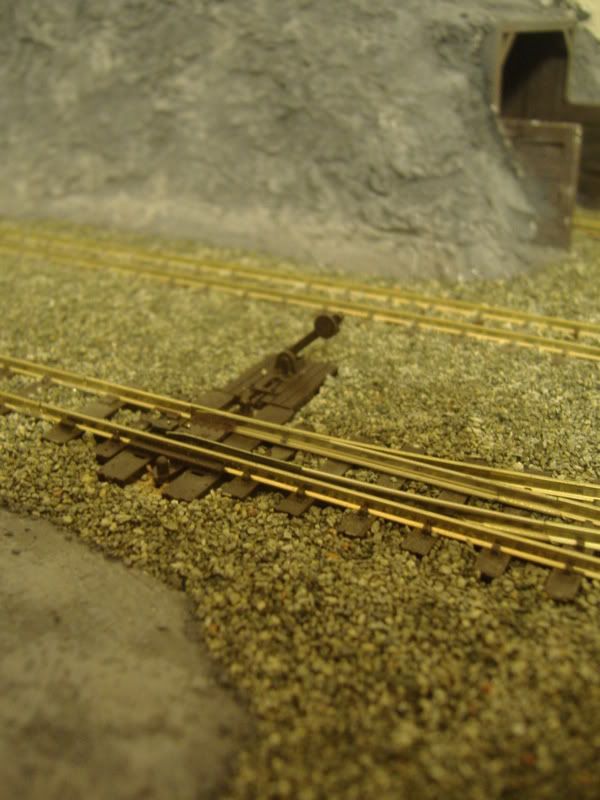
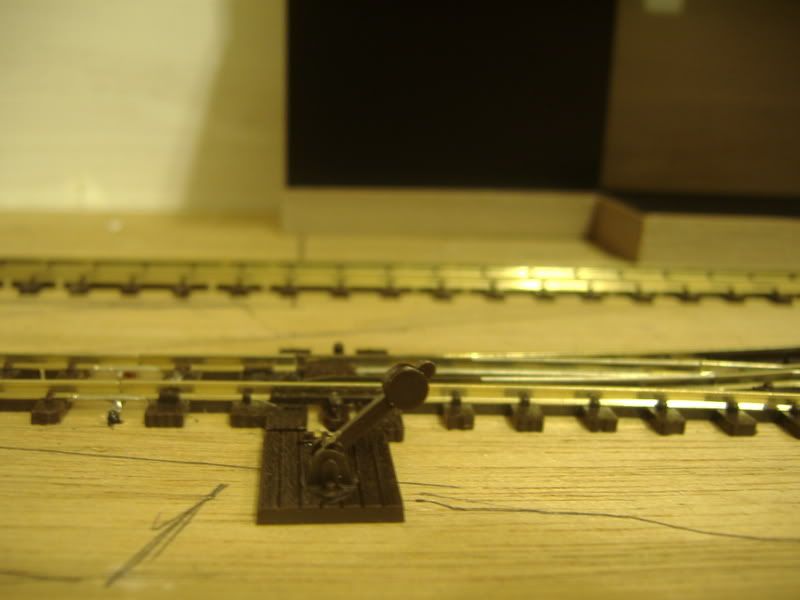
Also at this time Doc posted a great idea for mechanical point control which I really wanted to tell him I had used but had to sit on till now! It worked, nice one! I had some rail sat around but it was 00 and instead of filing it and bending it I soldered a nail at right angles for the bit to go through the baseboard.
Image

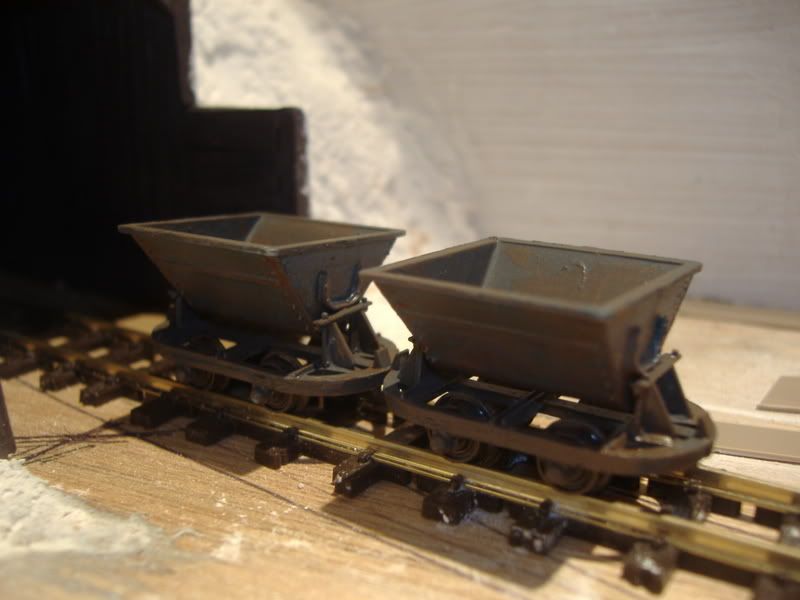
OOO, look what came in the post!
Image
Image
Image

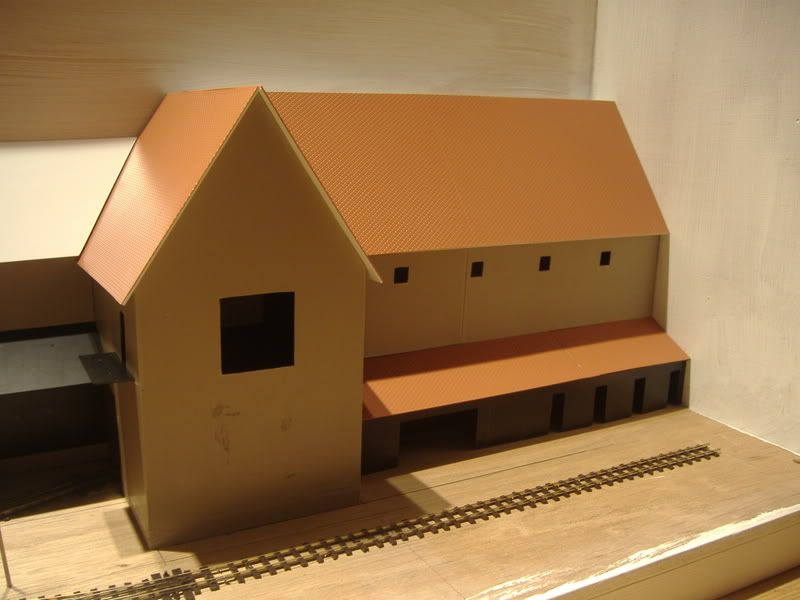
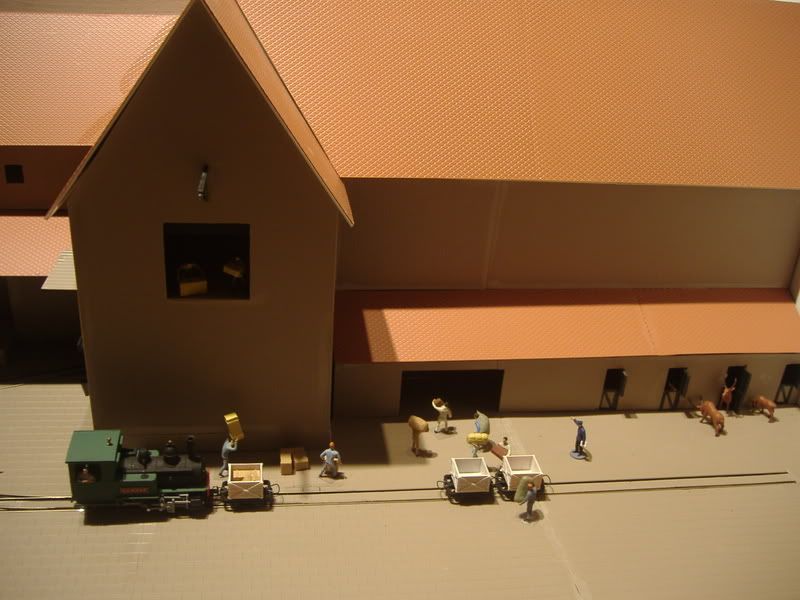
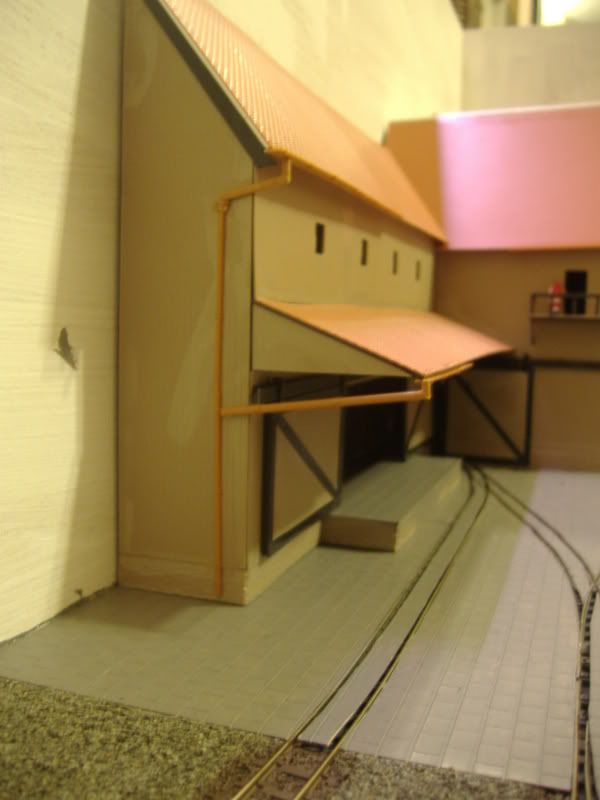
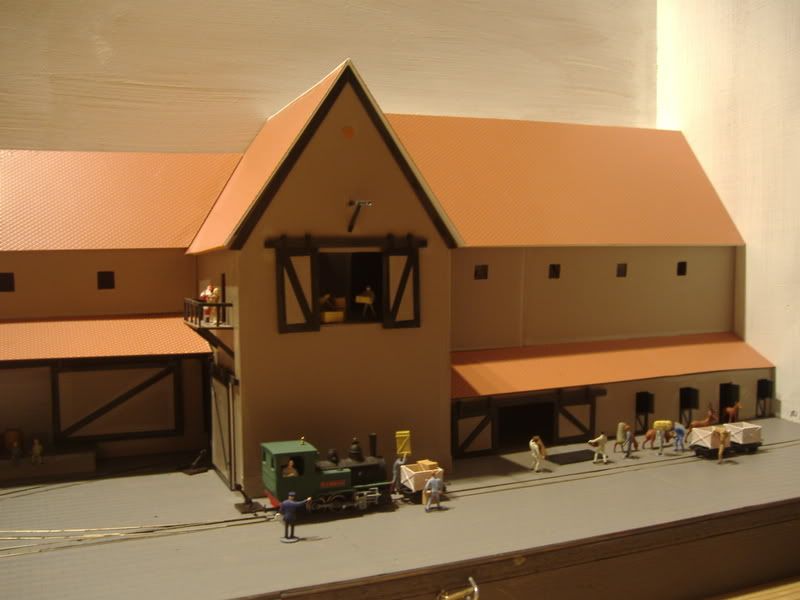
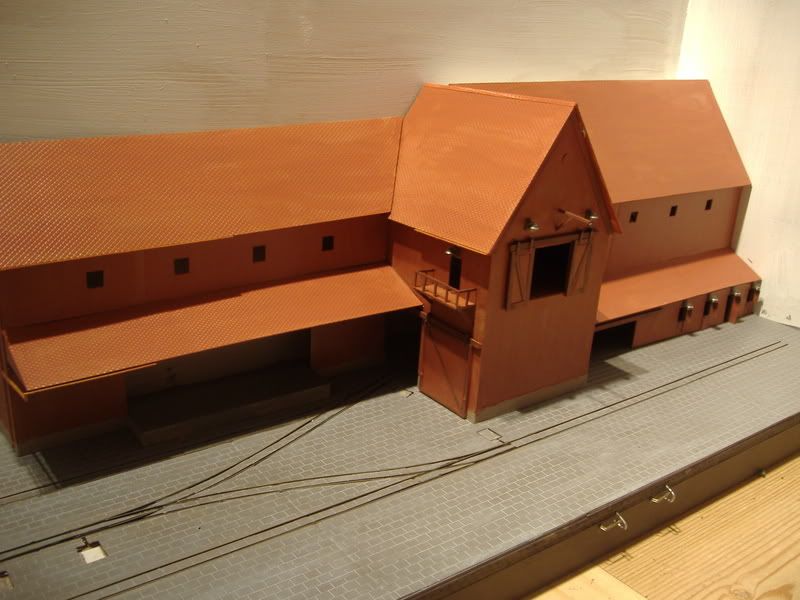
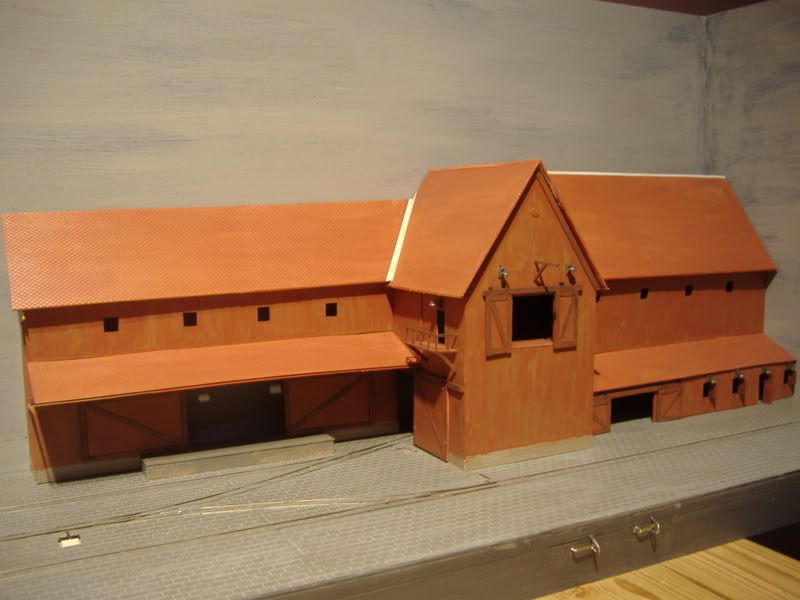
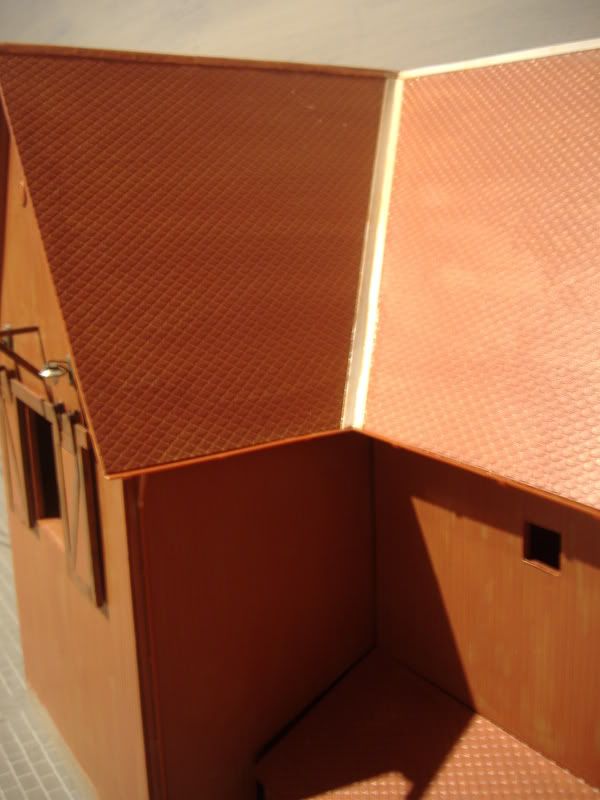
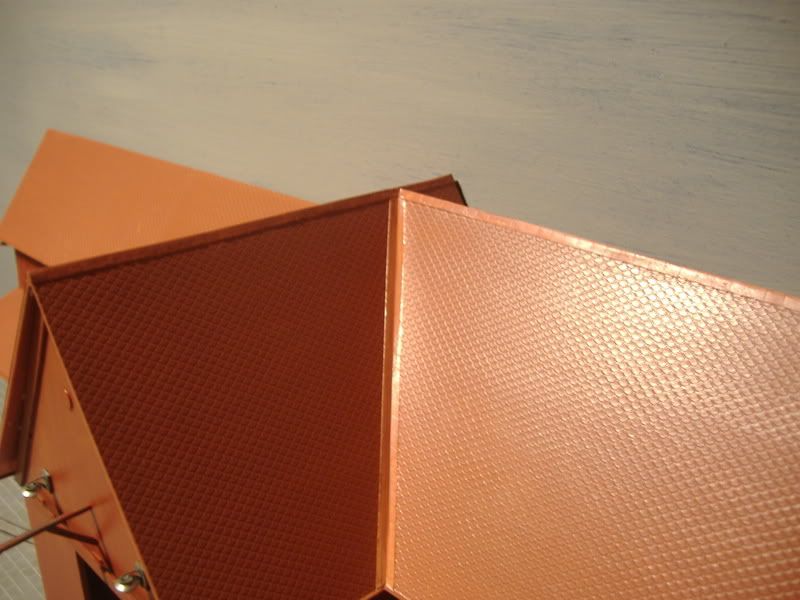
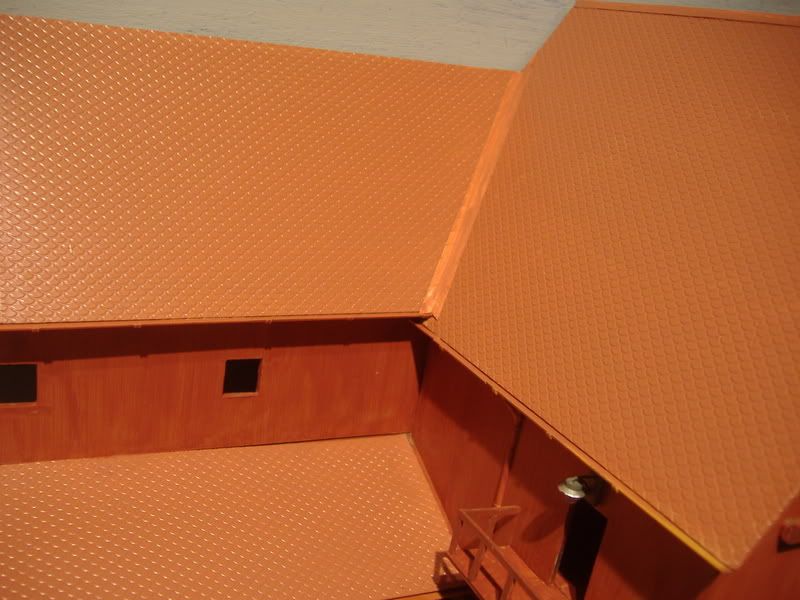
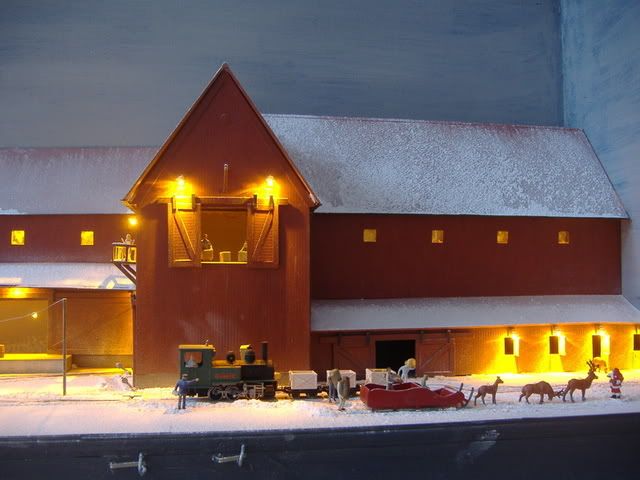
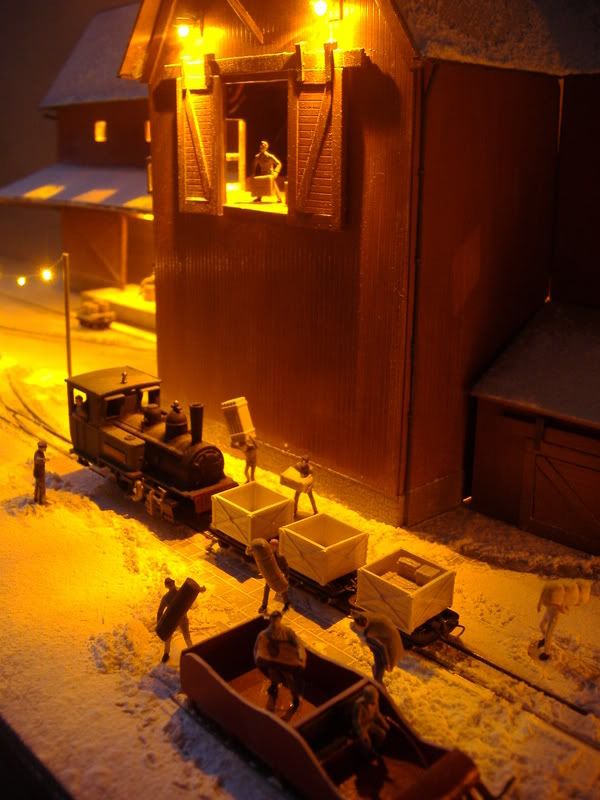
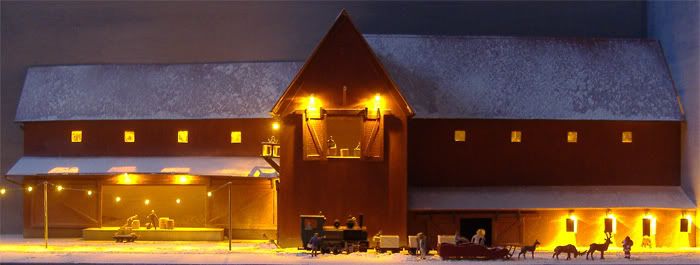
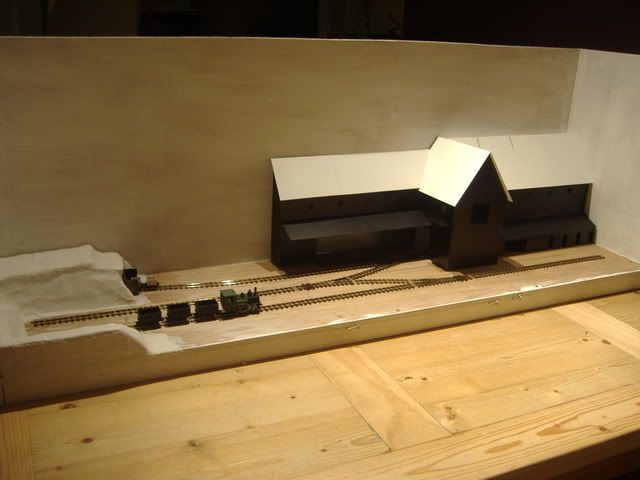
So the main part of this layout and the biggest test for me would be the factory structure, in that, this is the first building I have scratch built. I started off with a shell of plasticard that would later have embossed plasticard sheets added.
Image
Image
Image
Image

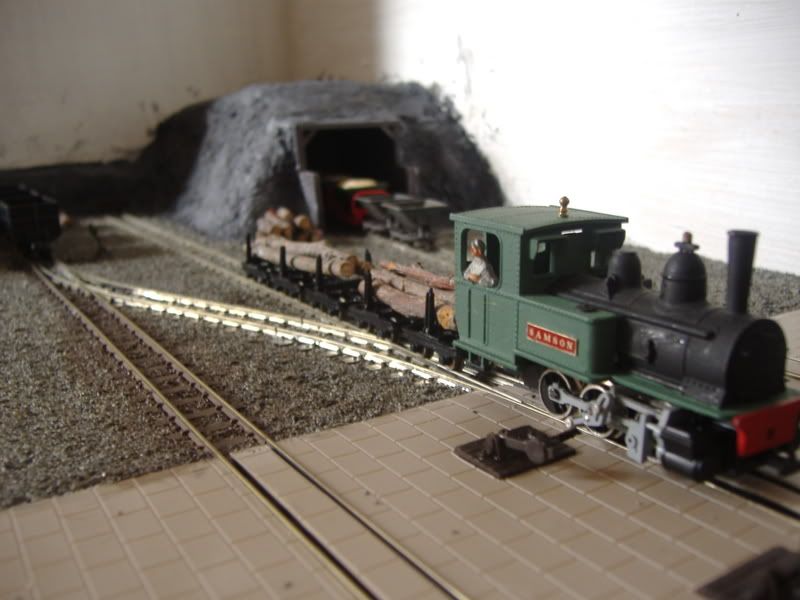
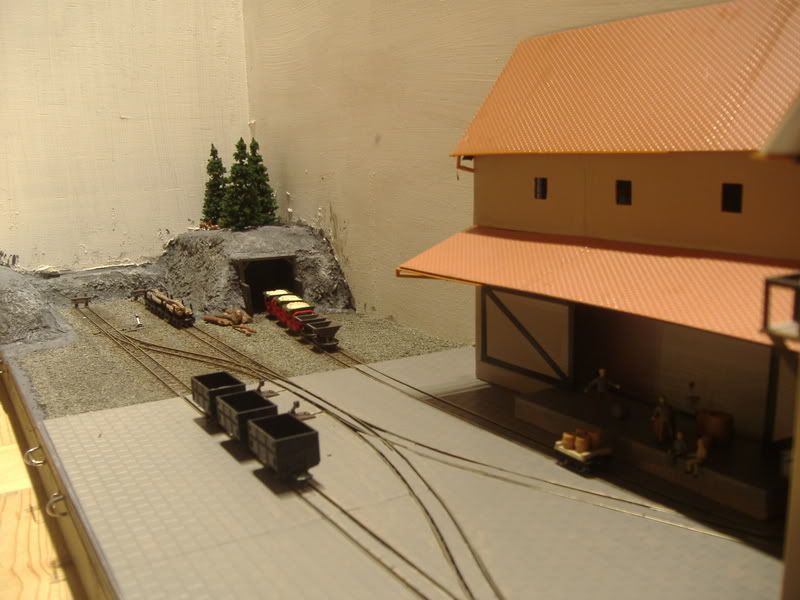
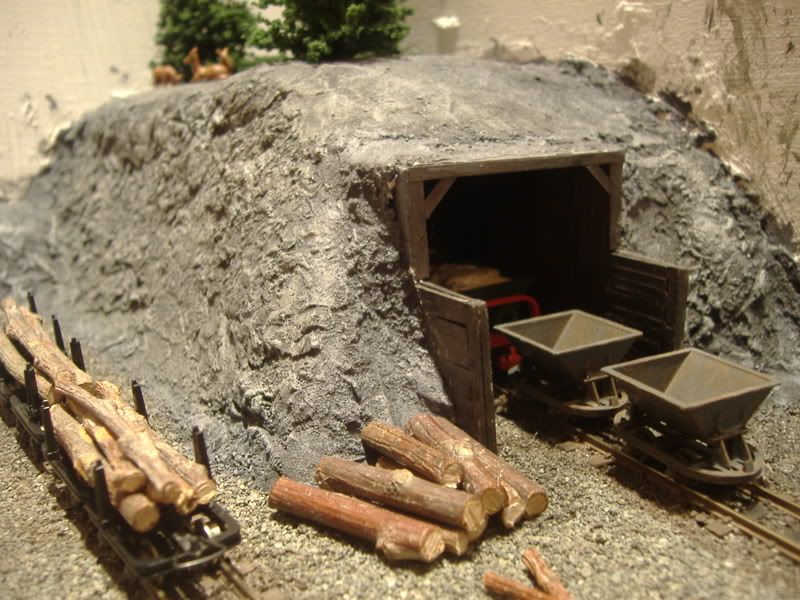
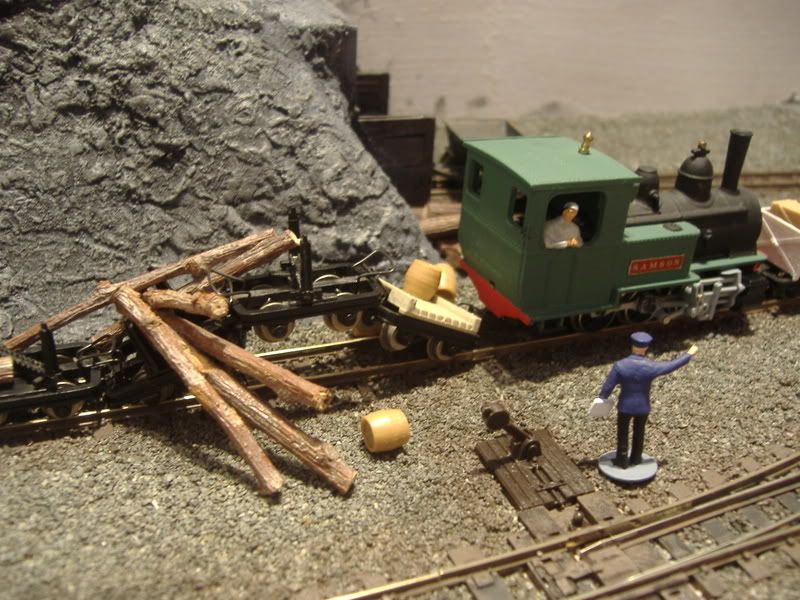
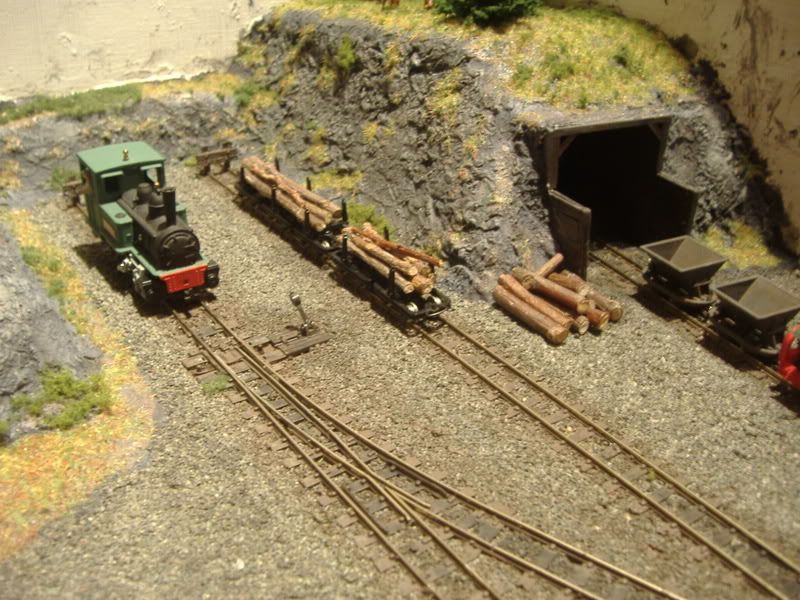
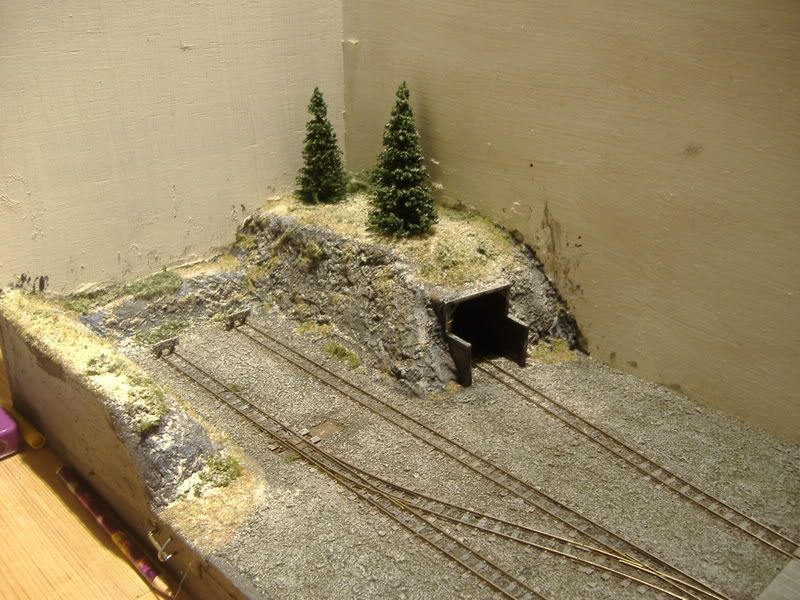
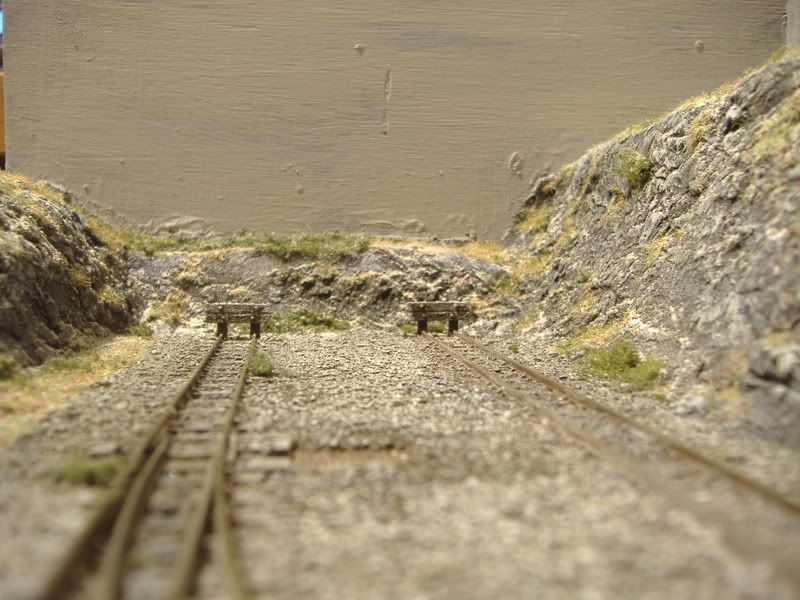
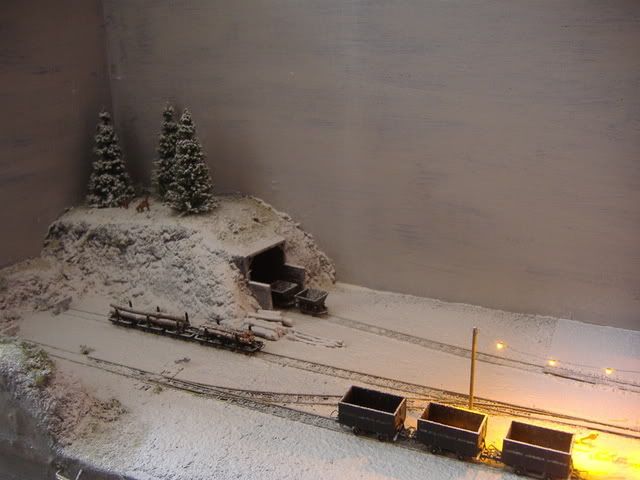
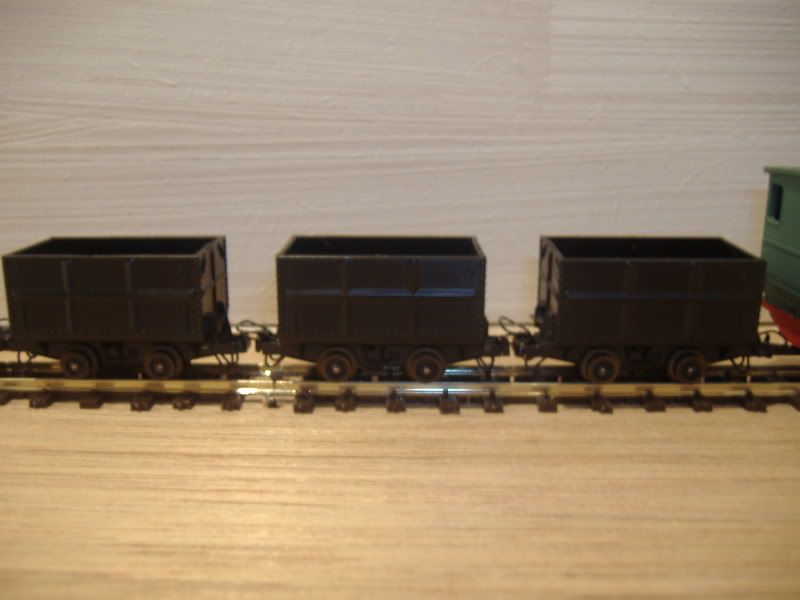
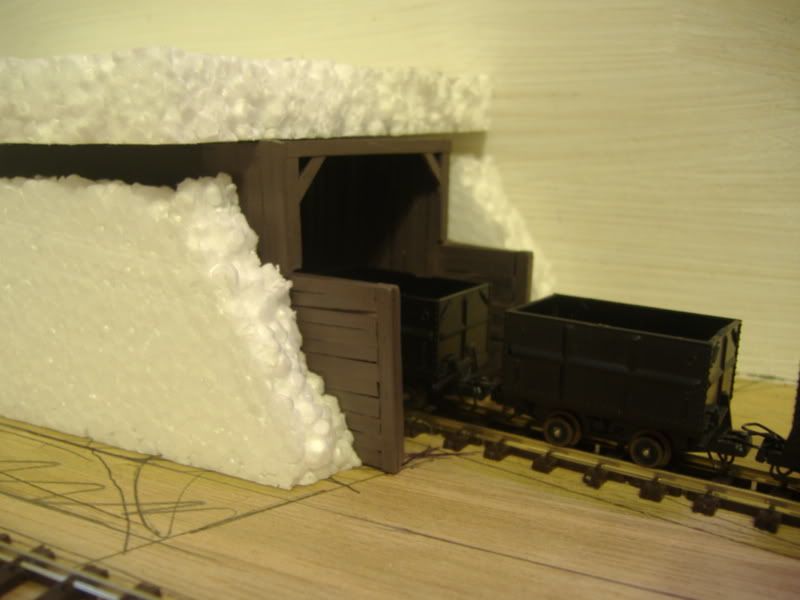
I then moved onto the other end where there was to be a mine, a mine for what I’m not sure but either coal or silver! Maybe both!
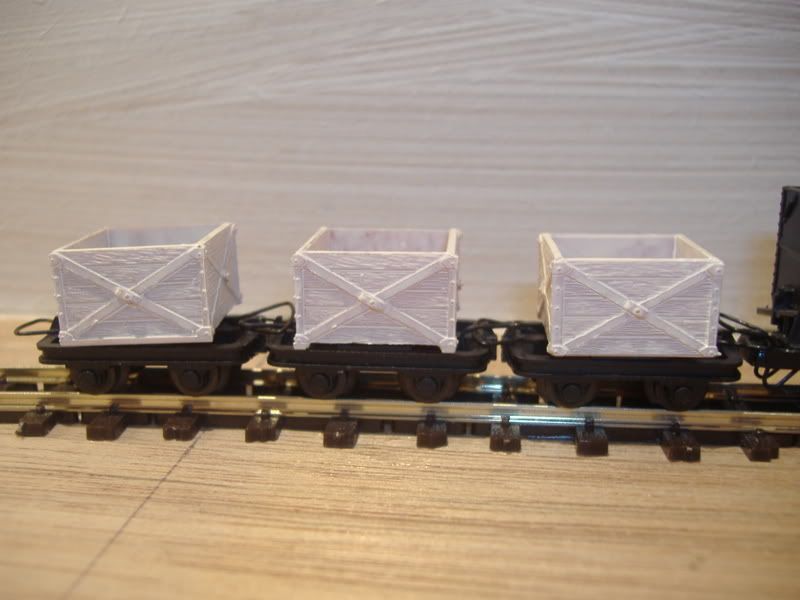
This was again scratch built using plasticard cut into strips, slightly roughed up with sandpaper to give a wood grain effect.
Image
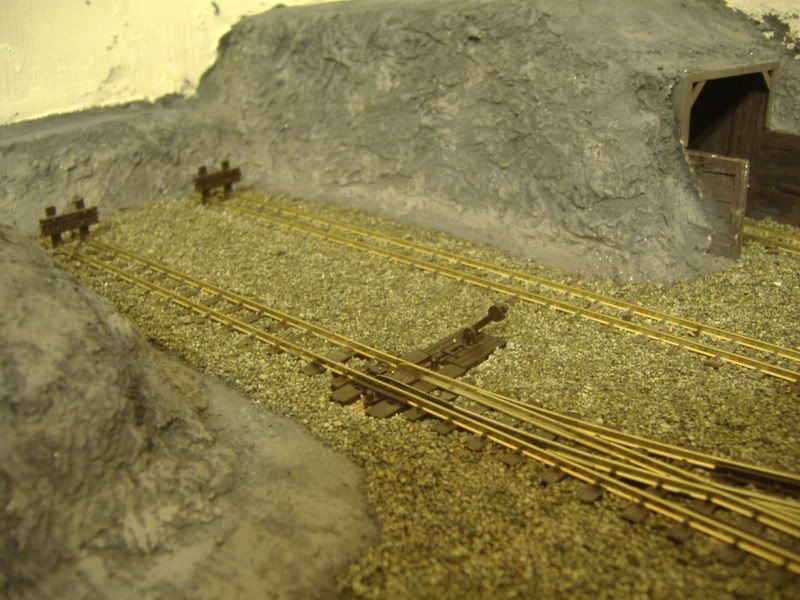
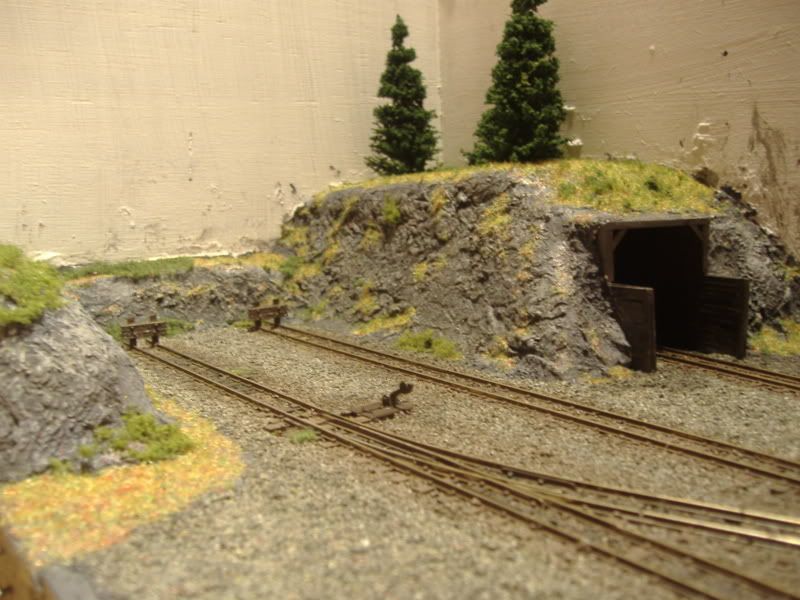
I then used some plaster bandages to cover it and sculpt the cutting that the sidings were in.
Image
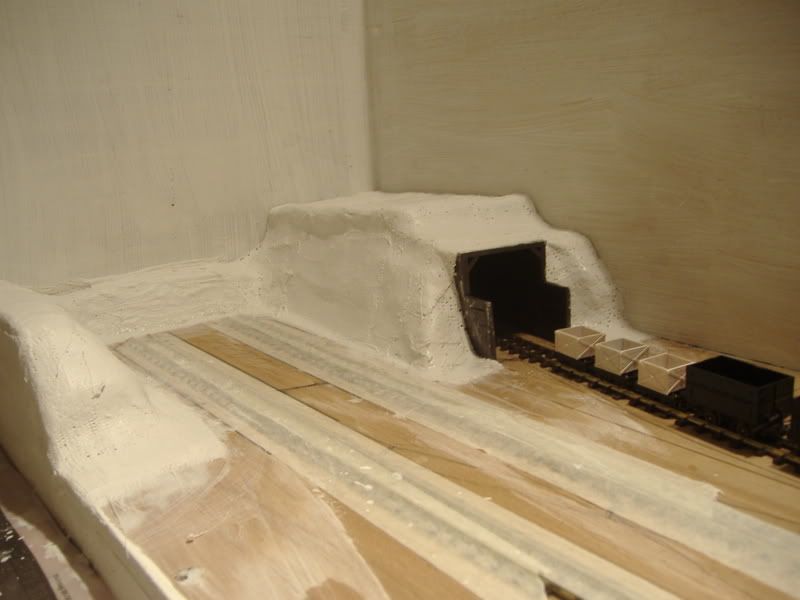
I used the foil method to get the rock textures.
Image

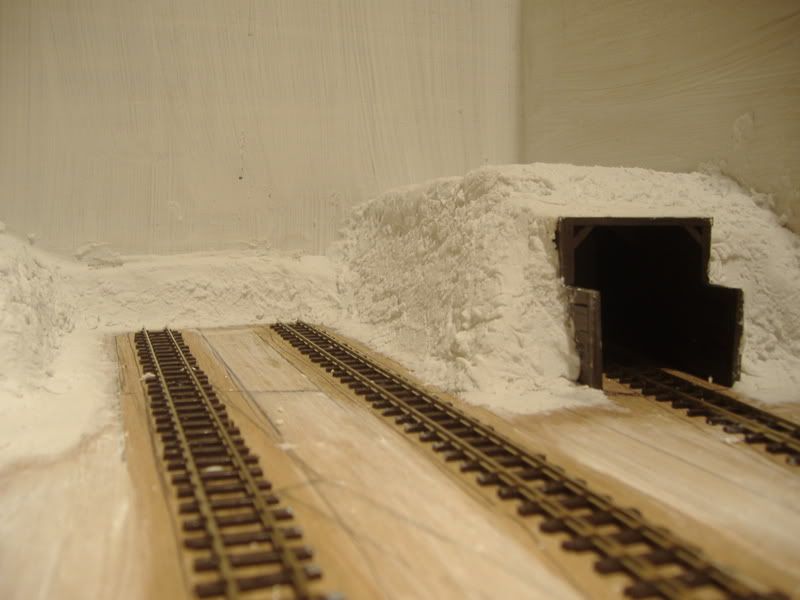
And an over view thus far…
Image

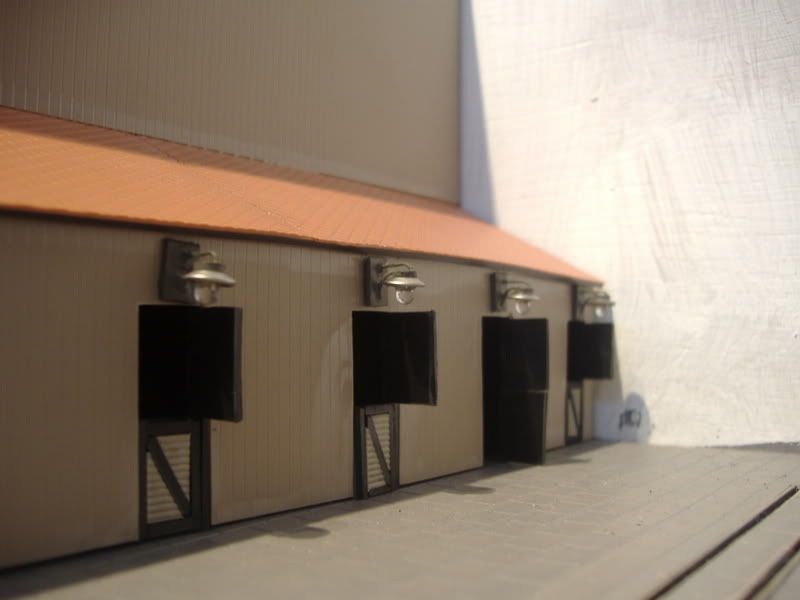
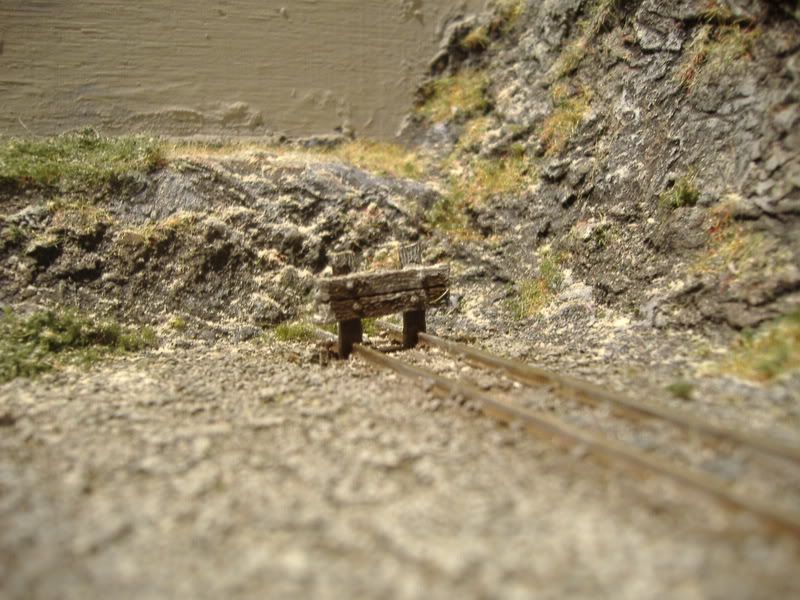
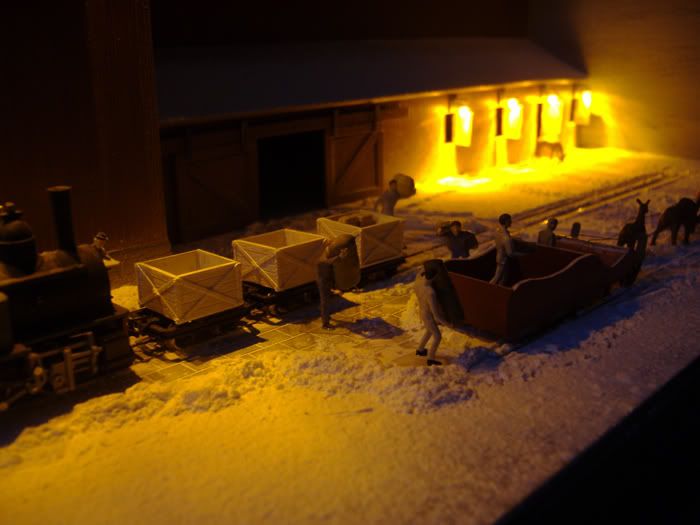
Some extras came in the post, point levers and buffers-which you can see later!
Image

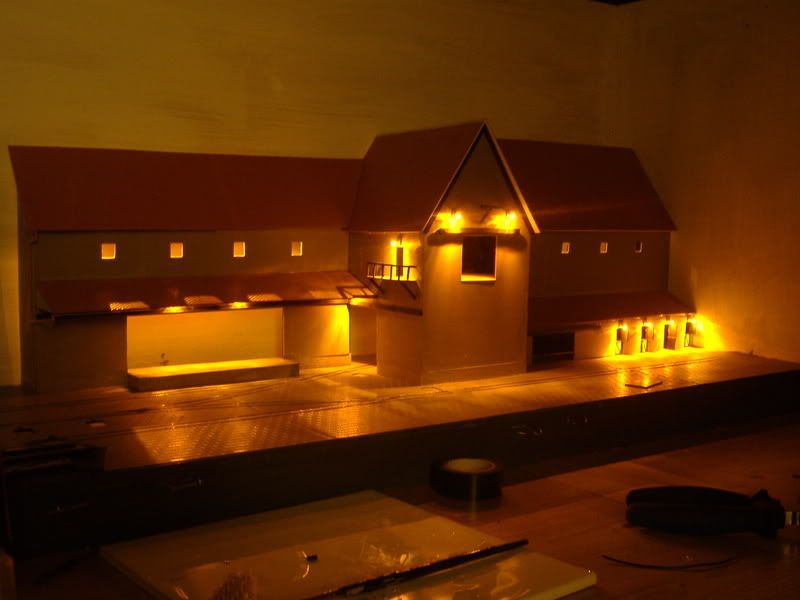
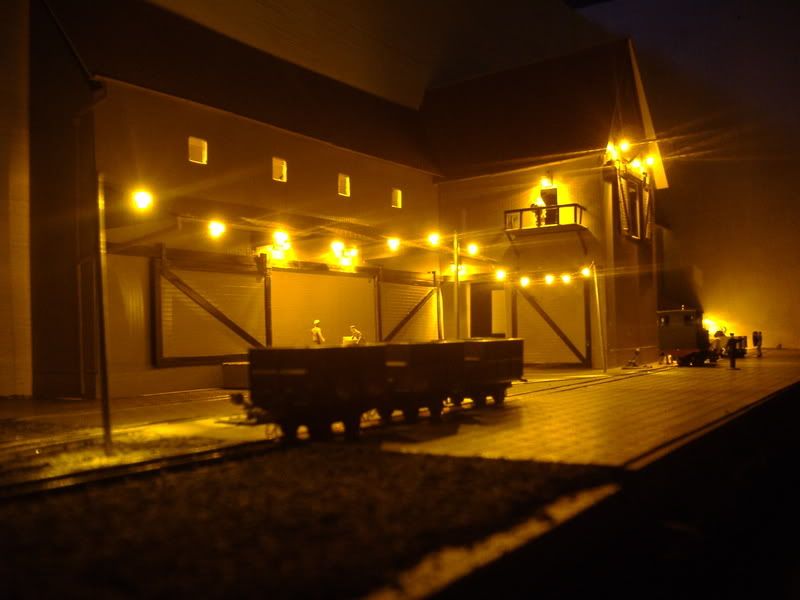
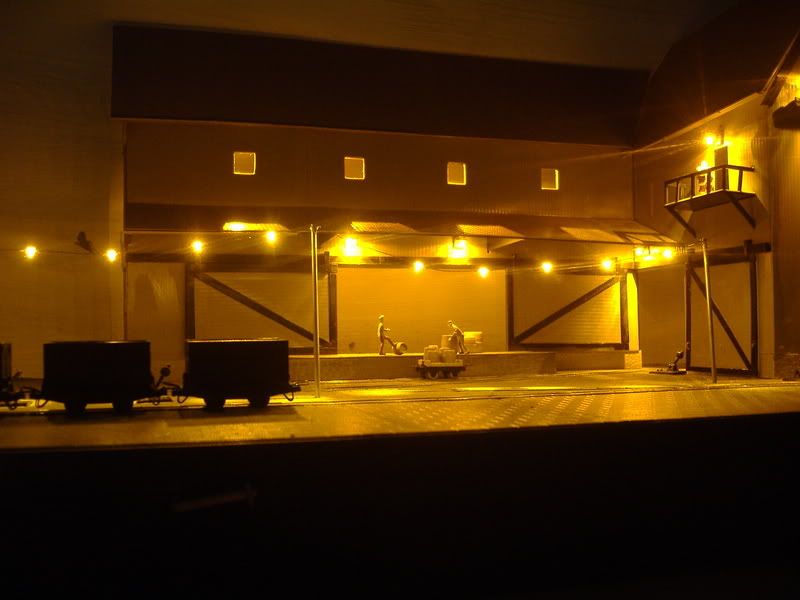
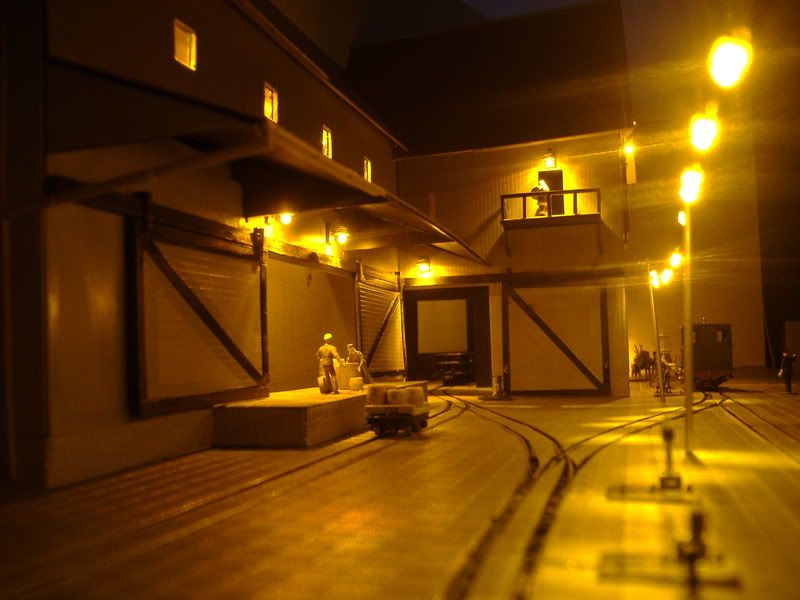
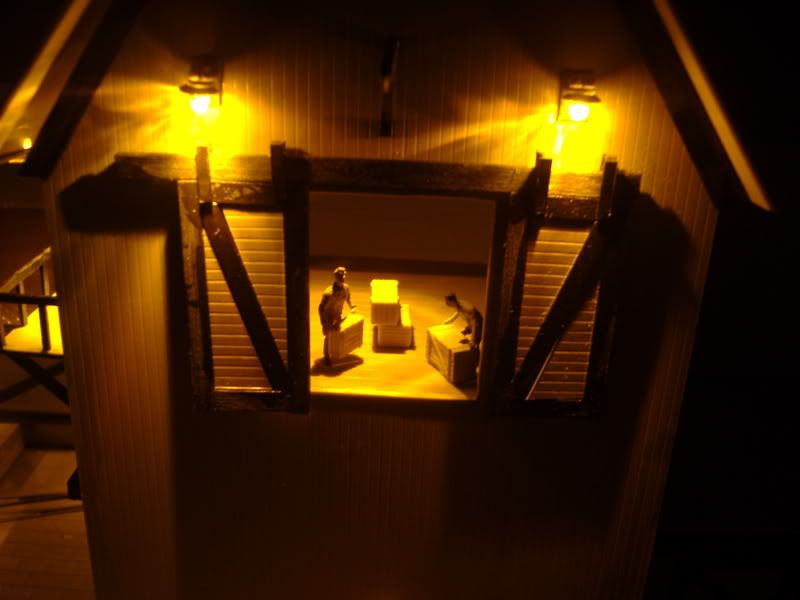
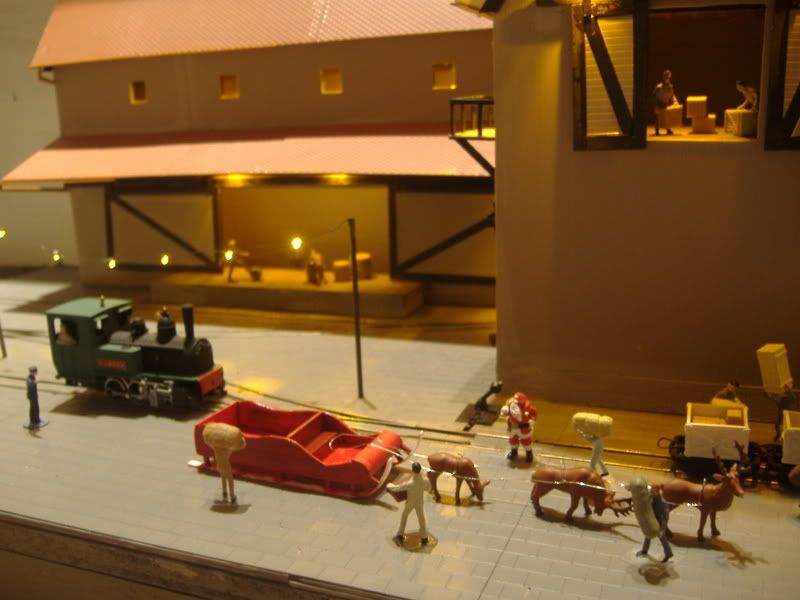
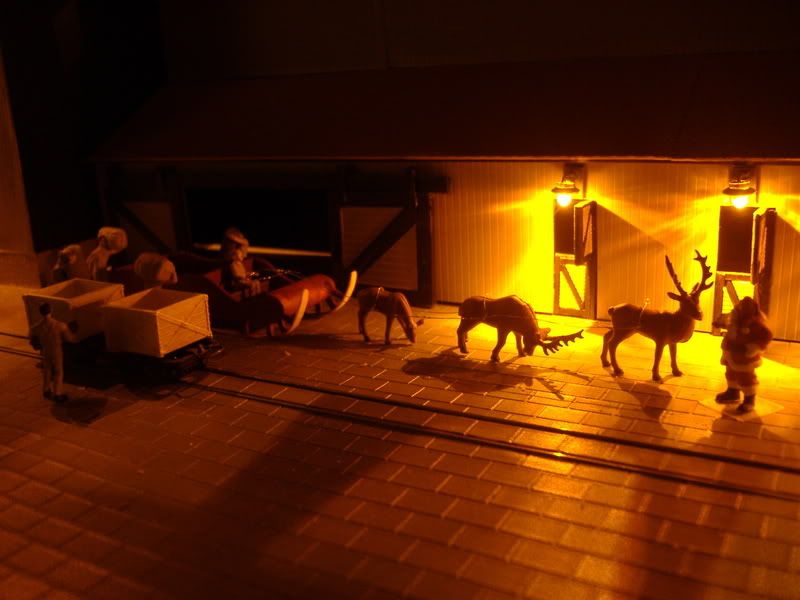
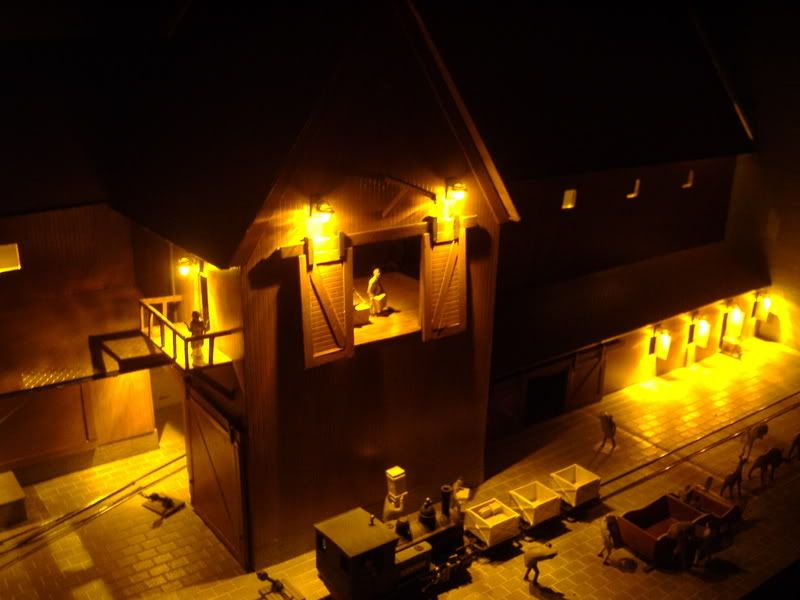
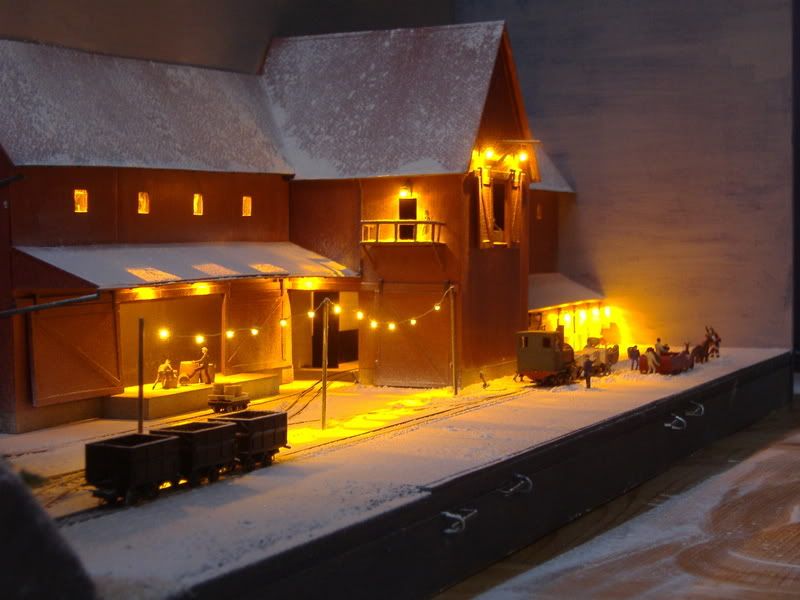
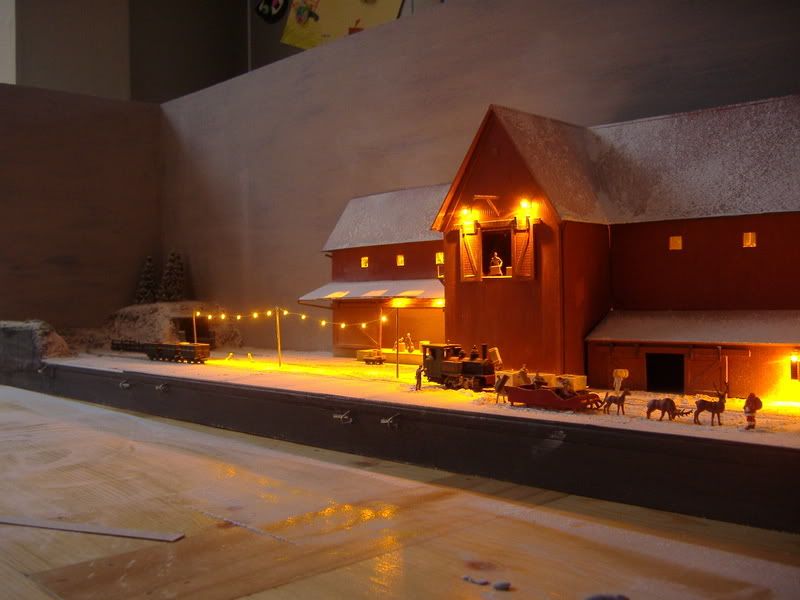
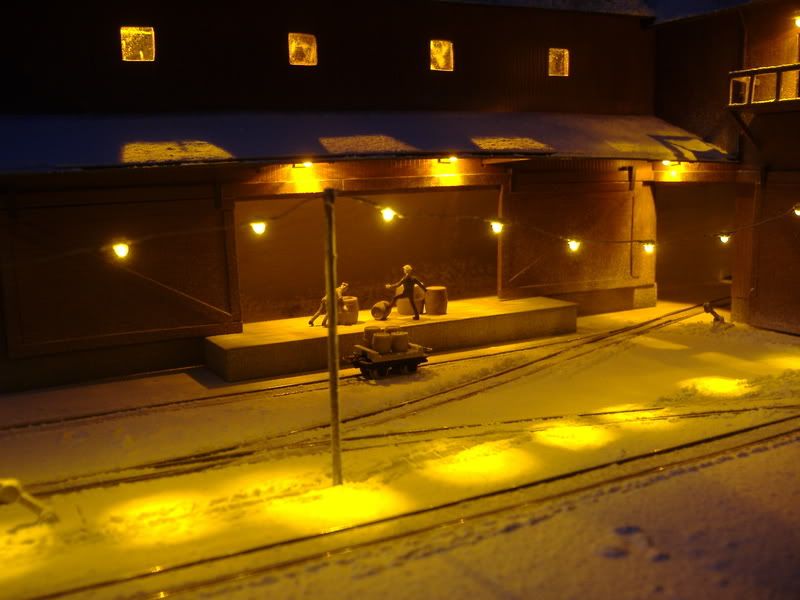
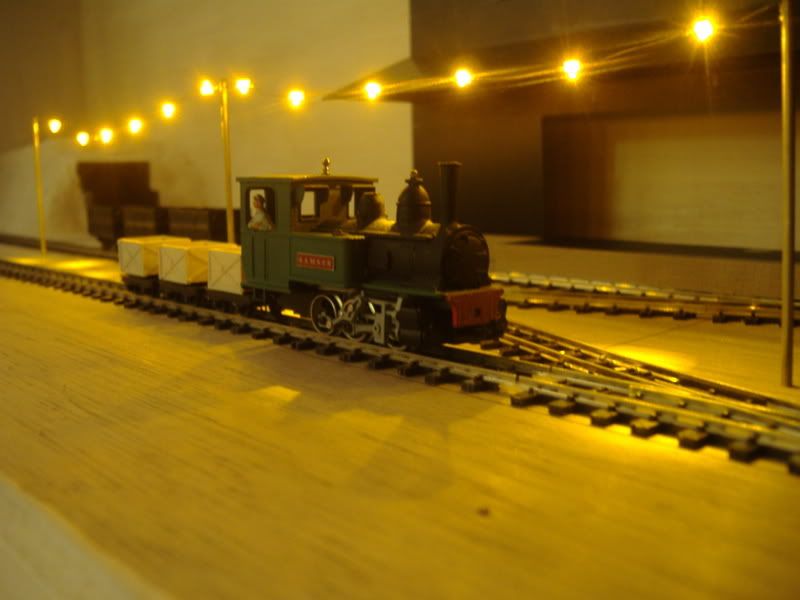
In my original plan I had a series of lights in a rope/line between 2 points on the factory, when I looked to get these commissioned it was suggested that I have them on poles to aid hooking them up... I was very pleased with the result when it arrived and it was connected to the power:
Image
Image

That’s it for this post… I will continue in another post so if I hopefully it goes onto a 2nd page and this means less download for each page…

Cheers
Michael
mumbles
Posts: 1802
Joined: Sun Nov 12, 2006 11:23 pm
Location: Kent
Contact:

Post by mumbles »

Carrying on…
Embossed plasticard is now going on, it was around about end of October I think I was at this stage
Image

In these next shots I have built a sliding door and done some of the paving as well. This was the slaters 4mm paving sheets
Image
Image

Parkside V hoppers built and painted
Image

Shot of fiddly to pave pointwork
Image

Ballasting was done with Modellers mate extra fine granite chips and weathered with sleeper grime, you can also see I have painted the plaster cutting and used various shades of grey to make a rock effect
Image
Image
Image

So, at some point I had to get more of the wood panel slaters plasticard, and it turned out when I had ordered it originally it had got sent the wrong one, which I found out when they sent me the wrong one again.. Eventually I got the right stuff and this job was finished along with the roof tiles, which are the scalloped variety
Image

Finishing up involved details such as drainpipes, more sliding doors, gables, hoist, balcony etc
Image
Image
Image

I went for a walk one day and picked up some twigs to use for the log loaders a mate lent me…
Image

And promptly went home and had a crash!!!
The engine driver gets a rollocking!!
Image

On the mine end I used static grass to cover the hill top, I had read somewhere or been told that the best way to do snow is to do ground as you would normally and then cover with the white stuff
Image
Image

Still more to come.. ha ha, this is the quickest layout thread ever!

Cheers
Michael
mumbles
Posts: 1802
Joined: Sun Nov 12, 2006 11:23 pm
Location: Kent
Contact:

Post by mumbles »

And more
More commissioned lights arrived and were fitted to the factory building, here above the reindeer stables and other places, also regular LEDS were fitted in the factory to shine through the windows and splash on the roof/paving
Image
Image
Image
Image
Image
Image

The mine at this point looks thus
Image

Santa’s sled was built…
Image
Wire for reigns
Image

The lighting in the upper loft
Image

Sled painted
Image
Image

First frost of winter arrives…
Image

Factory painted, this colour was inspired by Scandinavian fish smoking factories and the like! It was a very difficult colour to mix and I’m still not totally happy with it. Looking at Scandinavian buildings that are this red colour, they are all spotless, not a drop of weathering in sight [although I’m sure some smug git will come along and point out something different] so I will probably leave it unweathered.
Image

Sled detail
Image

One of the hardest bits of the factory build was getting the roof joined into one with flashes down the joins, bearing in mind it is about 2” long. I used very thin plasticard and scored and bent it for the flashing and the ridges tile effect.
Image
Image

The frosty buffers I said I would show you earlier…
Image
Image

Painted roof...
Image
Image

Finishing details such as painting gutters and door runners, more sled detail…
Image
Image

And a last shot before the winter snow
Image

Cheers
Michael
mumbles
Posts: 1802
Joined: Sun Nov 12, 2006 11:23 pm
Location: Kent
Contact:

Post by mumbles »

LET IT SNOW, LET IT SNOW, LET IT SNOW,,,

Image
Image
Image
Image
Image
Image
Image
Image
Image


Well, I hope you enjoyed the pics of how I built my first 009 narrow gauge layout, it took the best part of 3 months and was certainly not built on a tight budget, but then I didn’t set out to work to a budget as I was ultimately building a layout that I would have after the competition and not a disposable competition entry. I have many items that are not confined to this layout or gauge, and some that are, that can be taken forward into other modelling projects.

If I think of things I would do differently for this layout, I would probably not do much differently. If I was to think of what I would do differently for an entry to a competition on NRM, I would stick to just sprinkling some white stuff on a Blue loco with yellow ends on an existing layout…

Once again a big thank you to Andrew [Whatnothomas] for organising the competition, it was a great end to the year to build this instead of stressing about my loft or garage…
Which leaves me to say: Happy New Railway Modellers Year, and let’s hope we can all fulfill our modelling wishes for 2008.

Cheers
Michael


Ps Martin, yours sucked!
User avatar
Blaqkaudio009
Posts: 334
Joined: Thu Oct 18, 2007 7:13 pm
Location: Forden, Wales

Post by Blaqkaudio009 »

well done mate! are you keeping the layout or selling it?
Image
m.levin
Posts: 2009
Joined: Mon Jan 09, 2006 6:46 pm

Post by m.levin »

I wouldn't of guessed this was yours mate.
I love your lights :wink:
mumbles
Posts: 1802
Joined: Sun Nov 12, 2006 11:23 pm
Location: Kent
Contact:

Post by mumbles »

m.levin wrote:I wouldn't of guessed this was yours mate.
I love your lights :wink:
i want a refund :D
mumbles
Posts: 1802
Joined: Sun Nov 12, 2006 11:23 pm
Location: Kent
Contact:

Post by mumbles »

Blaqkaudio009 wrote:well done mate! are you keeping the layout or selling it?
keeping for now, unless i get any offers !!
User avatar
Blaqkaudio009
Posts: 334
Joined: Thu Oct 18, 2007 7:13 pm
Location: Forden, Wales

Post by Blaqkaudio009 »

well i was gunna say, if you are and the rolling stock is up for grabs, could i buy the vee tippers?
Image
Raider
Posts: 1085
Joined: Sun Oct 09, 2005 12:55 am
Location: Wolverhampton

Post by Raider »

As the layout is a working model, have you thought about the exhibition circuit?
mumbles
Posts: 1802
Joined: Sun Nov 12, 2006 11:23 pm
Location: Kent
Contact:

Post by mumbles »

Blaqkaudio009 wrote:well i was gunna say, if you are and the rolling stock is up for grabs, could i buy the vee tippers?
if i sell the layout i would keep the stock, sorry
they are dead easy to make though and i can let you know how i painted them if you want
Chuffer Chuff
Posts: 528
Joined: Tue Aug 28, 2007 6:55 pm
Location: Warwickshire, West Midlands (Near The GWSR)

Post by Chuffer Chuff »

Brilliant Layout Mr Mumbles! I love the lights!

Great Work! :D
"You only get one chance in life, so make the most of it!"
User avatar
Blaqkaudio009
Posts: 334
Joined: Thu Oct 18, 2007 7:13 pm
Location: Forden, Wales

Post by Blaqkaudio009 »

ok then no worries, yeah the paint thing sounds a plan! they look great!
Image
mumbles
Posts: 1802
Joined: Sun Nov 12, 2006 11:23 pm
Location: Kent
Contact:

Post by mumbles »

Raider wrote:As the layout is a working model, have you thought about the exhibition circuit?
i have but i think i would struggle to operate it for a day.. i would start to rebuild bits while i was there! who knows, if i get someone that would want to help it would be a possibility if anywhere wanted to have it in their show
there is still more to do though to get it up to a standard suitable for close nerdy scrutiny! :lol:
Lofty

Post by Lofty »

This is a cracking article about a stunning entry.

Having read through it, I think it’s better than it looked in the ‘entry pictures’. There are certainly details I hadn’t picked up on originally.

Lofty
Post Reply