Please tune in to 2LO on 365 m (822 kHz)
"London Calling. This is London Calling"
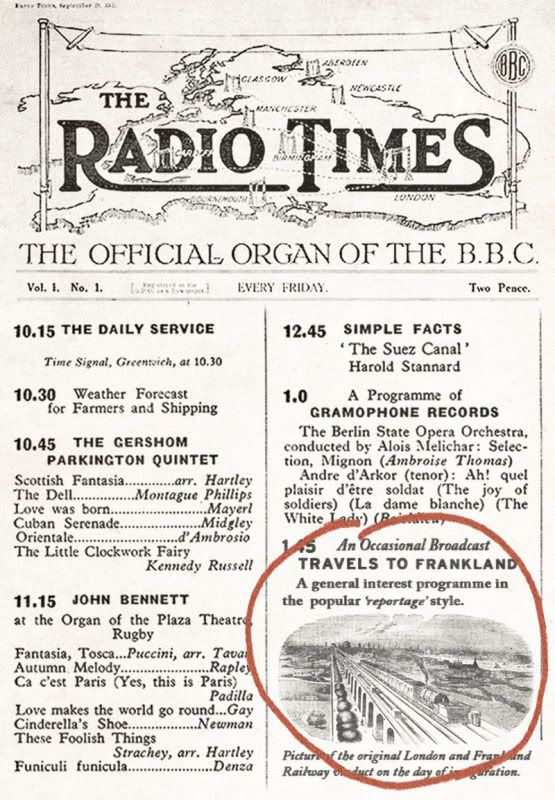
Frankland update No. 22:
 Hello everyone and welcome to another in our series of occasional broadcasts from Frankland ...
---------------------------------------------------------------------------------------------------------------
Well it's six months since the last news from Frankland and in that time some major works have taken place.
But first some minor updates.
Christmas:
Although Christmas has now long-since gone, I have to record a few items I was particularly happy with:
The first was a welcome addition to my library:
And I also received a variety of kits to put in the 'future projects' box.
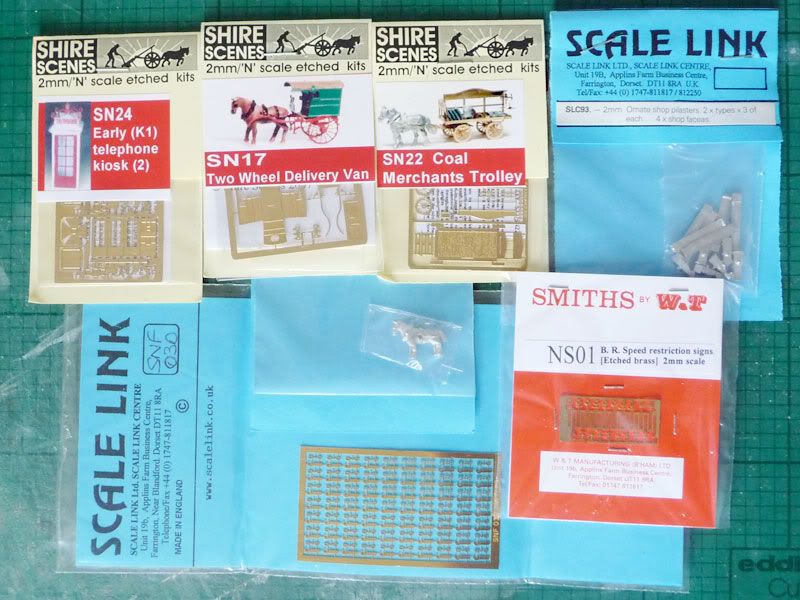
* Early telephone kiosks x 4
* Horse-drawn deliver van
* Horse-drawn coal cart
* Horses x 3
* Speed restriction signs
* Screw-link couplings
* Ornate Shop Pillasters x 3 each of two kinds (I already had some but needed more for a parade of shops I have in mind).
There are a few items still on back-order, including a horse-drawn milk float.
----------------------------------------------------------------------------------------------------------------
Backscene:
On another forum I was asked about my plans for a back-scene.
Using a photo of the layout from a couple of years ago I made the following mock-up in Photoshop.
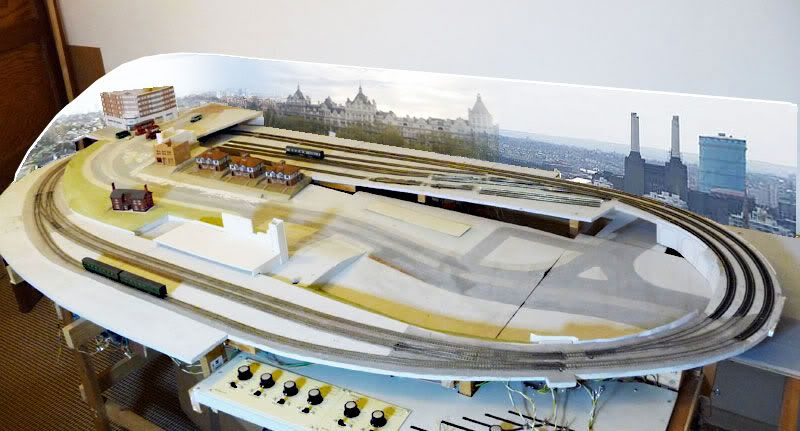
My usual operating/viewing position is bottom right (from where this picture is taken). The back-scene will curve up from bottom left, curve around top left, and then run in a straight line along the back to top right. There will be no back scene along the right-hand-side as this is where the window to the room is - so a back scene on this side would cast a shadow.
For the images on the back-scene I'll probably use a mix of my own photographs and Google-finds, and add a few period details like an airship or early Imperial Airways passenger plane perhaps.
It will be detachable so I can continue to work and take pictures from all sides.
----------------------------------------------------------------------------------------------------------------
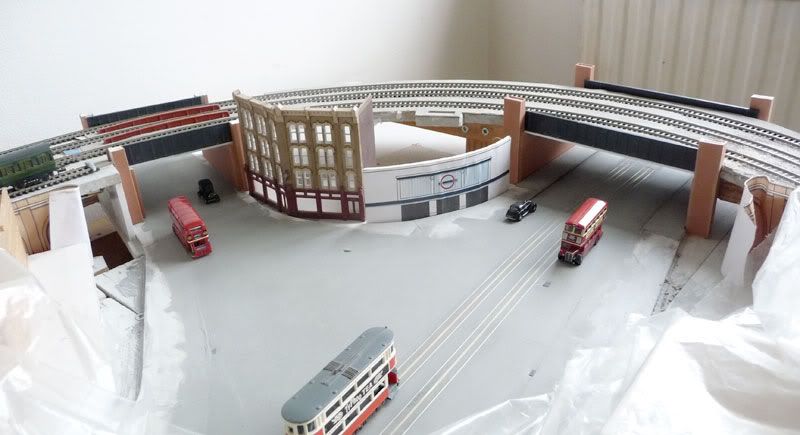
And now to the main news: Frankland 100:
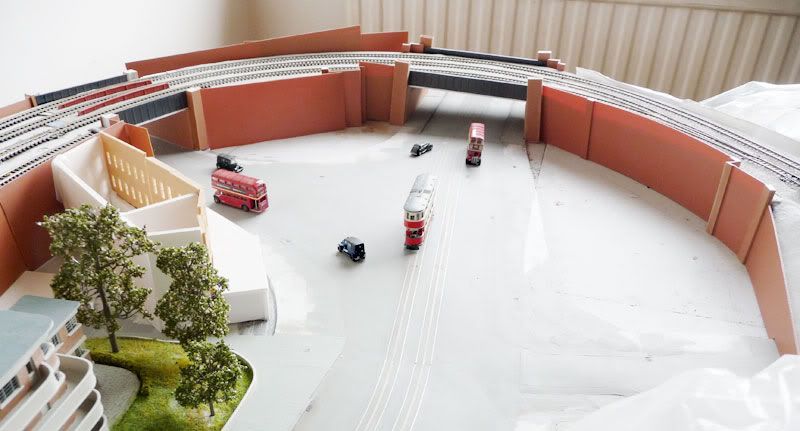
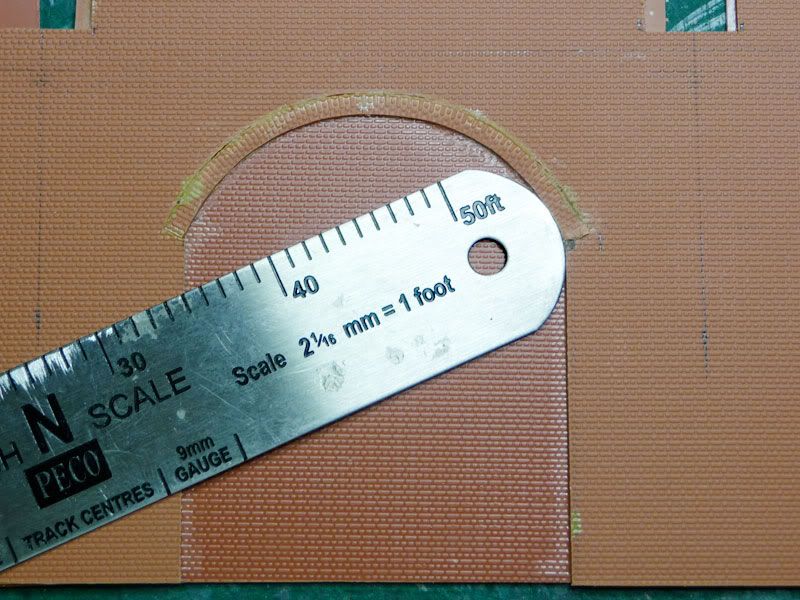
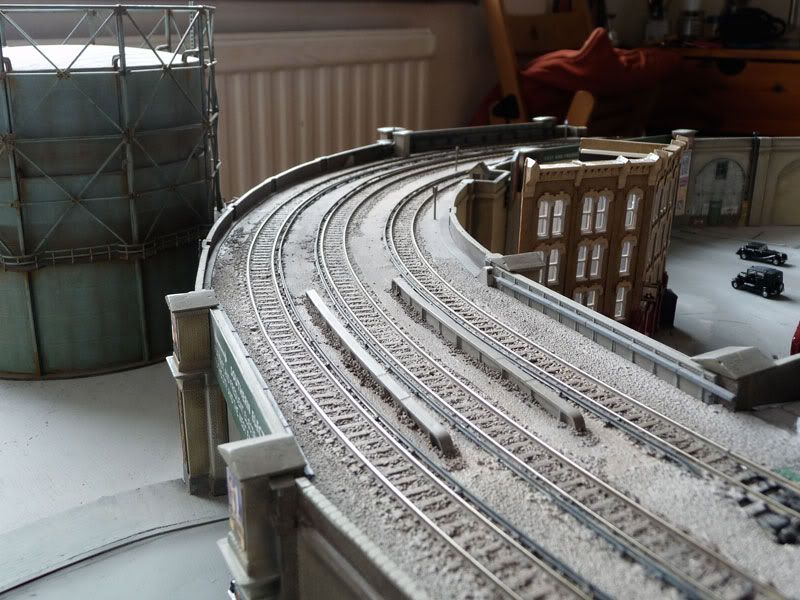
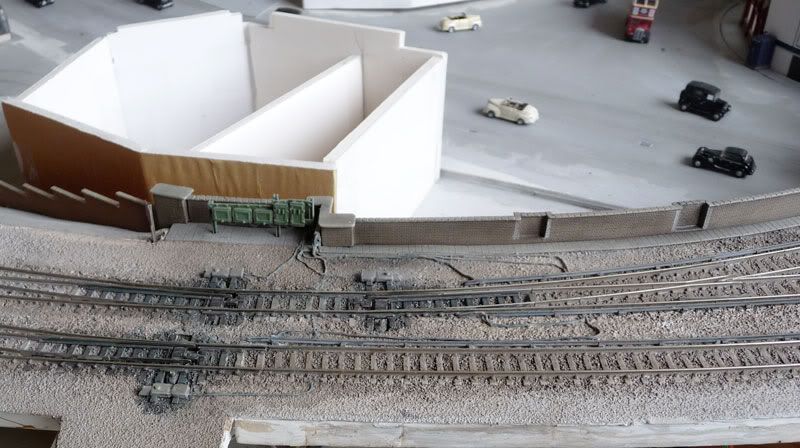
As listeners may recall, Frankland has long contended with a mere paper representation of its once-famous viaducts. But with the 100th anniversary of the opening of the London and Frankland Railway fast approaching, the powers-that-be decided a full survey of the scene should be conducted in order to see what could be done about it ...
From the London end, the viaduct starts behind the shops...
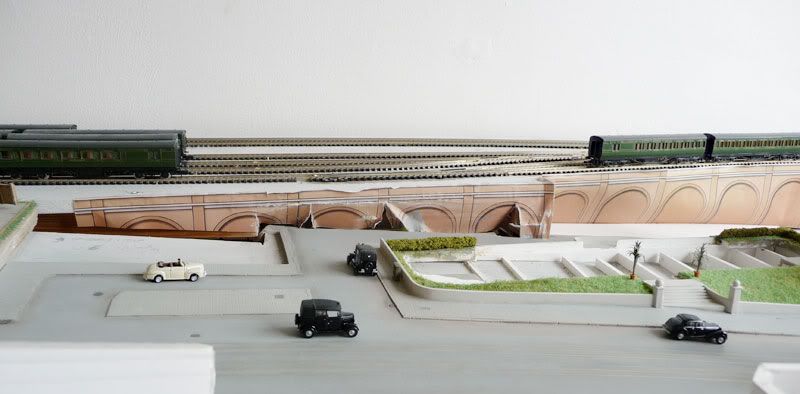
... and extends along behind the block of flats, then sweeps around and over a subsidiary road and the main road ...

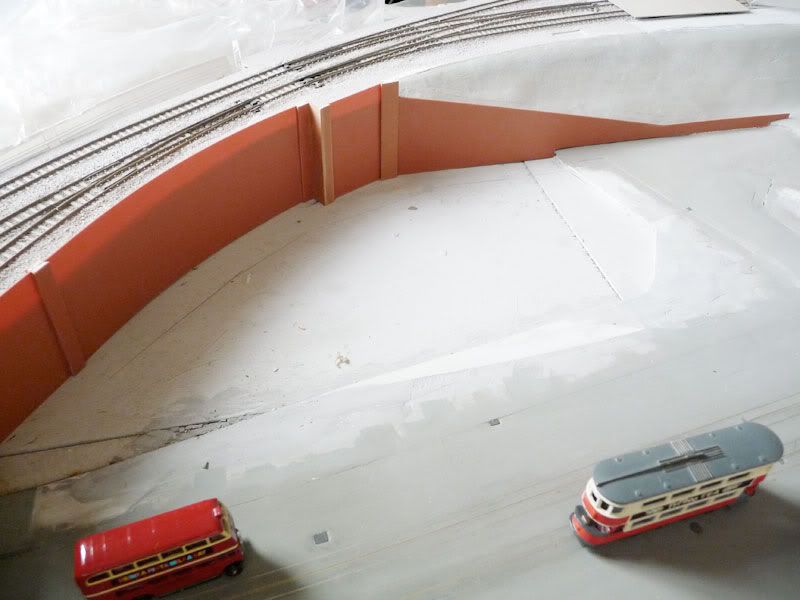
... and finally it gives way to an embankment at the back of the park where the tram shelter is situated.

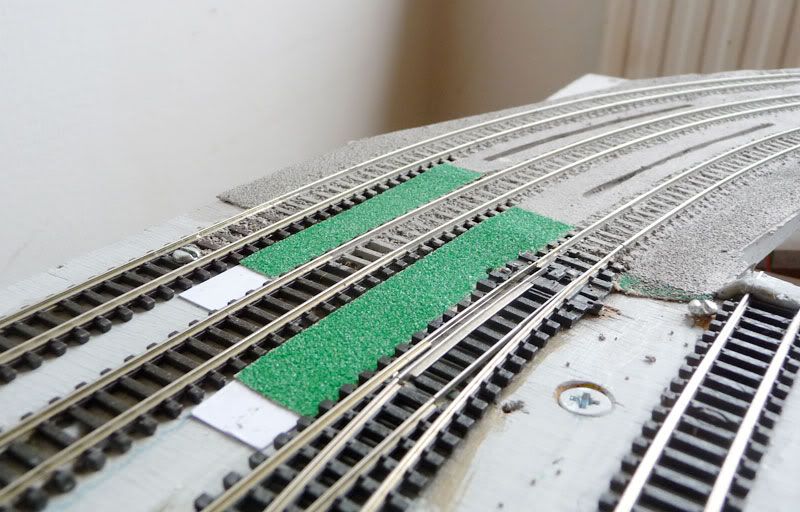
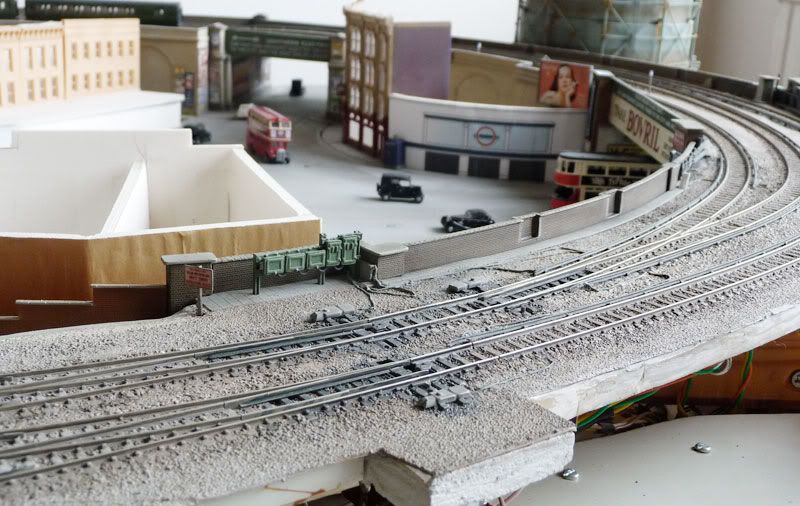
And just for the record, these two pictures show how things are track-wise before work commences ...
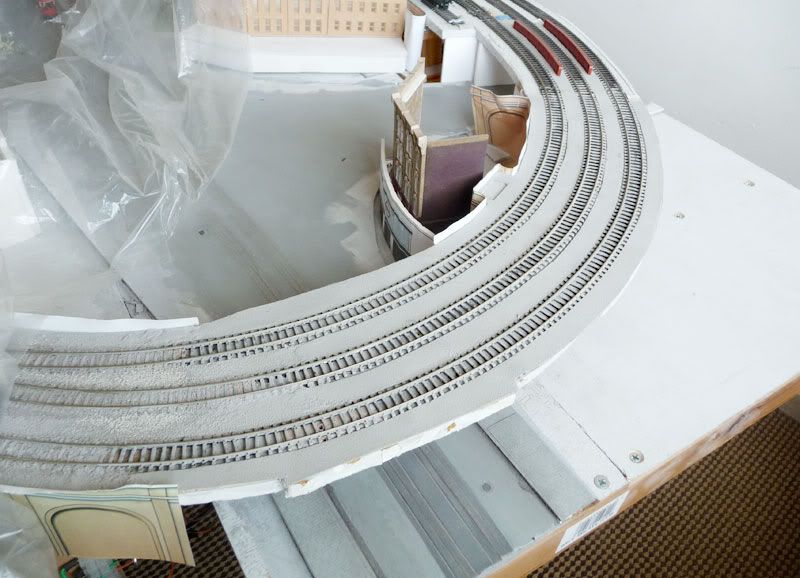
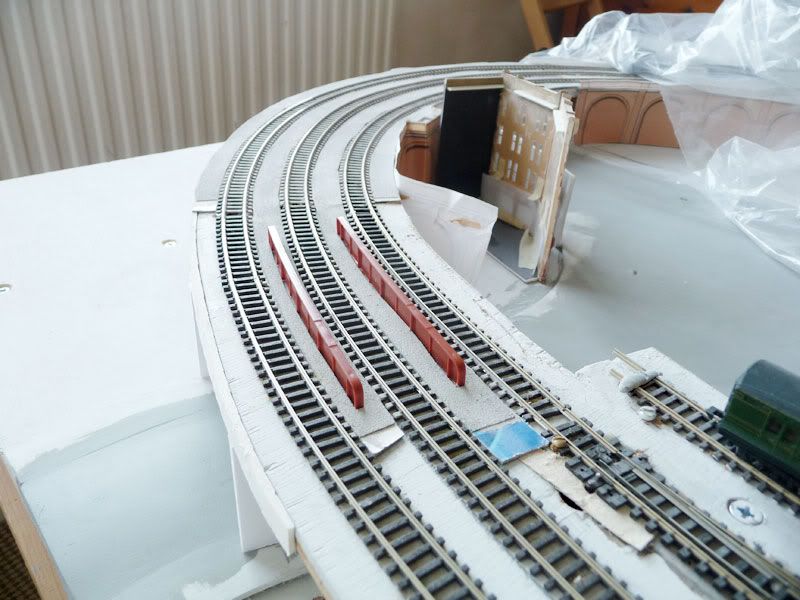
-----------------------------------------------------------------------------
Research:
Initially I got lost in a couple of weeks of very enjoyable and informative research. There are just so many interesting bridges and viaducts out there from which to draw inspiration, and I made notes and sketches as I went.
If anyone is interested, on my travels I found a web page that lists the terminology used to describe the various parts of bridges:
http://www.semgonline.co.uk/structures/glossary.html So now we can all sound as if we know what we're talking about

Anyway, after much indecision I struck upon the obvious...
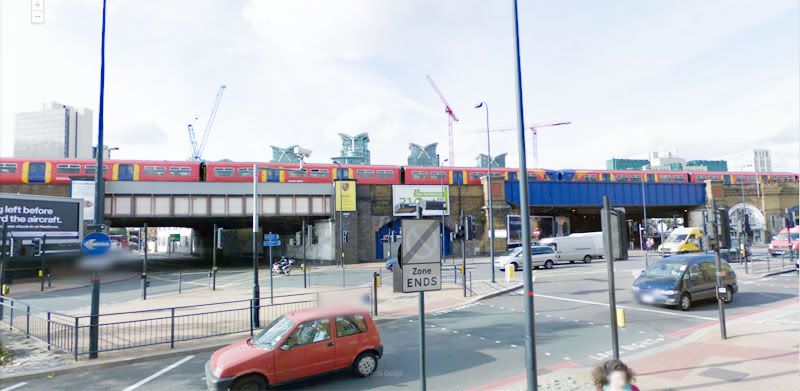
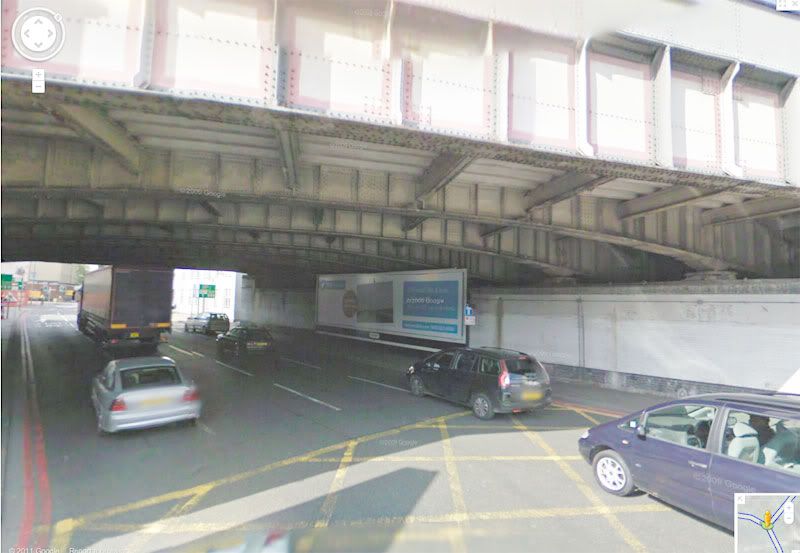
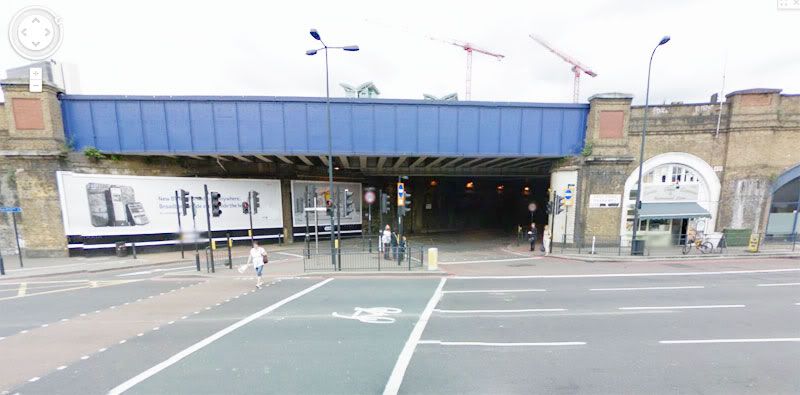
This is Vauxhall: It is correct for my time and place, and Google gave me the 'street views' I needed to get an overview as well as a good degree of detail.
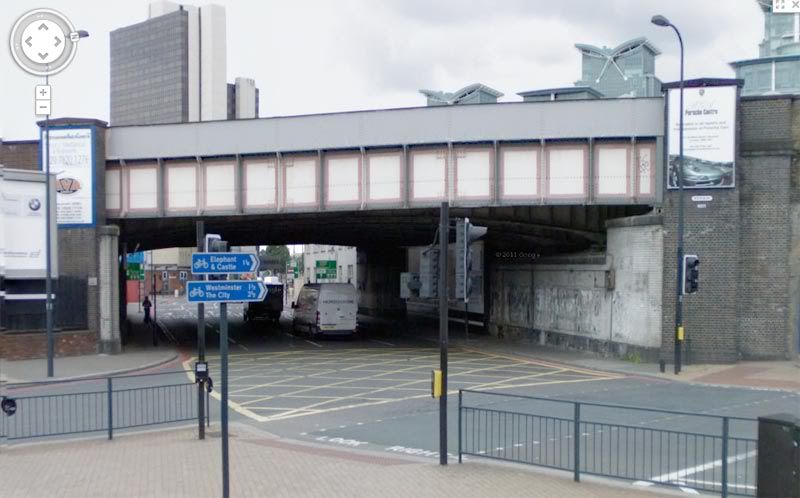
I love those substantial curved girders.
Into the mix I added one particular image from my earlier research.
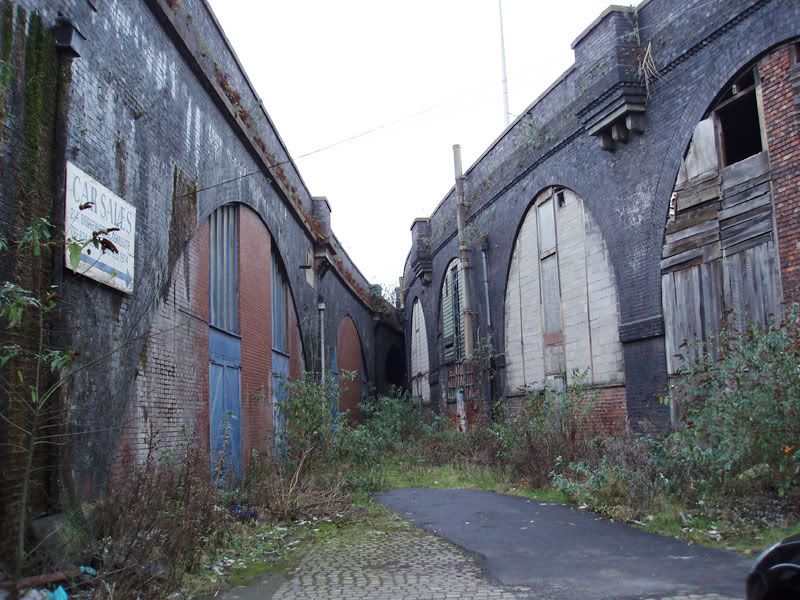
My interest in the picture lay not so much in the structure of the viaduct - but more in the old workshops in the arches and the multiple textures on the ground ... earth, tarmac, cobbles and scrubby bushes are all in the mix there. You'll see echoes of this later on.
The image is credited to the following website:
http://creativity103.com/collections/In ... 99140.html
Credit for inspiration also goes to:
Zunnan for suggestions via PMs and his thread on RMWeb 'Z's N Gauge workbench : Bridges'
http://www.rmweb.co.uk/community/index. ... h-bridges/
0121 Modeller on NRM for his thread 'Inspiration for Model Bridges'.
http://www.newrailwaymodellers.co.uk/Fo ... p?t=16973/
----------------------------------------------------------------------------
Practicalities:
I realised that once the bridges and viaduct where in place it would be more difficult to work on track-side details, so everything track-related was brought into the project too.
This gave me a 'chicken and egg' dilemma: I didn't want to fix in place small and fragile track-side details or third rail too soon in case I damaged them when working on the larger more clunky components such as viaduct walls - but at the same time realised that once walls and bridges were in place, it would be more fiddly to position small details.
So my approach was to make the larger items first and ensure they would 'click to fit' in place, put them to one side, then I worked on the track and related detailing, and fixed the large components towards the end, before finally weathering the lot.
----------------------------------------------------------------------------
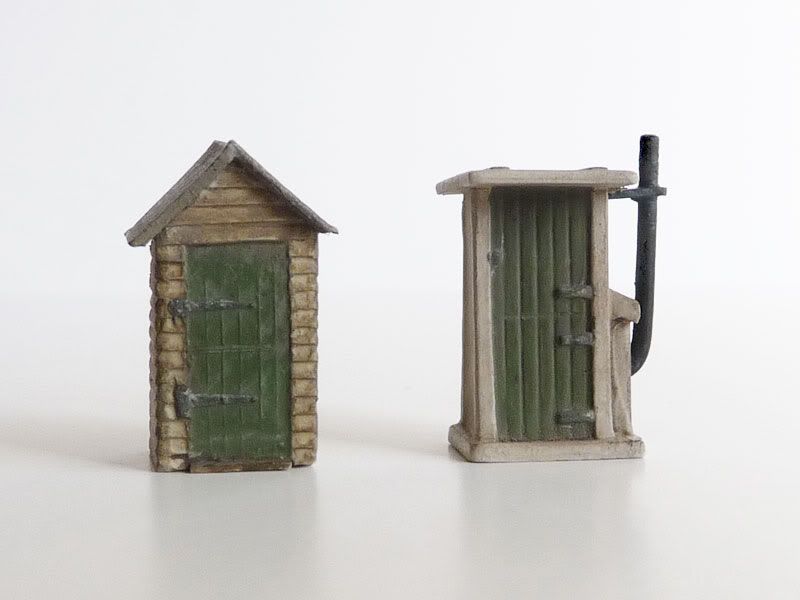
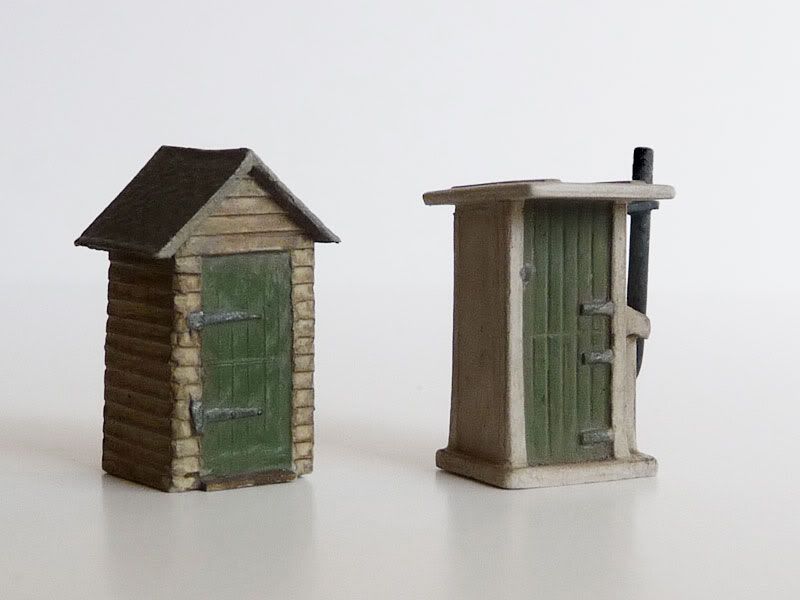
What I most looked forward to on this project was producing the clutter of rail-side paraphernalia: Cables, relay boxes, fog huts etc.
So I started off with the basics of a Southern Railway pre-fab fog hut.

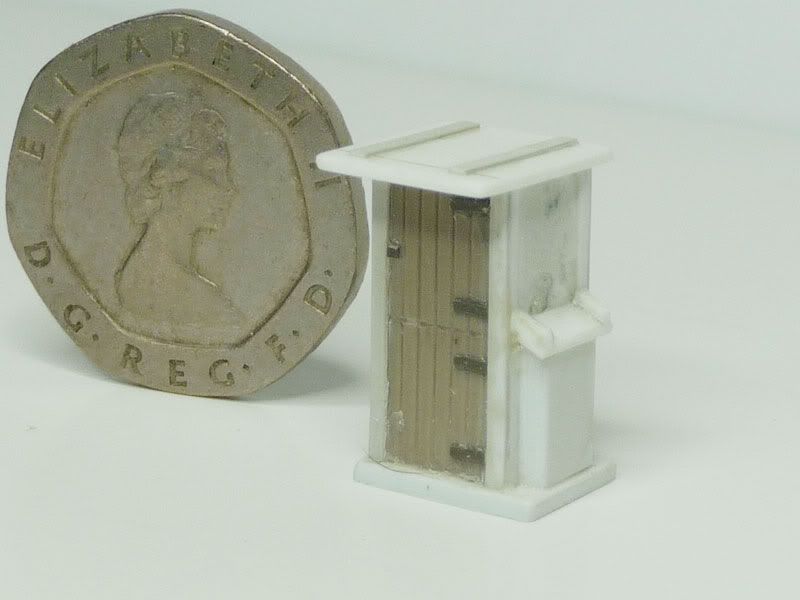
That was track-side detail No. 1 in the box.
----------------------------------------------------------------------------
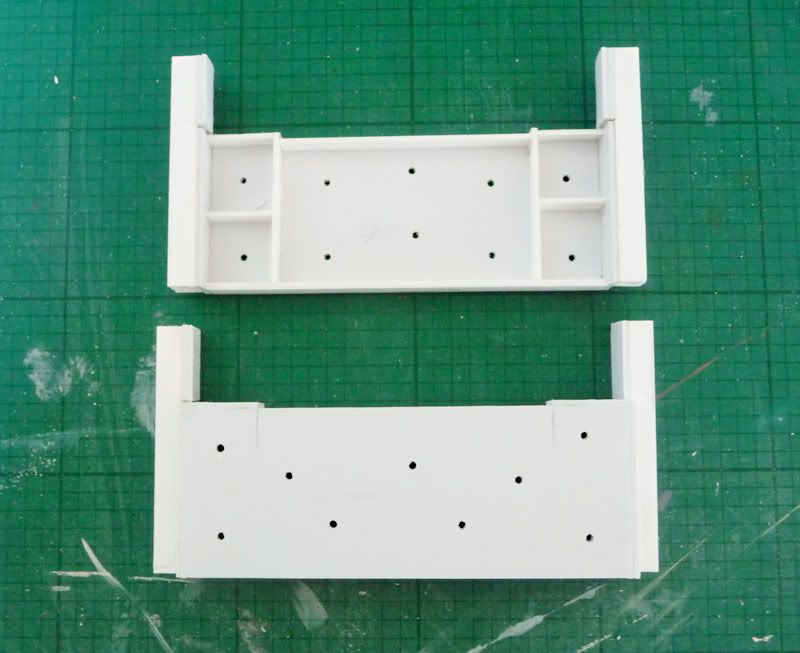
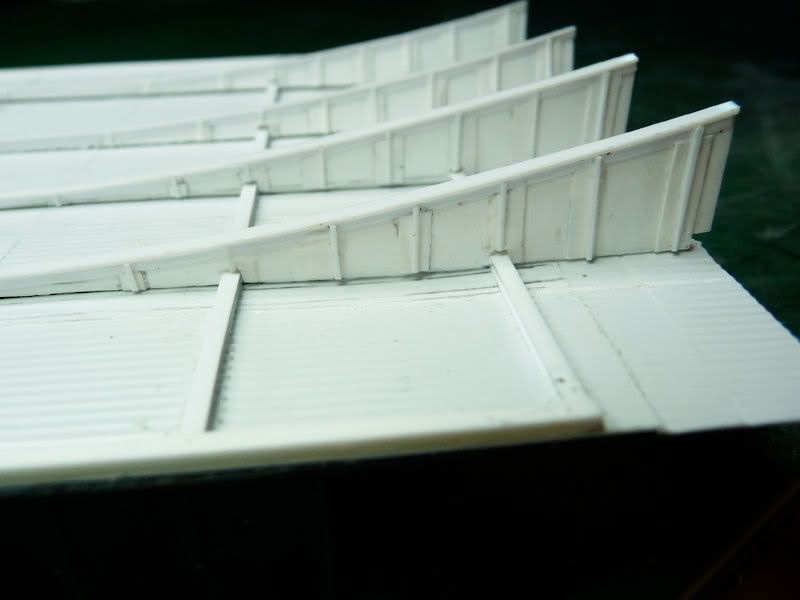
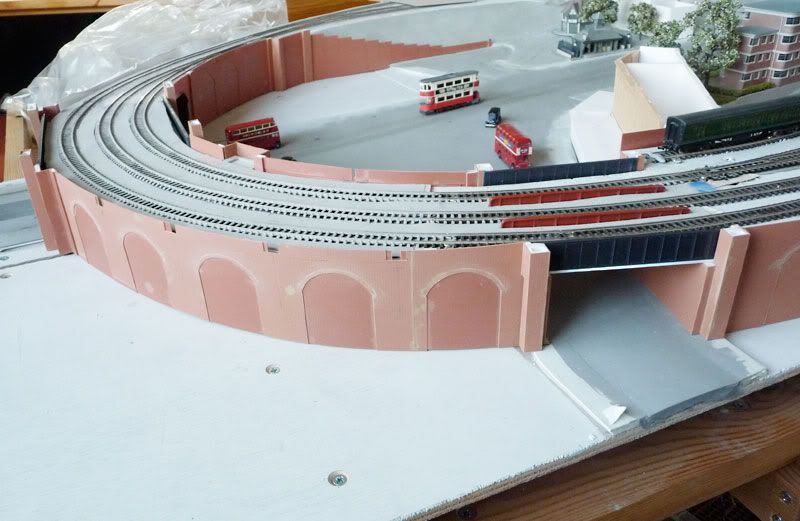
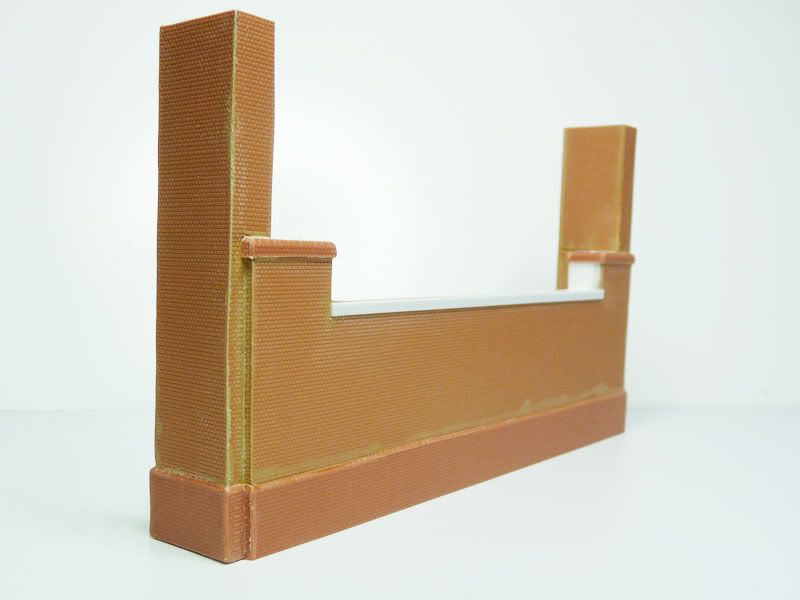
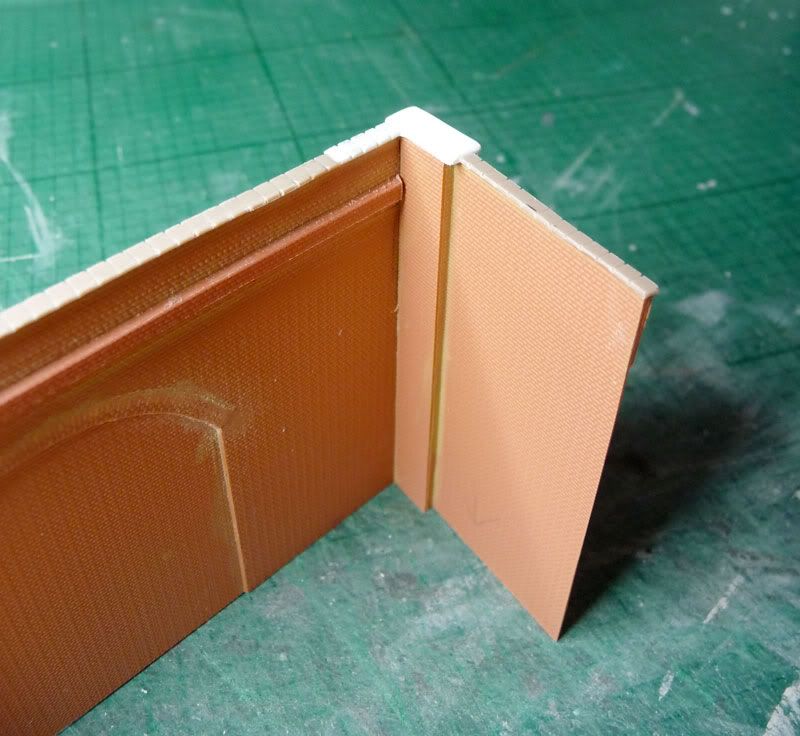
Then serious engineering commenced with the bridges.
For practical purposes I swopped the positions of the two bridges from Vauxhall, and adjusted dimensions to fit available space, but on the whole did try to retain a reasonable degree of integrity.
The bridges are the 19th and 20th out of London on the Frankland line, and I began with Bridge No. 19 (the blue bridge in the pictures of Vauxhall).
Here's the underneath with girders in place ...

... and here are the side walls ... (a back view and a front view)
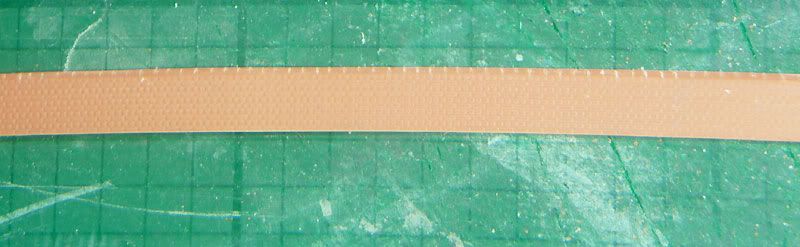
Then on with the Slaters brick sheet ...
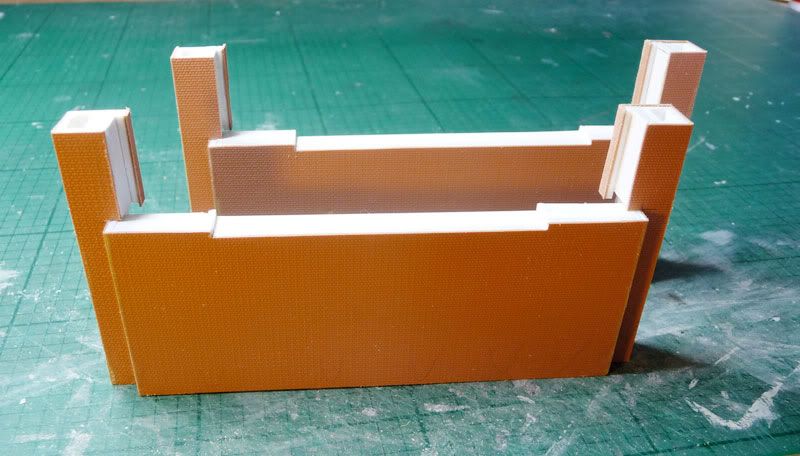
... and a dry-run to check everything fitted correctly and was square and true.

------------------------------------------------
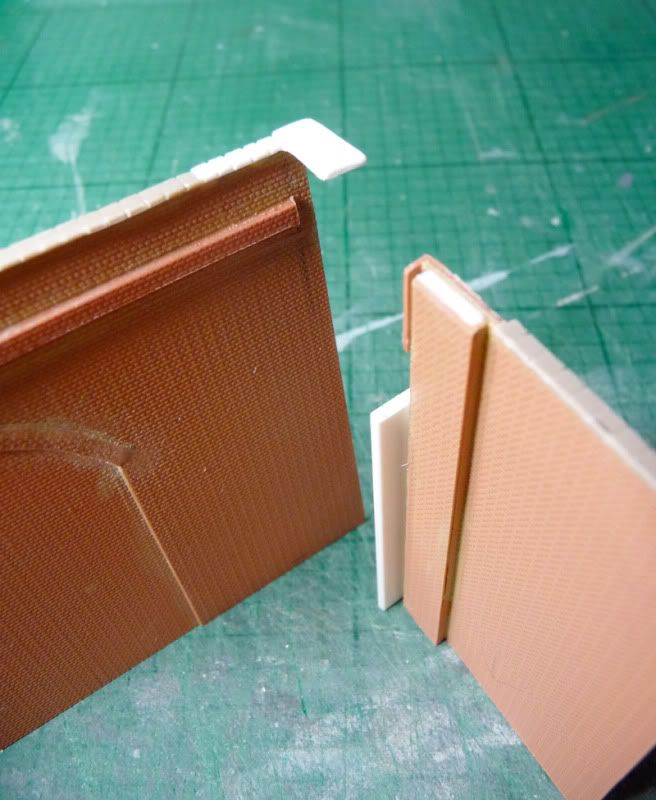
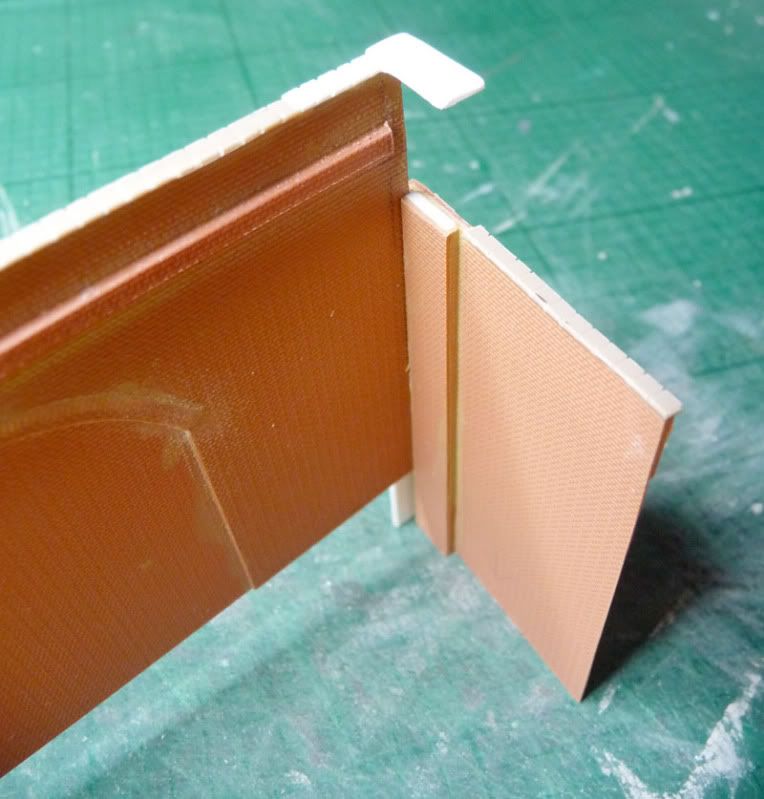
Whilst working on this bridge it struck me that my method of chamfering the edges of brick sheets with a file over the edge of a block of wood to get a 45º angle for the joins took an inordinately long time. I knew there had to be a better way.
Then I remembered that you can buy 'Mounting Board Cutters', where the blade is set at 45º.
I went to the shops and saw one at £25 and a cheaper one at £11 ... and thought 'that's still a lot of money just to have a nicely shaped bit of plastic with a blade that cuts at an angle' ...
So made this ...
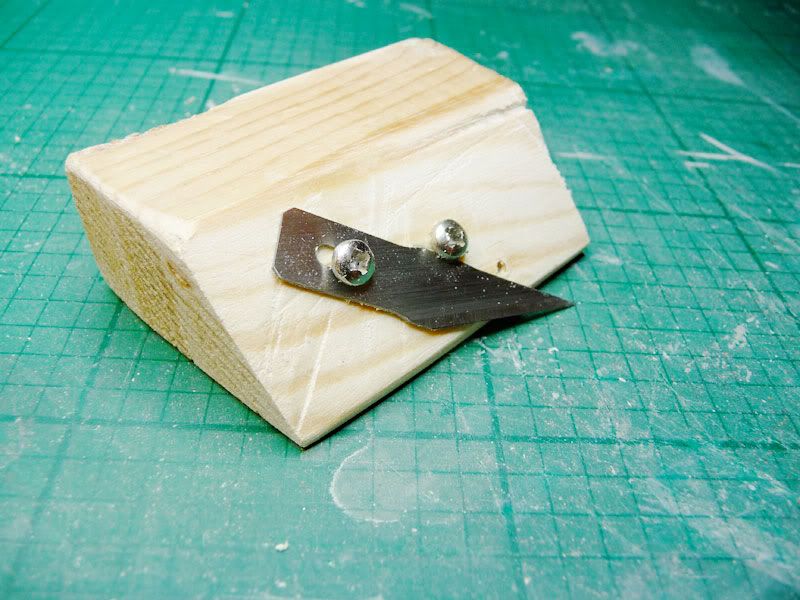
Job done: And a lot of time and effort saved in the future.
------------------------------------------------
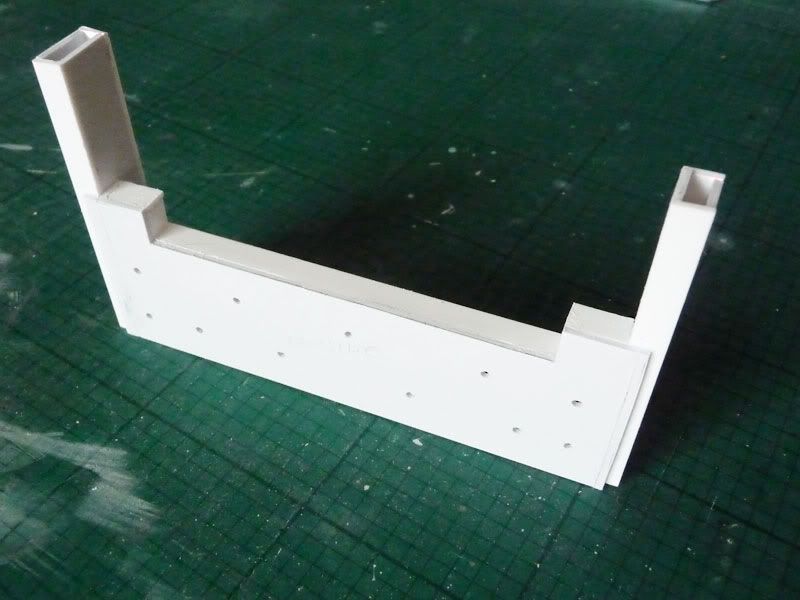
So with that resolved, I moved onto Bridge No. 20
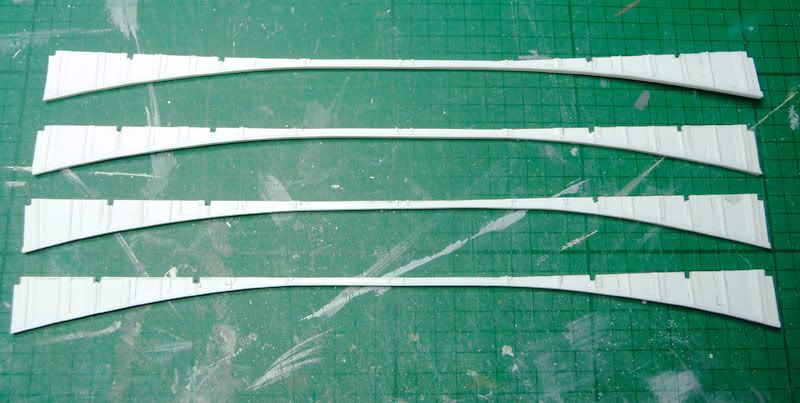
The base (which effectively is the 'ceiling' when viewed from underneath the bridge) is Evergreen corrugated plastic sheet, to represent the uppermost layer of girders. Eventually the 'top' of the deck will be glued underneath the plywood track bed, and then the side walls slid into place.
Next the basis for the curved girders. These are 14mm x 194mm. In reality they should be higher and more curved, but the depth of the plywood track-bed narrowed the clearance height to the road and so I had to make them more shallow in order double-deck trams could pass underneath.
In retrospect, when building the layout, I should have made the road surface dip at this point, but didn't think it would be necessary at the time.

Then I spent a long, long time cutting and sticking and layering various sections of Microstrip to represent the surface relief on the girders. The notches along the top are positioning guides.
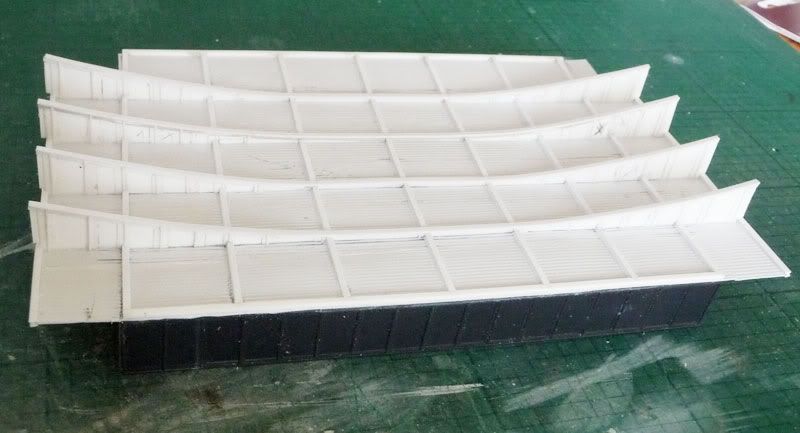
Here's a close up
And here is one of the two sides ...
And a dry run
------------------------------------------------
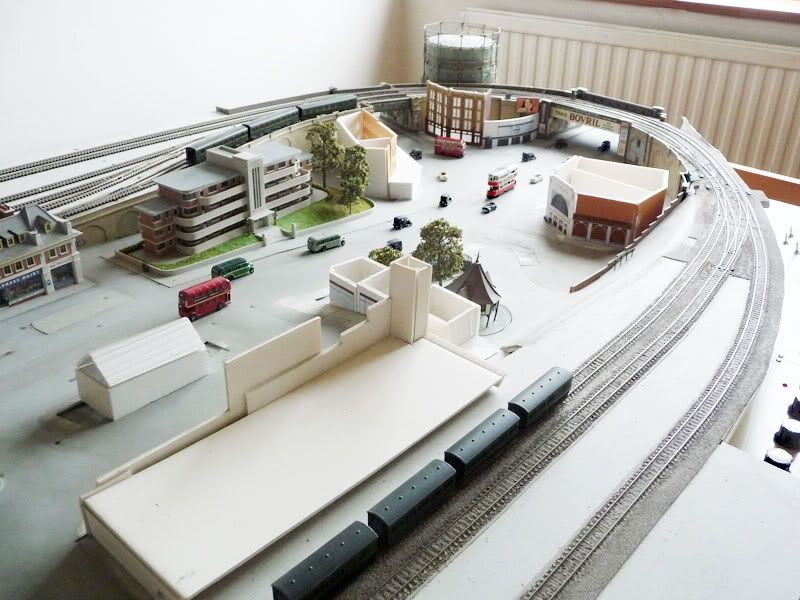
Then I took an overview just to see how things were coming along...
----------------------------------------------------------------
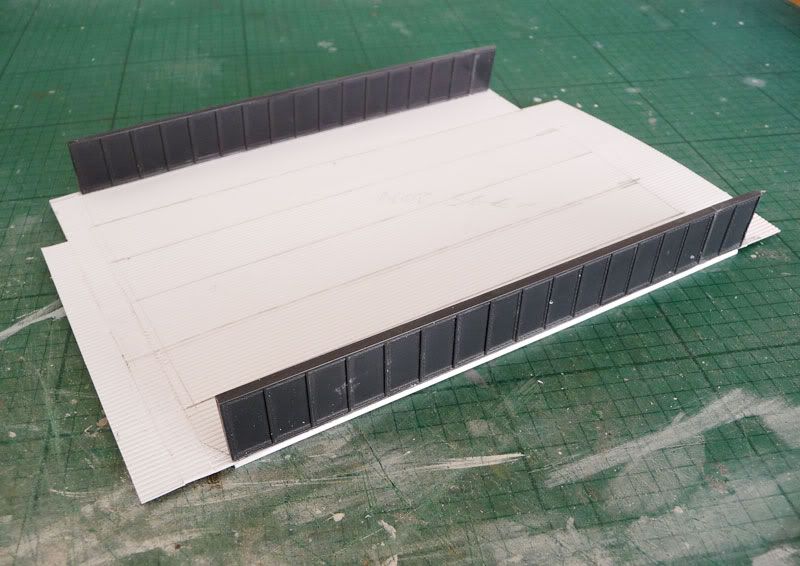
Next I made a test section of viaduct to try out techniques and check the proportions looked right.
And here it is painted... it's supposed to be yellow 'London Brick' after a century of smoke and grime (and allowing for 'colour perspective').
So feeling happy with that I 'blocked-out' sections of the viaduct walls
----------------------------------------------------------------
Then a brief distraction occurred and I made two sets of these:
Mechanical Fog Detonator Placers.
They came about because whilst researching fog huts, I stumbled across
an article on RMWeb about detonator placers (see post 14) and decided they were a 'must have' for Frankland. I'm not sure whether they are correct for the Southern Railway, but decided to err on the side of optimism!
They're actually the wrong way round in the photos (the long bar should be nearest the rail) - but you get the idea.

Eventually they'll be covered in grime and half lost in the ballast and stuff - so I'm happy with them being a bit 'abstract'.
So that was items 2 & 3 in the track-side box.
----------------------------------------------------------------
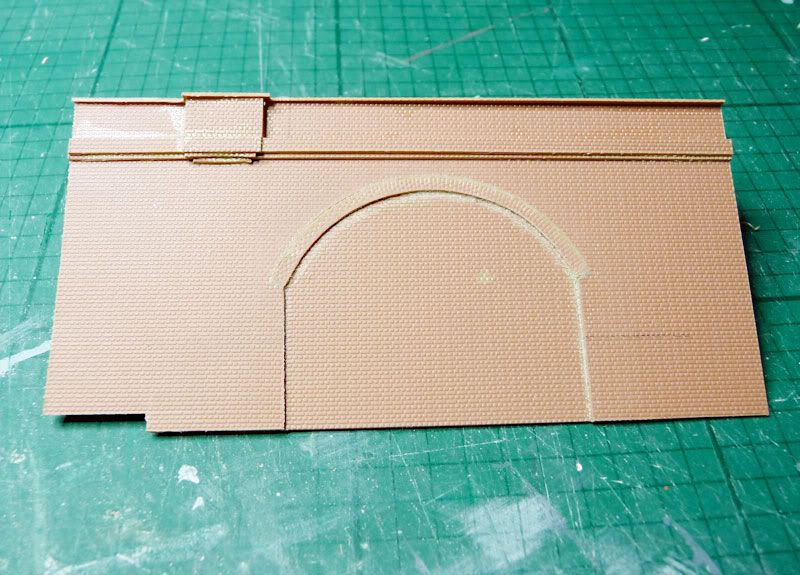
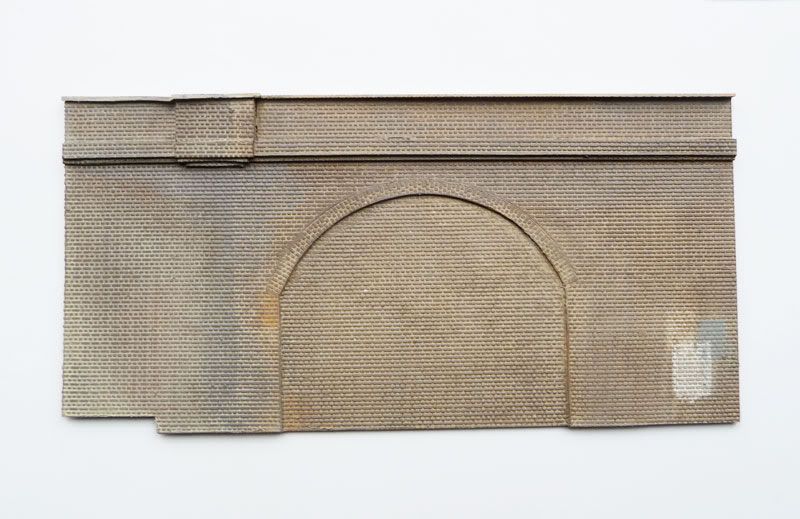
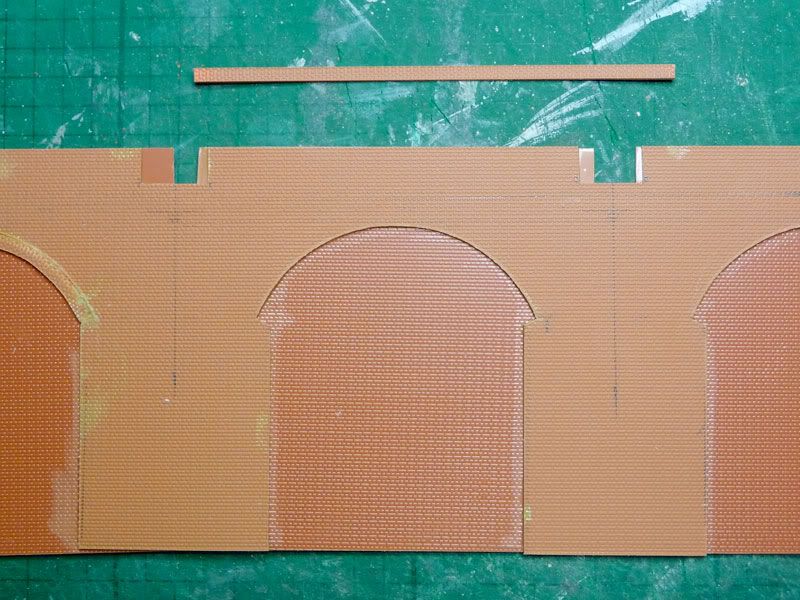
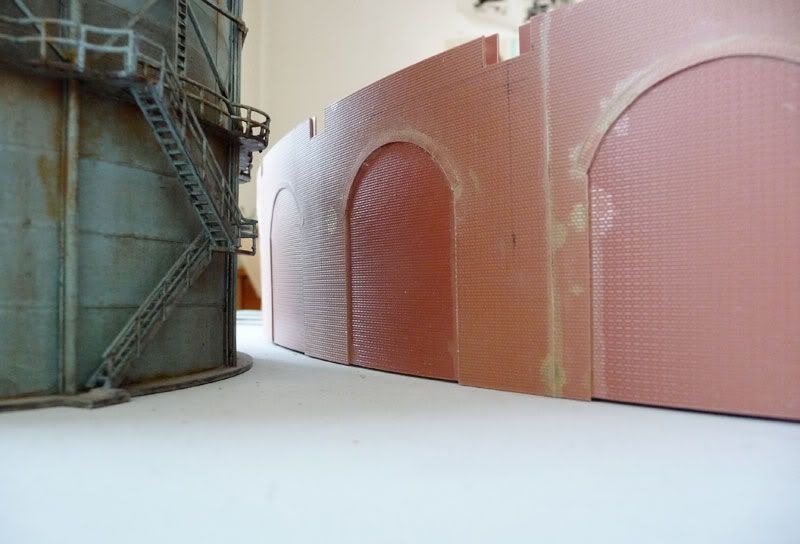
Next up was working out how to make the curved arches for the viaduct.
I thought I'd have a job curving them and would have to put them in warm water to shape them, but found that provided they weren't too wide then the momentary softening effect of Mek-Pak was sufficient to make them pliable.
So here we have one stretch of viaduct wall, and one oblong section that will become the arch...
One corner glued in place and a curved implement quickly pushes it into shape whilst it is still flexible from the effects of the glue.
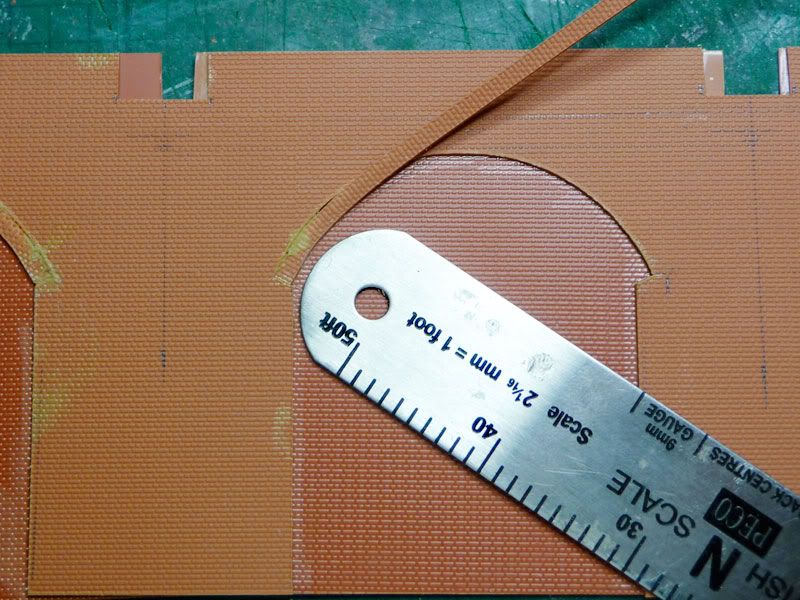
Gradually worked along the arch (three or four step-and-repeats of above).
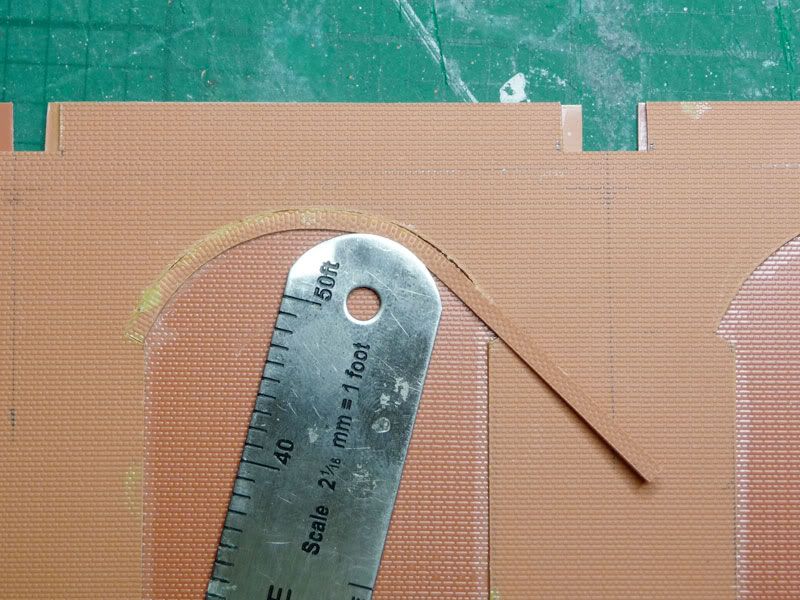
When nearing the end I snipped the excess Plasticard off and and latched it into place
A final dash of solvent (less is more in this case), and push and hold in place for a few seconds.
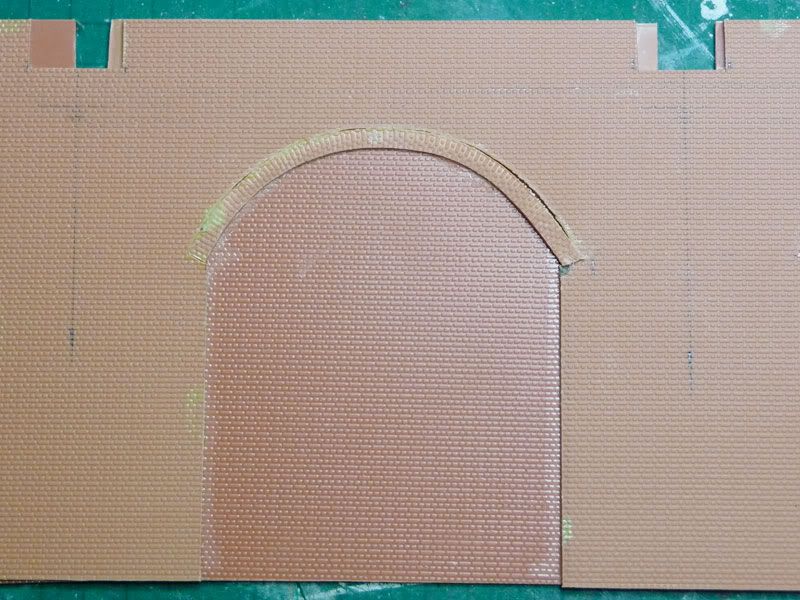
Then after ten minutes or so I filed and lightly sanded (wet & dry paper) any rough bits to give what I hope will be a reasonable finish once painted.

And so we had proper arches for the viaducts. Here's another dry-run ...
I love the next two photos with the gasometer temporarily back in place, I can already picture it looking dark, grimy and quite menacing around here ...
Driver's-eye view.

--------------------------------------------------------
Next onto detailing - and the first thing I made was a strip of chamfered brickwork using my 45º cutter and then a small needle file to represent the mortar joins
And here it is applied to Bridge No, 20

... and to Bridge No. 19 (with additional stonework added).
--------------------------------------------------------
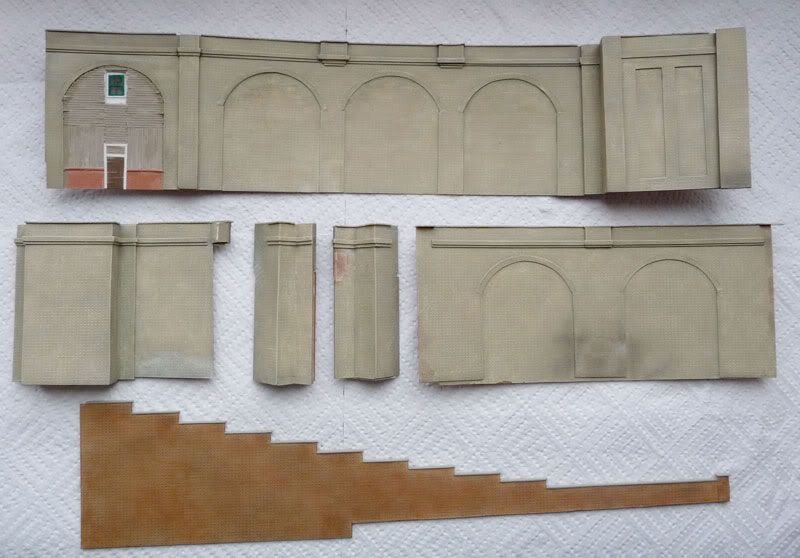
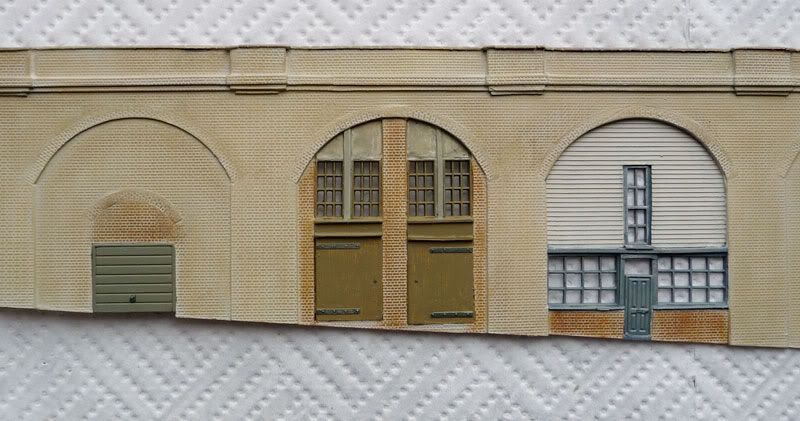
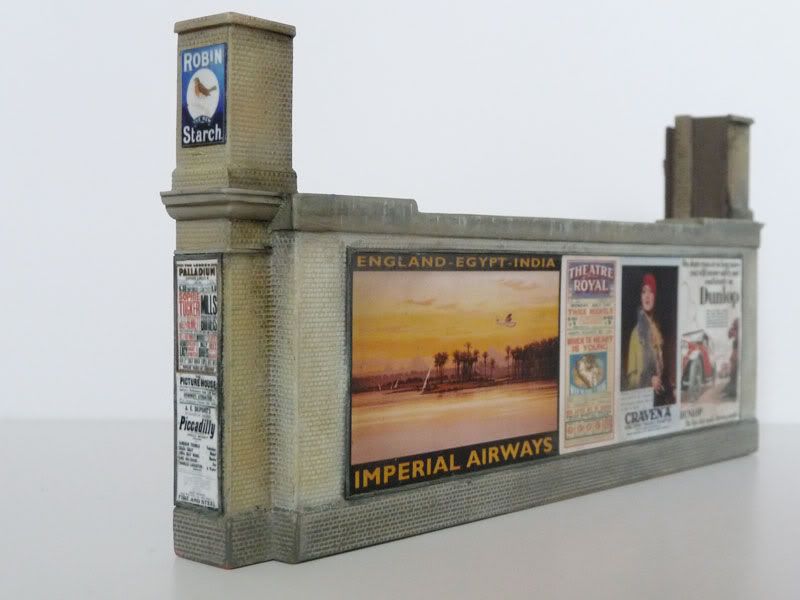
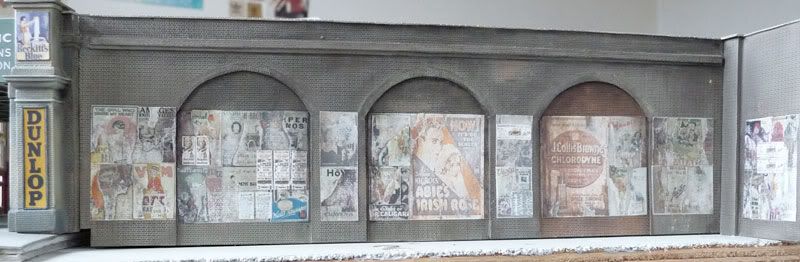
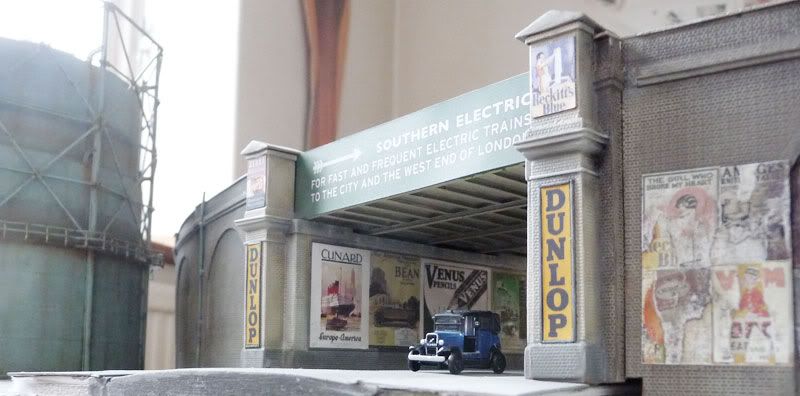
Now other detailing commenced, such as businesses in the arches ...
... including one long-boarded up

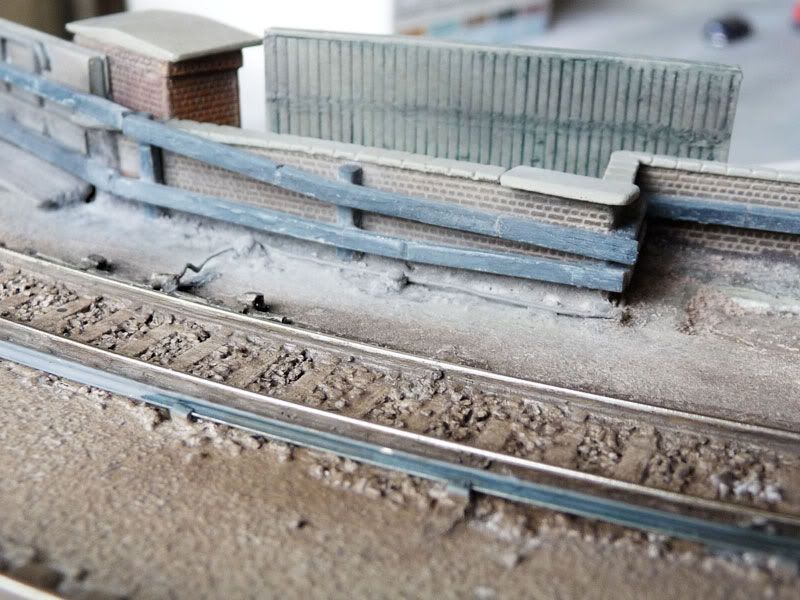
Railings run along the top of bridge No. 20,
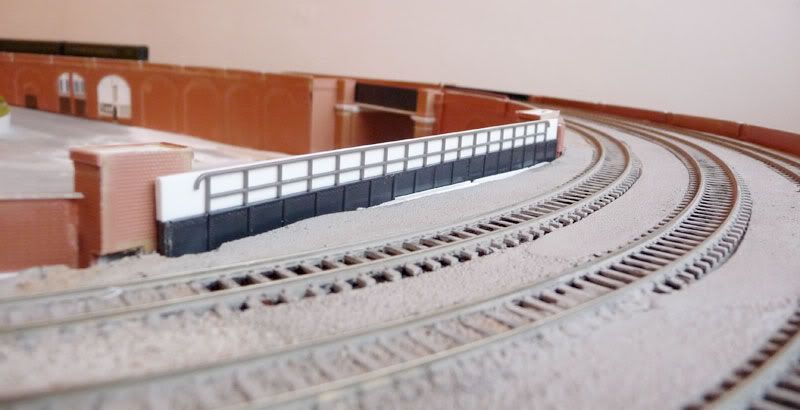
--------------------------------------------------------
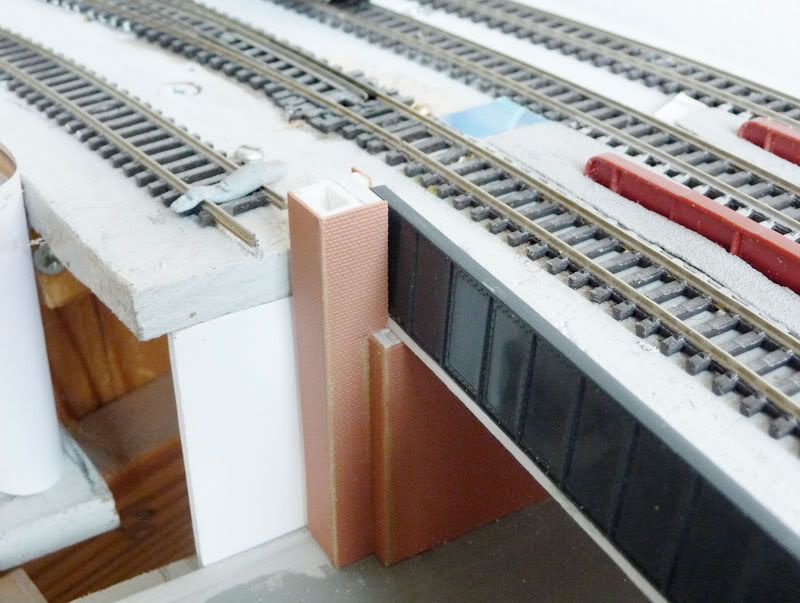
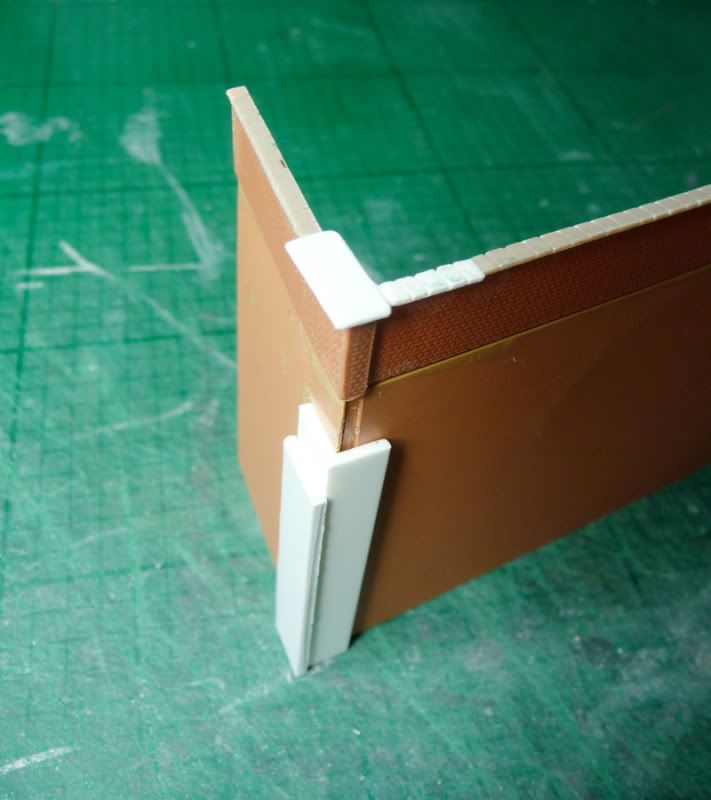
Some sections of the viaduct 'slot-in' to allow access to points motors if necessary...
--------------------------------------------------------
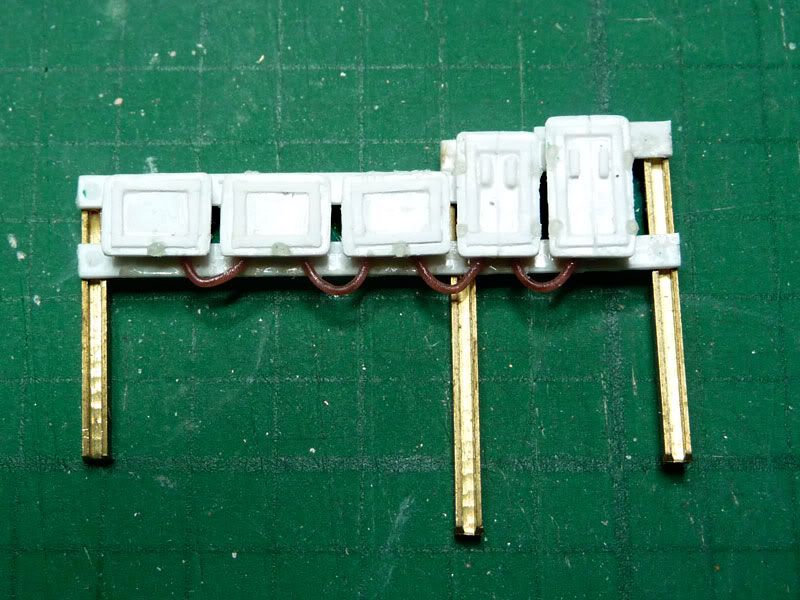
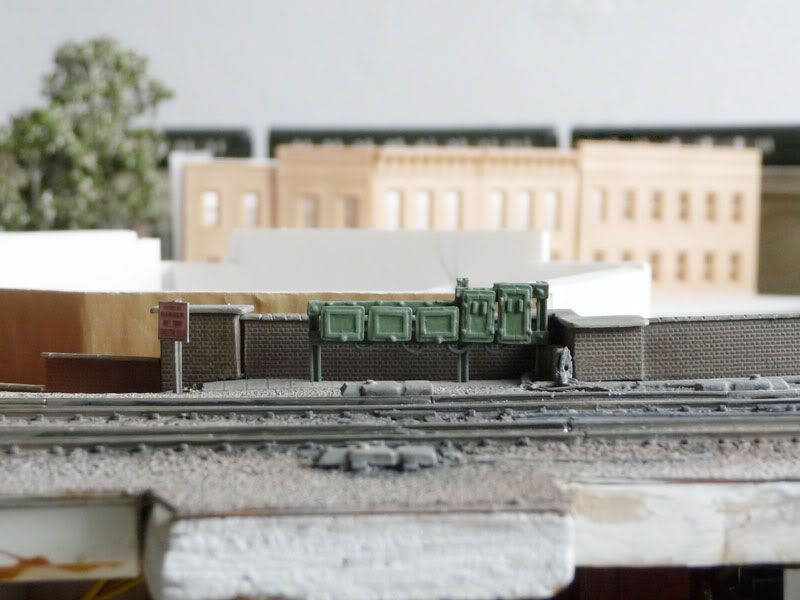
Then a couple more excursions into track-side detail came along ...
A set of relay cabinets
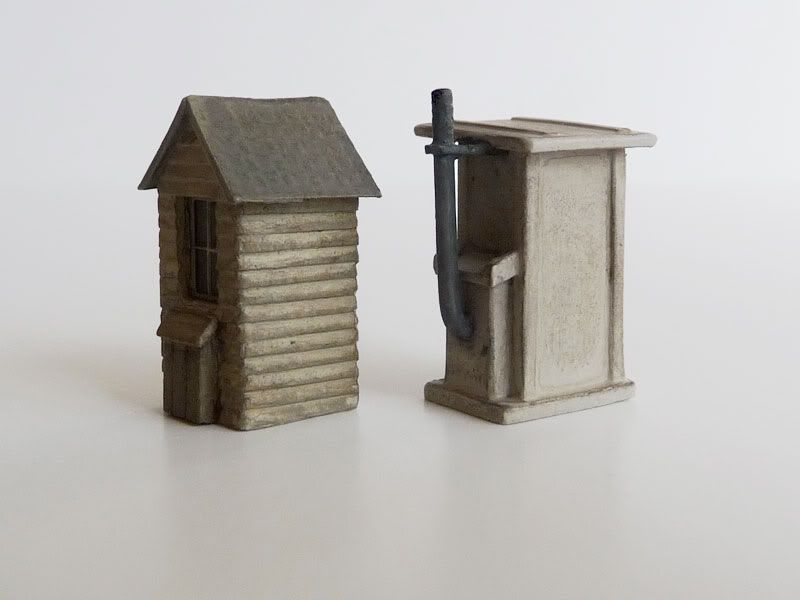
And another fog hut, this based on one near Victoria Station
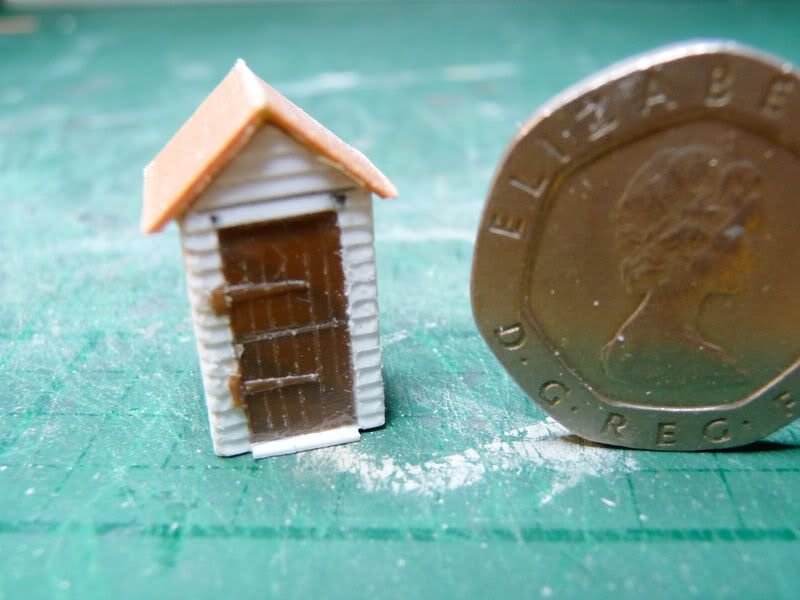
We now had items 4 & 5 in the track-side box.
--------------------------------------------------------
Next onto brickwork. I dry-brushed the viaducts and bridges. It took absolutely ages, but I am very pleased with the results.
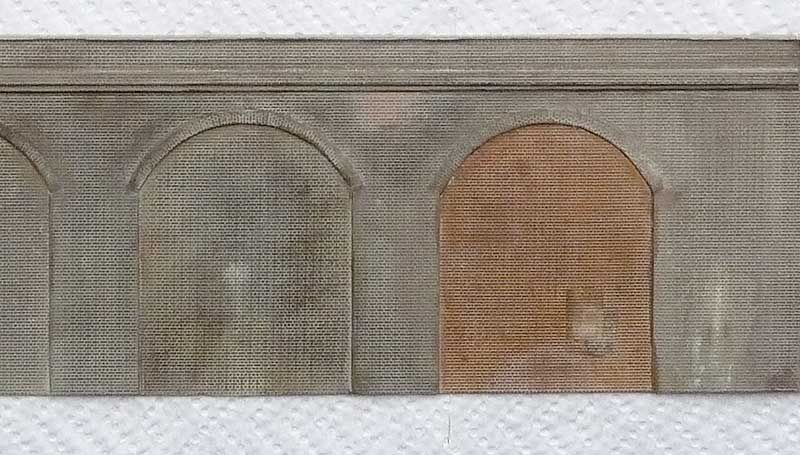
I also dry-brushed the girder details to bring out the rivets - I hadn't planned to - but I just suddenly found myself doing it by mistake!

And the businesses were painted too ...
--------------------------------------------------------
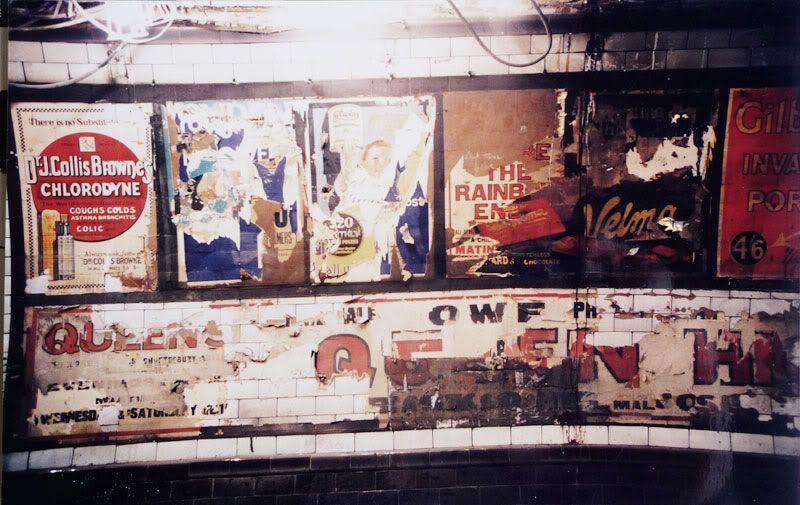
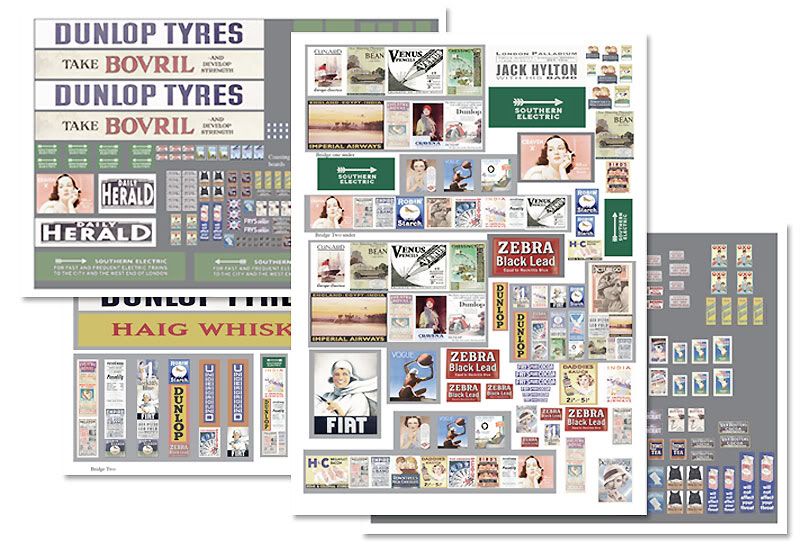
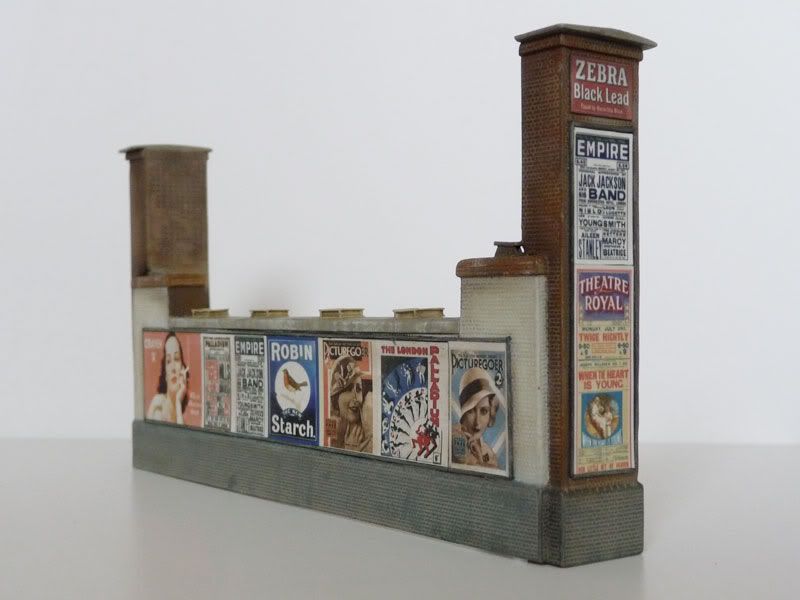
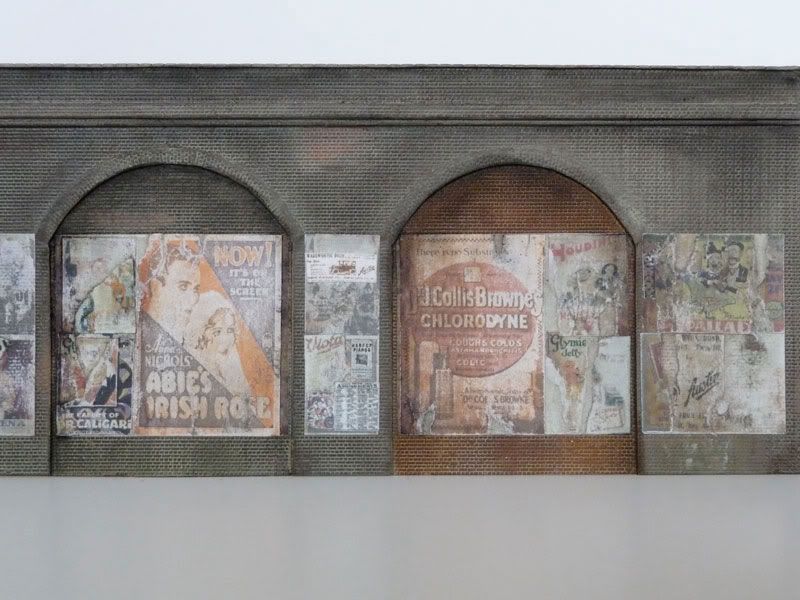
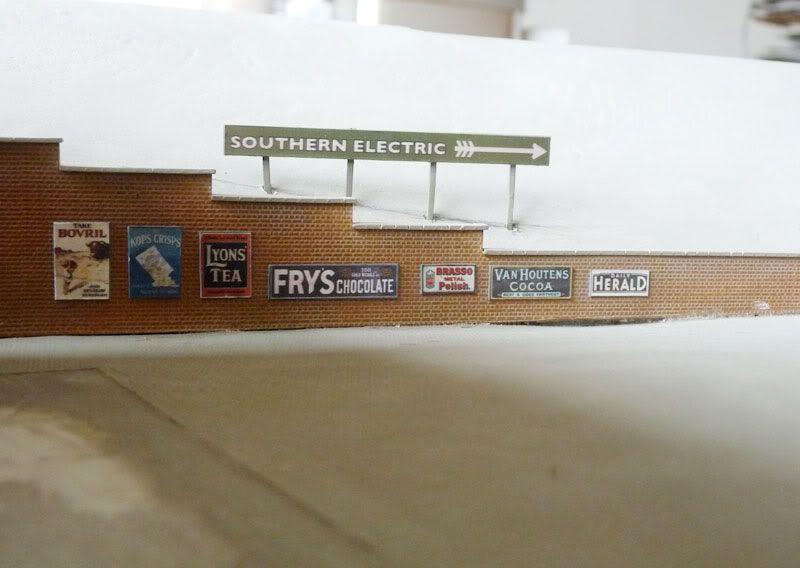
At this stage a conversation arose regarding 'fly posting', and whether it was appropriate for my viaducts.
I wasn't so sure, but did think that perhaps some form of dilapidated advertising would suit a less salubrious quarter of town.
And then I recalled that some years ago; at Clapham North tube station; renovation work revealed a section of wall with period advertising which perfectly suited what I had in my mind's eye. Here are a few photos I took at the time ...
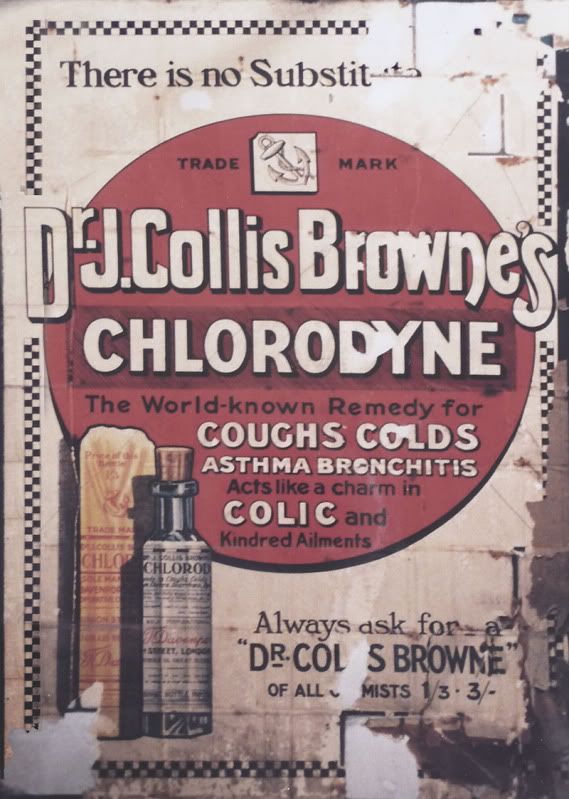

... and I had a go at reproducing something similar on a spare bit of brick sheet.
I was quite happy with that.
--------------------------------------------------------
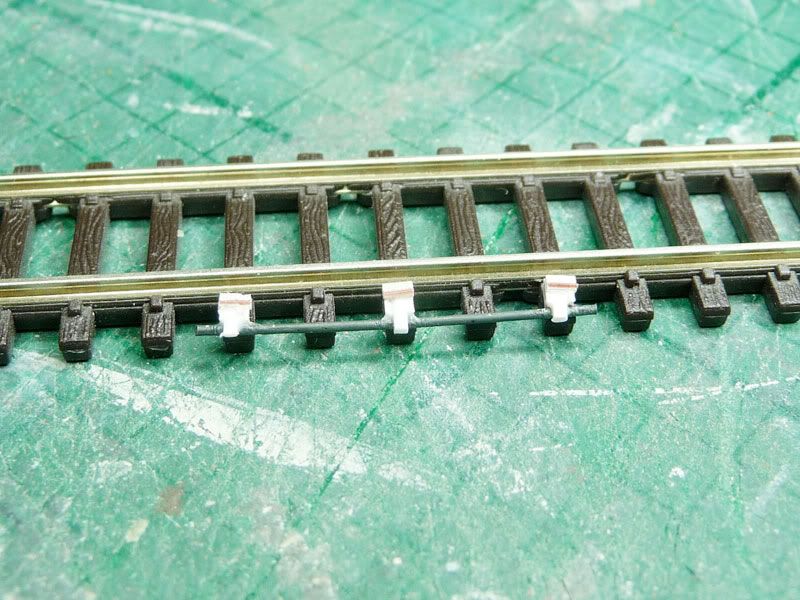
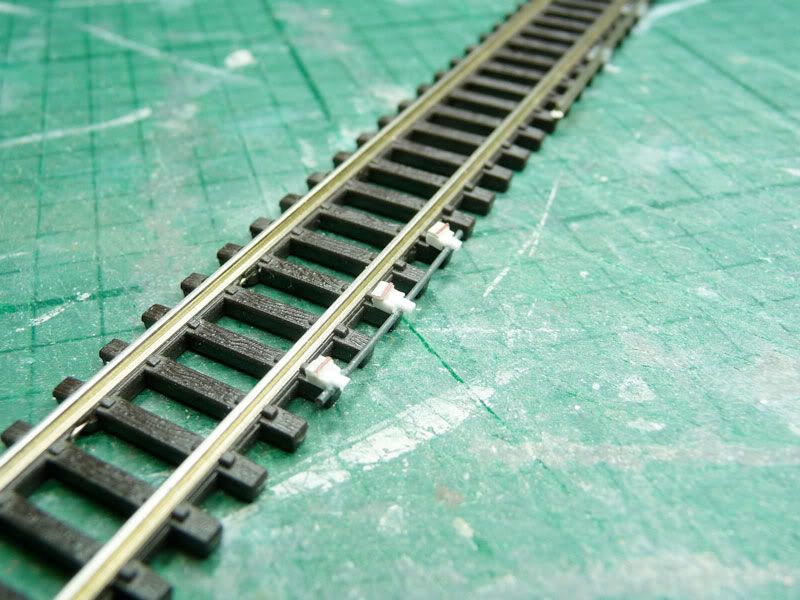
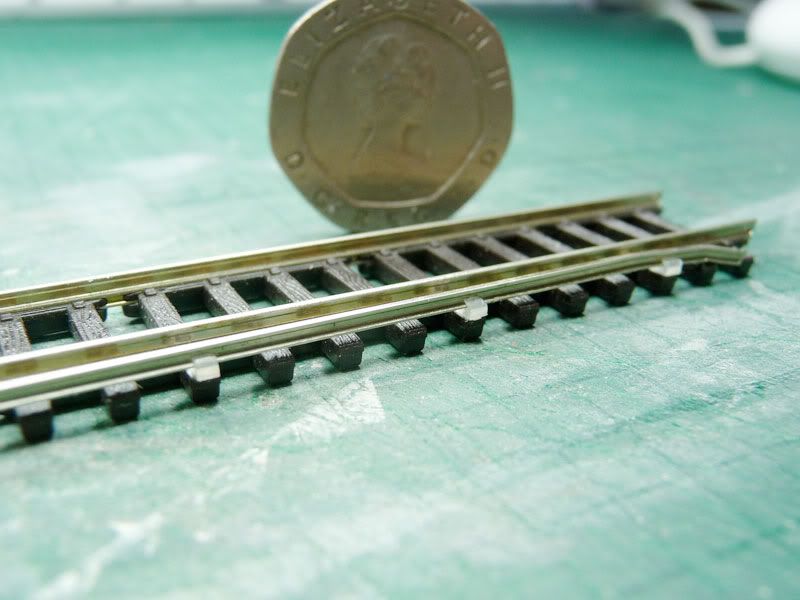
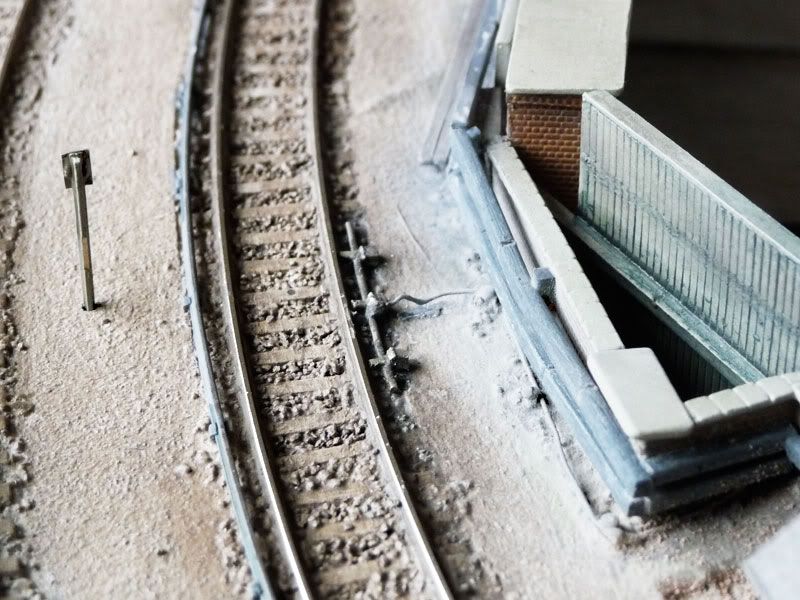
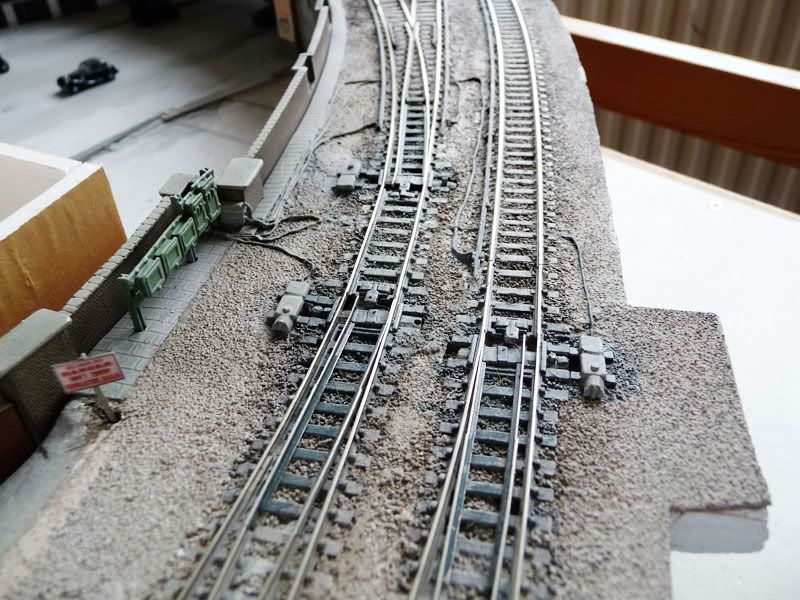
Next I turned to I ballasting...
... and made a start on the third rail.
I revisited earlier experiments using Code 40 rail and sections of insulating rail joiners - and consulted some
RMWeb experts to arrive at a plan for third-rail positioning.
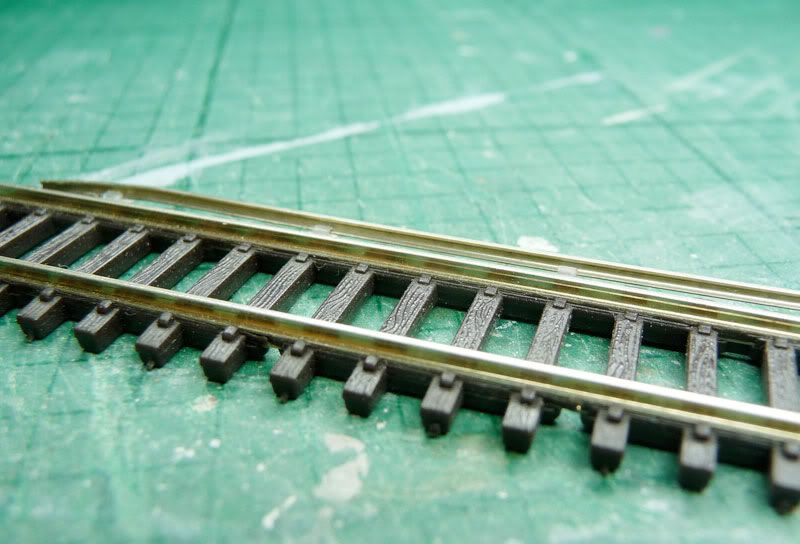
And here it is in progress:
To the left of the two outside lines you may be able to make out insulators stuck in place awaiting third rail. They are difficult to see though - and that's the only drawback to this method - being translucent, they are almost invisible to the eye, so it's difficult to position them and see if they are correctly aligned.
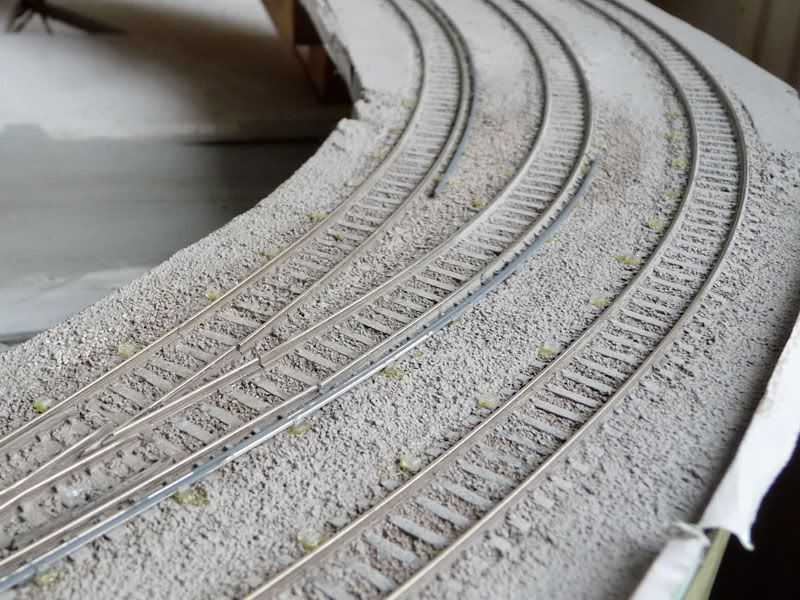
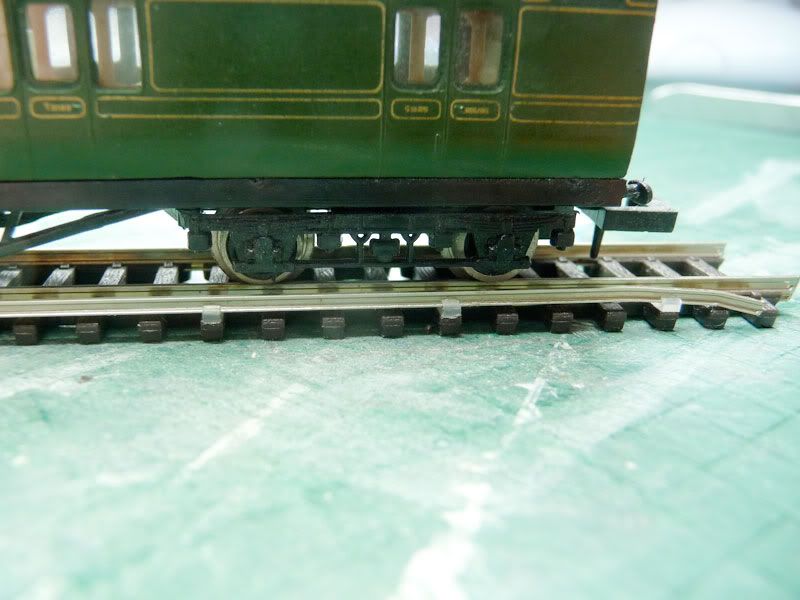
However, I found threading the rail through was far easier than I had anticipated. Despite these being quite tight curves, there was no resistance or friction at all.
--------------------------------------------------------
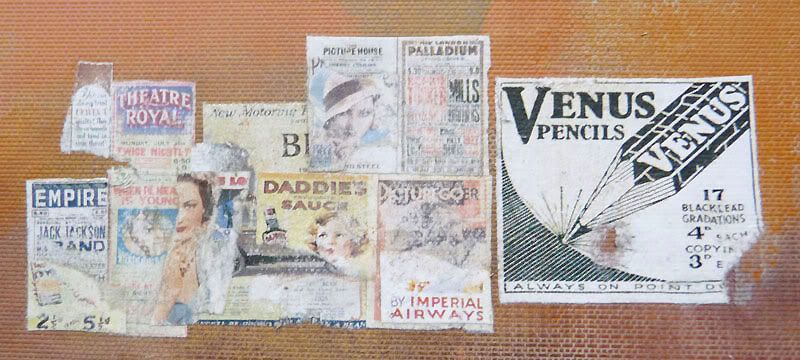
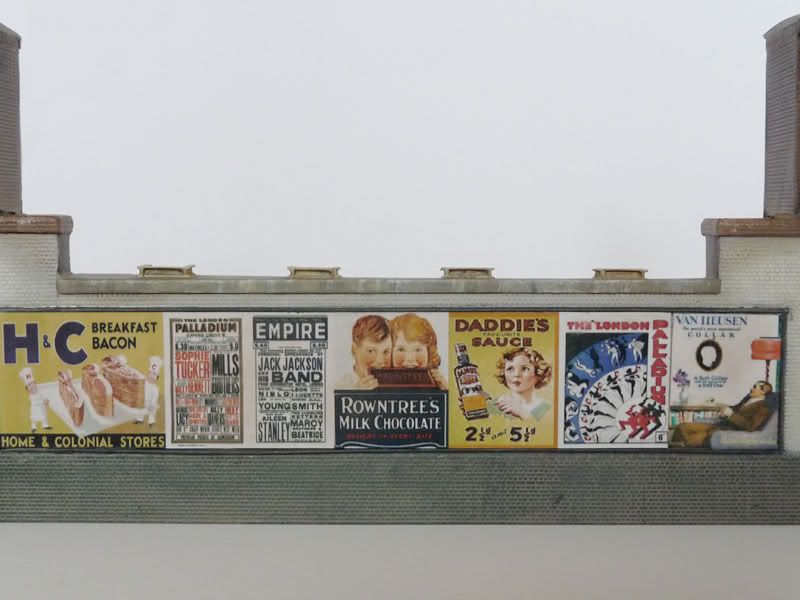
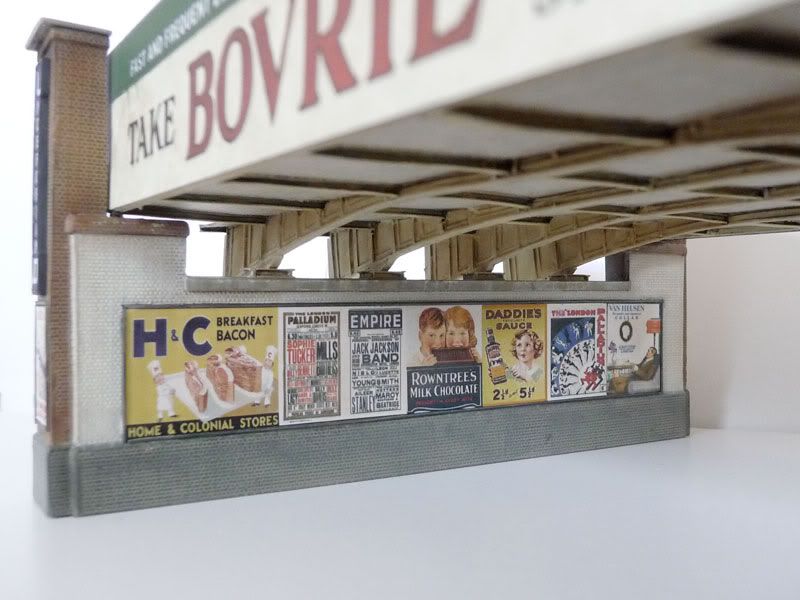
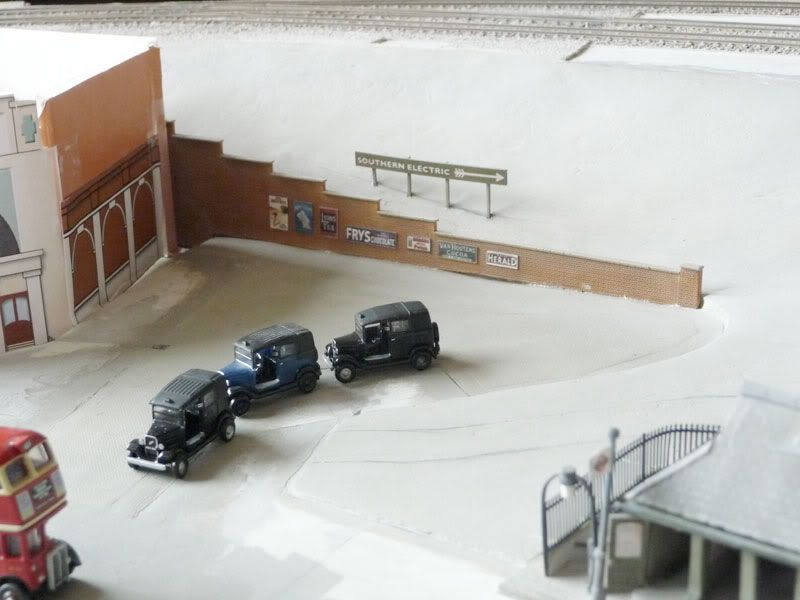
Then I made some of sheets of advertising and signs ...
... and had now reached a point where structures-great and details-small where more or less finished and it was time to start assembling everything ready to fix in place.
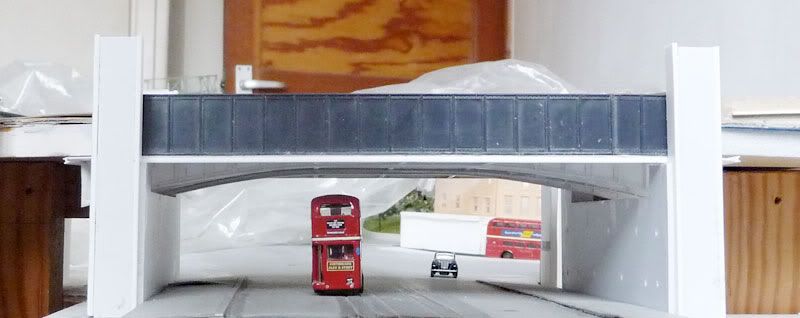
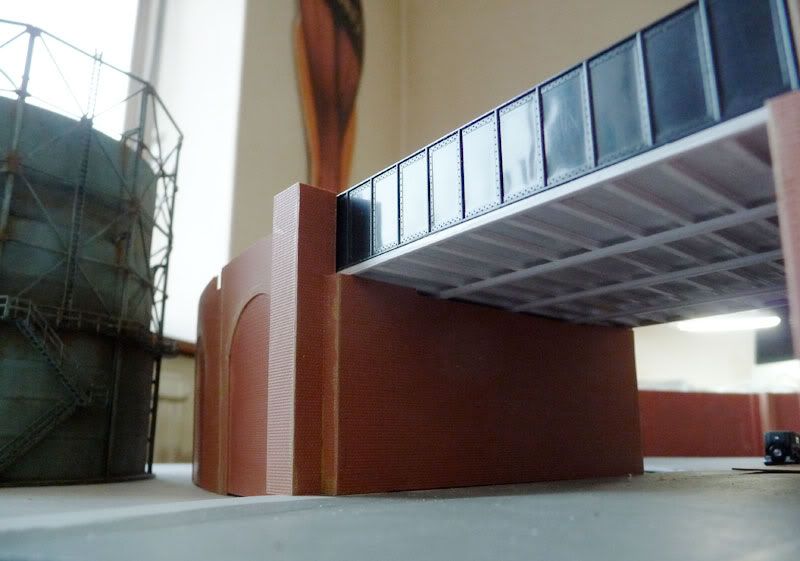
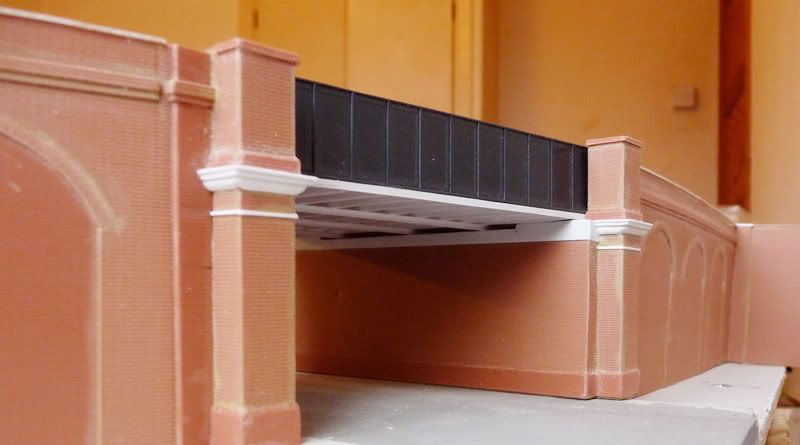
I have to say my favourite features of all this are my two bridges, and so before they were fixed in place one last photo-opportunity was granted to the press.
Bridge No.19
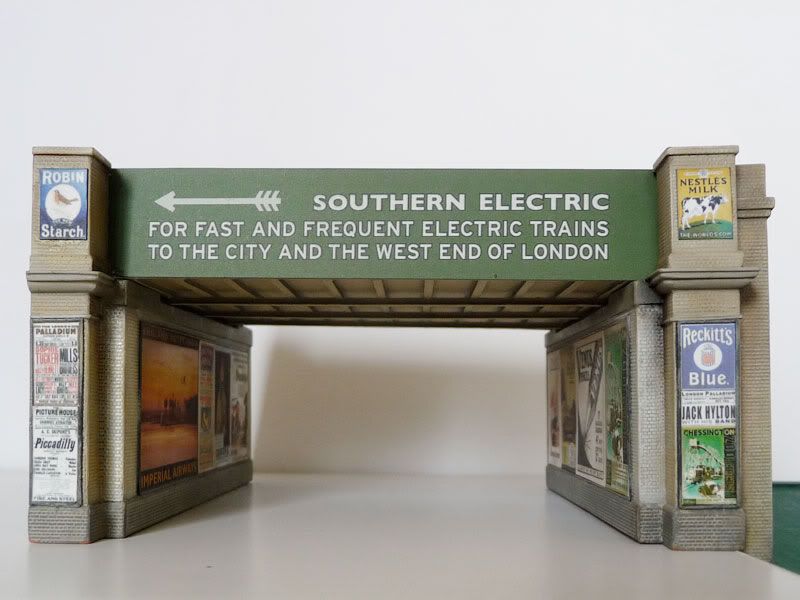
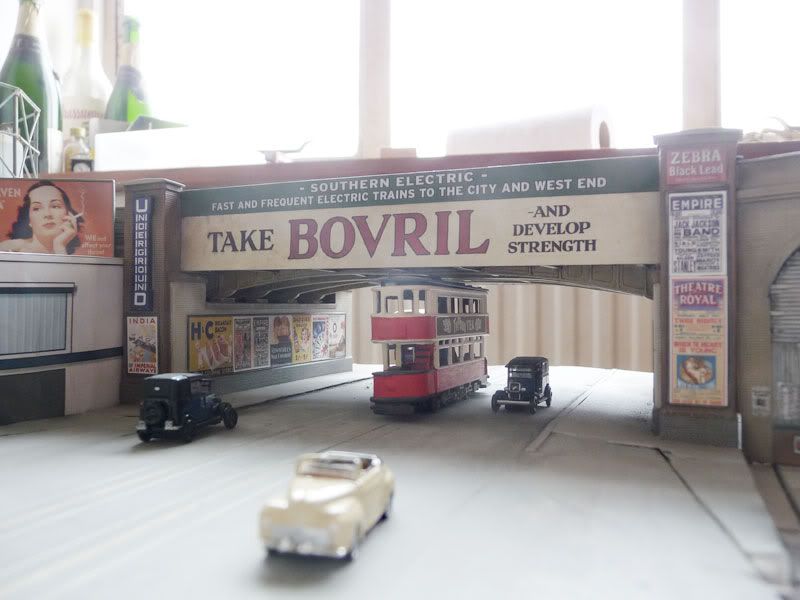
The white tiles under both bridges are satin varnished to give a glazed effect.
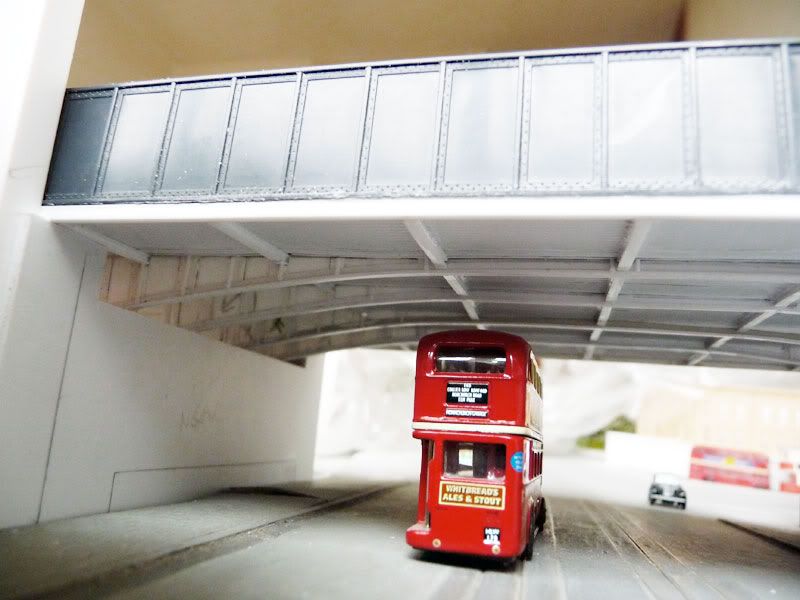
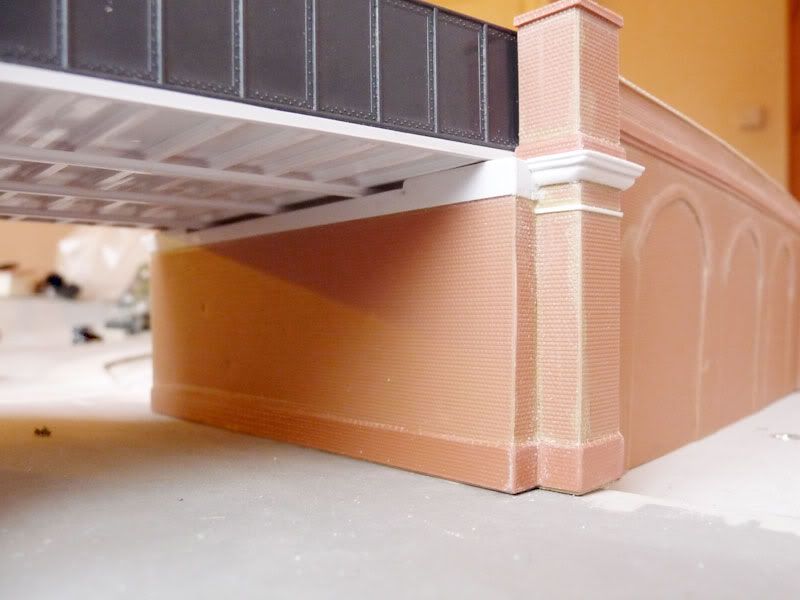
Bridge No. 20:
In the centre of this next picture is the support upon which the main girder of the bridge rests.
Interestingly, on the prototype, the other support on the same stretch of wall sits at a 90º angle to this one and is positioned behind the parapet rather then to one side of it. On the opposite wall this arrangement is reversed, so I modelled it likewise.
The next picture shows the four housings across the middle of the bridge upon which the large curved cross-girders sit.
Here we see everything sitting quite comfortably together. I was particularly happy with this. I hope it conveys an impression of great substance and heavy-duty engineering as did the original pictures to me.

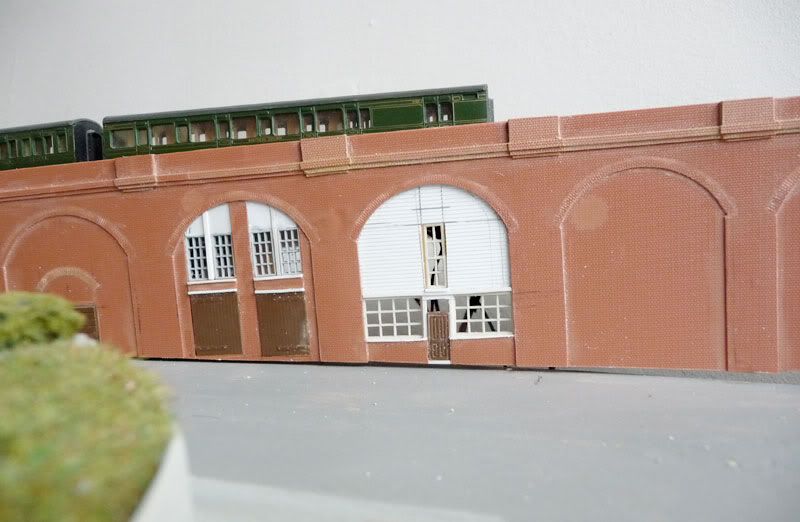
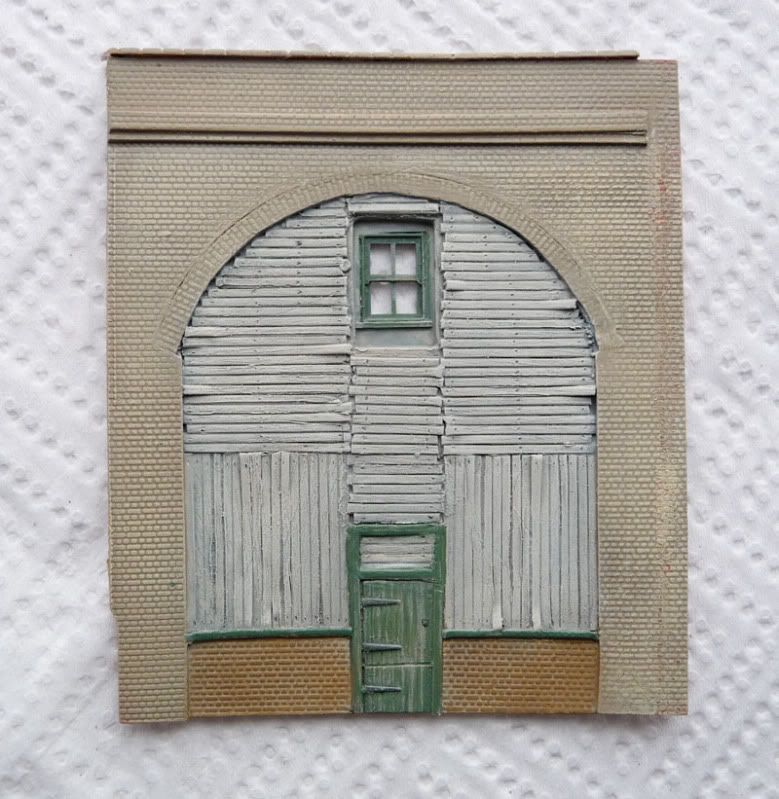
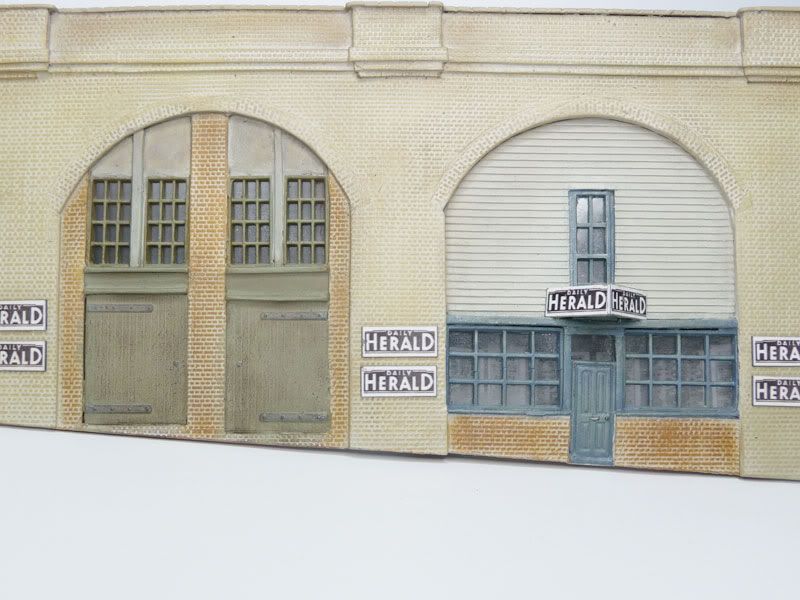
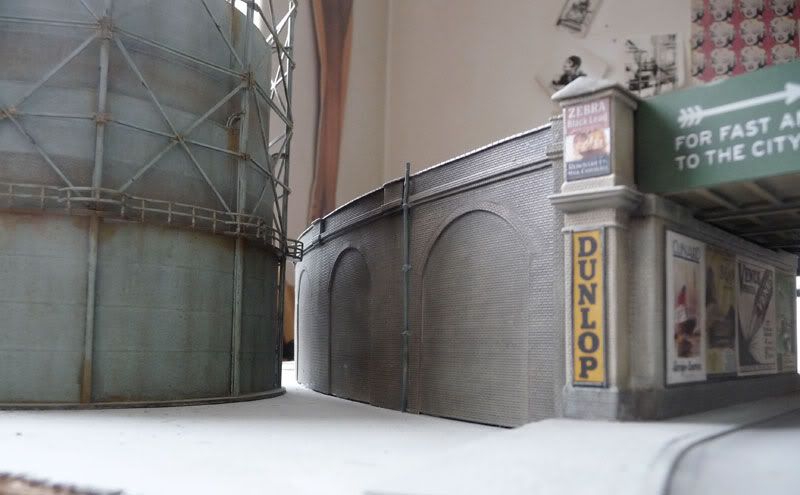
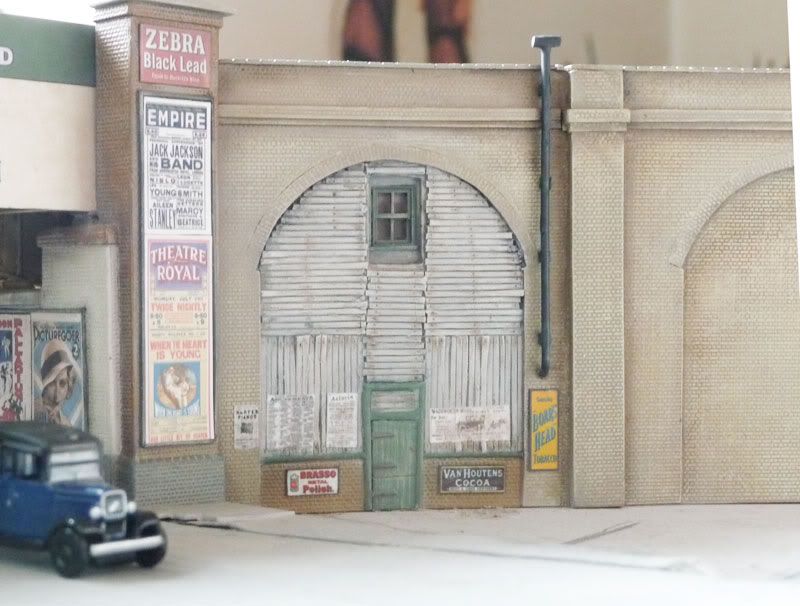
Here is the boarded-up arch ...
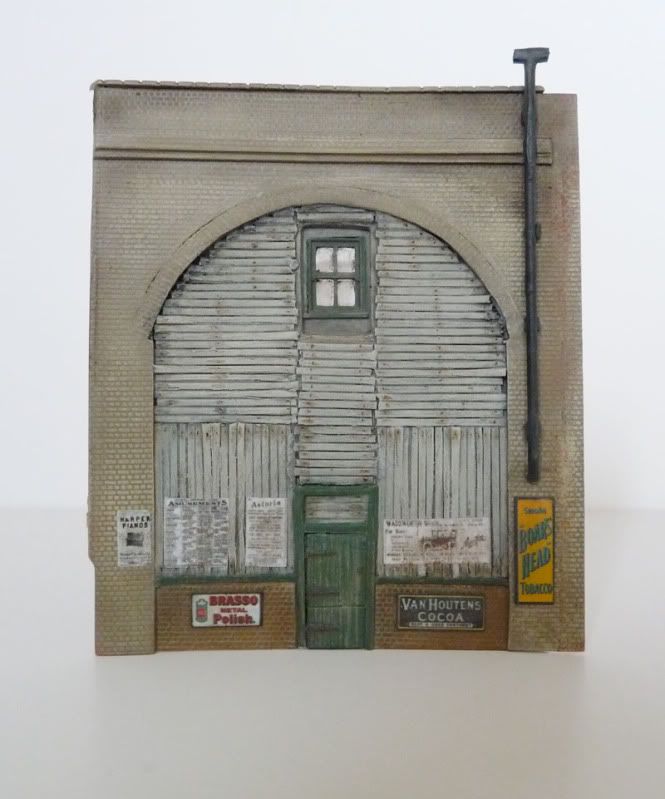
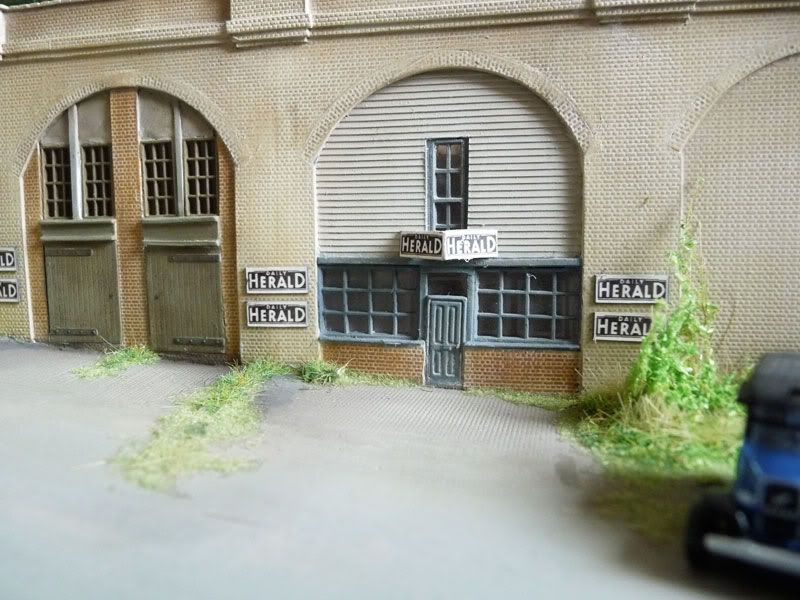
I decided that two of the arches belong to the local paper, 'The Herald'. On the right is the office, it has an interior with newspapers mounted on the wall, although the picture doesn't show that too well. The arch on the left houses the press.
---------------------------------------------------------------------------------
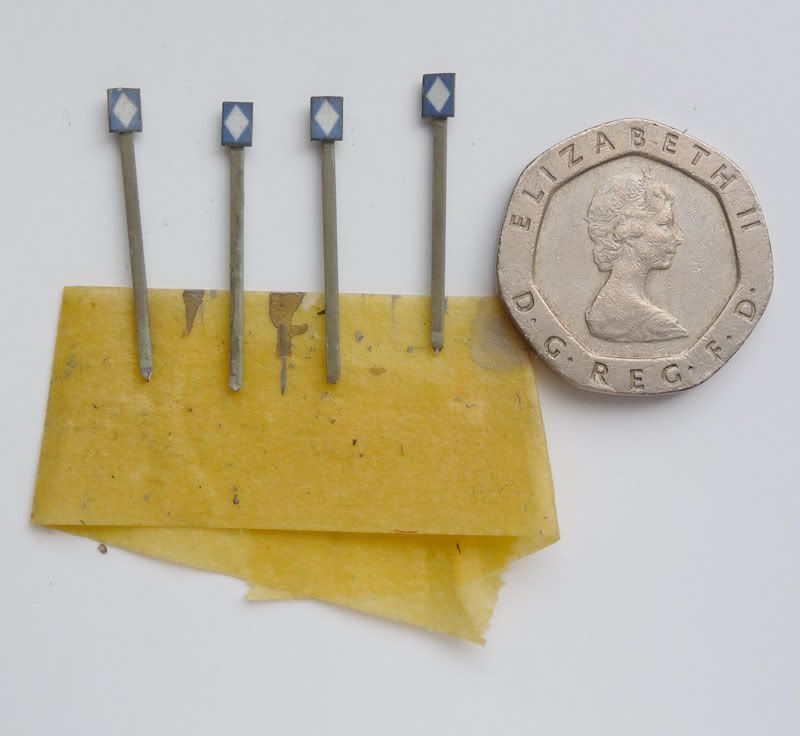
Then I had another mini-break and made some Coasting Signs for the motormen, mounted on lengths of old rail.
That's track-side item 6 in the box.
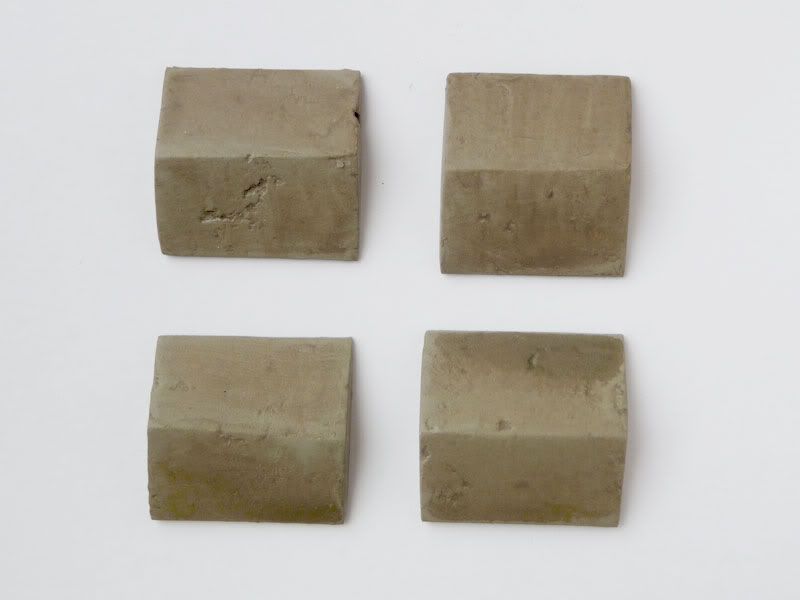
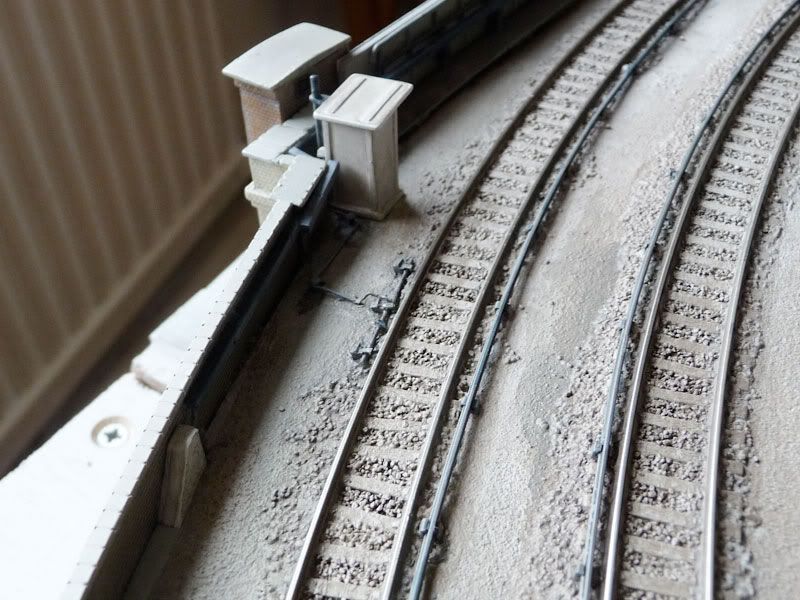
And here are the capping stones for Bridge No. 19: I built a 'stepped' base from Plasticard, then used Squadron White Putty to 'roughly' form the slopes. When dry I filed the slopes back, but left any imperfections unfilled, in order to give a time-worn, pitted look.
---------------------------------------------------------------------------------
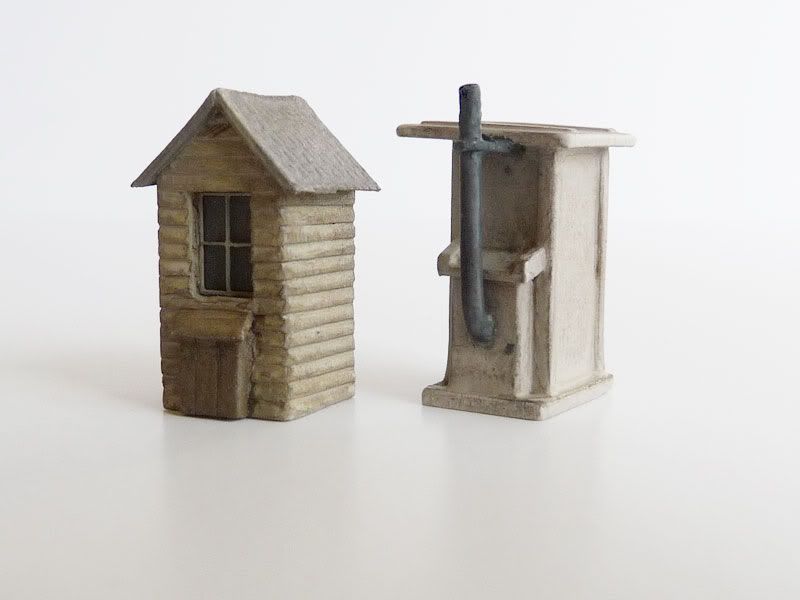
Later the two fog huts ancient and modern were painted and weathered ...
And that was pretty well it . So ...
---------------------------------------------------------------------------------
Frankland 100:
Welcome everyone to another fine Spring morning here in Frankland, where everyone is out in their Sunday best for a stroll around the famous viaducts.
---------------------------------------------------------------------------------
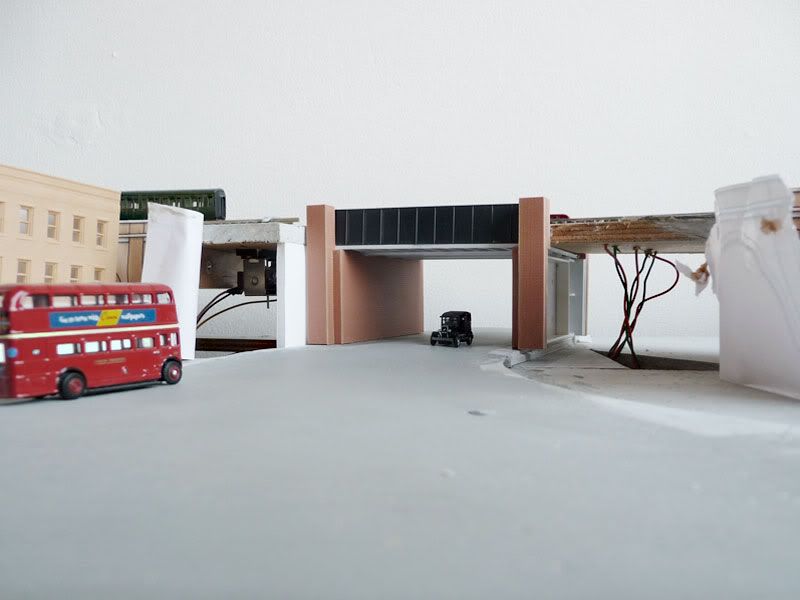
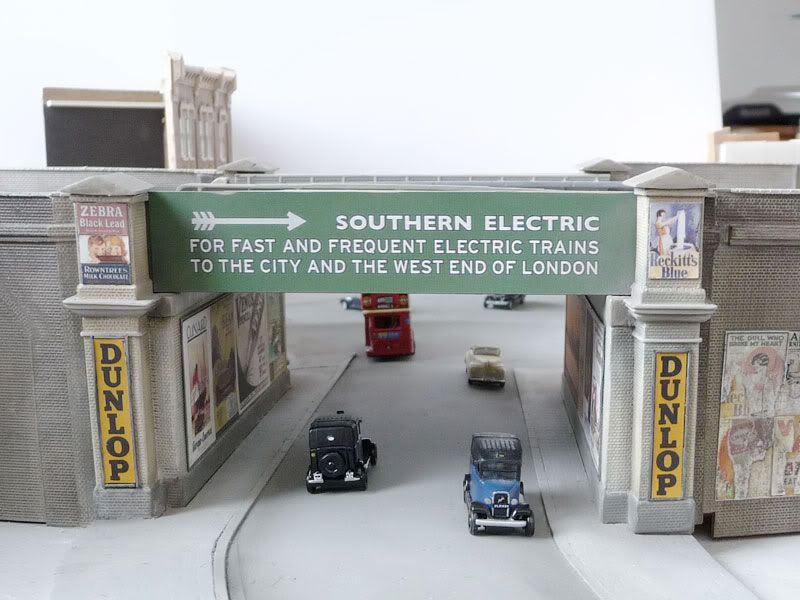
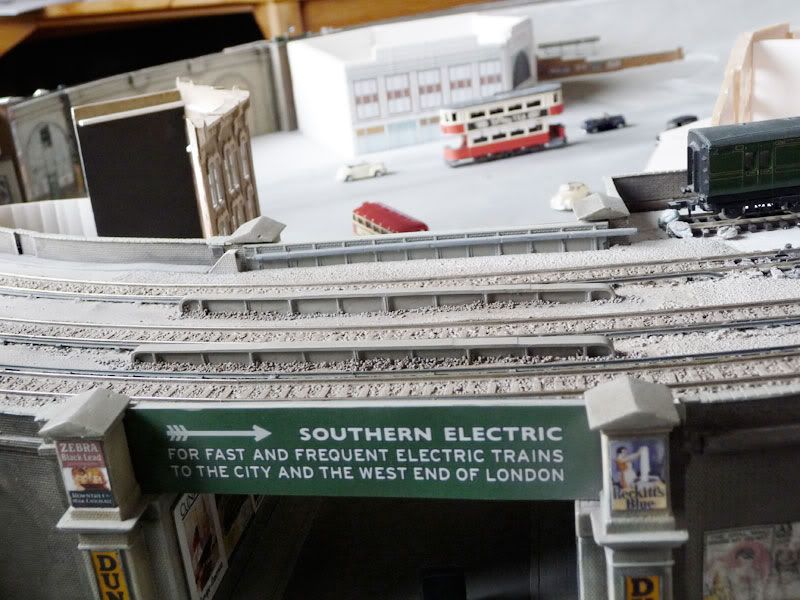
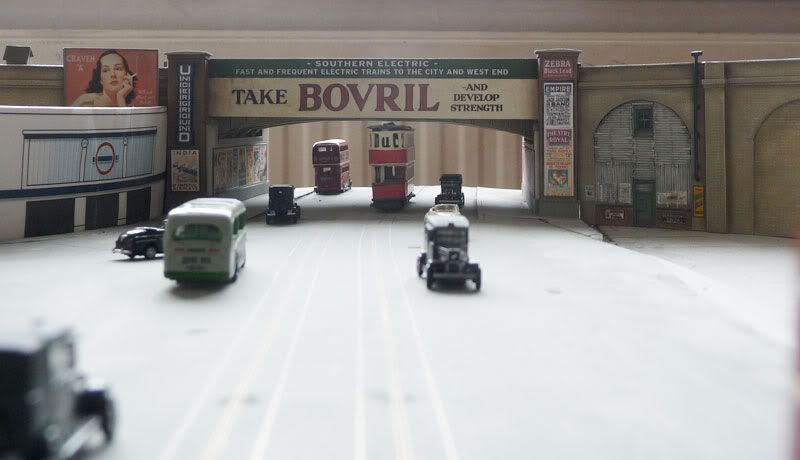
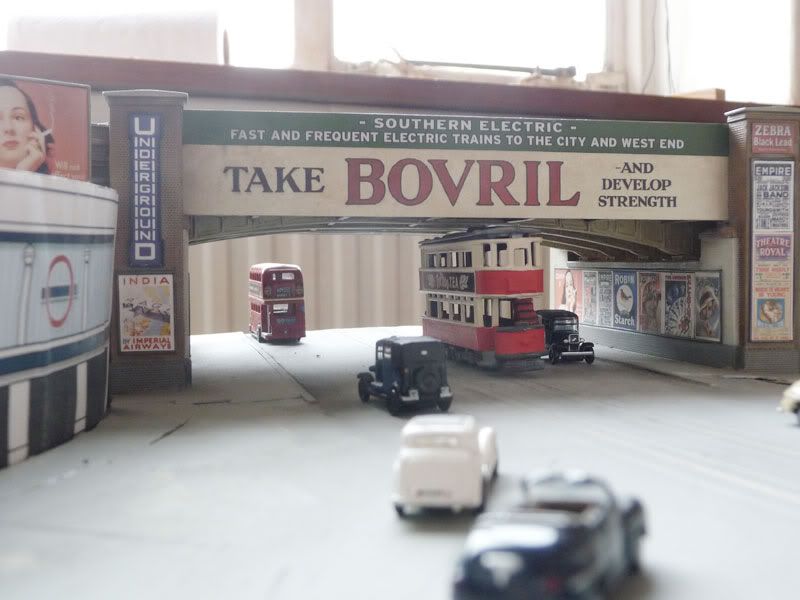
We start with a few views of Bridge No. 19
It's a bit run-down around here so we won't hang around for too long ...
This corner looks particularly dark and dank - I wouldn't want to walk through here at night!
Mind you, if you climb half-way up the Gasometer there's a good view of Frankland Station.
And the view from the top is even better!
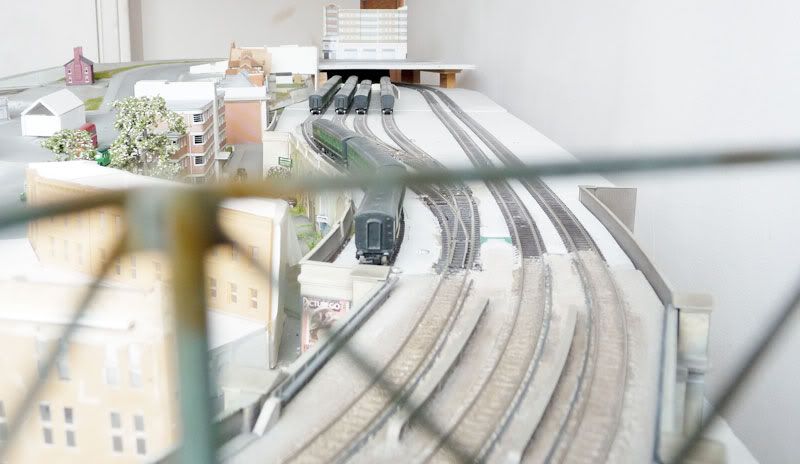
Here's a view over the bridge
And another looking along and around the viaduct towards bridge No. 20
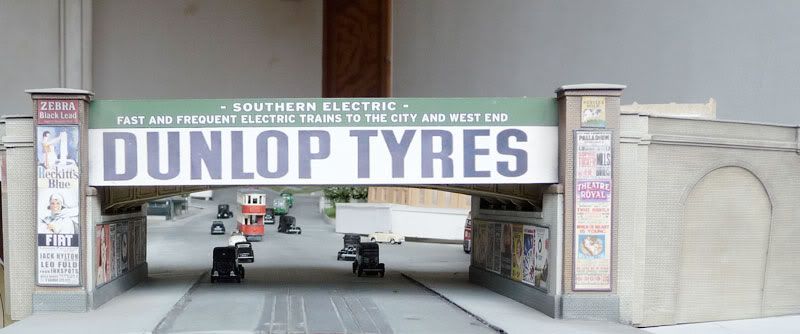
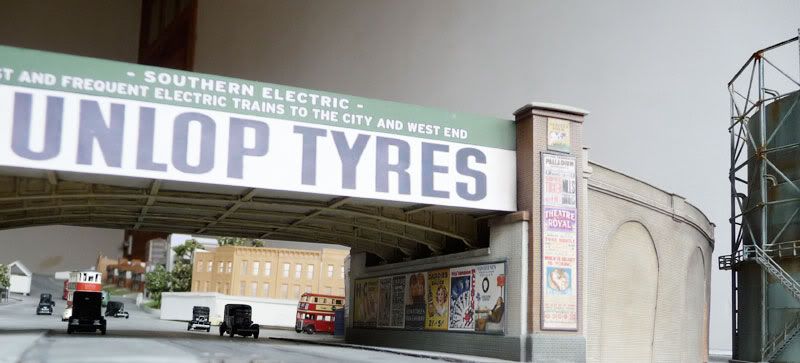
Bridge No. 20

-----------------------------------------------------------------------------
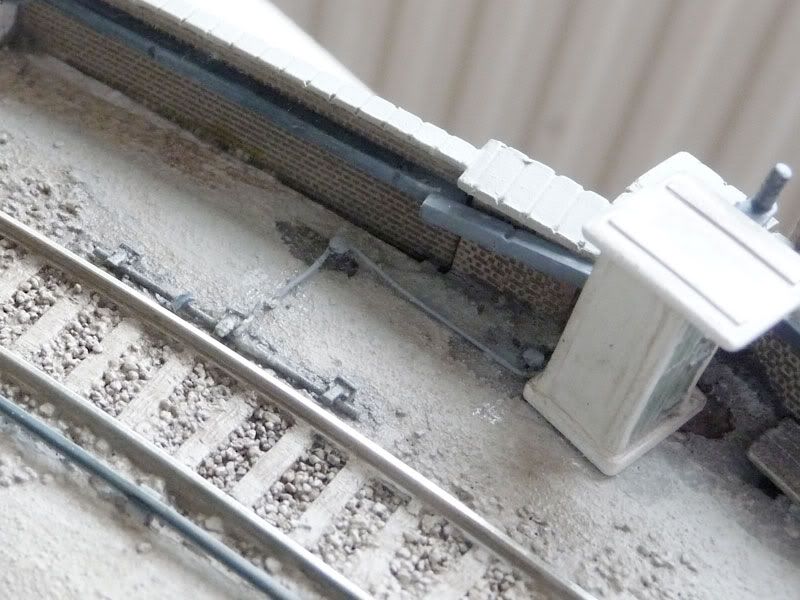
On the far side of the bridge are the Automatic Fog Detonator placers. Here is one of them
And here you can see the cranks and rods that operate it.
Ditto on the opposite track
-----------------------------------------------------------------------------
Cabling runs track-side the length of the viaduct: Some in ground-level concrete conduits, some along wall mounted brackets, but mostly in raised wooden conduits. Here you can see examples of all three.
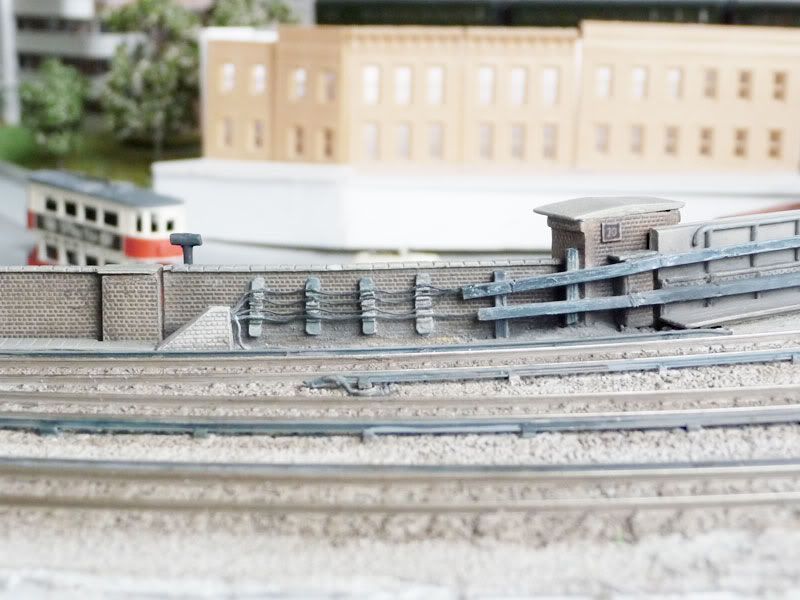
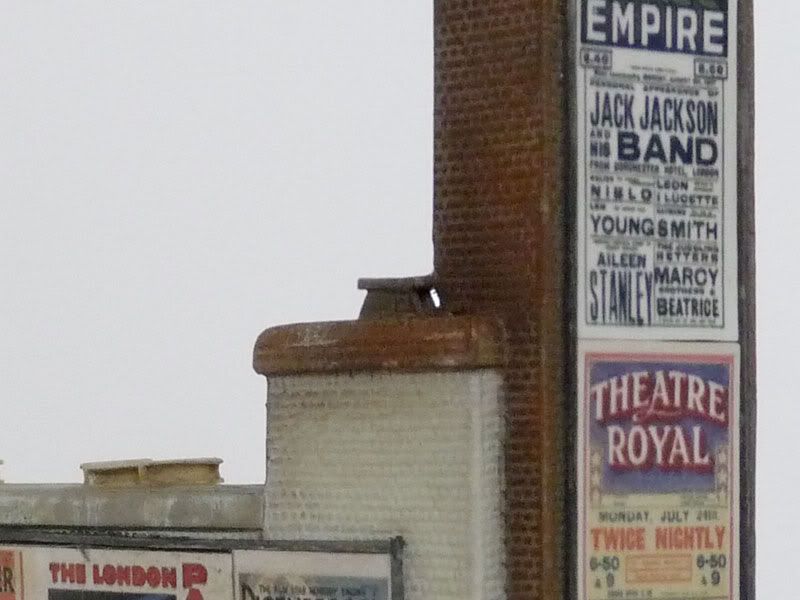
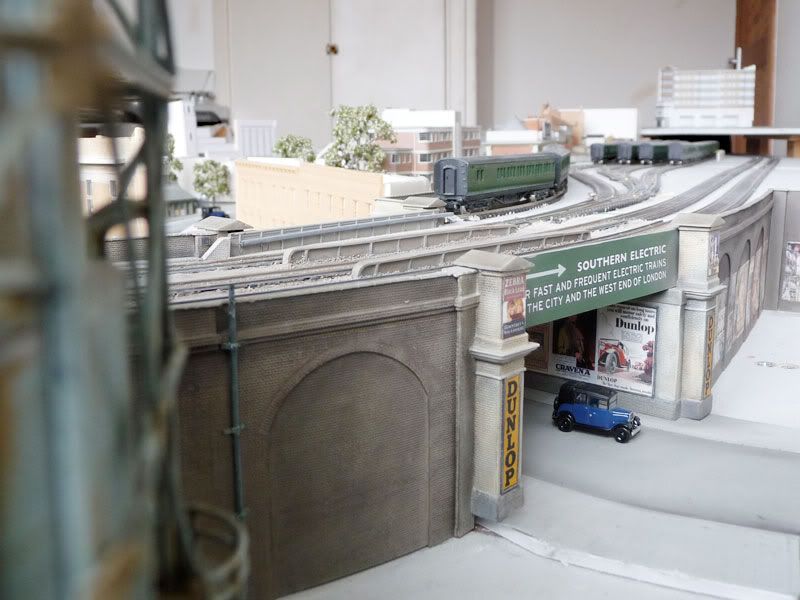
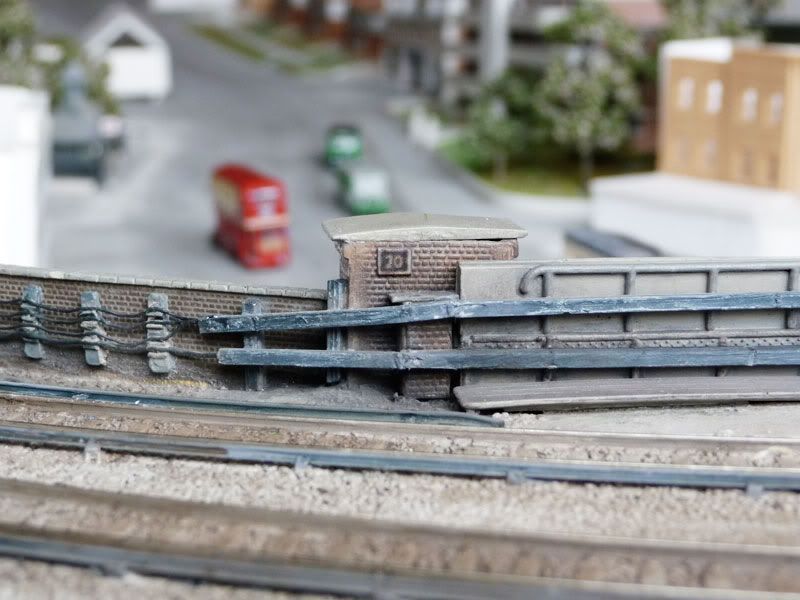
And here is the Bridge Number mounted on the parapet
You can get quite a good view up Frankland Hill from here
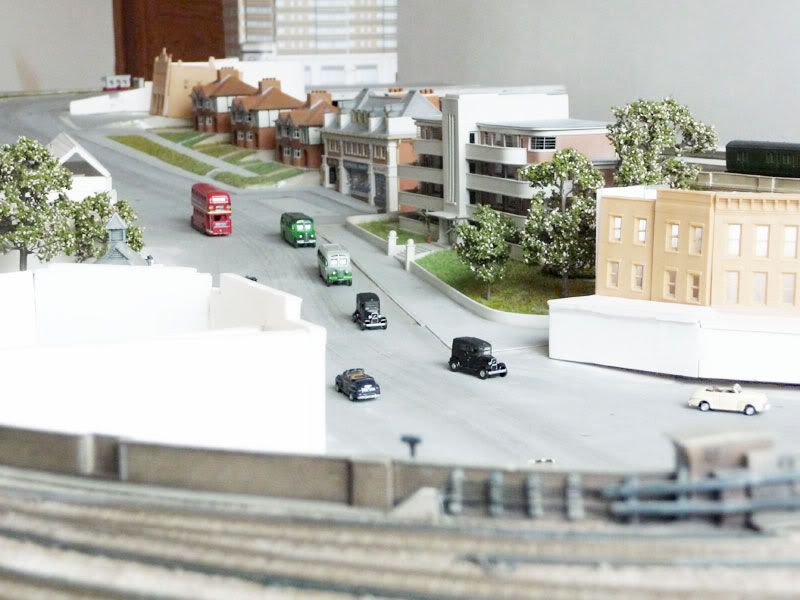
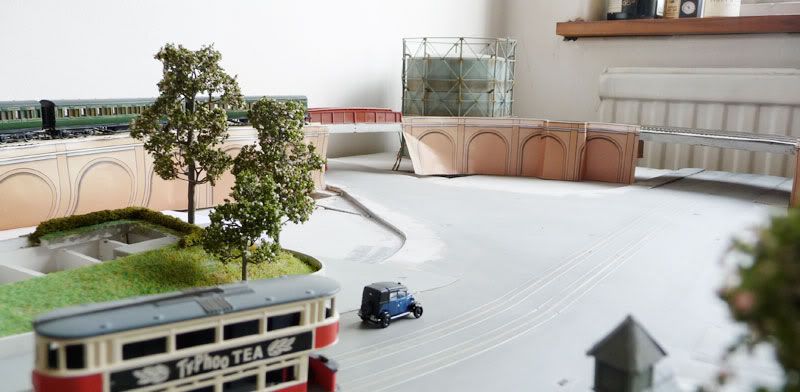
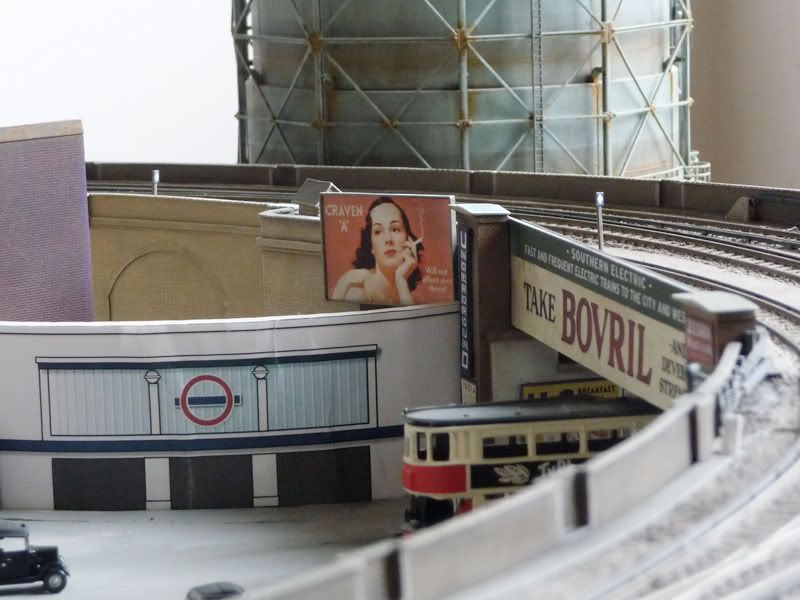
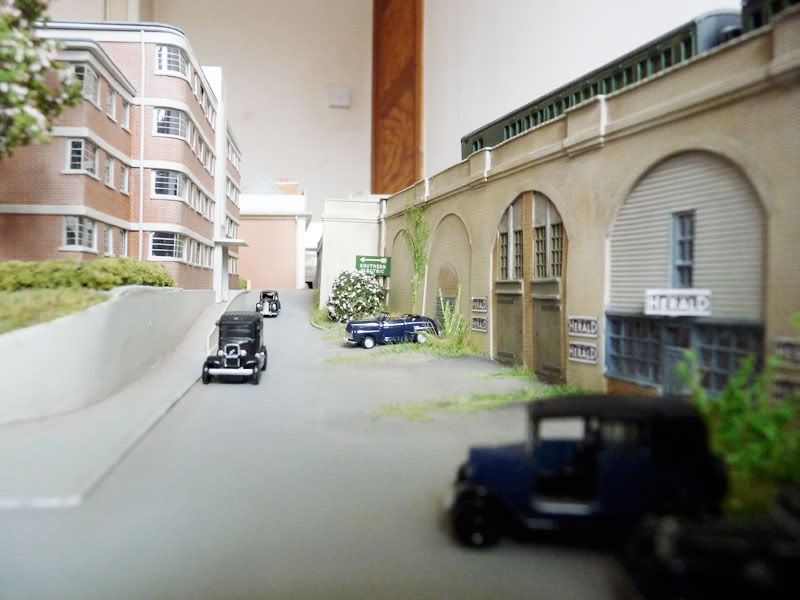
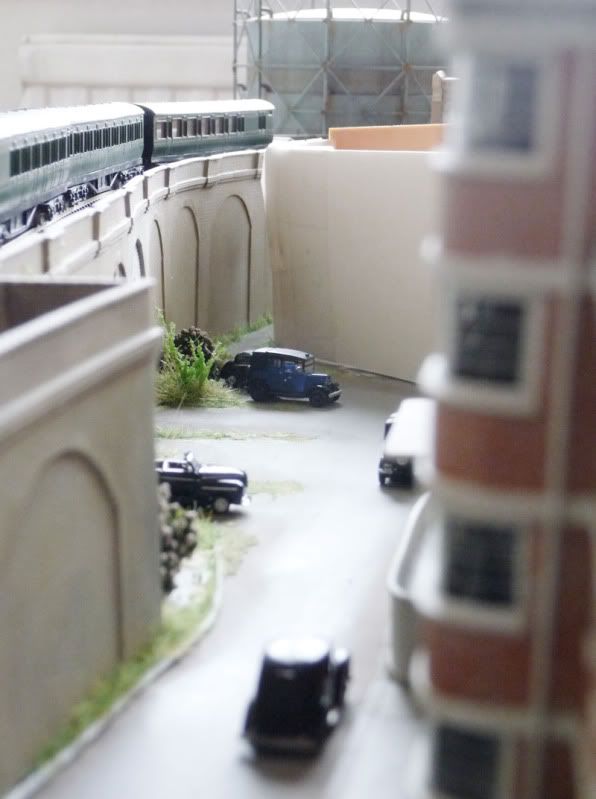
But let's continue around the viaduct toward Frankland Park
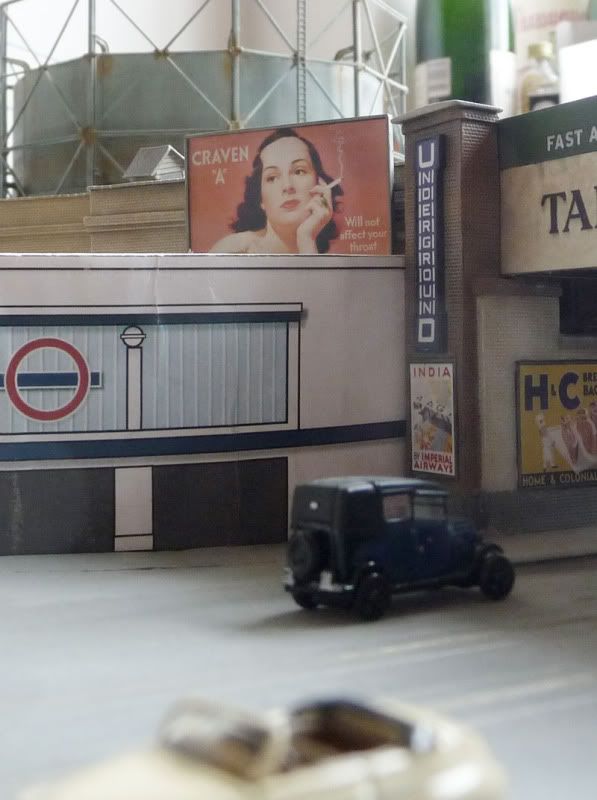
In the distance is my Mona Lisa - the 'Craven A' lady has such an enigmatic look
Here are the relay cabinets by the junction just outside Frankland Park station
There are three point machines and plenty of cables here - and it looks to me like the points have been recently oiled too
-----------------------------------------------------------------------------
Well now we're going to scramble down the embankment behind the tram shelter
If we turn around and look across the road we spy the alleyway that runs between the flats on the left and old shops on the right
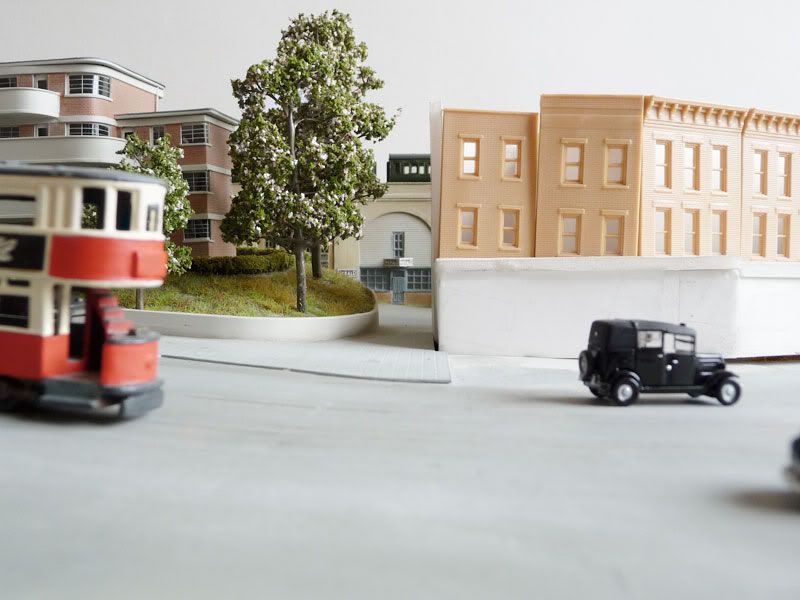
We've never been down that way before so I thought today maybe we should take a look
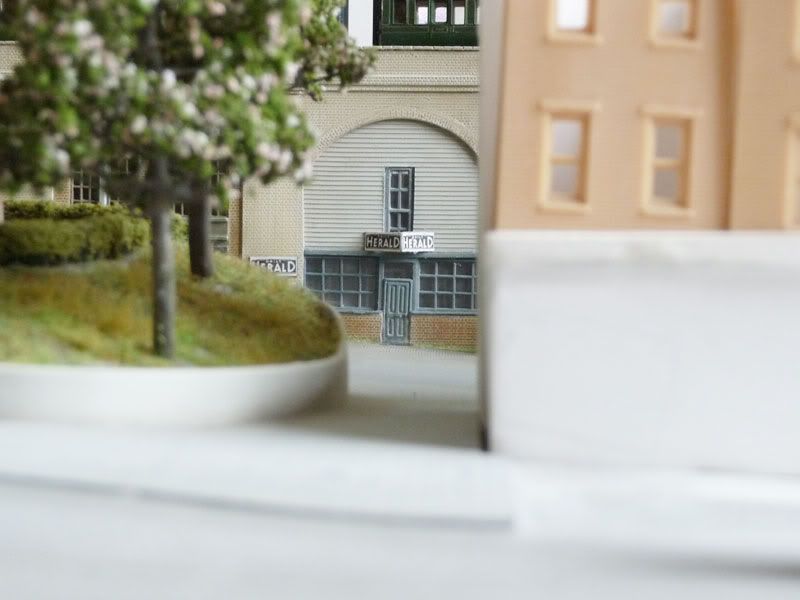
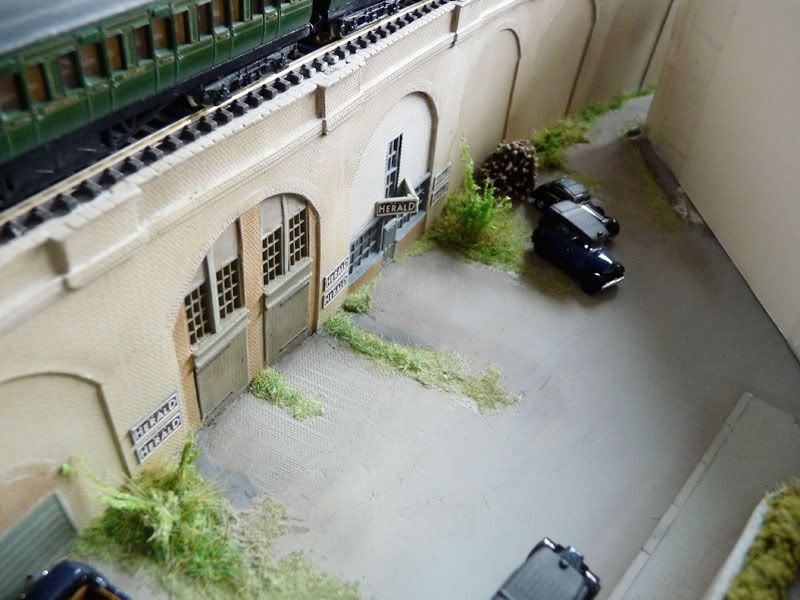
Here's office and print works of The Herald
I don't think the paper does particularly well, their last big story was that court case involving the Winslow Boy and the 5/- Postal Order, and that was in 1908
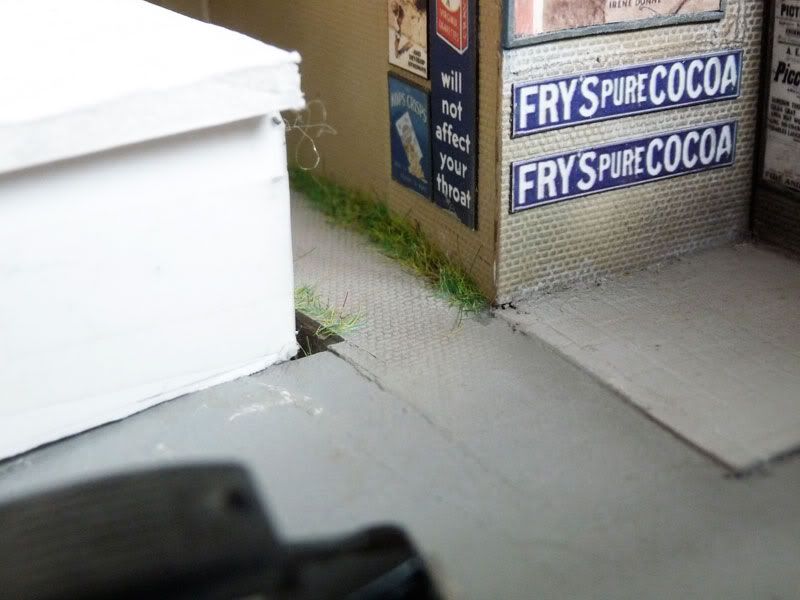
Originally a small cobbled road ran along the front of the arches here up as far as the Rhododendron bush in the corner - however, when they built the new access road to the flats the original path became redundant and is now getting overgrown. But if you look carefully, you can still see some cobbles from the original path in some places.
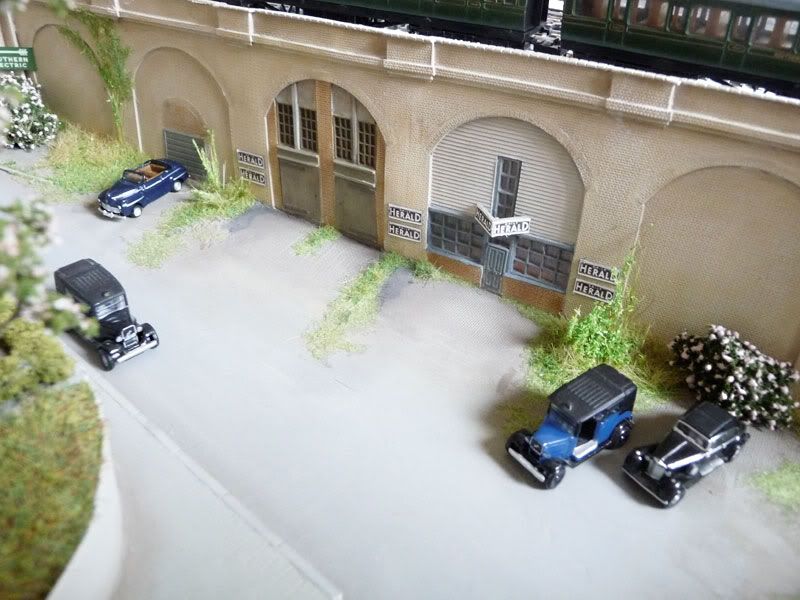
If you're wondering why the viaduct here looks so clean and new, it's because the developers of the flats had them all cleaned up to make the area a little more presentable.
Anyway, here we are at the top of the road.
If you climb to the roof of the shops you get some interesting angles down the back of the flats

Look at the far end of this view and you'll see the little cut-through back to the main road
It brings you out back by Bridge No 19
Like I said - you can still see the original cobbles in some places.
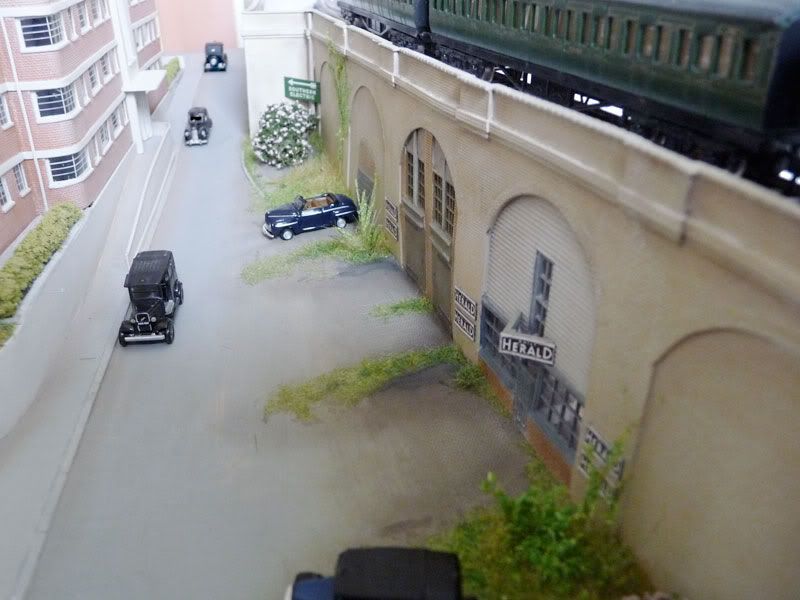
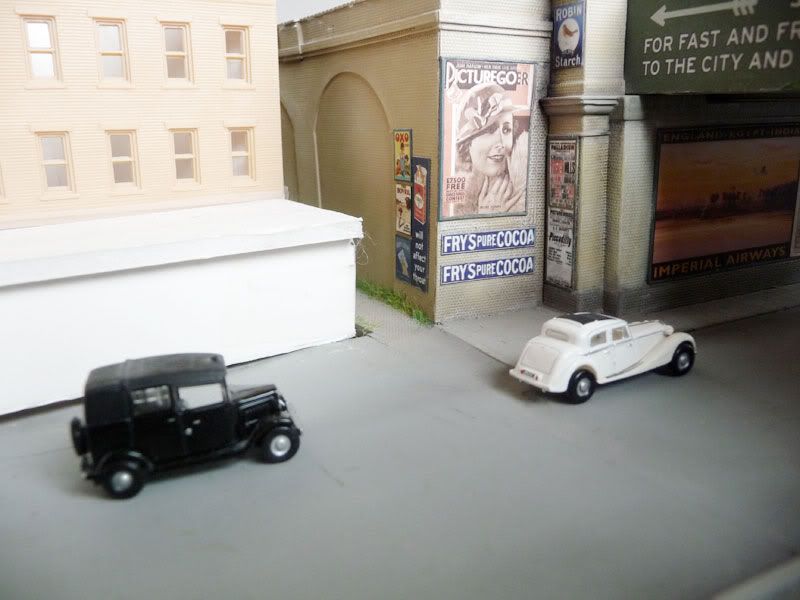
So here we are back in the busy street. There seems to be a lot of traffic today!
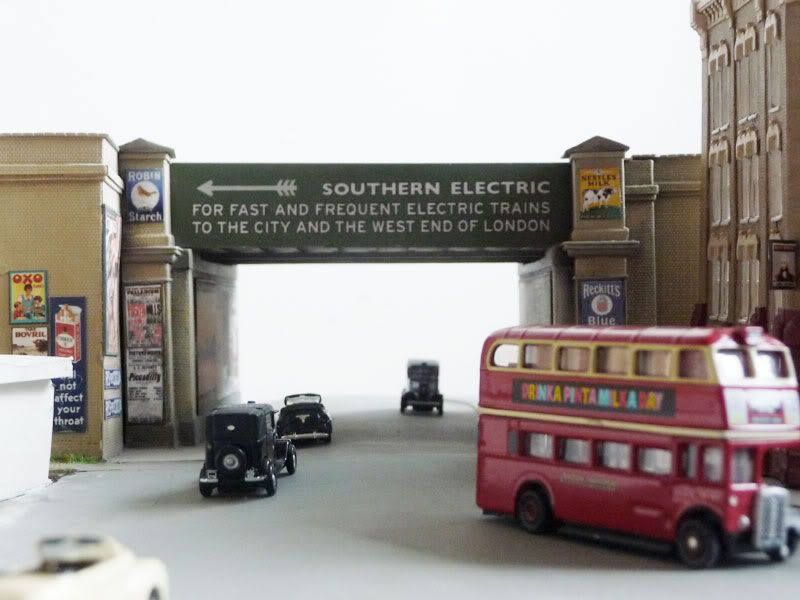
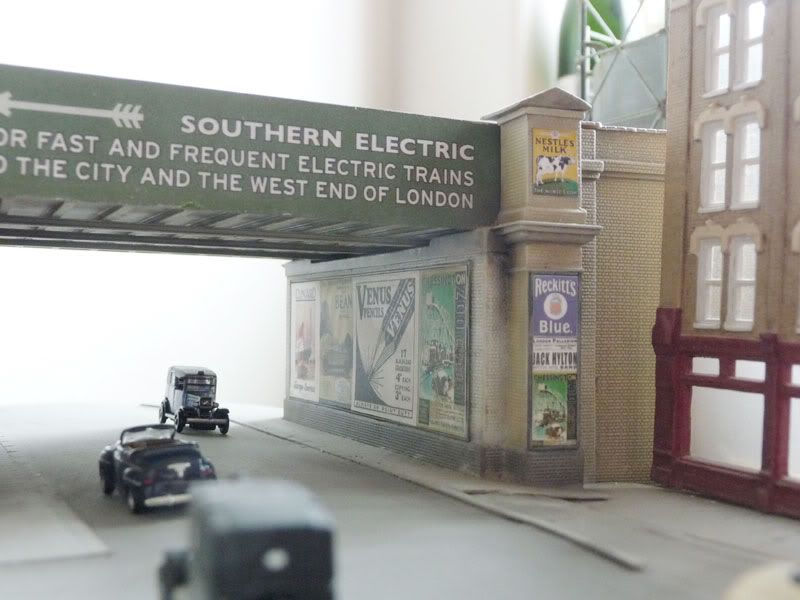
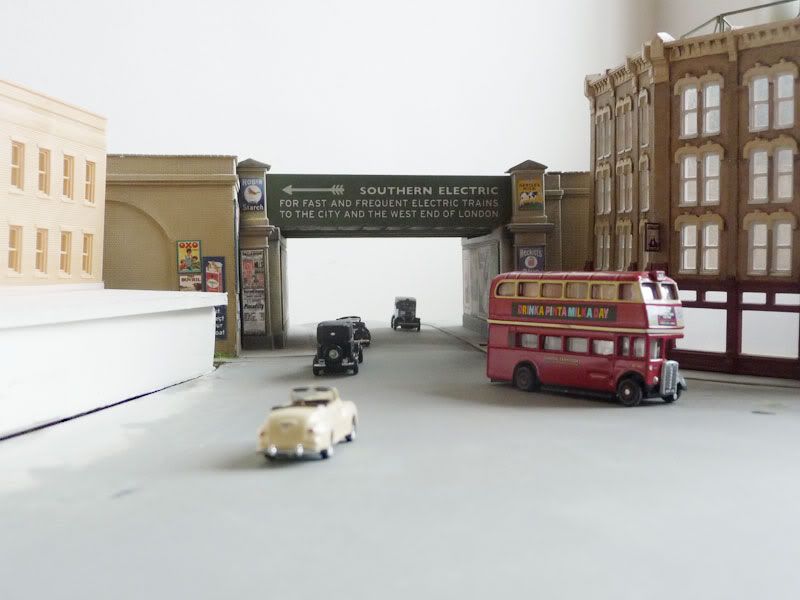
If you turn to your right here you'll see Bridge No. 20
There's Mona Lisa again - enigmatic as ever!
More traffic!
This old arch has been boarded up for years.
And here's the other side of Bridge No 20
To our right is where we started this pleasant afternoon amble
And here's a last look back before we go
---------------------------------------------------------------------------------
Finally, before this programme ends, do take a minute to watch this delightful short clip:
A Ride Over Westminster Bridge
And that is the end of this broadcast.