WORKING WITH FOAM

Have any questions or tips and advice on how to build those bits that don't come ready made.
Daniel
Posts: 1544
Joined: Fri Oct 30, 2020 8:48 am
Location: Here

WORKING WITH FOAM

Post by Daniel »

Read good this introduction before you jump into the subject!

There is, of course, not much wrong with the old methods and materials used for modelbuilding.
I don't dare to say the same about modern ones.
Yes, they all suggest plenty of posibilities and they do ofer much indeed, but about how healthy is to work with them I have heard plenty of contradictory stories.
For that reason I hope you will not take for guaranteed that all the materials I use are safe for people and enviroment. Probably they don't but to reach a more or less safe range of materials and methods one should get back to the 1950s and even so have much good luck.

At least most of the glues used in the hobby are pretty unhealthy and probably also some of the types of foam are.
Sadly, I just don't know so if someone could enrich this thread with good information about that would be great for all of us.

To be clear: it is not opinions what we need but real knowledge.

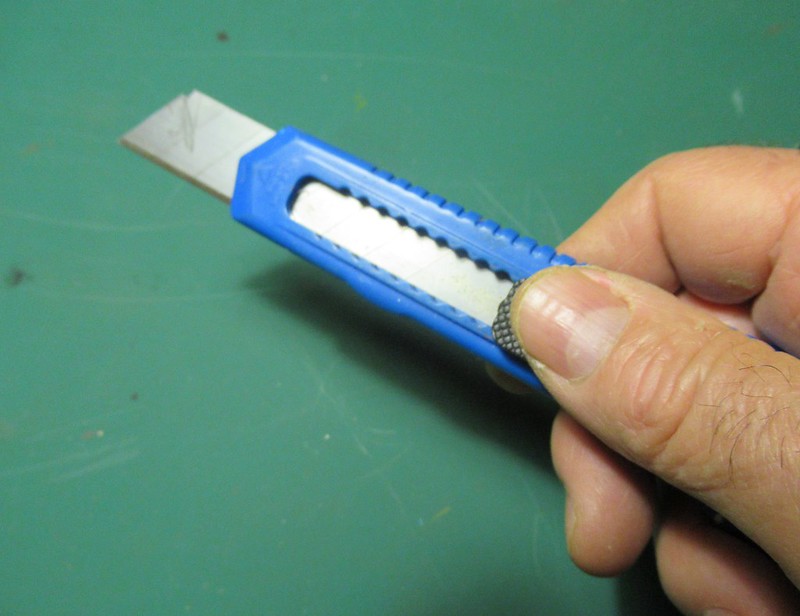
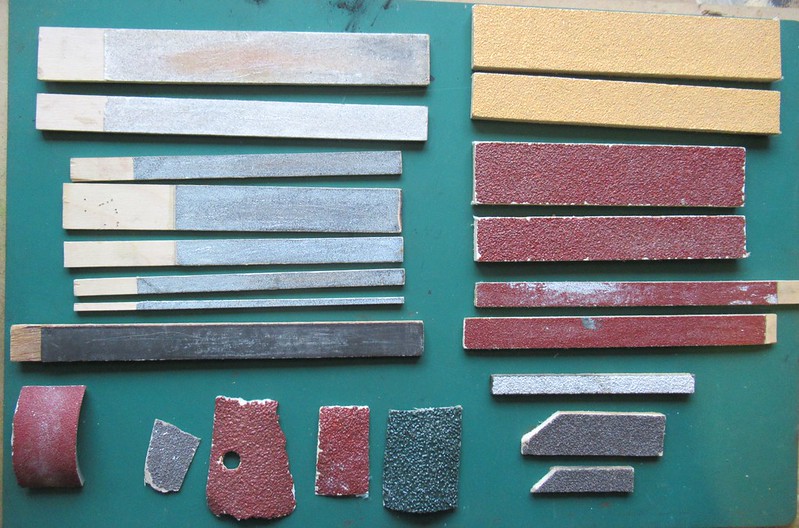
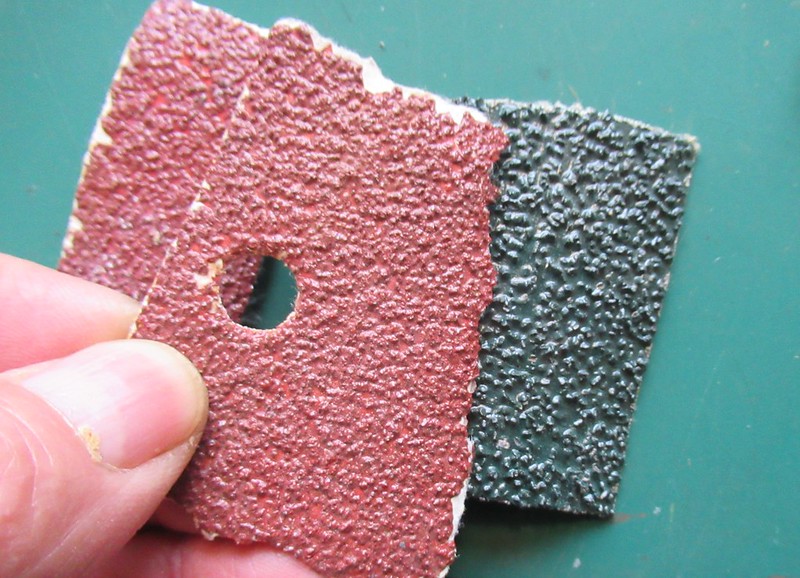
One thing I know for sure: most foams are really nice to work with and also very easy for cutting and engraving but sanding -which is also incredibly easy- is something I try to avoid and if there is no alternative I do use latex gloves and a mouth & nose mask, both of the disposable type and, even so, I always clean the place, my clothes and shoes inmediately after sanding using a vacuumcleaner with fine stuff filter because I don't want to get that invisible powder in my lungs.

Cutting, bending and embossing seems a lot less dangerous because they don't create an invisible cloud around you.
I am not sure if hotwire cutters are trully safe and have heard at least some foams must not be cut that way.
I would like to know which ones and how to distinguish them from the rest! BUT: I DON'T KNOW.

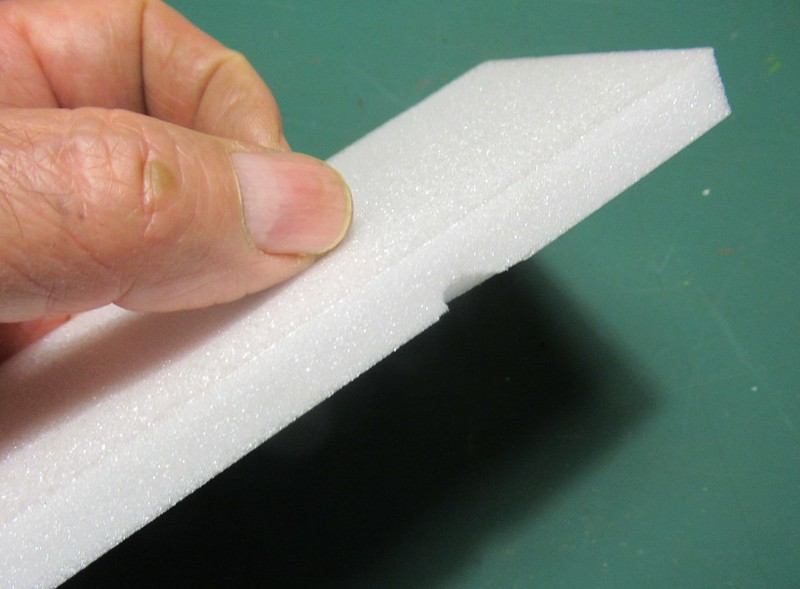
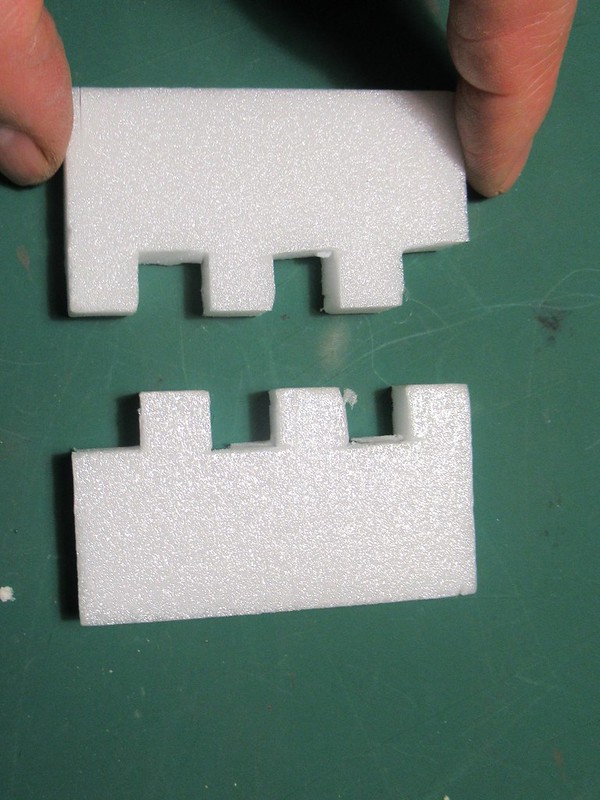
One of the most popular foam types is the so called 'foamboard'.
It is easy to find, cheap, works great and so far as I know it is at least reasonably safe.
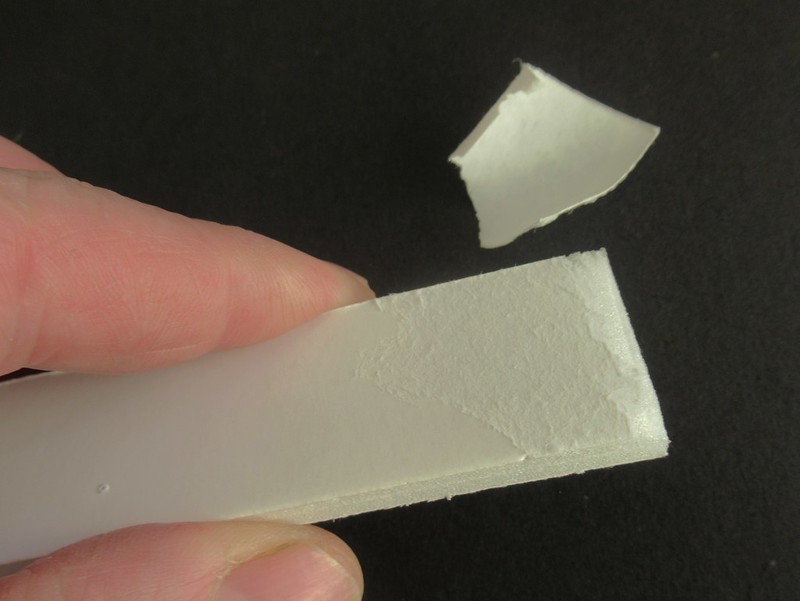
It is a sanwich: a piece of foam with a paper layer glued on top and under:

ImageIMG_0111 (2) by Daniel Osvaldo Caso, on Flickr

It comes in different thicknesses ranging from 2 or 3 mm to 20mm and sizes ranging from the standard (and cheapest) A4 up to huge pieces far beyond A0.
It also comes in a range of colour combinations from white foam with white paper to all combinations of gray, black and white.

For simply building the skeleton for a structure the whole sandwich (foam & paper layers) are perfect. Incredibly light, pretty strong and easy to cut with a hobby knife.
You can glue it with simple PVA glue ('white glue') and the paper will help a lot at that.

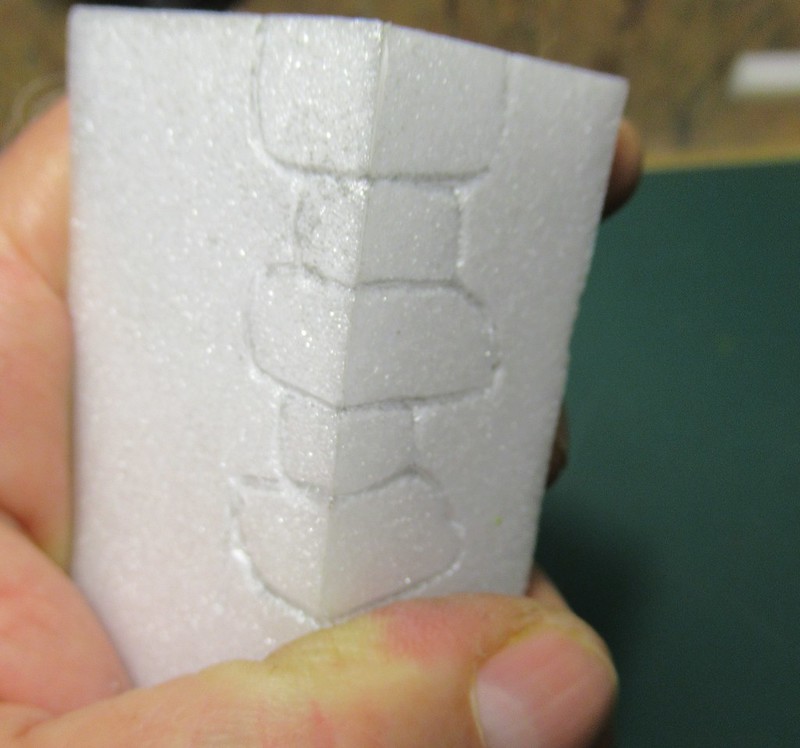
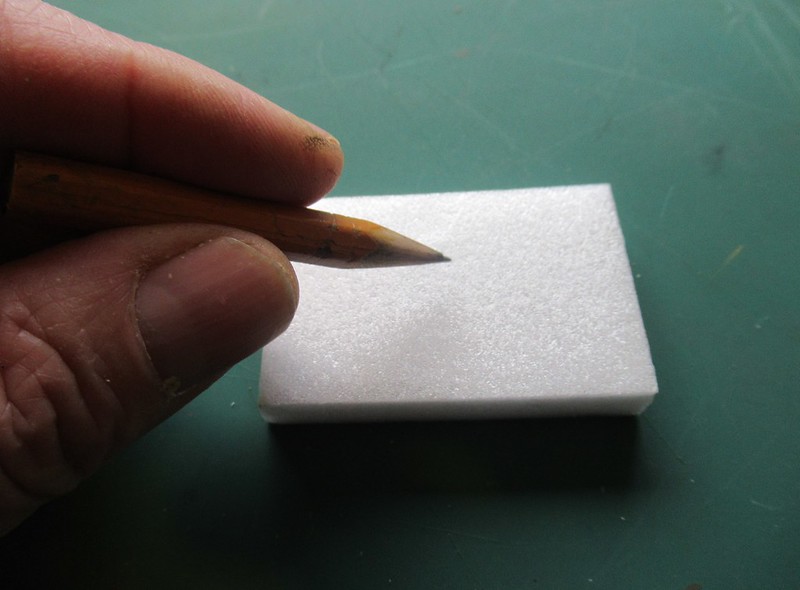
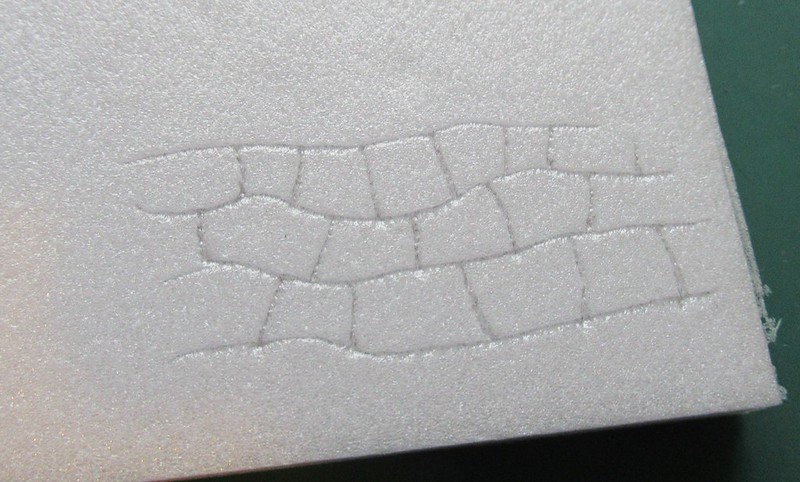
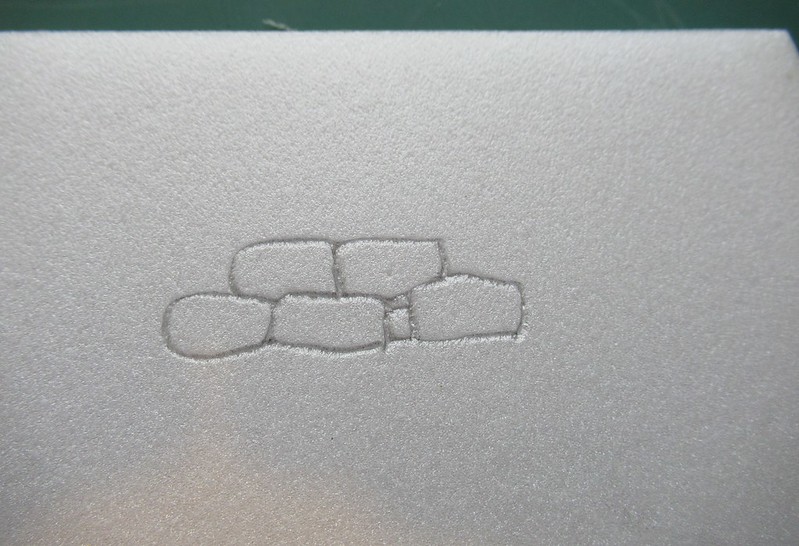
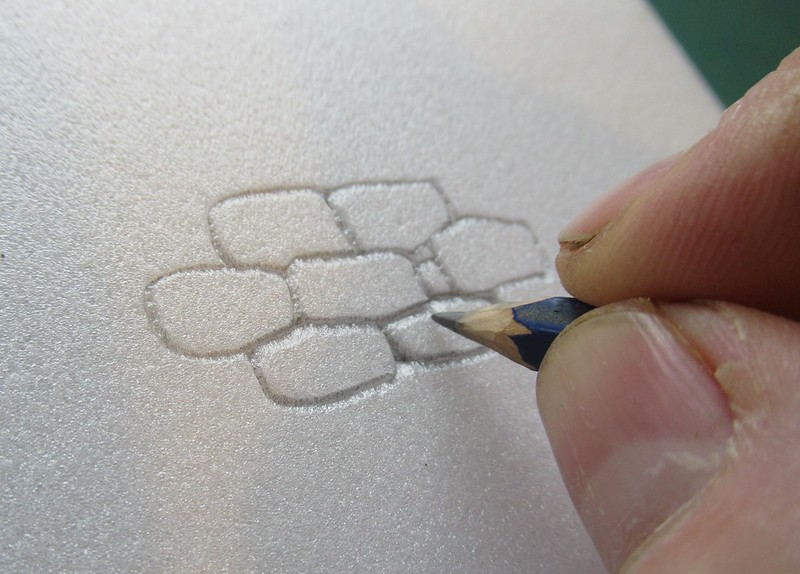
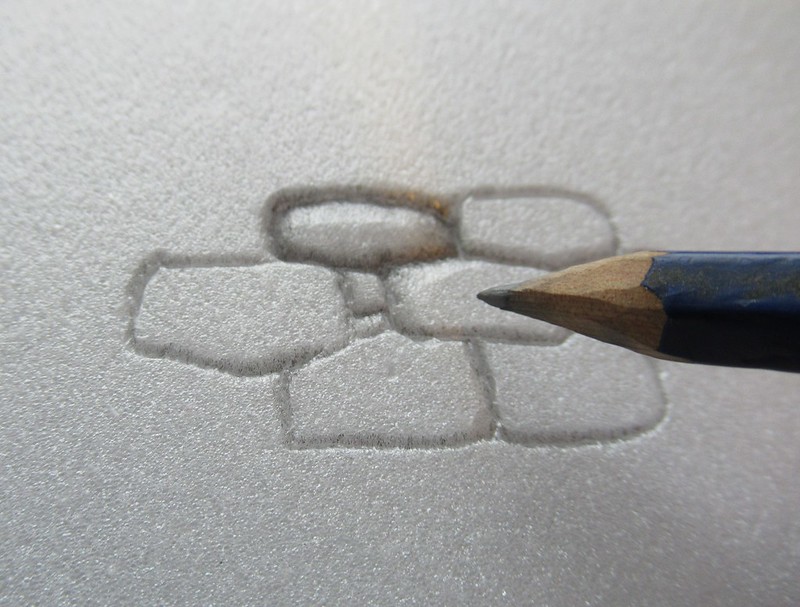
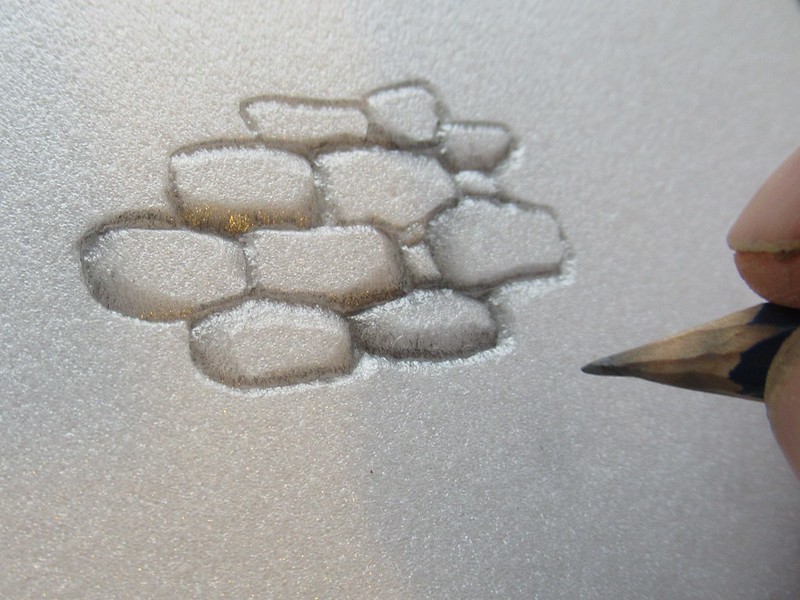
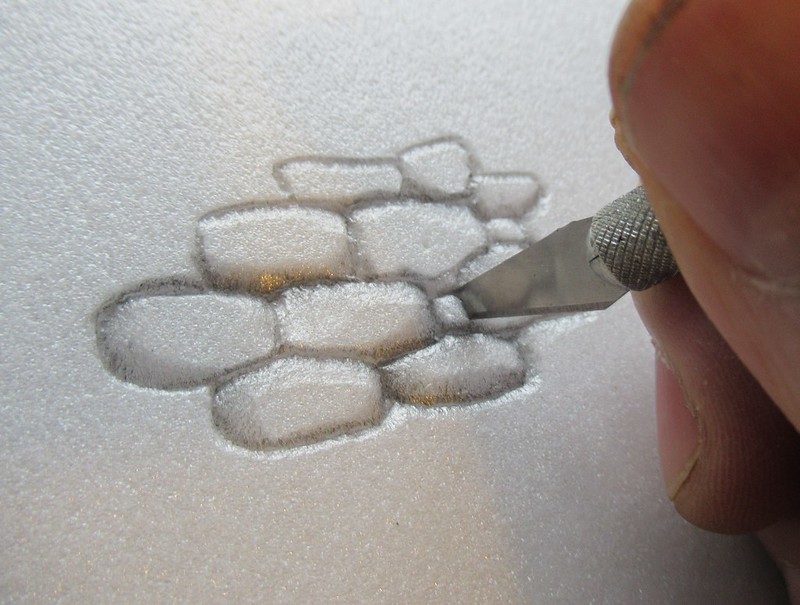
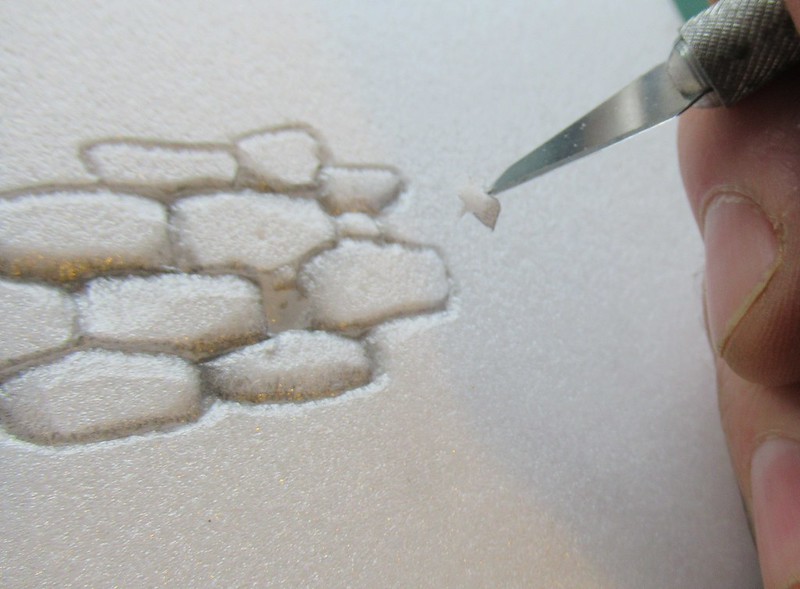
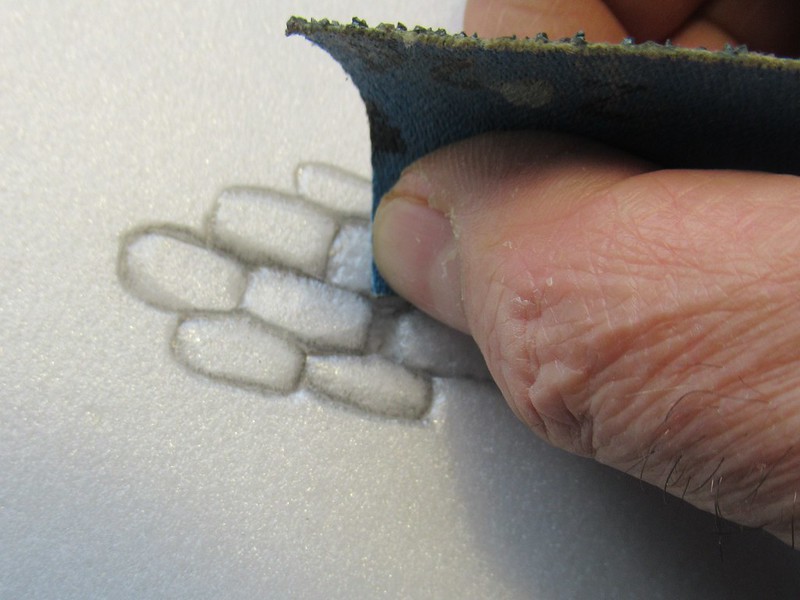
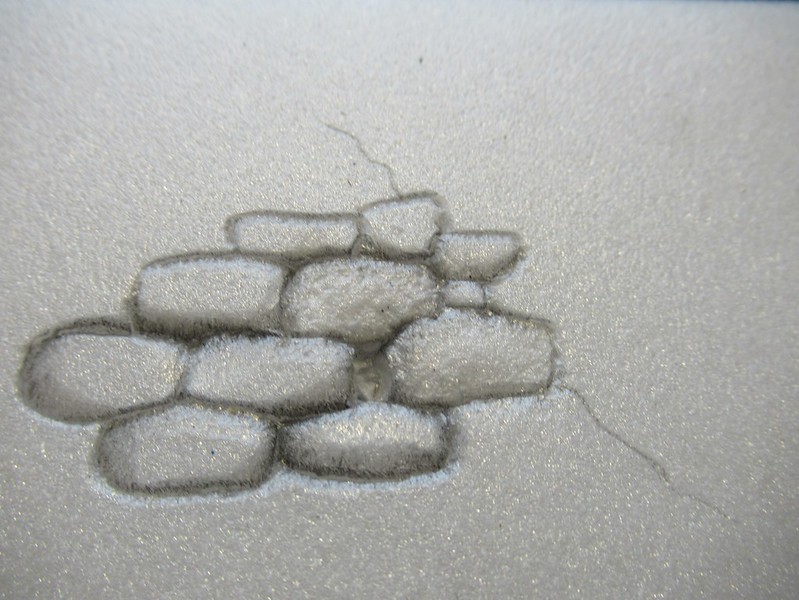
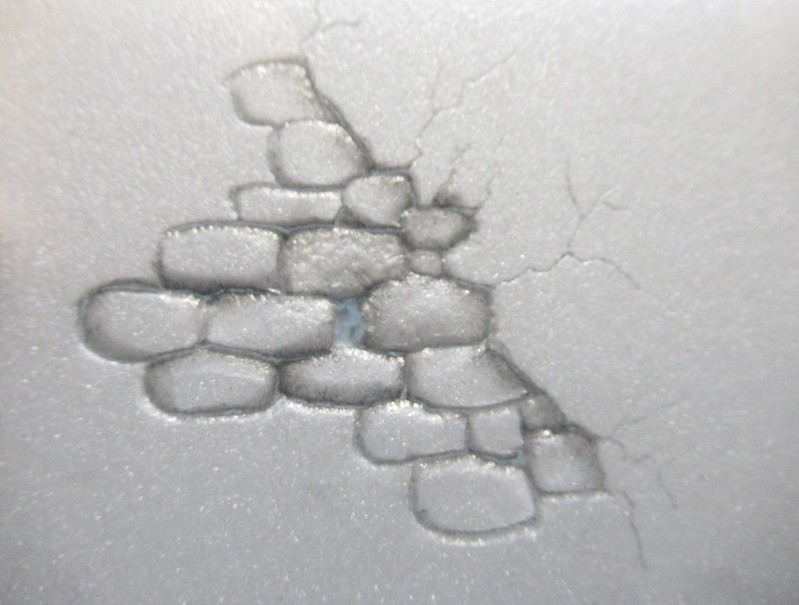
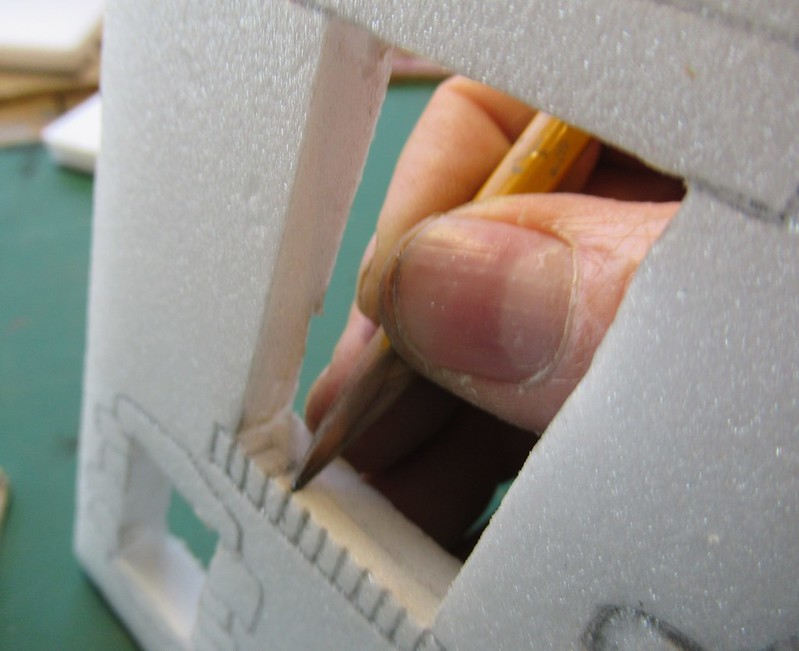
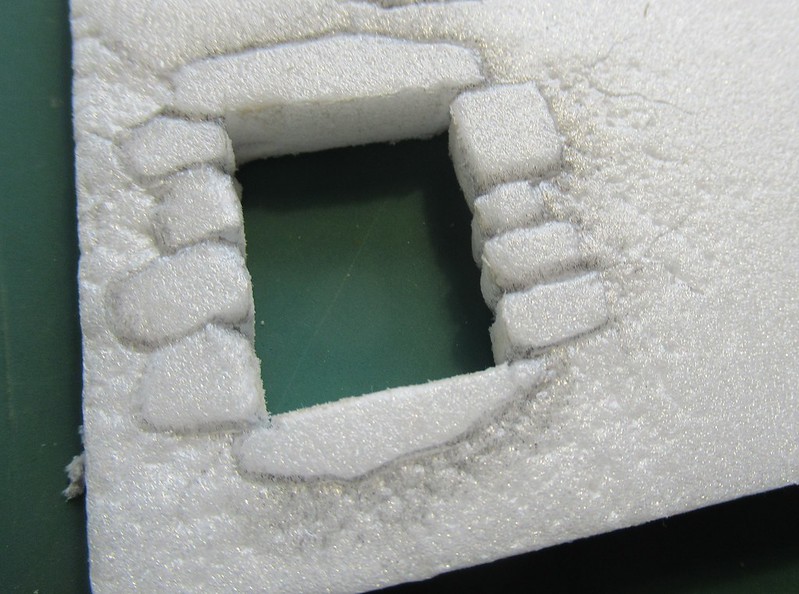
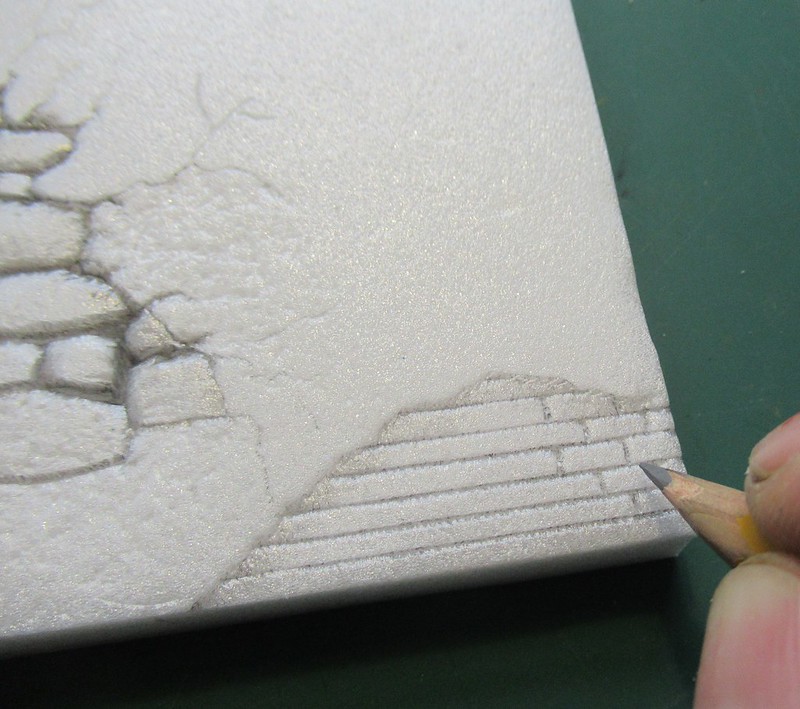
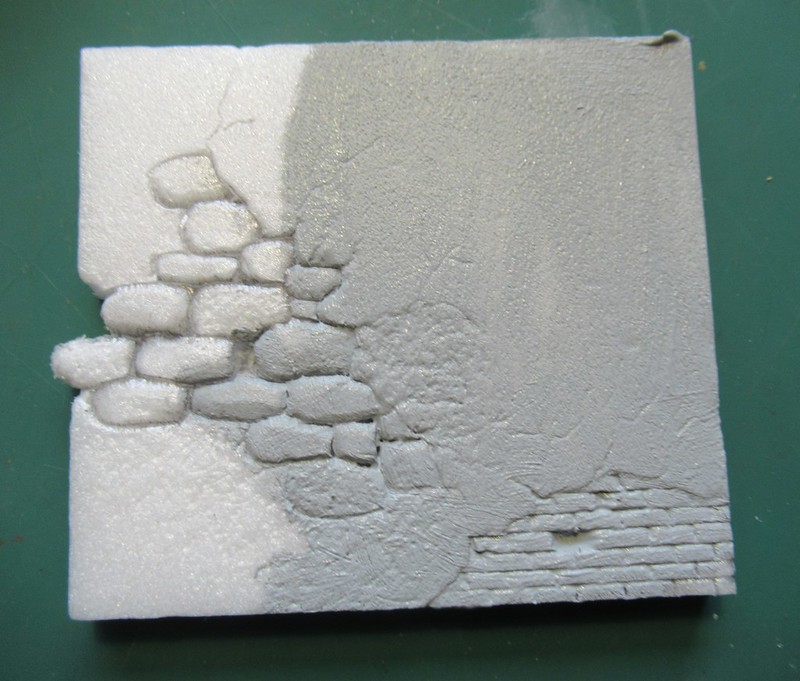
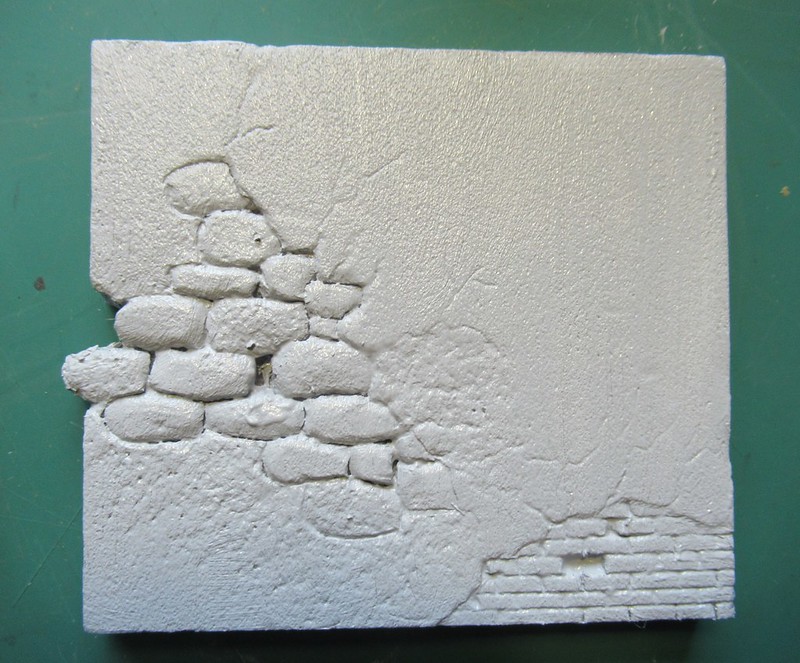
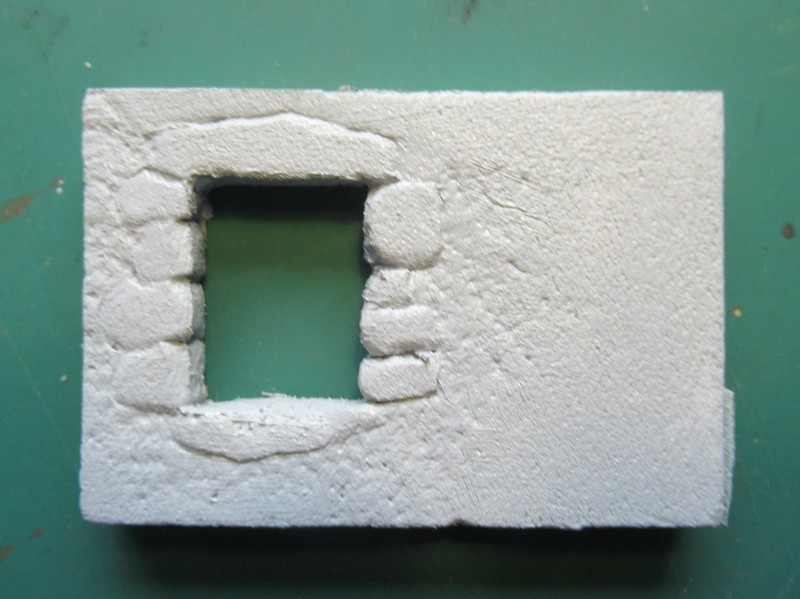
For making any embossing of bricks, stones or whatever, one need to peel away one or both layers of paper (depending on if you want texture embossing on both sides or just one.

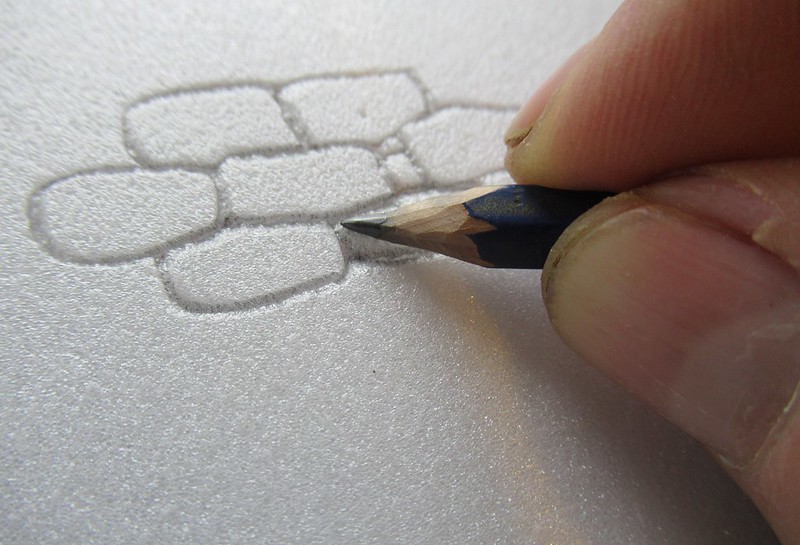
Peeling foamboard is not the nicest job I've doen for modeling but is neither bad nor difficult. It takes just a bit of patience because one can start it very easily:

ImageIMG_0113 (2) by Daniel Osvaldo Caso, on Flickr

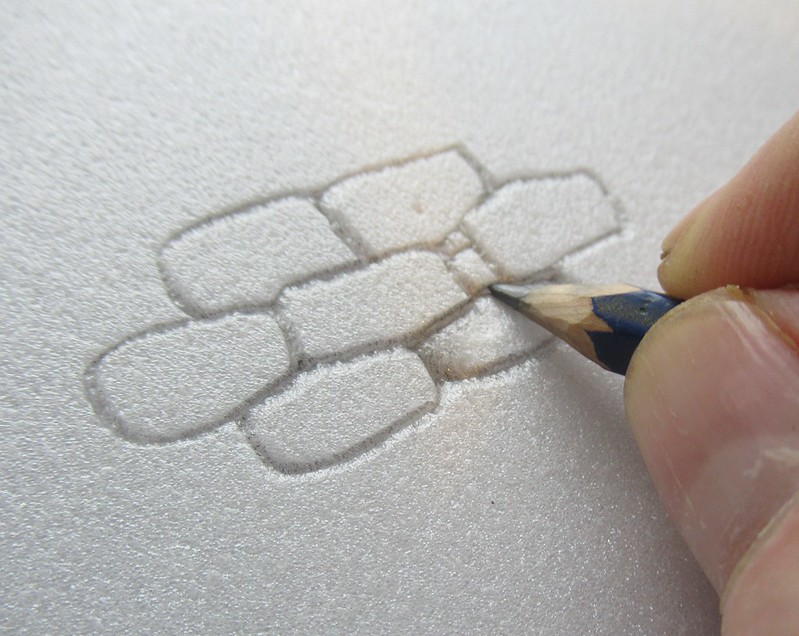
but soon the paper will show it's teeth:

ImageIMG_0115 (2) by Daniel Osvaldo Caso, on Flickr
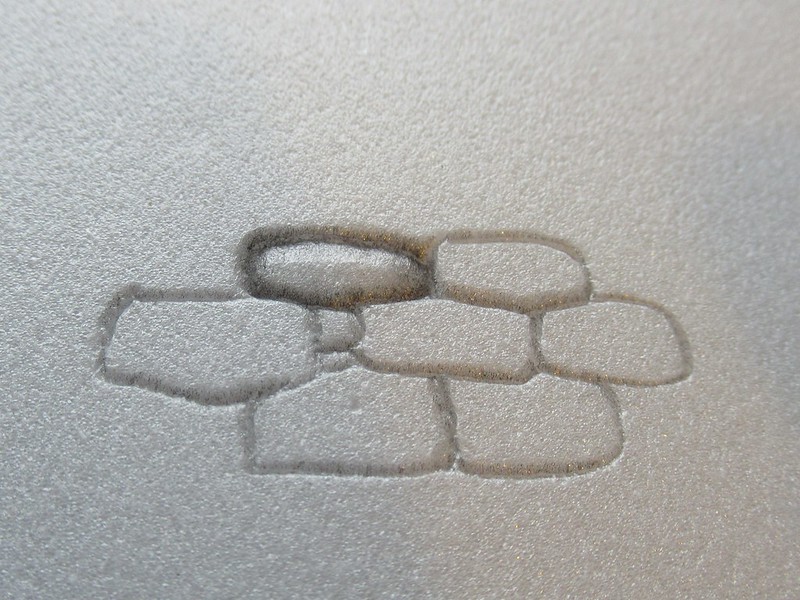
No problem.
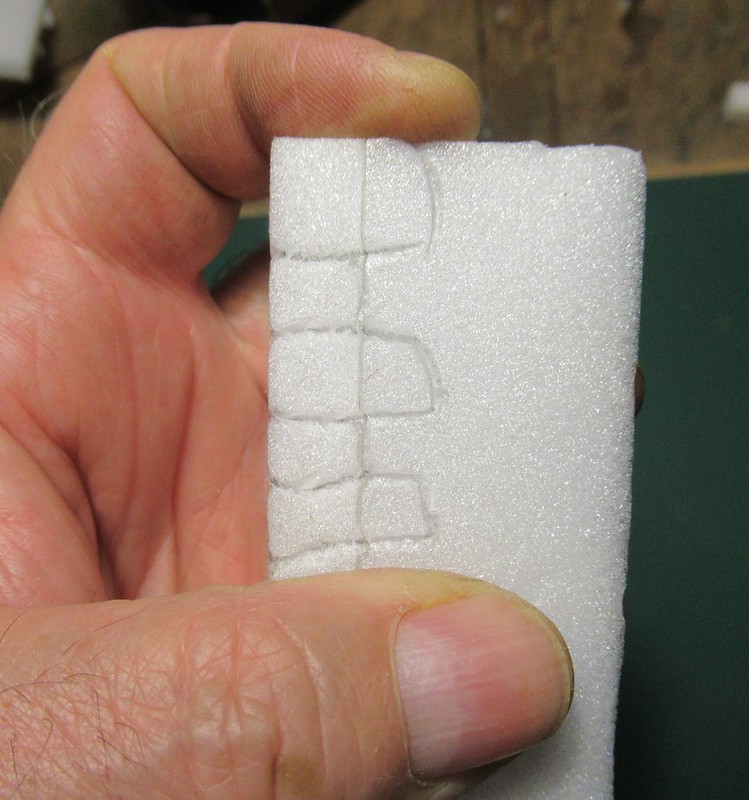
All you need is (not too) hot water and the paper will become more friendly

ImageIMG_0117 (2) by Daniel Osvaldo Caso, on Flickr

but you will need to rub the wet paper away with the tip of your fingers:

ImageIMG_0120 (2) by Daniel Osvaldo Caso, on Flickr

ImageIMG_0118 (2) by Daniel Osvaldo Caso, on Flickr

Once dried it will show a nice, a bit porous surface (think the photos are pretty enlarged)

ImageIMG_0122 (2) by Daniel Osvaldo Caso, on Flickr

(I have left a bit of the paper at the left so you can compare the two surfaces)

ImageIMG_0123 (2) by Daniel Osvaldo Caso, on Flickr

Next photo shows the piece I have just peeled beside a 10mm thick piece of same type of foam but bought already without paper layers

ImageIMG_0002 (2) by Daniel Osvaldo Caso, on Flickr

I suppose it depends on the type of glue but two years ago I bought a full box of 5mm A2 black foamboard and peeling it took no more than 10 minutes FOR THE FULL BOX!. Just pulling from one corner the whole paper came out to meet my happy smile.

More later in next message (sorry but If I do not cook I do not eat!) :)

Daniel
My new Flickr:
https://www.flickr.com/photos/158027525@N08/

My old Flickr:
https://www.flickr.com/photos/daniel_1_32_scale/page223

Being right is one thing, but being true is quite another.
Ex-Pat
Posts: 2203
Joined: Tue Feb 08, 2011 10:51 pm
Location: Newry Northern Ireland

Re: WORKING WITH FOAM

Post by Ex-Pat »

An excellent introduction that leaves me hungry for more!

Only sorry that I have no experience to contribute.
Daniel
Posts: 1544
Joined: Fri Oct 30, 2020 8:48 am
Location: Here

Re: WORKING WITH FOAM

Post by Daniel »

Ex-Pat wrote:An excellent introduction that leaves me hungry for more!

Only sorry that I have no experience to contribute.
Ex-Pat

Thank you for your kind words.

You are wrong: the most important contribution is your attention.

The only essential thing is that you and the rest dare to make their questions, mention all doubts and, most important, pointing as clearly as possible my errors. That way we all learn.

In one or two hpours I will be posting next message with more.

Daniel
My new Flickr:
https://www.flickr.com/photos/158027525@N08/

My old Flickr:
https://www.flickr.com/photos/daniel_1_32_scale/page223

Being right is one thing, but being true is quite another.
Daniel
Posts: 1544
Joined: Fri Oct 30, 2020 8:48 am
Location: Here

Re: WORKING WITH FOAM

Post by Daniel »

CUTTING FOAM

Cutting foam is very easy.
Cutting it wrong is much easier. And more expensive.
Soon or later one discovers that it is all about the quality of one's attention what makes the difference. Well, almost: a sharp, clean cutting tool helps a lot.

For cutting thin foam I use the average hobby knives in their cheapest version:

ImageIMG_0007 (2) by Daniel Osvaldo Caso, on Flickr

They all have valuable functions but the type of blade I preffer for small neat cuttings is this one:

ImageIMG_0005 (2) by Daniel Osvaldo Caso, on Flickr

Of course, that is personal so doesn't mean it's the best option for you too.

Not even this whole thread will teach you more about than a piece of foam, a knife and some curiosity.
The most important is you to realize that your best teachers are your own errors and mistakes. So when you see one, don't be ashamed but thank for it, try to understand what and why went wrong and do a new try. You'll be surpriced.

For long cuts, specially if in 10mm or so foam I prefer this type of knife:

ImageIMG_0003 (2) by Daniel Osvaldo Caso, on Flickr

specially if getting perfect straight cutting is important.

In such cases it helps to have an apropriate (preferably metal) ruler.
Even better if it is a heavy one with a thick body that you can use as reference to keep the blade perfect perpendicular all the way:

ImageIMG_0010 (2) by Daniel Osvaldo Caso, on Flickr

ImageIMG_0012 (2) by Daniel Osvaldo Caso, on Flickr

With a clean, sharp blade you can get easily neat cuttings:

ImageIMG_0013 (2) by Daniel Osvaldo Caso, on Flickr

A less sharp blade may give you cuttings that look well from above but may give you surprises when you see the underside. Specially if you are cutting thick foam:

ImageIMG_0014 (2) by Daniel Osvaldo Caso, on Flickr

Angle cuts are not very difficult but require practice and a lot of attention

ImageIMG_0019 (2) by Daniel Osvaldo Caso, on Flickr

ImageIMG_0017 (2) by Daniel Osvaldo Caso, on Flickr

but they often gives you surprises at their underside:

ImageIMG_0018 (2) by Daniel Osvaldo Caso, on Flickr

If you look carefully the photo above you'll notice the top edge is near perfectly straight but the lower edge is not.
Sometimes that is not an issue but it depends of what are you building.

A neat, straight corner edge may make your job a lot easier...

ImageIMG_0021 (2) by Daniel Osvaldo Caso, on Flickr

... provided you manage to lead the blade feeling in your hand the 45 degree which I rarely do:

ImageIMG_0022 (2) by Daniel Osvaldo Caso, on Flickr

But don't worry, we'll talk tomorrow about simple improvised solutions for that.

Even if you are going to model pretty rough cornerstones, having a neat corb=ner joint helps a lot:

ImageIMG_0023 (2) by Daniel Osvaldo Caso, on Flickr

ImageIMG_0025 (2) by Daniel Osvaldo Caso, on Flickr

Yes, it can be done also another way

ImageIMG_0026 (2) by Daniel Osvaldo Caso, on Flickr

but then you will need to work extra to hide the joints of the material at the middle of each stone.

ImageIMG_0027 (2) by Daniel Osvaldo Caso, on Flickr

You can also go for a more prototypical approach:

ImageIMG_0028 (2) by Daniel Osvaldo Caso, on Flickr

ImageIMG_0029 (2) by Daniel Osvaldo Caso, on Flickr

ImageIMG_0031 (2) by Daniel Osvaldo Caso, on Flickr

but after doing one or two of such corners I often discover that a nice green creeper hiding the joints will be enough for this project.

I left my bed at 4 in the morning and I feel tired now so we let it here for today.

More tomorrow.

Daniel
My new Flickr:
https://www.flickr.com/photos/158027525@N08/

My old Flickr:
https://www.flickr.com/photos/daniel_1_32_scale/page223

Being right is one thing, but being true is quite another.
Daniel
Posts: 1544
Joined: Fri Oct 30, 2020 8:48 am
Location: Here

Re: WORKING WITH FOAM

Post by Daniel »

I will post more here in the afternoon but in the mean time here a simple way of building your own hot wire foam cutter:

https://www.youtube.com/watch?v=3GWzHb4Hd8Y

In case you want amore professional one here you go:

https://www.youtube.com/watch?v=ot-x3bIGDGE

Proxxon makes three versions of good quality:

https://www.youtube.com/watch?v=lbdoQx2yPVM

https://www.youtube.com/watch?v=kyBguQt17i0

https://www.proxxon.com/en/micromot/27084.php

I have all three Proxxon's. The first one is the one I use every now and then. The second one has not been used except for playing a bit the day I bought it. The third one is still in it's unopened box because I bought it for slicing big pieces of foam but had not the chance nor need yet.

There are also a range of special tools for cutting foamboard and I have none of them. The reason is that I tried one at the shop but was not ereally convinced. Still, I know some modellers like them a lot.

https://www.youtube.com/watch?v=BefKPhQCuB8

https://www.walmart.com/ip/Logan-FoamWe ... r/24625841

Here all of them but with the text in Dutch. I assume you can easily find some in English in the net.

https://www.vanderlindewebshop.com/nl/c ... euw/g+c+bg

Daniel
My new Flickr:
https://www.flickr.com/photos/158027525@N08/

My old Flickr:
https://www.flickr.com/photos/daniel_1_32_scale/page223

Being right is one thing, but being true is quite another.
Daniel
Posts: 1544
Joined: Fri Oct 30, 2020 8:48 am
Location: Here

Re: WORKING WITH FOAM

Post by Daniel »

[quote="Daniel"]I will post more here in the afternoon but in the mean time here a simple way of building your own hot wire foam cutter:

https://www.youtube.com/watch?v=3GWzHb4Hd8Y

In case you want amore professional one here you go:

https://www.youtube.com/watch?v=ot-x3bIGDGE

Proxxon makes three versions of good quality:

https://www.youtube.com/watch?v=lbdoQx2yPVM

https://www.youtube.com/watch?v=kyBguQt17i0

https://www.proxxon.com/en/micromot/27084.php

I have all three Proxxon's. The first one is the one I use every now and then. The second one has not been used except for playing a bit the day I bought it. The third one is still in it's unopened box because I bought it for slicing big pieces of foam but had not the chance nor need yet.

There are also a range of special tools for cutting foamboard and I have none of them. The reason is that I tried one at the shop but was not ereally convinced. Still, I know some modellers like them a lot.

https://www.youtube.com/watch?v=BefKPhQCuB8

https://www.walmart.com/ip/Logan-FoamWe ... r/24625841

Here all of them but with the text in Dutch. I assume you can easily find some in English in the net.

https://www.vanderlindewebshop.com/nl/c ... euw/g+c+bg


But my Friend Doug Scott use a soldering iron with the soldering tip removed and replaced by a knitting needle.

Daniel
My new Flickr:
https://www.flickr.com/photos/158027525@N08/

My old Flickr:
https://www.flickr.com/photos/daniel_1_32_scale/page223

Being right is one thing, but being true is quite another.
Daniel
Posts: 1544
Joined: Fri Oct 30, 2020 8:48 am
Location: Here

Re: WORKING WITH FOAM

Post by Daniel »

Sorry for the delay, last night my nose wouldn't let go my layout thread and when it did I was too tired. But here we go again.

I took 10mm thick foam for this just because it jumped to my hand but there is no real reason.

What you see in the photo is the normal surface of foamboard once the paper has been removed or when you buy it without the paper layers.

ImageIMG_0002 (2) by Daniel Osvaldo Caso, on Flickr

The pencil I'm using is a comon HB one with a (not too) sharp point

ImageIMG_0003 (2) by Daniel Osvaldo Caso, on Flickr

Scribing foam is incredibly easy. Yopu can for example model beautiful stone, brick or even wood walls with little work a no headache. All you need to do is to do is to draw doing a little more presure than hwere you are just drawing...

ImageIMG_0004 (2) by Daniel Osvaldo Caso, on Flickr

Of course, the more the pressure the deeper the scribing and if you are not a bit careful you may even reach the other side of the foam.
Let's start with a little stone wall.

We all have or have had a time when we tho8ght we would fool the eyes by tracing more or less irregularly parallel lines and 'cutting'the spaces sugesting stones:

ImageIMG_0006 (2) by Daniel Osvaldo Caso, on Flickr

Well, at least I did long ago but afterwards the trick didn't managed to fool my own eyes and I realised every single stone has an own character.
Eaven more: same as in society, the beauty owe plenty to diversity.

So I abandoned the trick and started drawing individual stones:

ImageIMG_0005 (2) by Daniel Osvaldo Caso, on Flickr

I liked that but afterwards noticed there where plenty of places where stones where a bit evidently following the next stone shape.

ImageIMG_0007 (2) by Daniel Osvaldo Caso, on Flickr

... so I've found that one must pay real attention to form every single stone with some convenient depth and minimalizing the flat top foam surface (except, of course if one is modelling brick or other standard cut stones.)

ImageIMG_0009 (2) by Daniel Osvaldo Caso, on Flickr

ImageIMG_0011 (2) by Daniel Osvaldo Caso, on Flickr

We all tend to repeat unconsciously some accents as when we write, draw or even speak.
I noticed in my own scribing and then found that rotating every two or three stones the foam plate 45, 90 or 180 degree the accents keep coming but because appear working in many different directions they are no more evident to the viewer.
Of course that is not an issue if one is scribing rectangular bricks or stones using a ruler.

ImageIMG_0012 (2) by Daniel Osvaldo Caso, on Flickr

ImageIMG_0013 (2) by Daniel Osvaldo Caso, on Flickr

ImageIMG_0014 (2) by Daniel Osvaldo Caso, on Flickr

ImageIMG_0017 (2) by Daniel Osvaldo Caso, on Flickr

Using for embossing not only the point of the pencil but also the surface formed by the pencil sharpener is a great way to escape the foam's top flatness. In other words: use the pencil at an angle where you are making presure with the wood of the side and not with the point.

ImageIMG_0019 (2) by Daniel Osvaldo Caso, on Flickr

ImageIMG_0020 (2) by Daniel Osvaldo Caso, on Flickr

ImageIMG_0021 (2) by Daniel Osvaldo Caso, on Flickr

ImageIMG_0023 (2) by Daniel Osvaldo Caso, on Flickr

Missing stones tell a whole story without words and add plenty of charme...

ImageIMG_0024 (2) by Daniel Osvaldo Caso, on Flickr

ImageIMG_0025 (2) by Daniel Osvaldo Caso, on Flickr

... but must be done within some logic because a hollow stone wall won't stay in place...

ImageIMG_0026 (2) by Daniel Osvaldo Caso, on Flickr

I have a box full of 'special' sanders. Most of them were made by glueing a sheet of sandpaper on a piece ofply or MDF and cutting pieces in the needed size to fit each specific task:

ImageIMG_0027 (2) by Daniel Osvaldo Caso, on Flickr

and pieces of sand paper and cloth of evry degree.
This one is the roughest I have and comes from the belt of a heavy floor sanding machine:

ImageIMG_0028 (2) by Daniel Osvaldo Caso, on Flickr

and I use it a lot not only for foam walls but also for modelling tree bark or heavy weathere wood.

But all of them are useful.
This one is P40 from Bosch and great for modelling stone textures or rough masonry surfaces:

ImageIMG_0029 (2) by Daniel Osvaldo Caso, on Flickr

For sanding the interior of tunnels or arches I make a special tool with the desired radius finding a piece of thick card tube or, as in the photo, a piece of PVC pipe:

ImageIMG_0030 (2) by Daniel Osvaldo Caso, on Flickr

ImageIMG_0032 (2) by Daniel Osvaldo Caso, on Flickr

but REMEMBER what was said at the beginning of this thread: sanding foam is no joke and one MUST be careful and take precautions.

ImageIMG_0034 (2) by Daniel Osvaldo Caso, on Flickr

ImageIMG_0037 (2) by Daniel Osvaldo Caso, on Flickr

ImageIMG_0038 (2) by Daniel Osvaldo Caso, on Flickr

ImageIMG_0039 (2) by Daniel Osvaldo Caso, on Flickr

ImageIMG_0040 (2) by Daniel Osvaldo Caso, on Flickr

More in next message.

Daniel
My new Flickr:
https://www.flickr.com/photos/158027525@N08/

My old Flickr:
https://www.flickr.com/photos/daniel_1_32_scale/page223

Being right is one thing, but being true is quite another.
Ex-Pat
Posts: 2203
Joined: Tue Feb 08, 2011 10:51 pm
Location: Newry Northern Ireland

Re: WORKING WITH FOAM

Post by Ex-Pat »

You've now answered one of my "internal" questions - I was wondering what sort of knife was used to scribe the brick/stonework, and now I know it's a sharp pencil!
Daniel
Posts: 1544
Joined: Fri Oct 30, 2020 8:48 am
Location: Here

Re: WORKING WITH FOAM

Post by Daniel »

The inclined line in the photo is the start for simulating two areas with different plaster. I don't know in the UK but in France such differences are really abundant and come in unimaginable variety.

ImageIMG_0040 (2) by Daniel Osvaldo Caso, on Flickr

To create the illusion of two different thicknesses of plaster is easy using one of the very basic methods of 'bas-reliefs'.
The trick is to create a very slightly slope in the surface of the side that must show as thinner plaster so at the point where the two areas meet one shows a bit receding and therefore the other a bit protruding.
Easier to do than to put in words:

ImageIMG_0041 (2) by Daniel Osvaldo Caso, on Flickr

You see the are right under the pencil is going down under the presure which makes the other area look as protruding.
Basically the same logic we used to differenciate the stones from the plaster but in a 'light' version.
That is done by dragging the wooden 'belly' of the pencil, slightly inclined so the graphite point makes the deepest impression and the rear of the wooden belly not even touches the foam.

Another similar effect but between stones and the plasterwork suggesting the stones were also covered until the plaster felt down is easy to do by the same trick but making the stone tops to be all slightly deeper than the top surface of the foam:

ImageIMG_0043 (2) by Daniel Osvaldo Caso, on Flickr

then also cracking but not yet fallen plaster may be siggested my thin lines running from the plaster edges to the plaster area

ImageIMG_0045 (2) by Daniel Osvaldo Caso, on Flickr

-----------------

CUTTING OPENINGS

In principle cutting openings in foam is easy.
In thinn foeam up to 5 or 6mm it is very easy provided one takes care of doing a neat cutting using a (preferable metal) ruler as guide and paying attention that the point of the blade that you don't see doesn't cut beyond the corners.
For that the best wy is to cut from the corners and not to them. That means cutting each line from bothe ends toward the center of the line.
With the 10mm foam I used today is a bit less easy.
Of course, how deeper the foam the lesser the chance to keep good control on the hidden point of the blade so one must take precautions to be able to correct such errors.

ImageIMG_0046 (2) by Daniel Osvaldo Caso, on Flickr

One of convenient precautions is to avoid using the window casting as a pattern for marking the contour of the cutting to be done. That is tempting but always a garantee for trouble.
In case you doe it really very carefully and use the window casting as pattern sliding the cutting blade along it with total care, you will end with a may be nicelly neat cut... twice the thick of the blade too big and that in case you are so good at it that your cuttings were all perfectly perpendicular to the foam surface. Conlusion: FORGET IT.

Also using the casting for just drawing the contour on the foam is worthless: you may end with a carefully cut open exactly the right size ... and a line scribed almost at the edge as a very thin frame.

Well, every truth that words can convey is ambivalent because that is after all the nature of words so all what I say is valid but the opposite as well at least in certain circumnstances. For example one can want such a delicate contour around the window opening in a luxury building or whatever.
So carefully drawing the openings you want and doing the cutting taking care to keep the plade at 90 degree of the foam surface, a clear notion of where is the point of the blade that you can't see while cutting and cutting slightly at the inner side of the drawwn lines will give you a good chance to correct eventual errors.

ImageIMG_0047 (2) by Daniel Osvaldo Caso, on Flickr

For example by sanding.

REMEMBER THE PRECAUTIONS FOR SANDINMG BEFORE YOU START!!!

And here is where the sandingstikcs become important:

ImageIMG_0049 (2) by Daniel Osvaldo Caso, on Flickr

ImageIMG_0050 (2) by Daniel Osvaldo Caso, on Flickr

Once you have the wall cut and all openings done the fun begins.

There is plenty that can be done.
NBot only embossing, engraving and cutting but also adding pieces of foam, wood, plastics or whatever.

ImageIMG_0051 (2) by Daniel Osvaldo Caso, on Flickr

ImageIMG_0052 (2) by Daniel Osvaldo Caso, on Flickr

ImageIMG_0053 (2) by Daniel Osvaldo Caso, on Flickr

ImageIMG_0054 (2) by Daniel Osvaldo Caso, on Flickr

Among many other tricks, using different pieces of sandpaper can make amazing variations:

ImageIMG_0061 (2) by Daniel Osvaldo Caso, on Flickr

ImageIMG_0059 (2) by Daniel Osvaldo Caso, on Flickr

ImageIMG_0062 (2) by Daniel Osvaldo Caso, on Flickr

and the game is endless...

ImageIMG_0063 (2) by Daniel Osvaldo Caso, on Flickr

ImageIMG_0064 (2) by Daniel Osvaldo Caso, on Flickr

ImageIMG_0079 (2) by Daniel Osvaldo Caso, on Flickr

ImageIMG_0076 (2) by Daniel Osvaldo Caso, on Flickr

ImageIMG_0065 (2) by Daniel Osvaldo Caso, on Flickr

ImageIMG_0067 (2) by Daniel Osvaldo Caso, on Flickr

ImageIMG_0070 (2) by Daniel Osvaldo Caso, on Flickr

In an old wall a missing brick can be interesting...

ImageIMG_0072 (2) by Daniel Osvaldo Caso, on Flickr

Once your wall or what I am doing is ready y give it a base layer of acrylic paint.
We are going to discuse paints in anoither chapter but for a base layer the cheapest you can get will be o.k.... Well..., at least if you don't expect you work to be topped by Sotheby's in the summer of 2465 toghether with Rembrandt's Nightwatch.

Every color darker than whit will enance a lot your work. Mainlky because the shadows.
For a base I preffer (mostly) a medium neutral gray but in case of walls depends on the colors I want between the bricks or the stones.

ImageIMG_0073 (2) by Daniel Osvaldo Caso, on Flickr

ImageIMG_0075 (2) by Daniel Osvaldo Caso, on Flickr

Image

IMG_0074 (2) by Daniel Osvaldo Caso, on Flickr

Good, next time well, see more but for the time being enjoy your pause.

Daniel
My new Flickr:
https://www.flickr.com/photos/158027525@N08/

My old Flickr:
https://www.flickr.com/photos/daniel_1_32_scale/page223

Being right is one thing, but being true is quite another.
Daniel
Posts: 1544
Joined: Fri Oct 30, 2020 8:48 am
Location: Here

Re: WORKING WITH FOAM

Post by Daniel »

Ex-Pat wrote:You've now answered one of my "internal" questions - I was wondering what sort of knife was used to scribe the brick/stonework, and now I know it's a sharp pencil!
Yes.
Not only a sharp one. Often a thick p[oint is very helpfull too.
But 99% of it all is taking a piece of foam and discovering with eyes and hands the material.
It is really fascinating stuff.

Daniel
My new Flickr:
https://www.flickr.com/photos/158027525@N08/

My old Flickr:
https://www.flickr.com/photos/daniel_1_32_scale/page223

Being right is one thing, but being true is quite another.
Daniel
Posts: 1544
Joined: Fri Oct 30, 2020 8:48 am
Location: Here

Re: WORKING WITH FOAM

Post by Daniel »

Daniel wrote:
Ex-Pat wrote:You've now answered one of my "internal" questions - I was wondering what sort of knife was used to scribe the brick/stonework, and now I know it's a sharp pencil!
Yes.
Not only a sharp one. Often a thick point is very helpful too.
But 99% of it all is taking a piece of foam and discovering with eyes and hands the material.
It is really fascinating stuff.

Daniel
My new Flickr:
https://www.flickr.com/photos/158027525@N08/

My old Flickr:
https://www.flickr.com/photos/daniel_1_32_scale/page223

Being right is one thing, but being true is quite another.
User avatar
Lofty
Posts: 240
Joined: Fri May 27, 2005 9:58 pm

Re: WORKING WITH FOAM

Post by Lofty »

Great tutorial 8)
Once upon a time I built a model railway in the loft. Now I dabble on much smaller baseboards.
Daniel
Posts: 1544
Joined: Fri Oct 30, 2020 8:48 am
Location: Here

Re: WORKING WITH FOAM

Post by Daniel »

Stainsacre wrote:Great tutorial 8)
Thank you Dave.

It will be really a lot better if some fellows take a small piece of foam and give themselves permission to play with it for a while.
Then we'll get serious input of experiences and questions.

Would you? :)


Daniel
My new Flickr:
https://www.flickr.com/photos/158027525@N08/

My old Flickr:
https://www.flickr.com/photos/daniel_1_32_scale/page223

Being right is one thing, but being true is quite another.
User avatar
Lofty
Posts: 240
Joined: Fri May 27, 2005 9:58 pm

Re: WORKING WITH FOAM

Post by Lofty »

I have had a little dabble Daniel. I used Fomex which is a more solid substance than you are using. It requires a proper scriber to make indentations:
16-01-06-01.jpg
16-01-06-02.jpg
16-01-06-03.jpg
Being 1/72 scale its also a lot smaller than your work
Once upon a time I built a model railway in the loft. Now I dabble on much smaller baseboards.
User avatar
Lofty
Posts: 240
Joined: Fri May 27, 2005 9:58 pm

Re: WORKING WITH FOAM

Post by Lofty »

Another micro project:
16-10-19-01.jpg
16-10-22-01.jpg
16-10-23-01.jpg
It's something that I will return to in the future.
Once upon a time I built a model railway in the loft. Now I dabble on much smaller baseboards.
Post Reply