Brassmasters Duchess test build

Have any questions or tips and advice on how to build those bits that don't come ready made.
Jim S-W
Posts: 1468
Joined: Fri Dec 04, 2009 5:38 pm

Brassmasters Duchess test build

Post by Jim S-W »

Hi All

I am currently embarked on building a test build of the forthcoming Brassmasters Coronation or Duchess kit. Way before I got distracted with Brettell Road I always thought that if Brassmasters ever did a Duchess i would have a go at building one as 46235 'City of Birmingham'. Well now they are and so I am!

Of course its a personal opinion thing but I never really liked streamlined steam locos. While the Duchesses were a little more thoughtfully designed than the god awful GWR efforts I always thought they looked a bit like an upturned bath tub and have to admit the A4's did look a fair bit better. However with the streamlining taken off the Duchesses were 'it'. The steam locomotive version of the Concorde moment. To my eyes, at least, the pinnacle of steam loco perfection.

Anyway enough hero worship and on to the model. Starting with...

Image
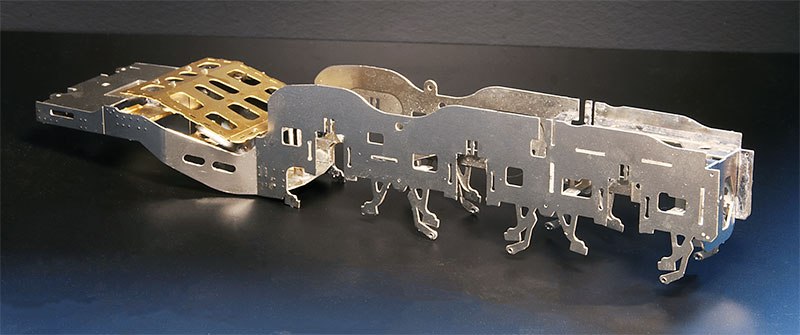
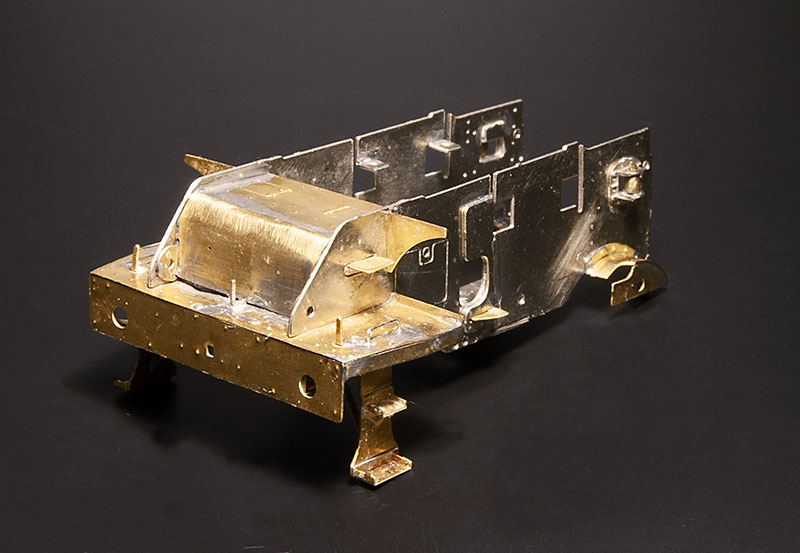
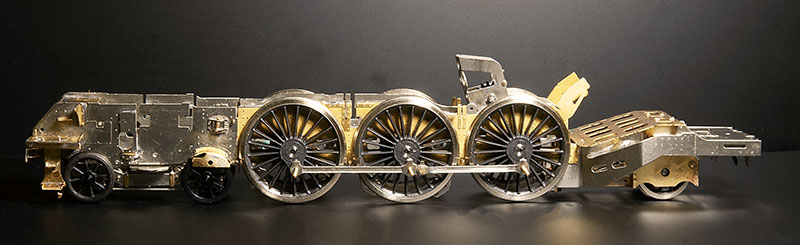
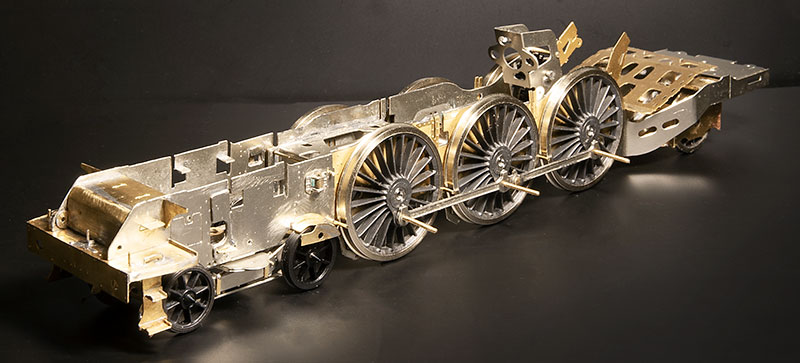
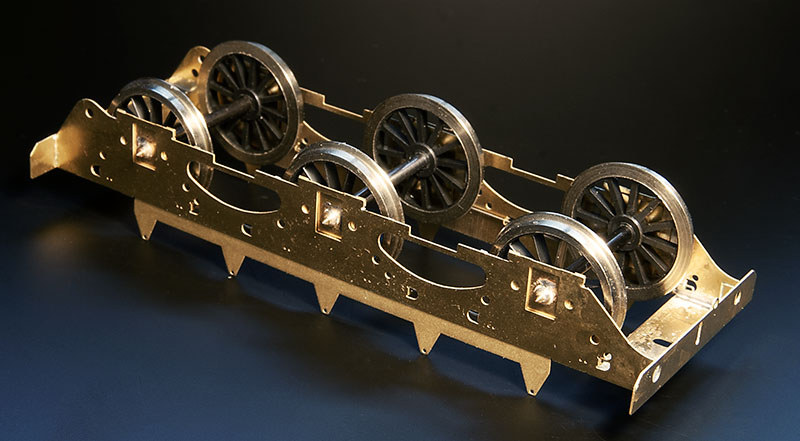
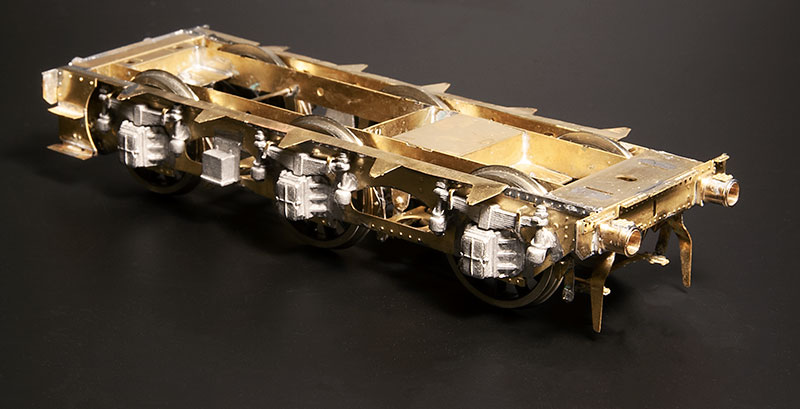
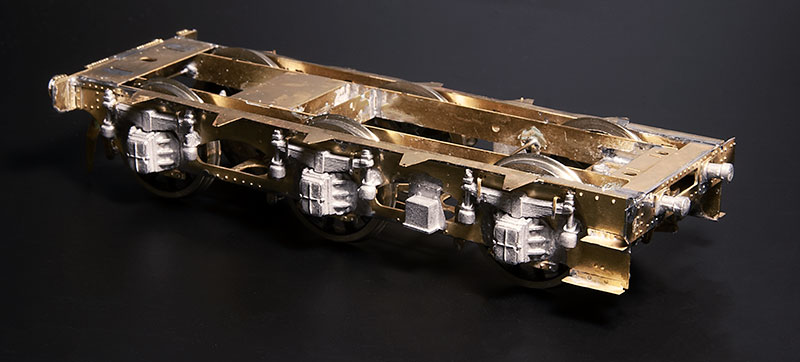
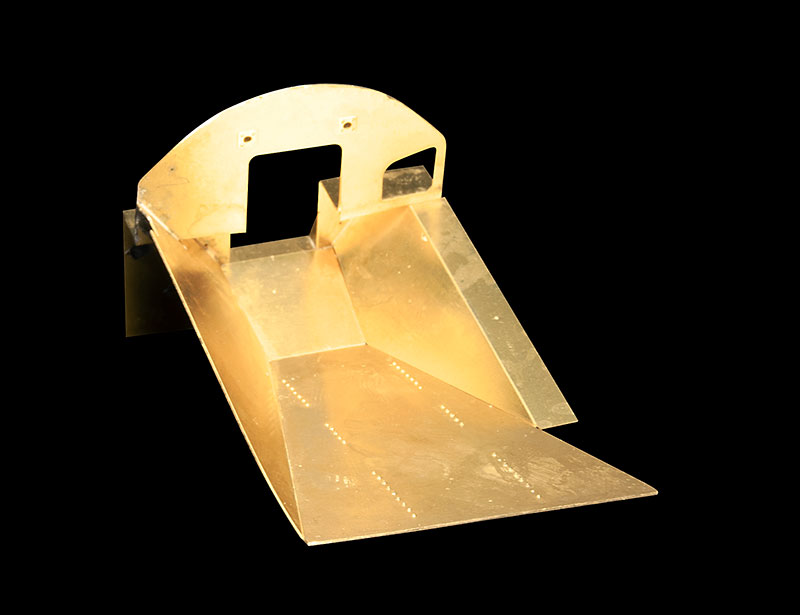
The main sub-frames. The loco frames come in 3 sub sections related to the wheels. A driving wheel section, a pony truck section and a bogie section.

Image
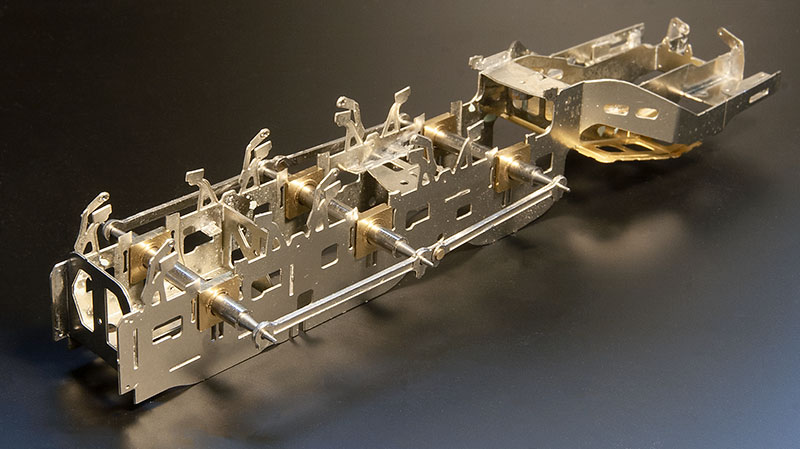
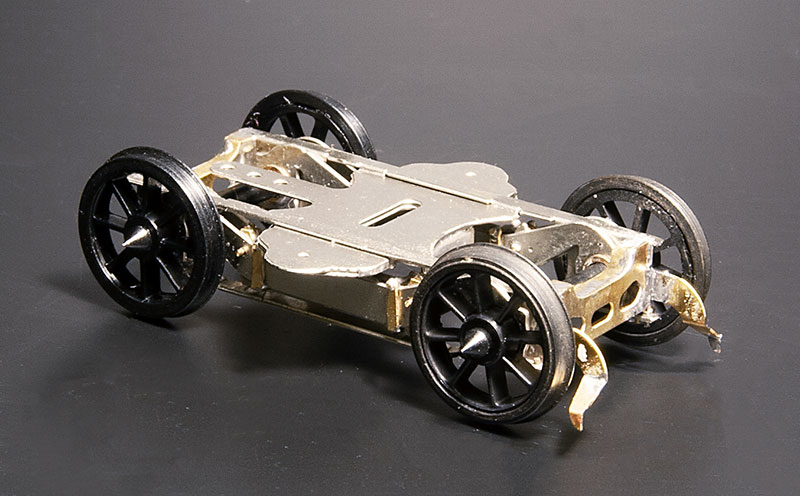
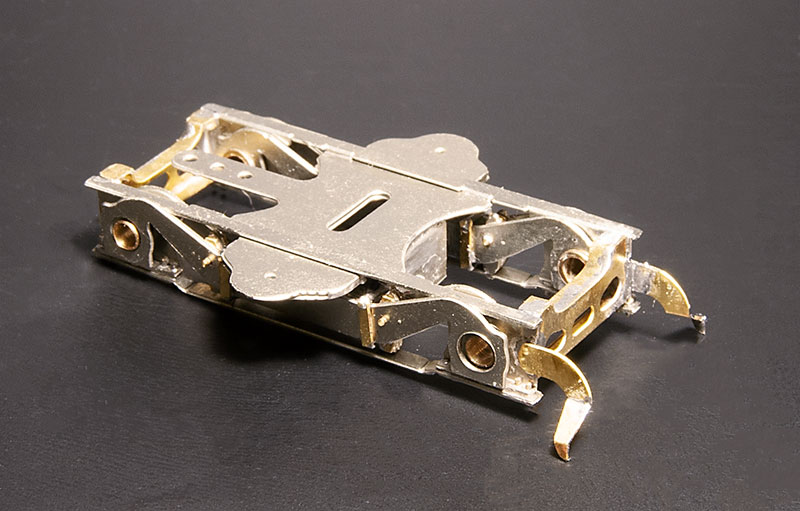
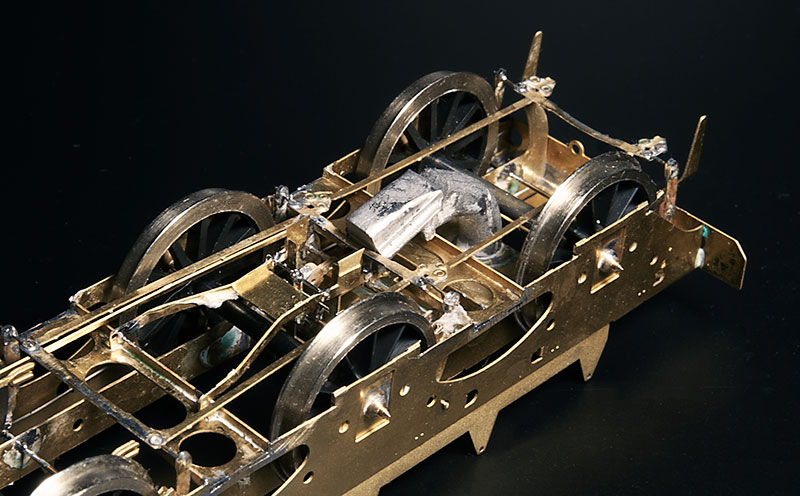
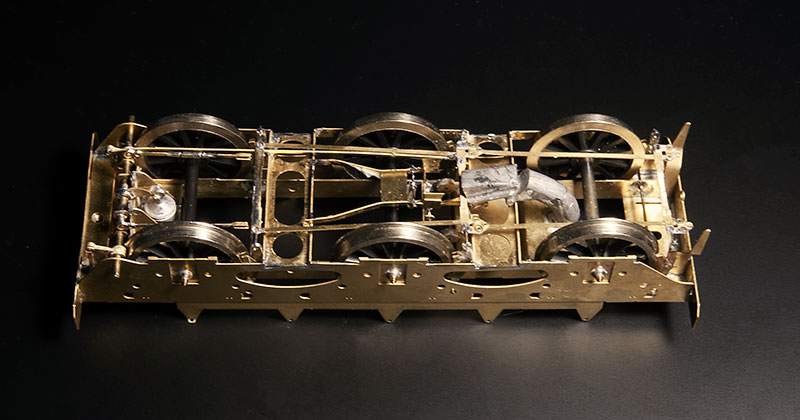
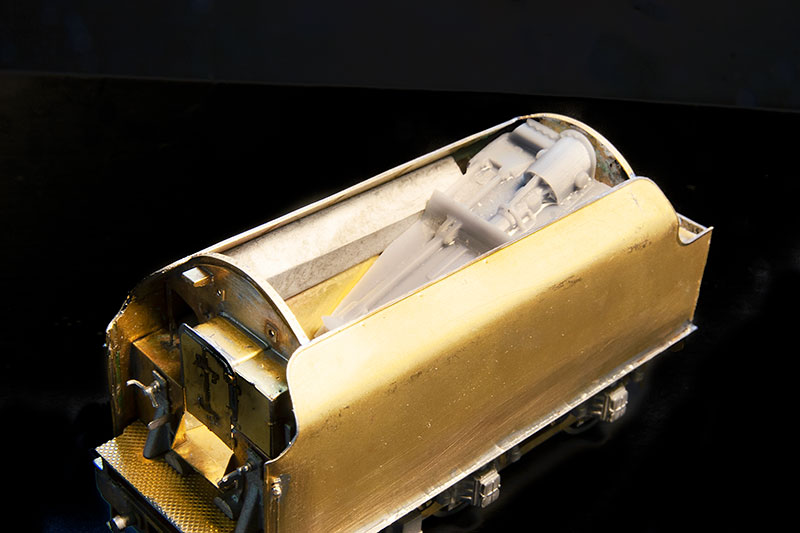
The chassis upside down, test fitting the main coupling rods.

Image
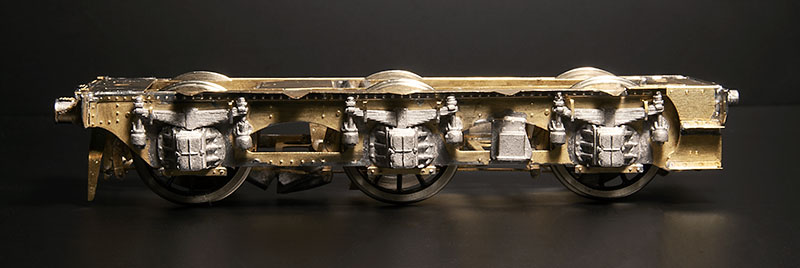
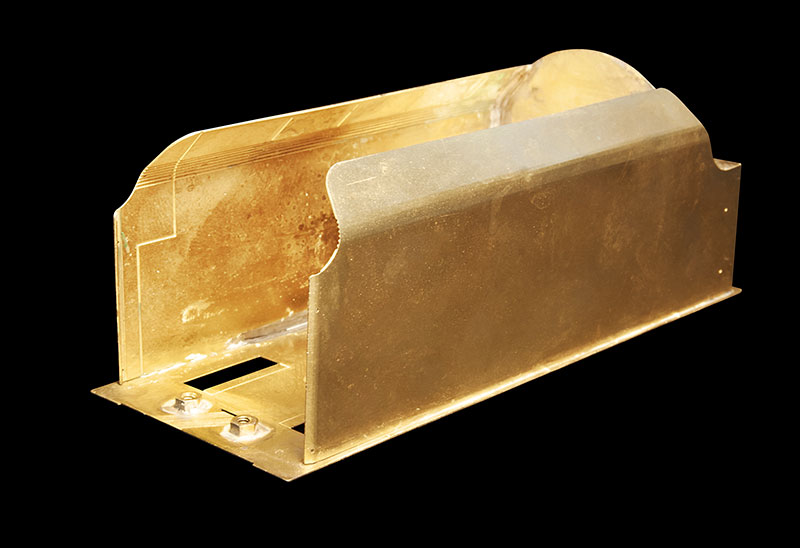
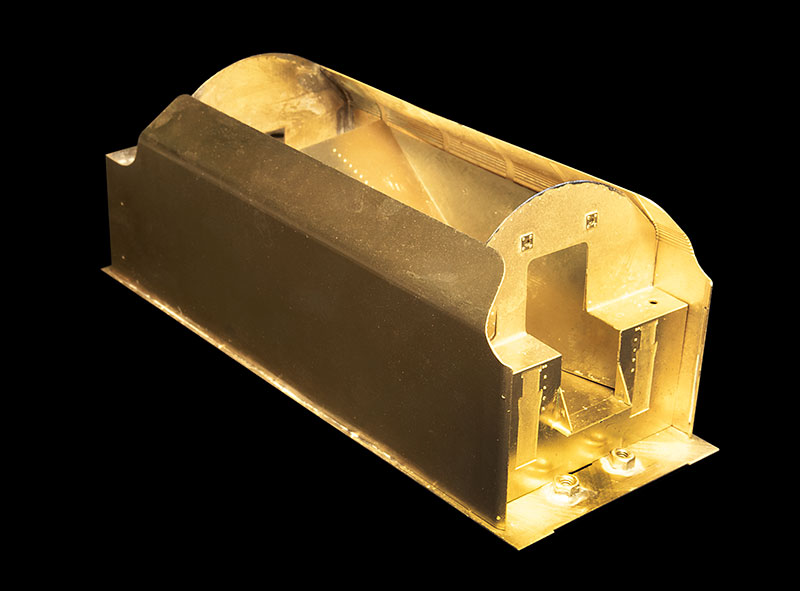
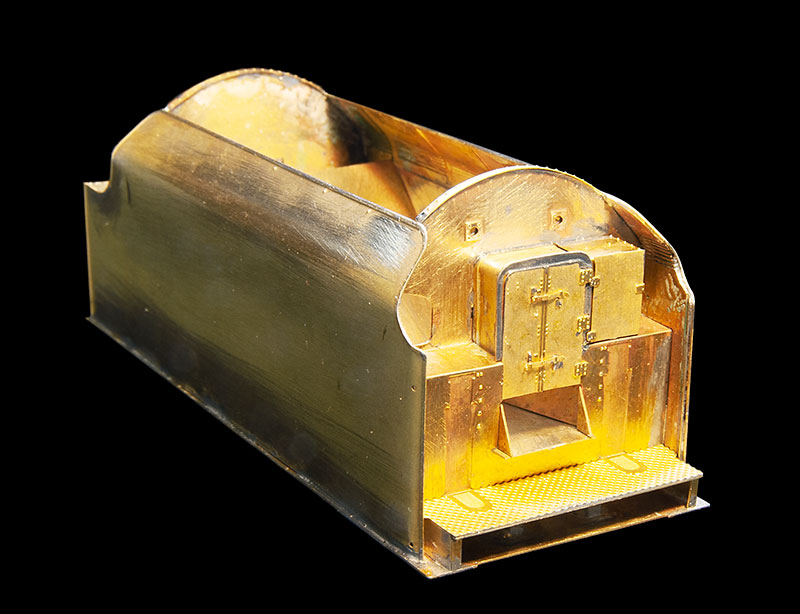
The main frame with the brass overlays fitted.

Image
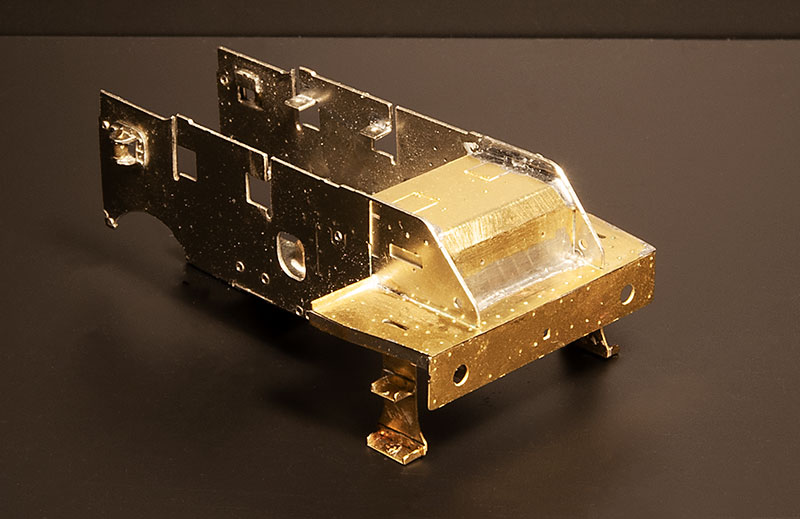
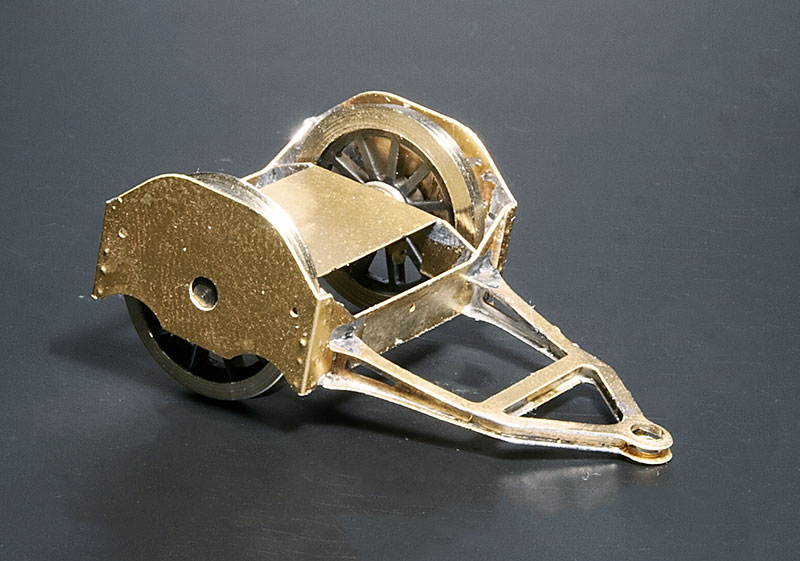
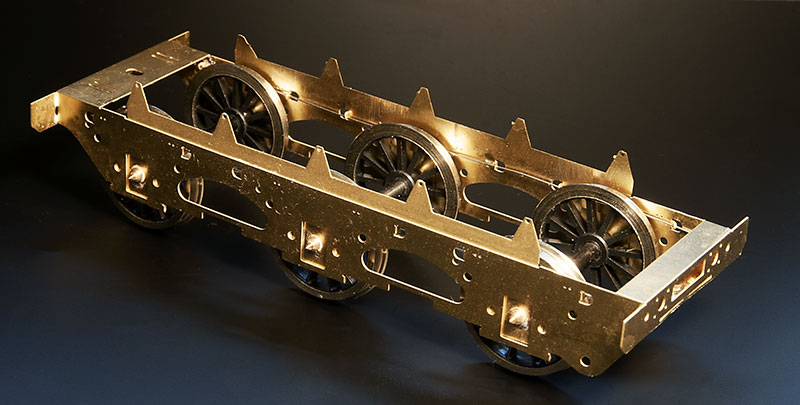
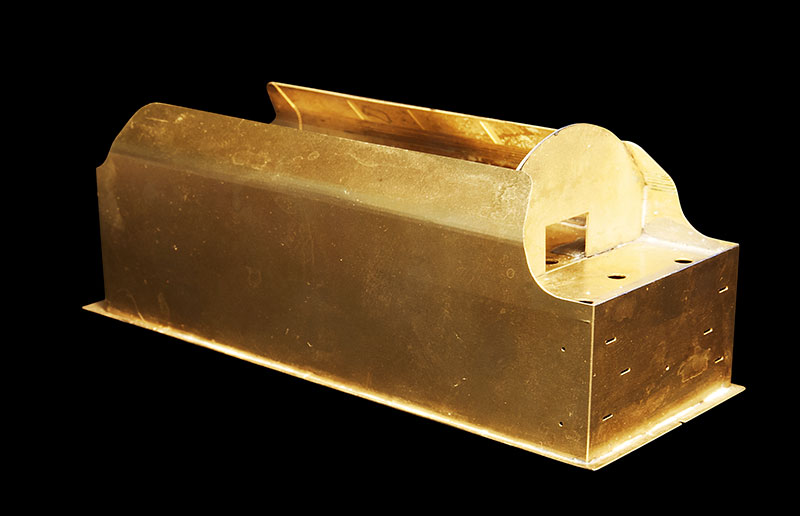
The front or bogie area sub-frame.

More to follow.
Jim S-W
Posts: 1468
Joined: Fri Dec 04, 2009 5:38 pm

Re: Brassmasters Duchess test build

Post by Jim S-W »

So progress continues on my Coronation build.

Image

The front frame is as far as I can go for the moment. (I don't have the cast bits for the loco yet. If you are wondering about the cylinders they are a separate sub assembly.

Image

No problems with the pony truck so far. The kit provides for both the earlier and later types. This is the later one.

Image

The bogie is compensated. As the bogie is the only part of the loco that traps the wheels in place I have used some old/rejected wagon wheels for the moment. I ideally only want to put wheels onto the axle once if I can.

Image

Without the wheels in the way.

Image

I couldn't resist a temporary mock up to see get a better feel for the loco. I've used a High Level Road runner + gearbox. The main drivers don't have their springs in place yet so its sitting a little off at the moment.

Image
Dad-1
Posts: 7327
Joined: Sun Aug 24, 2008 8:05 pm
Location: Dorset - A mile from West Bay.

Re: Brassmasters Duchess test build

Post by Dad-1 »

I just don't know what to say other than

'Wow'

Certainly beyond my ability, just watching in wonder !!

Geoff T.
User avatar
glencairn
Posts: 4878
Joined: Sat Aug 30, 2008 6:09 pm
Location: Both sides of the Border

Re: Brassmasters Duchess test build

Post by glencairn »

Stunning!!

Modelling to the highest degree.

Well done.

Glencairn
To the world you are someone. To someone you are their world.
I Cannot Afford the Luxury of a Negative Thought
Jim S-W
Posts: 1468
Joined: Fri Dec 04, 2009 5:38 pm

Re: Brassmasters Duchess test build

Post by Jim S-W »

I've moved away from the loco for a while as the next stage of the build is the cylinders and I don't have the castings i will need for them just yet. So attention has shifted to the tender.

Image
The first stage is the outside sub frames - a simple box really. The kit allows for springing or internal compensation. I've opted for springing.
Image

Image
Underside of the tender showing the sub frame, brake gear and water scoop gear. A little fiddly but its been fun to build so far.
Image
Bigmet
Posts: 10251
Joined: Tue Aug 14, 2007 2:19 pm

Re: Brassmasters Duchess test build

Post by Bigmet »

That's going to look fabulous when complete. Will it be screw assembled to break down into major components for painting?
User avatar
Mountain
Posts: 5884
Joined: Mon Oct 24, 2016 3:43 pm
Location: UK.

Re: Brassmasters Duchess test build

Post by Mountain »

It is soo tempting not to paint it when it is built. It looks so good in brass.
Jim S-W
Posts: 1468
Joined: Fri Dec 04, 2009 5:38 pm

Re: Brassmasters Duchess test build

Post by Jim S-W »

Bigmet wrote:That's going to look fabulous when complete. Will it be screw assembled to break down into major components for painting?
Yep :D
Jim S-W
Posts: 1468
Joined: Fri Dec 04, 2009 5:38 pm

Re: Brassmasters Duchess test build

Post by Jim S-W »

Mountain wrote:It is soo tempting not to paint it when it is built. It looks so good in brass.
I know I always get that with etched kits. :?
Jim S-W
Posts: 1468
Joined: Fri Dec 04, 2009 5:38 pm

Re: Brassmasters Duchess test build

Post by Jim S-W »

The tender chassis is now effectively done - Not a lot else to say really so here's some pictures.

Image
Right hand side

Image
Rear end

Image
Front, or loco end.
User avatar
Bufferstop
Posts: 13821
Joined: Thu Mar 11, 2010 12:06 pm
Location: Bottom end of N. Warks line

Re: Brassmasters Duchess test build

Post by Bufferstop »

As usual Jim it leaves me lost for words.
Growing old, can't avoid it. Growing up, forget it!
My Layout, My Workbench Blog and My Opinions
Jim S-W
Posts: 1468
Joined: Fri Dec 04, 2009 5:38 pm

Re: Brassmasters Duchess test build

Post by Jim S-W »

Moving on to the tender body...

Image

Brassmasters supply a basic sub structure with different overlays for the 3 main types of tender found behind a Duchess.

Image

Image

This is the coal chute and front bulkhead assembly.

Image

The 2 sub assemblies test fitted together.
User avatar
Bufferstop
Posts: 13821
Joined: Thu Mar 11, 2010 12:06 pm
Location: Bottom end of N. Warks line

Re: Brassmasters Duchess test build

Post by Bufferstop »

I'd be a bit pigged off that it's no longer possible to pop in and take a look at the prototype now that it costs an arm and a leg just to get through the door.
Growing old, can't avoid it. Growing up, forget it!
My Layout, My Workbench Blog and My Opinions
Jim S-W
Posts: 1468
Joined: Fri Dec 04, 2009 5:38 pm

Re: Brassmasters Duchess test build

Post by Jim S-W »

Image

Progress on my tender build continues. This is the front end with some of the detail started.

Image

And the rear end.

Image

Inside showing the fire iron tunnel and and the coal pusher which is a 3d print.
Below are the some images of the tender in its nearly complete state. There's still a few bits I need such as the ladder etc but focus will now shift back to the loco.

Image

Image

Image
Post Reply