

I believe Man is the only creature that invents problems for himself for the pleasure of solving them. In my case, my attempts with modeling clay, plaster, card stock and balsa to create satisfactory grade crossings have been miserable failures, most suitable for the derailment of rolling stock.
Is there a relatively idiot proof way to create such OO item? Failing that, does Hornby make curved grade crossings? I've only seen straight. I model an imaginary attempt at the 1920's. Would a plank or stone grade crossing have been in use?
Getting the curvature correct has also been beyond me. A sort of template would be useful. Any ideas?
Pulling my hair out, what's left of it.
Pulling my hair out, what's left of it.
Nessie rocks!
-
End2end

- Posts: 6010
- Joined: Sun Jan 12, 2014 9:58 pm
- Location: At the end....... and sometimes at the other end
Re: Pulling my hair out, what's left of it.
Crosswords! 
Lay the curve on a peice of paper and trace round it.This should give you a curvature template.
Thanks
End2end
Lay the curve on a peice of paper and trace round it.This should give you a curvature template.
Thanks
End2end
"St Blazey's" - The progress and predicaments.
Welcome
Planning
Building
St. Blazey's Works & Depot thread
Welcome
Planning
Building
St. Blazey's Works & Depot thread
Re: Pulling my hair out, what's left of it.
Hi Chops
Just been looking around Peco sell curved level crossings for radius 1, 2 and 3. If that's any help.
Just been looking around Peco sell curved level crossings for radius 1, 2 and 3. If that's any help.
Re: Pulling my hair out, what's left of it.
Sit back in the sun and have a cup of tea - much better that the American Coffee drinking !
Tea is more calming.
Are you talking about a track infill for a road, or barrow crossing ?
If so you need to sort of fold some paper over the rails where you
want it, to leave marks you can cut around. You then need to cut
about 2.0 mm inside for flange clearance. You should now have a
paper pattern for your infill piece.
I would then stick to some plasticard, trim the plastic to shape and
whatever shape you wanted you should have a nicely fitting infill.
I may of course have miss-understood what you are really looking for ?
Geoff T.
Remember ... I know nothing about railways.
http://www.newrailwaymodellers.co.uk/Fo ... 22&t=32187 and Another on http://www.newrailwaymodellers.co.uk/Fo ... &sk=t&sd=a
http://www.newrailwaymodellers.co.uk/Fo ... 22&t=32187 and Another on http://www.newrailwaymodellers.co.uk/Fo ... &sk=t&sd=a
-
Bufferstop

- Posts: 13833
- Joined: Thu Mar 11, 2010 12:06 pm
- Location: Bottom end of N. Warks line
Re: Pulling my hair out, what's left of it.
The actual infill on UK level crossings has been just about as varied as the surfaces used for roads. Where traffic was light the infill would quite likely be timber (sleepers of various ages) tarred and gritted to form a wearing surface. Every effort would have been made to avoid resorting to concrete due to the difficulty of its removal. If it was infill for yards, wharves, and street running the infill (and the margins) would frequently be stone setts for their hard wearing qualities.
If you want a template for cutting run an HB pencil along the surface of the rails, put a sheet of paper over it then rub hard with your finger, or if the rails have been in use skip the bit with the pencil just rub.
If you want a template for cutting run an HB pencil along the surface of the rails, put a sheet of paper over it then rub hard with your finger, or if the rails have been in use skip the bit with the pencil just rub.
Growing old, can't avoid it. Growing up, forget it!
My Layout, My Workbench Blog and My Opinions
My Layout, My Workbench Blog and My Opinions
Re: Pulling my hair out, what's left of it.
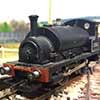
As mentioned by the other contributors here, there are a number of ways to create level crossings. The easiest, but most costly, is to use commercial products. This one uses Peco 3rd and 4th radius components.
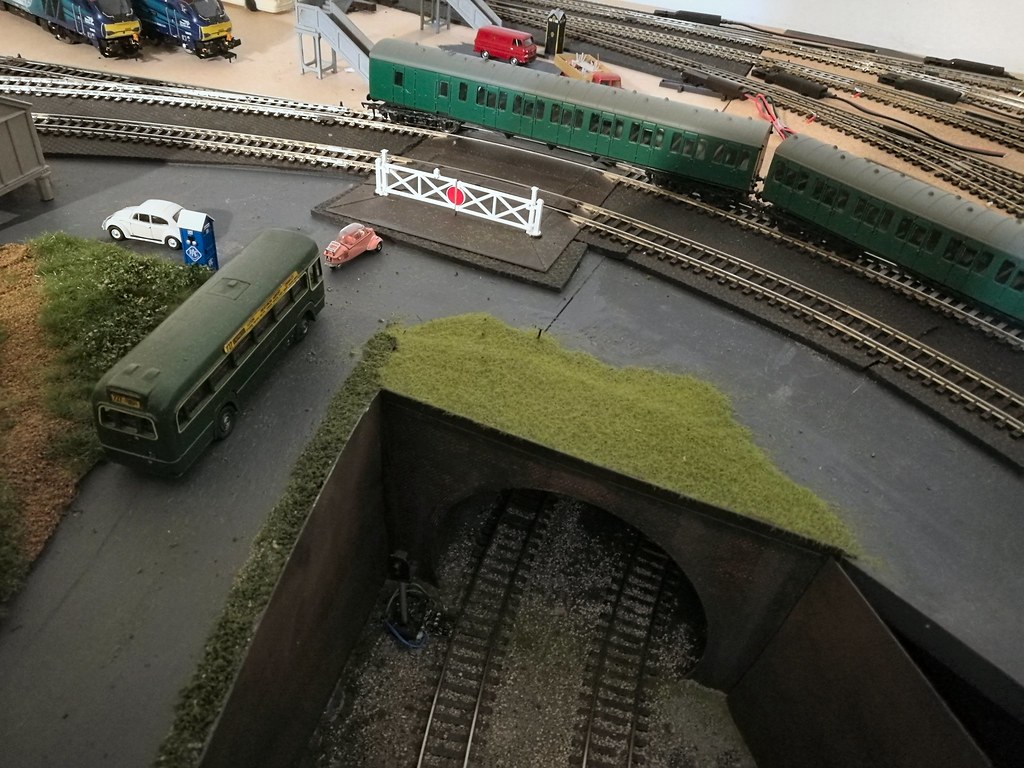
IMG_20180330_213737 by Jeffrey Lynn, on Flickr
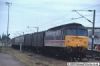
I have also used Wills plastic sheets - wood planking and cobblestones, using the method suggested above by Bufferstop to create the templates, plus a little trial and error to refine it.
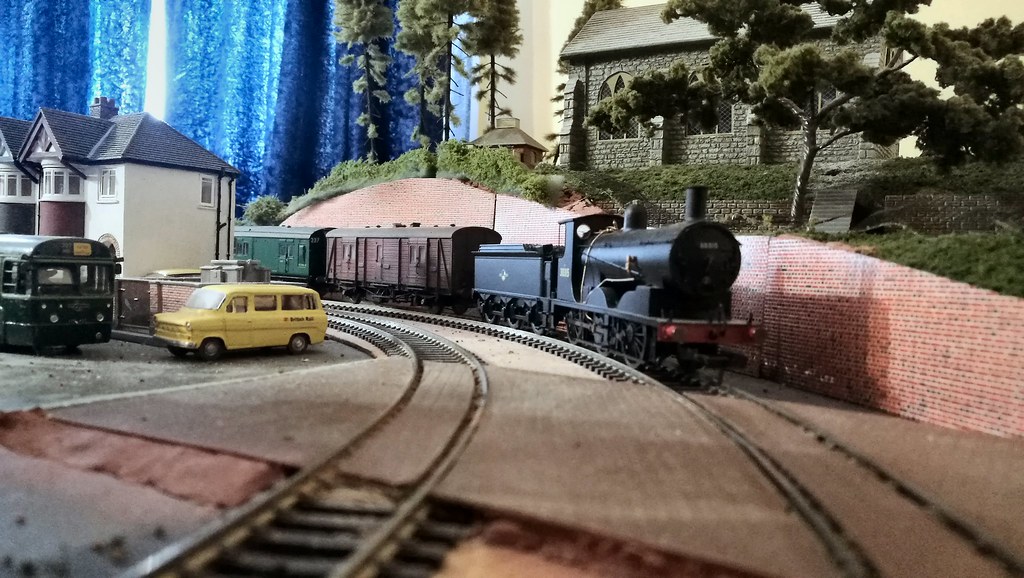
700 Class 30315 on Local Passenger - 1 by Jeffrey Lynn, on Flickr
Finally, the cheapest and easiest of all: use card sheet, laminated to create the correct depths. This one is still under construction, and definitely needs another layer in the track infills. With this and the previous method, create an undersized infill to sit between the chairs on the sleepers, then add full width layers above that. Always check flangeway clearances with the coarsest wheel sets you possess that are in regular use. The beauty with card is that if you get it wrong first go, it is a cheap and plentiful material, allowing you many goes until it is up to the standard you want.
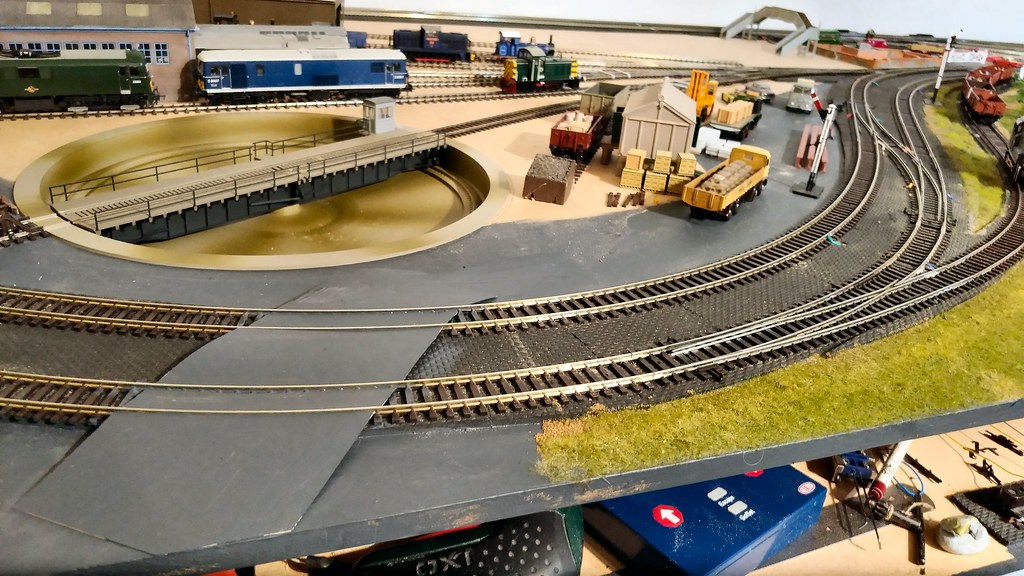
P_20180824_151404_vHDR_On by Jeffrey Lynn, on Flickr
One other word of advice: leave the level crossing surfaces *just* below the top level of the running rails. The practicalities of a model railway mean that you have to be able to clean the rails. Also, you don't want the road surface lifting the locomotive wheels off the tops of the rails, as that will severely affect electrical pickup and, therefore, running qualities.
IMG_20180330_213737 by Jeffrey Lynn, on Flickr
I have also used Wills plastic sheets - wood planking and cobblestones, using the method suggested above by Bufferstop to create the templates, plus a little trial and error to refine it.
700 Class 30315 on Local Passenger - 1 by Jeffrey Lynn, on Flickr
Finally, the cheapest and easiest of all: use card sheet, laminated to create the correct depths. This one is still under construction, and definitely needs another layer in the track infills. With this and the previous method, create an undersized infill to sit between the chairs on the sleepers, then add full width layers above that. Always check flangeway clearances with the coarsest wheel sets you possess that are in regular use. The beauty with card is that if you get it wrong first go, it is a cheap and plentiful material, allowing you many goes until it is up to the standard you want.
P_20180824_151404_vHDR_On by Jeffrey Lynn, on Flickr
One other word of advice: leave the level crossing surfaces *just* below the top level of the running rails. The practicalities of a model railway mean that you have to be able to clean the rails. Also, you don't want the road surface lifting the locomotive wheels off the tops of the rails, as that will severely affect electrical pickup and, therefore, running qualities.
Re: Pulling my hair out, what's left of it.
That's crucial advice and there's a further 'traps' to be aware of in this matter. I think Bachmann have been the most recent offender with their E4 0-6-2T, putting the pick up wipers so low on the wheelbacks that they can foul on check rails, and also thereby track infills. Sometimes there is nothing for it but changing coarse wheelsets for finer types, or modifying a poorly executed feature on a model.SRman wrote:... Always check flangeway clearances with the coarsest wheel sets you possess ...
Nice looking layout building there...
Re: Pulling my hair out, what's left of it.
Thanks for the compliment, Bigmet.Bigmet wrote:That's crucial advice and there's a further 'traps' to be aware of in this matter. I think Bachmann have been the most recent offender with their E4 0-6-2T, putting the pick up wipers so low on the wheelbacks that they can foul on check rails, and also thereby track infills. Sometimes there is nothing for it but changing coarse wheelsets for finer types, or modifying a poorly executed feature on a model.SRman wrote:... Always check flangeway clearances with the coarsest wheel sets you possess ...
Nice looking layout building there...
Speaking of poorly executed features on models, every single one of my Lima/Hornby class 73s had to have their grossly overscale and out of line sand pipes cut off flush with the bottom of the bogie side frames, otherwise they scraped on my third rail installations.
I agree about changing wheels where possible - I have swapped a good many coarse and/or plastic wheel sets for better, more modern metal sets.
-
Bufferstop
- Posts: 13833
- Joined: Thu Mar 11, 2010 12:06 pm
- Location: Bottom end of N. Warks line
Re: Pulling my hair out, what's left of it.
If you want realistic looking flangeways getting shot of the old Triang thick flanged wheels is an essential step. Otherwise you have to leave trenches alongside the rails. Very few people realise that those wheels were intended to slide apart on the axle to go through the flangeways on the Triang points. For it to work there had to be some endfloat in the axle so that the fixed half could move and the other half free to slide on the axle.
Growing old, can't avoid it. Growing up, forget it!
My Layout, My Workbench Blog and My Opinions
My Layout, My Workbench Blog and My Opinions
Re: Pulling my hair out, what's left of it.
For what it's worth, I did my level crossing on a curve using card. I'm not a complete perfectionist though - my layout is for my enjoyment, not really for anyone else's!
I cut up a bit of spare card to the right shape for the insert and both sides, and stuck them down with PVA. I smoothed out the transition between the card and the rest of the road using some strips of newspaper, carefully choosing pieces that had been printed black, seeing as I knew that would be the colour of my road. Once it was dry (and fully tested to make sure nothing was snagging on it) I painted it black along with the rest of the road bed. Finally, some white lines (with a fine-nibbed Posca white marker) added some detail, along with some Peco gates.
As for what is 'realistic', that depends entirely on what you're modelling and what you choose for your prototype. I found a few nice crossings on Google Maps and modelled mine loosely on those. https://www.google.co.uk/maps/@51.18171 ... 312!8i6656
Frontington & Backwoods Railway: https://www.matthewdawkins.co.uk/catego ... way-build/
LocoSound - sound effects for DC model railways: https://mafu-d.github.io/loco-sound
LocoSound - sound effects for DC model railways: https://mafu-d.github.io/loco-sound
Re: Pulling my hair out, what's left of it.
Thank you, some very nice work here. Useful information regarding the characteristics of Triang flanges, as well. I avoid Bachmann stuff like the plague, for I have found it does not work reliably. I will try again using some the methods mentioned above. My favorite crossing is the cobble stoned one pictured by SRman, above. Getting the template right is probably the most important thing, the smooth cuts of the correct radius looks simple, but defies me, but I shall have at it again.
Nessie rocks!
Re: Pulling my hair out, what's left of it.
Whilst agreeing with the other suggestions and admiring the photographs that go with them, I am always reminded that not all level crossings were 'level', (especially in the North East of England). Many were made of wood, (be it beams or sleepers I cannot remember) and over time were of various thickness. Many crossings had to be driven over slowly as they were 'up hill and down dale' and were nicknamed 'unlevel crossings'.
As an aside for any modellers modelling North East England railways in the 1950s, many roads had signs 'Road Liable To Subsidence'.
Glencairn
As an aside for any modellers modelling North East England railways in the 1950s, many roads had signs 'Road Liable To Subsidence'.
Glencairn
To the world you are someone. To someone you are their world.
I Cannot Afford the Luxury of a Negative Thought
I Cannot Afford the Luxury of a Negative Thought

Re: Pulling my hair out, what's left of it.
What's that sticky stuff you lay out from a roll that becomes ballast or a level crossing or anything else that you want to make with it called? I assume it is sticky? It is sticky in my mind! Would that do the trick?
Modelling On A Budget ---》 https://www.newrailwaymodellers.co.uk/F ... 22&t=52212
-
Ironduke

- Posts: 1234
- Joined: Mon Sep 26, 2005 12:04 am
- Location: Ballarat Victoria Australia
- Contact:
Re: Pulling my hair out, what's left of it.
Do you mean AMI instant roadbed? They don't make it any more, unfortunatelyMountain wrote:What's that sticky stuff you lay out from a roll that becomes ballast or a level crossing or anything else that you want to make with it called? I assume it is sticky? It is sticky in my mind! Would that do the trick?
Regards
Rob
Rob