Mainly 3D Printed LNER Locomotives in N gauge

Have any questions or tips and advice on how to build those bits that don't come ready made.
Atso
Posts: 264
Joined: Thu Aug 24, 2006 2:07 pm

Re: Mainly 3D Printed LNER Locomotives in N gauge

Post by Atso »

I feel that I've done very well in my 2mm/N gauge haul for the day.

Image

I am very grateful to my long suffering, very understanding and tolerant girlfriend for these wonderful gifts! :D
Steve
User avatar
Mountain
Posts: 5883
Joined: Mon Oct 24, 2016 3:43 pm
Location: UK.

Re: Mainly 3D Printed LNER Locomotives in N gauge

Post by Mountain »

Wow. That should keep you busy for a while.
Atso
Posts: 264
Joined: Thu Aug 24, 2006 2:07 pm

Re: Mainly 3D Printed LNER Locomotives in N gauge

Post by Atso »

Yes, they should - especially as I'll be struggling to find time to build them for a few weeks yet! :lol:

I got a second set of wheels from my parents as well. These were assembled, quartered, coupling rods added and the second J3 was assembled this morning before heading over to the future inlaws for the rest of the day.

Image
Steve
Atso
Posts: 264
Joined: Thu Aug 24, 2006 2:07 pm

Re: Mainly 3D Printed LNER Locomotives in N gauge

Post by Atso »

Any colour as long as it is black...

Image
Steve
Atso
Posts: 264
Joined: Thu Aug 24, 2006 2:07 pm

Re: Mainly 3D Printed LNER Locomotives in N gauge

Post by Atso »

Ok, about as far from the J3 in terms of the time of building as I can get.

Image

The test build of my revised L1 print. I've still got some snagging work to do on this one and a couple of minor things to redesign internally to make life easier but it is slowly coming along. This one already has a new home to go to (a layout being built based on Whitby) and I hope to have this, and some of the variations, available for general sale later in 2019.
Steve
Atso
Posts: 264
Joined: Thu Aug 24, 2006 2:07 pm

Re: Mainly 3D Printed LNER Locomotives in N gauge

Post by Atso »

The last kit I built in 2018, completed around 11pm last night...

Image

Nothing special, just one half of the NGS LMS box van double pack (kit 18), build straight out of the packet.

Happy 2019 everyone! Here is to another year of seeing some great modelling from everyone! :D :D :D
Steve
User avatar
Mountain
Posts: 5883
Joined: Mon Oct 24, 2016 3:43 pm
Location: UK.

Re: Mainly 3D Printed LNER Locomotives in N gauge

Post by Mountain »

Happy new year to you too Atso. The van looks good. I like the black locos too.
Atso
Posts: 264
Joined: Thu Aug 24, 2006 2:07 pm

Re: Mainly 3D Printed LNER Locomotives in N gauge

Post by Atso »

WOW, I can't believe that I've neglected this thread since the beginning of the year!

Well first off, I finished hand lining the GWR County and sent it to its new owner.

Image

Image

I've made a start on laying the track for Hadley Wood's fiddle yard.

Image

I've been building some more 2mm/N gauge etched kits, which still need painting.

Image

Image

Image

Image

Image

I've been working on a Prestwin kit I've been commissioned to build.

Image

And, I've made a start on another 3D printed locomotive.

Image

I'll try to remember to update the thread a bit more often. :oops:

Anyone know when the next competition will be?
Steve
User avatar
Mountain
Posts: 5883
Joined: Mon Oct 24, 2016 3:43 pm
Location: UK.

Re: Mainly 3D Printed LNER Locomotives in N gauge

Post by Mountain »

I like the trackwork. Impressive.
User avatar
TimberSurf
Posts: 2537
Joined: Wed Jan 08, 2014 5:47 pm
Location: N.Wales
Contact:

Re: Mainly 3D Printed LNER Locomotives in N gauge

Post by TimberSurf »

I like every picture!
The brass wagons look awesome, I cant believe your patience for such small brasswork! :o
Image
Lumsdonia <--- Hit link to go to my website for full story and wiring advice!
Atso
Posts: 264
Joined: Thu Aug 24, 2006 2:07 pm

Re: Mainly 3D Printed LNER Locomotives in N gauge

Post by Atso »

Thanks guys. :D
TimberSurf wrote:I like every picture!
The brass wagons look awesome, I cant believe your patience for such small brasswork! :o
It depends on the wagon and how much detail has been incorporated into the etch.

The two outside frame fish vans above took around 90 minutes each to assemble the bodies. The 2mm Scale Association chassis took another 90 minues each so that's three hours, or a Sunday afternoon, to assemble. However, the Toad E brake van is a much more comprehensive kit and took around eight hours to assemble due to the number of separate parts; admittedly, I wasn't going flat out as, it is for me and I've not got much work on at the moment.

I'm really not a very patient person. However, I learnt a little while ago that being impatient usually requires a task to be done more than once. :oops:

The Prestwin has gobbled up ten hours so far, but part of this is due to it being an unfamiliar prototype and a very different thought process to the design (which is very good). Having worked everything out on this one, I expect the second one I've been asked to build to take less than half the time of the first.

Speaking of the Prestwin, I've made up the discharge(?) valves out of various etchings and wir,e and installed them onto the wagon.

Image

Image

I'm awaiting suitable buffers from the 2mm Association before I get on with the final bits on this build.
Steve
Atso
Posts: 264
Joined: Thu Aug 24, 2006 2:07 pm

Re: Mainly 3D Printed LNER Locomotives in N gauge

Post by Atso »

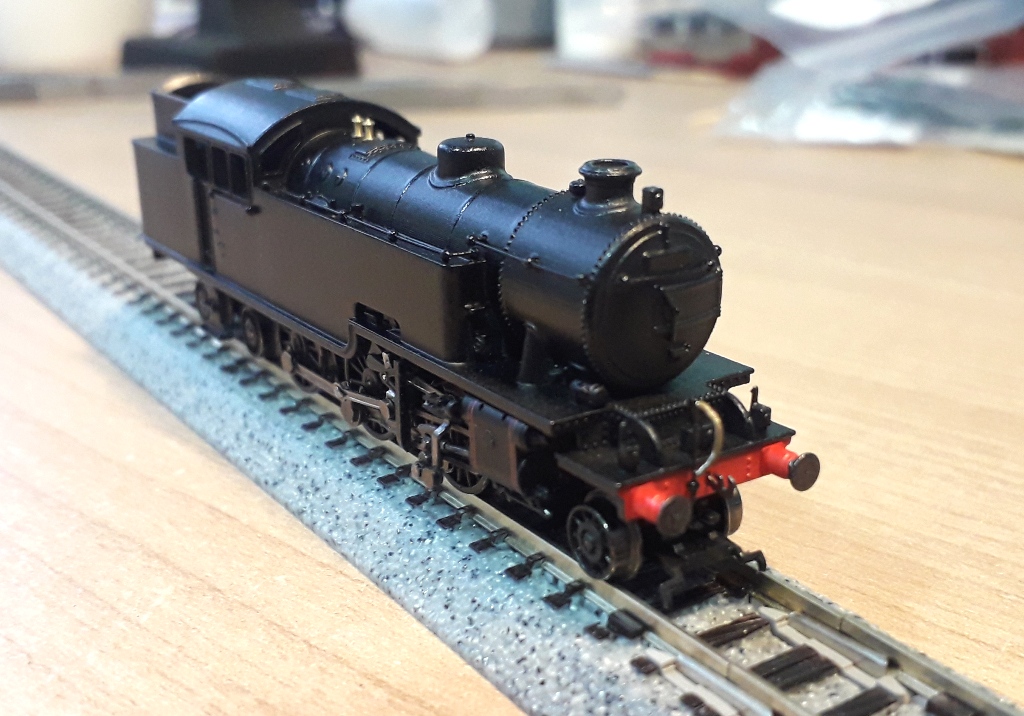
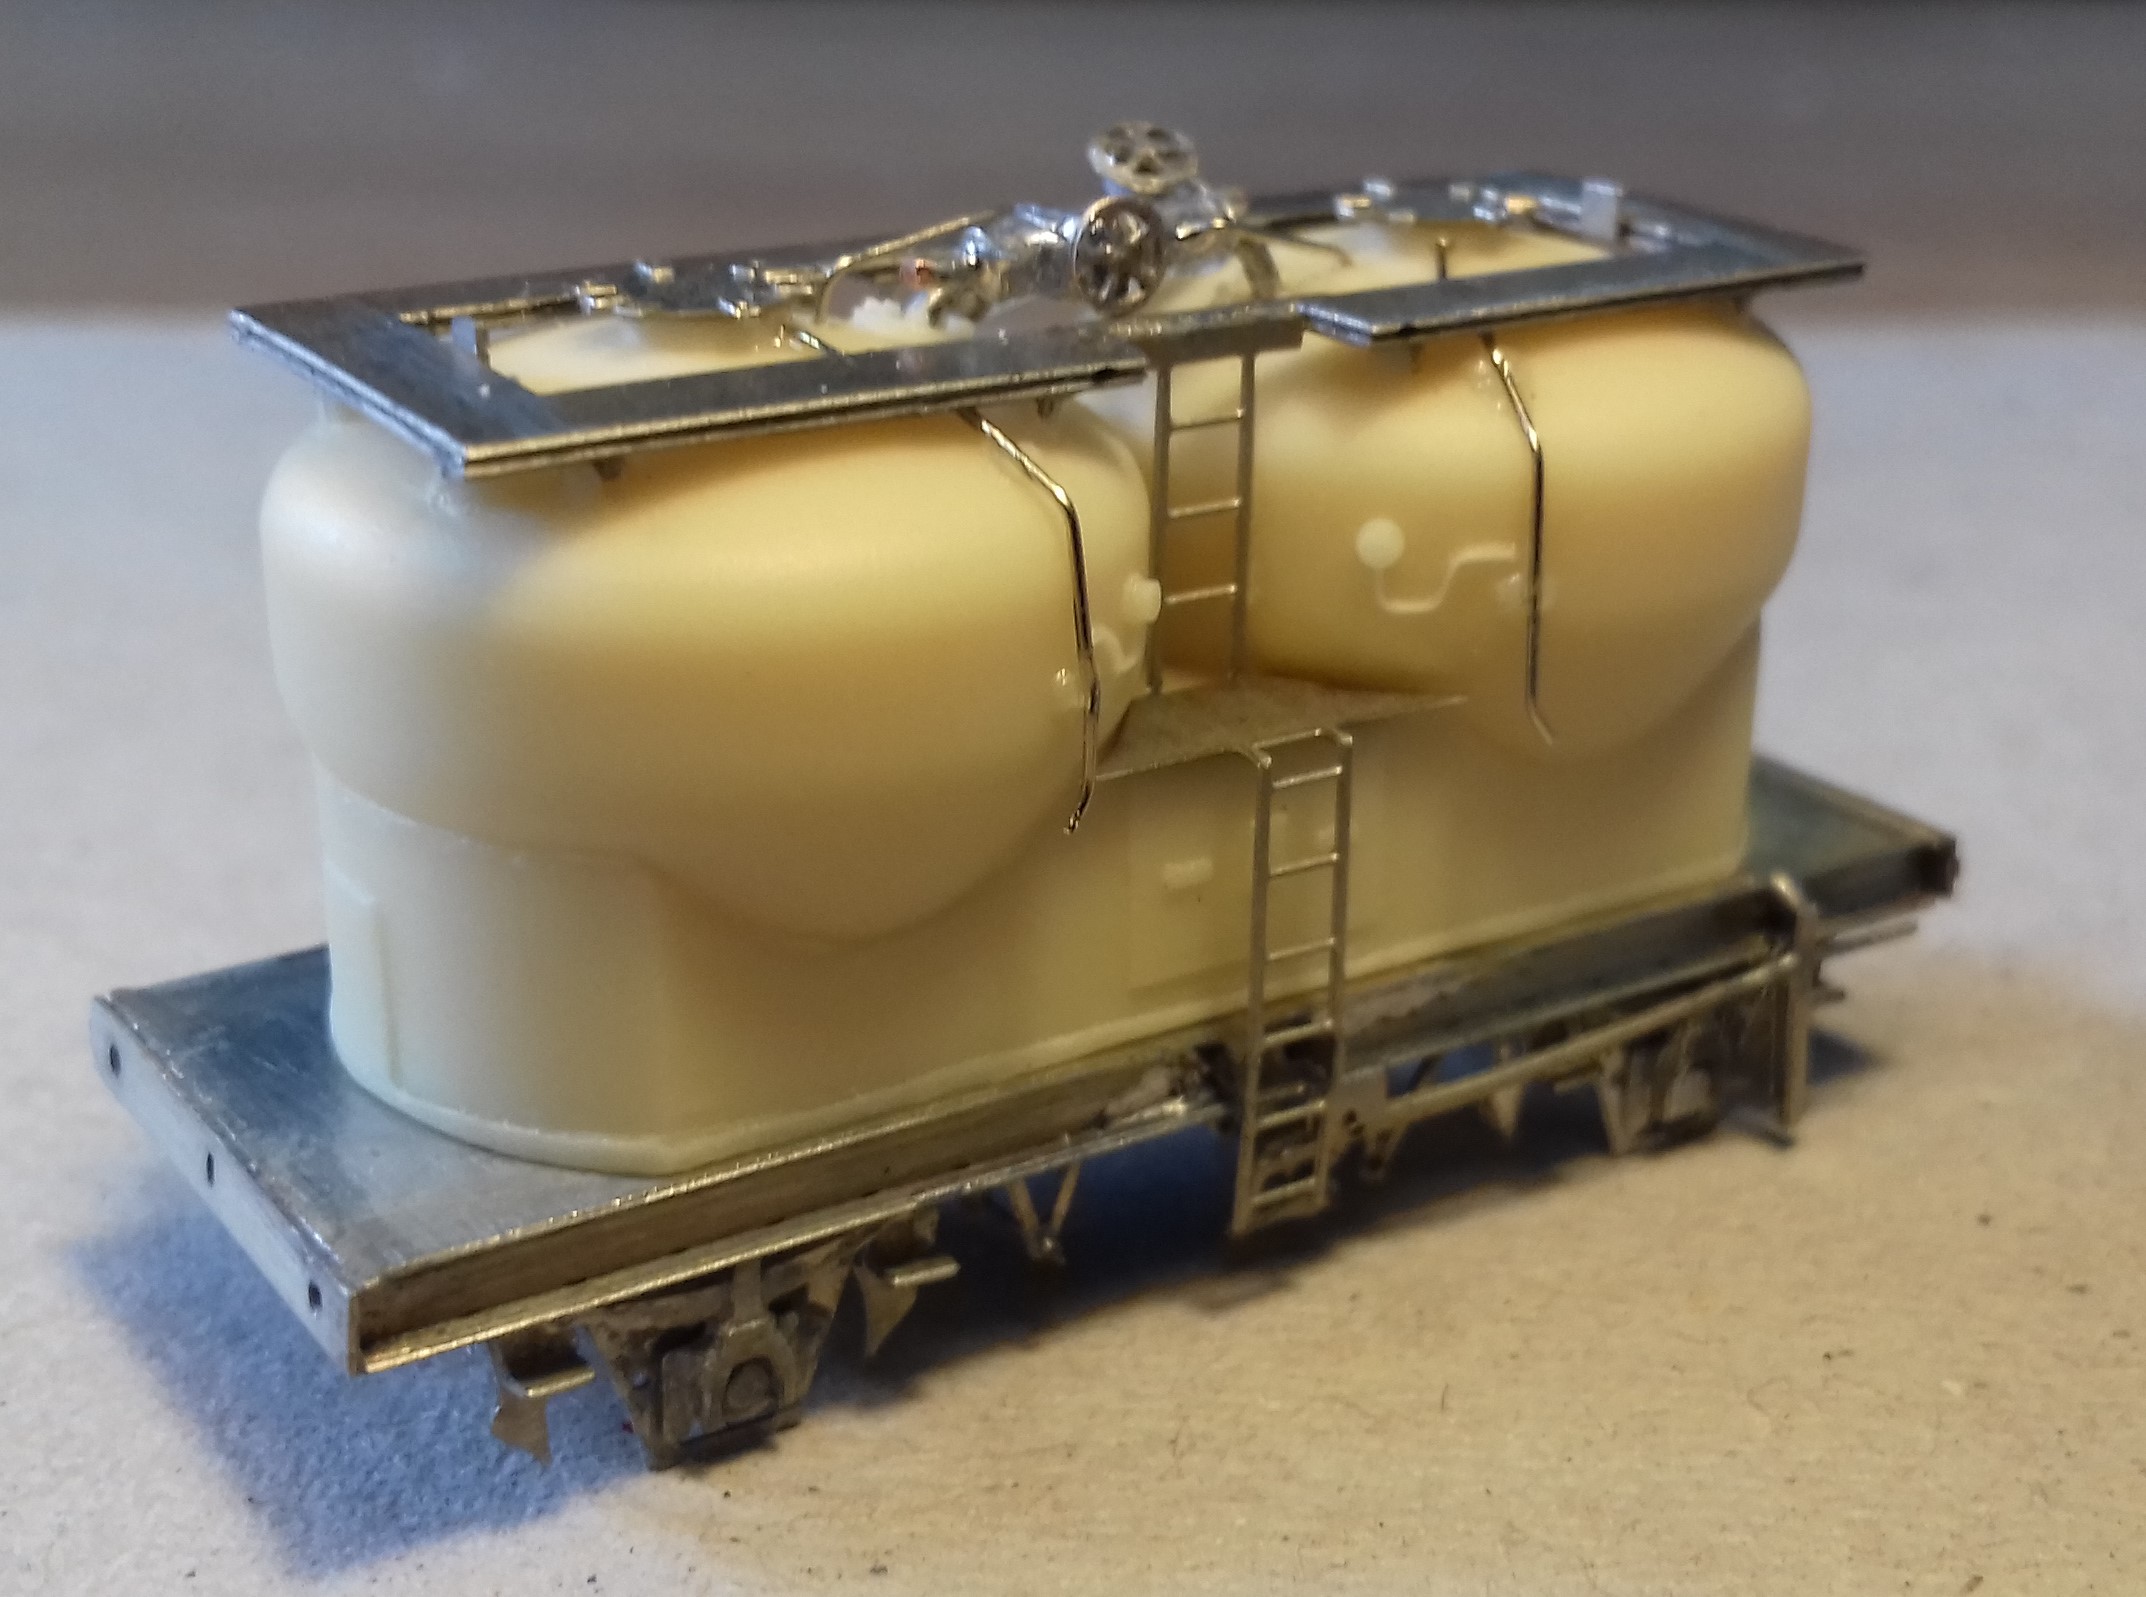
Well I got the Prestwin completed at the beginning of last week, despite being in and out of the doctors/hospital. I just need to build the second one so that they can progress to the painting stage!

Image

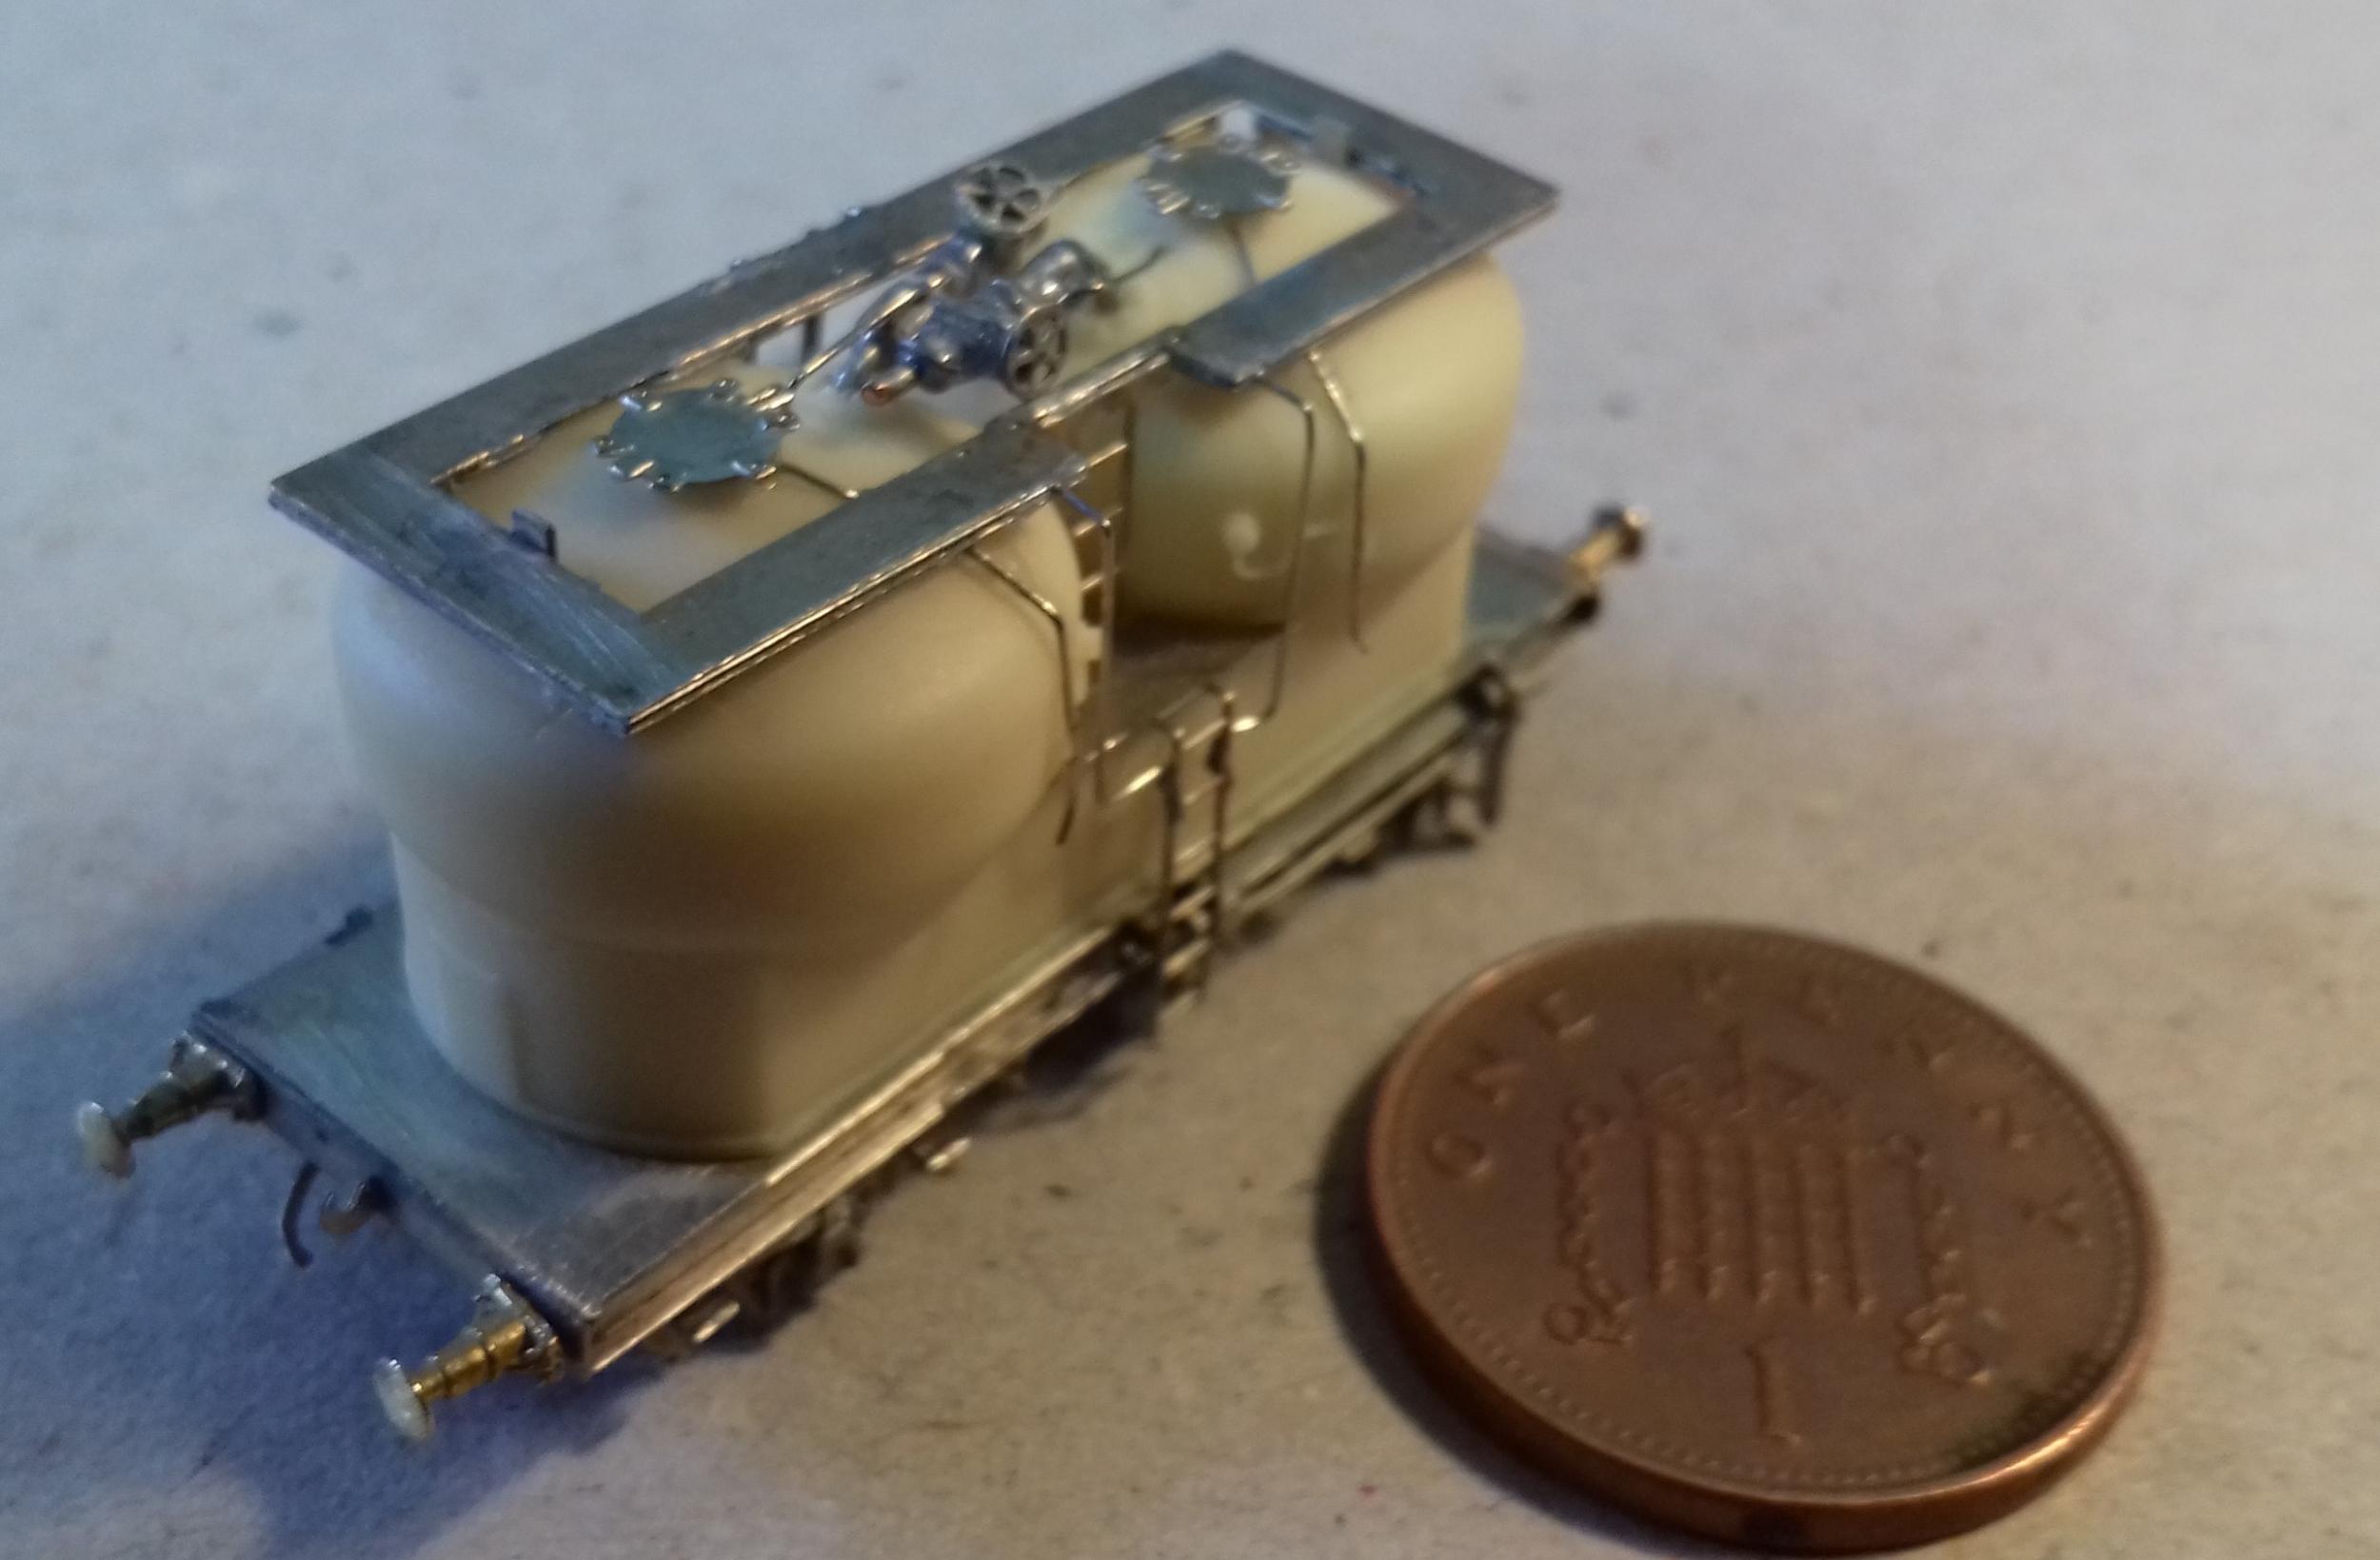
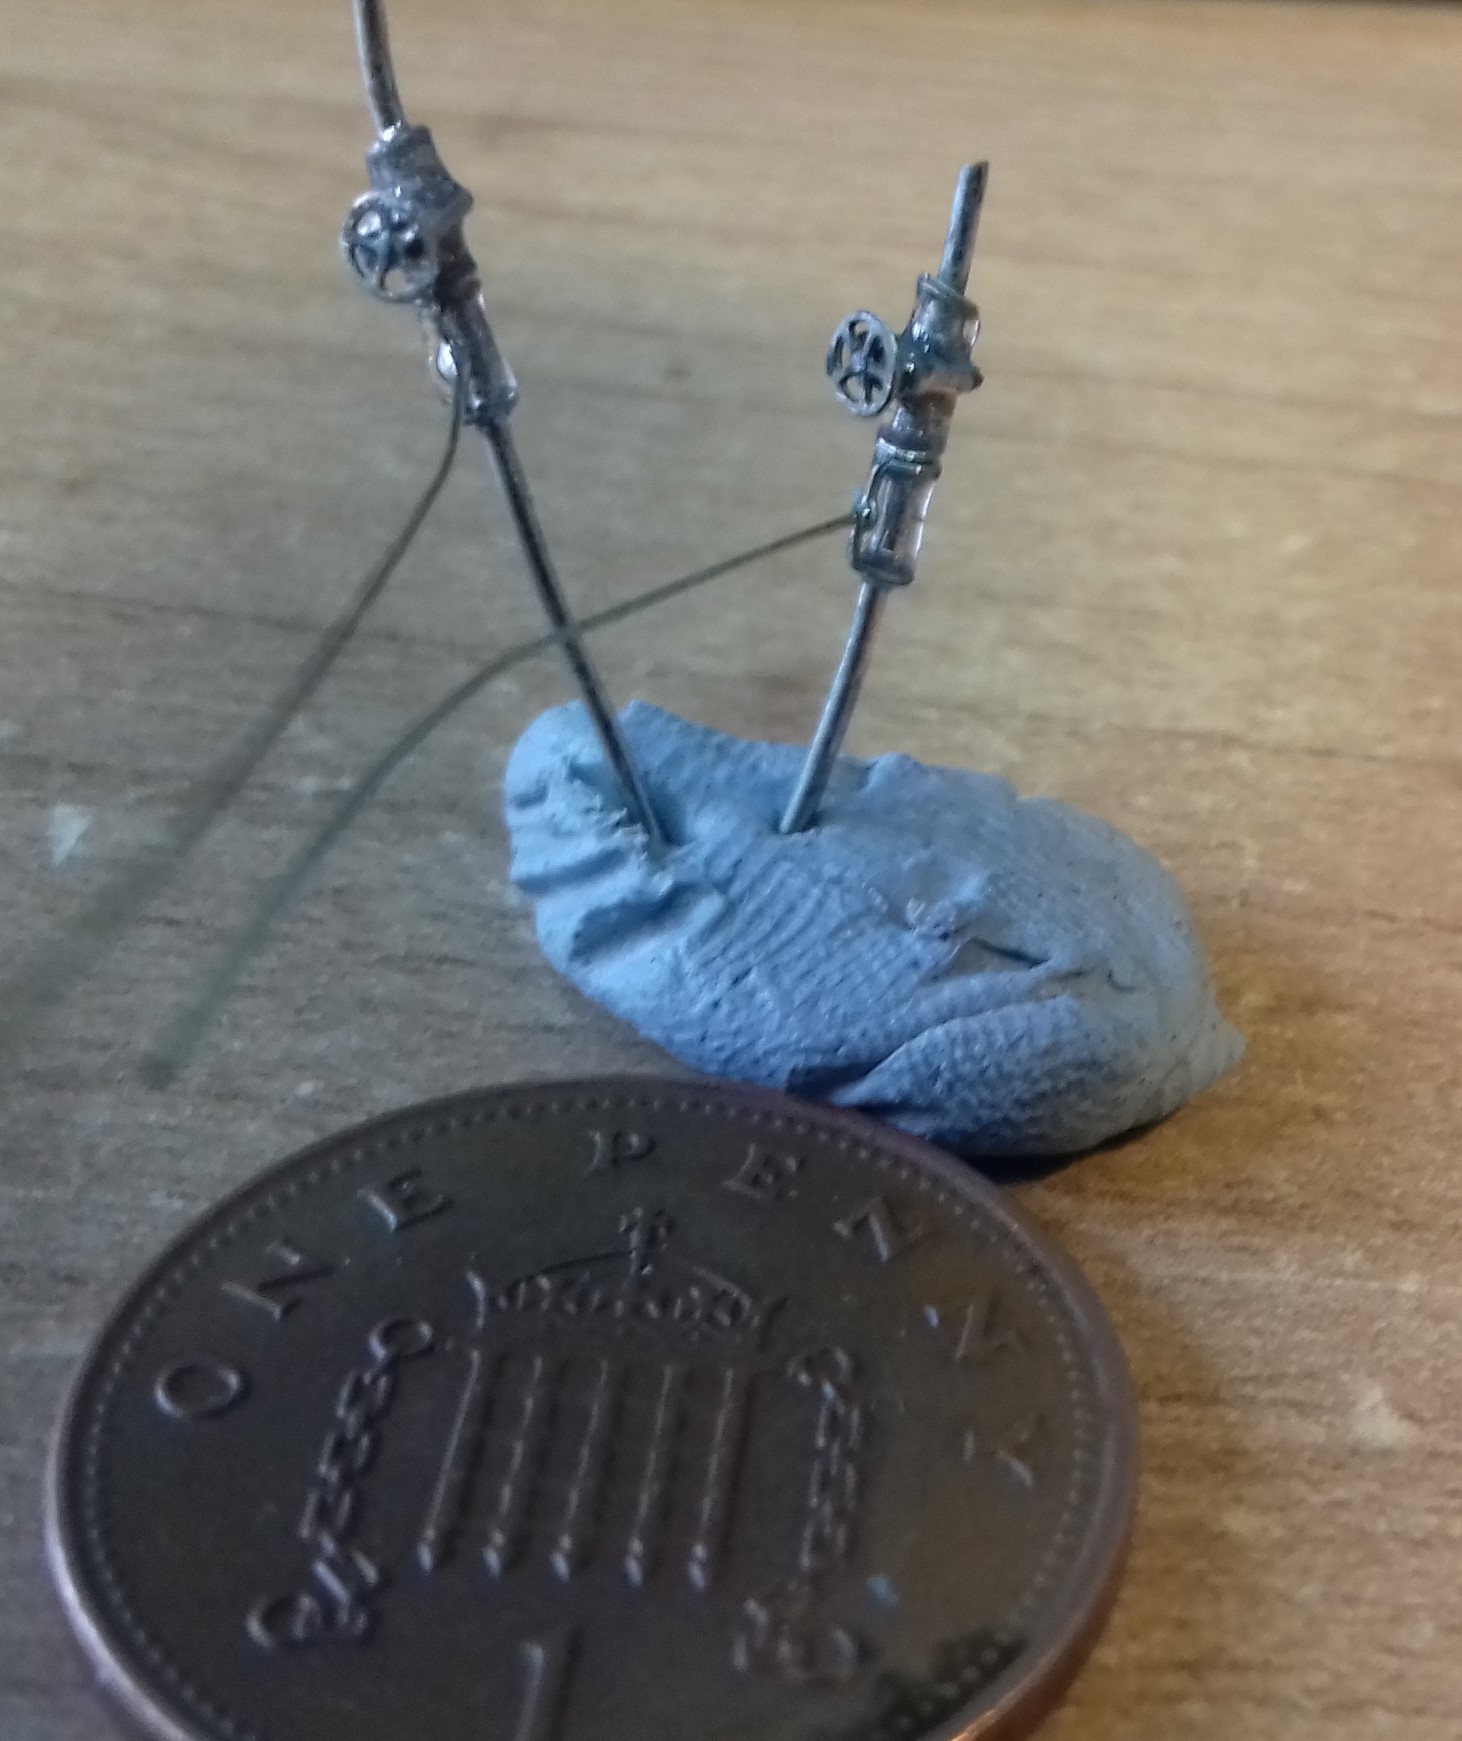
As the tanks are a (very nice) resin casting, I had to fit all the pipework to it using epoxy. This left me with time to knock together something a little simpler.

Image

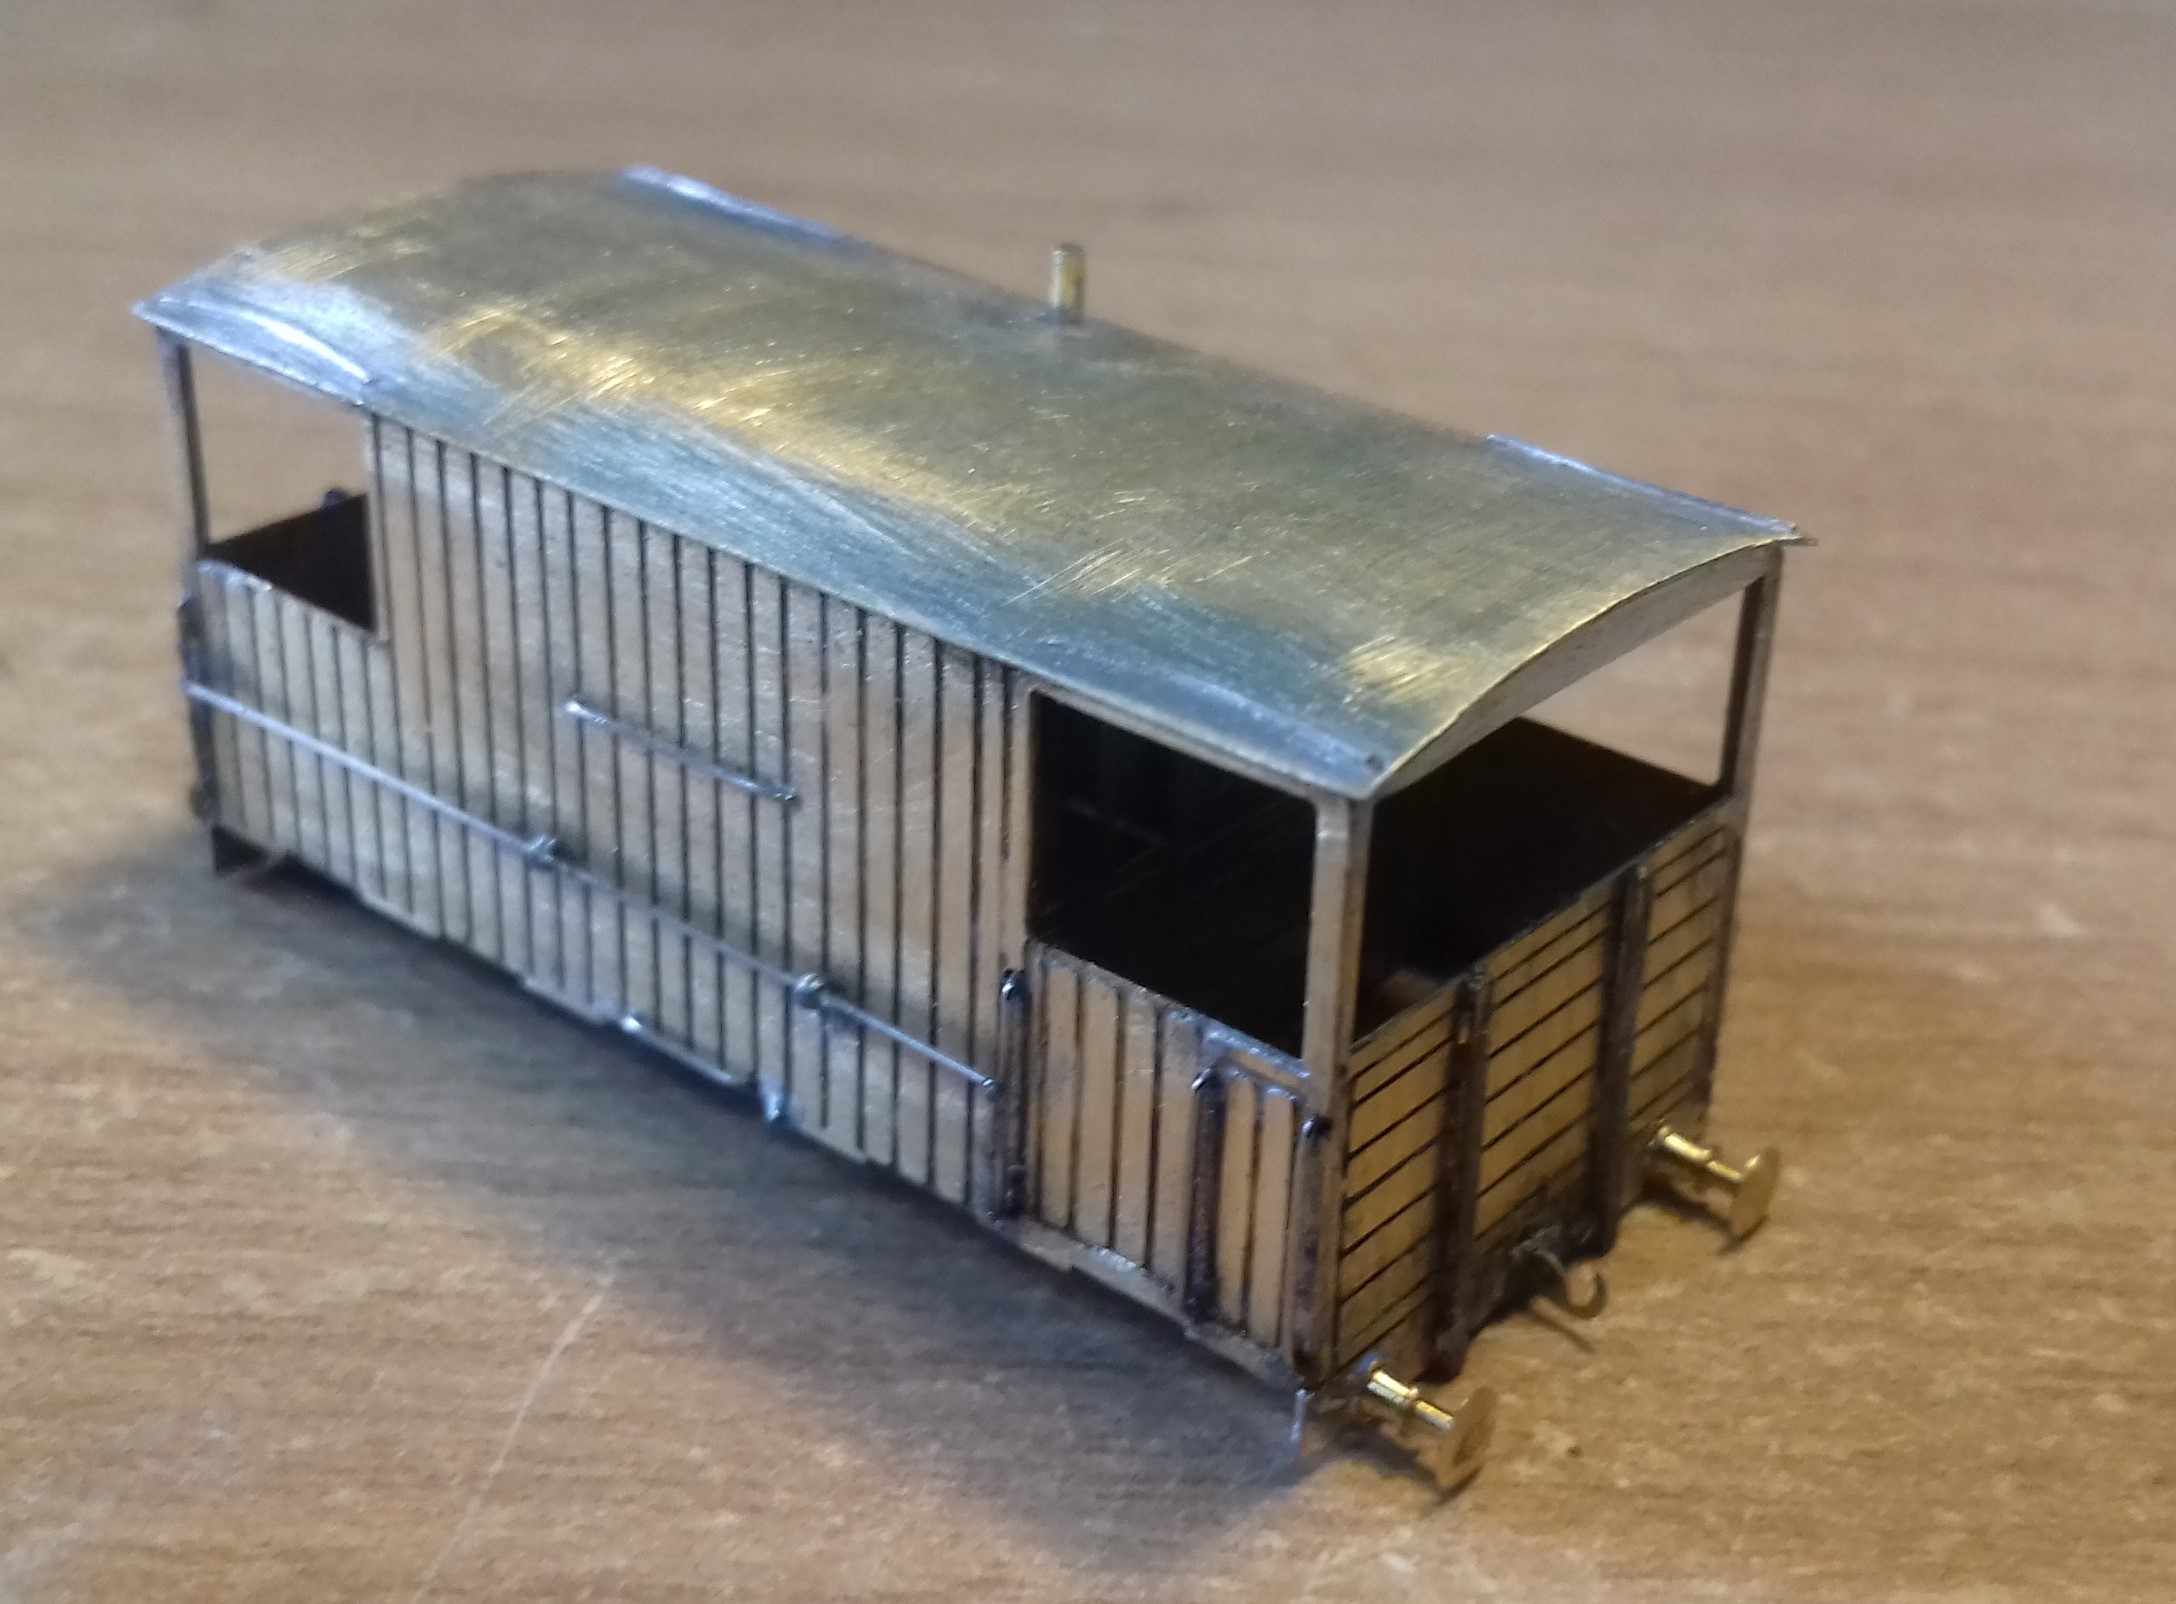
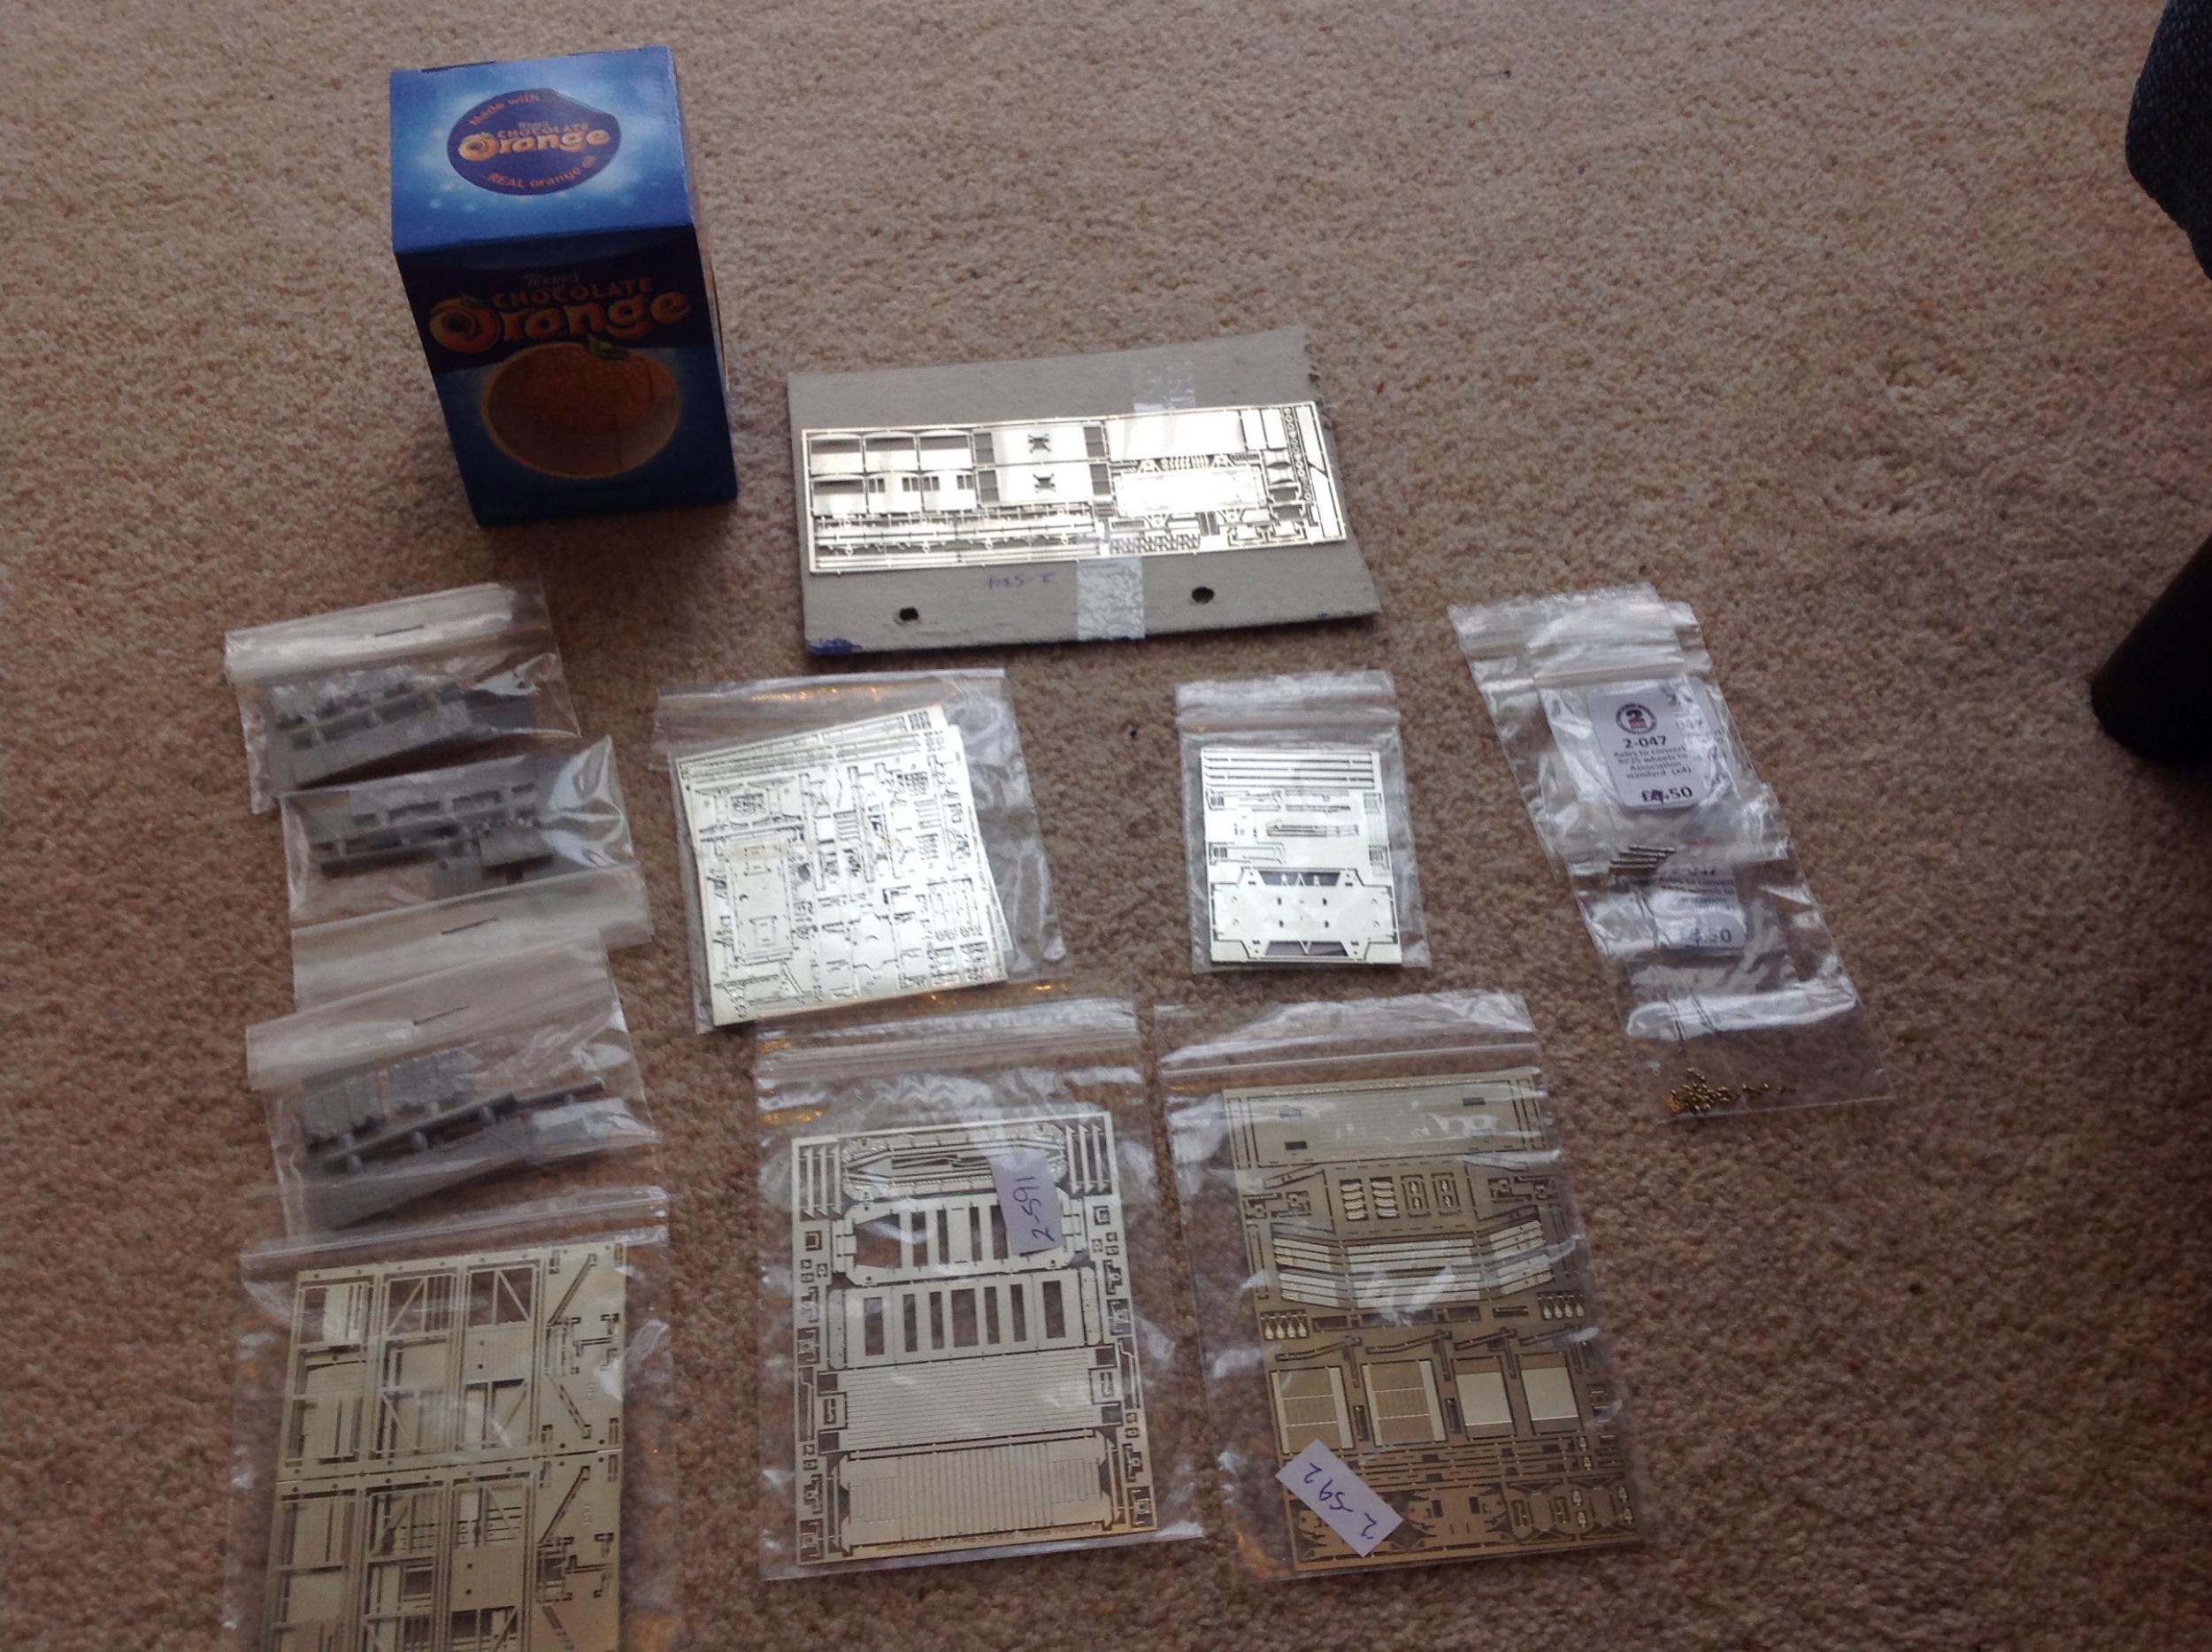
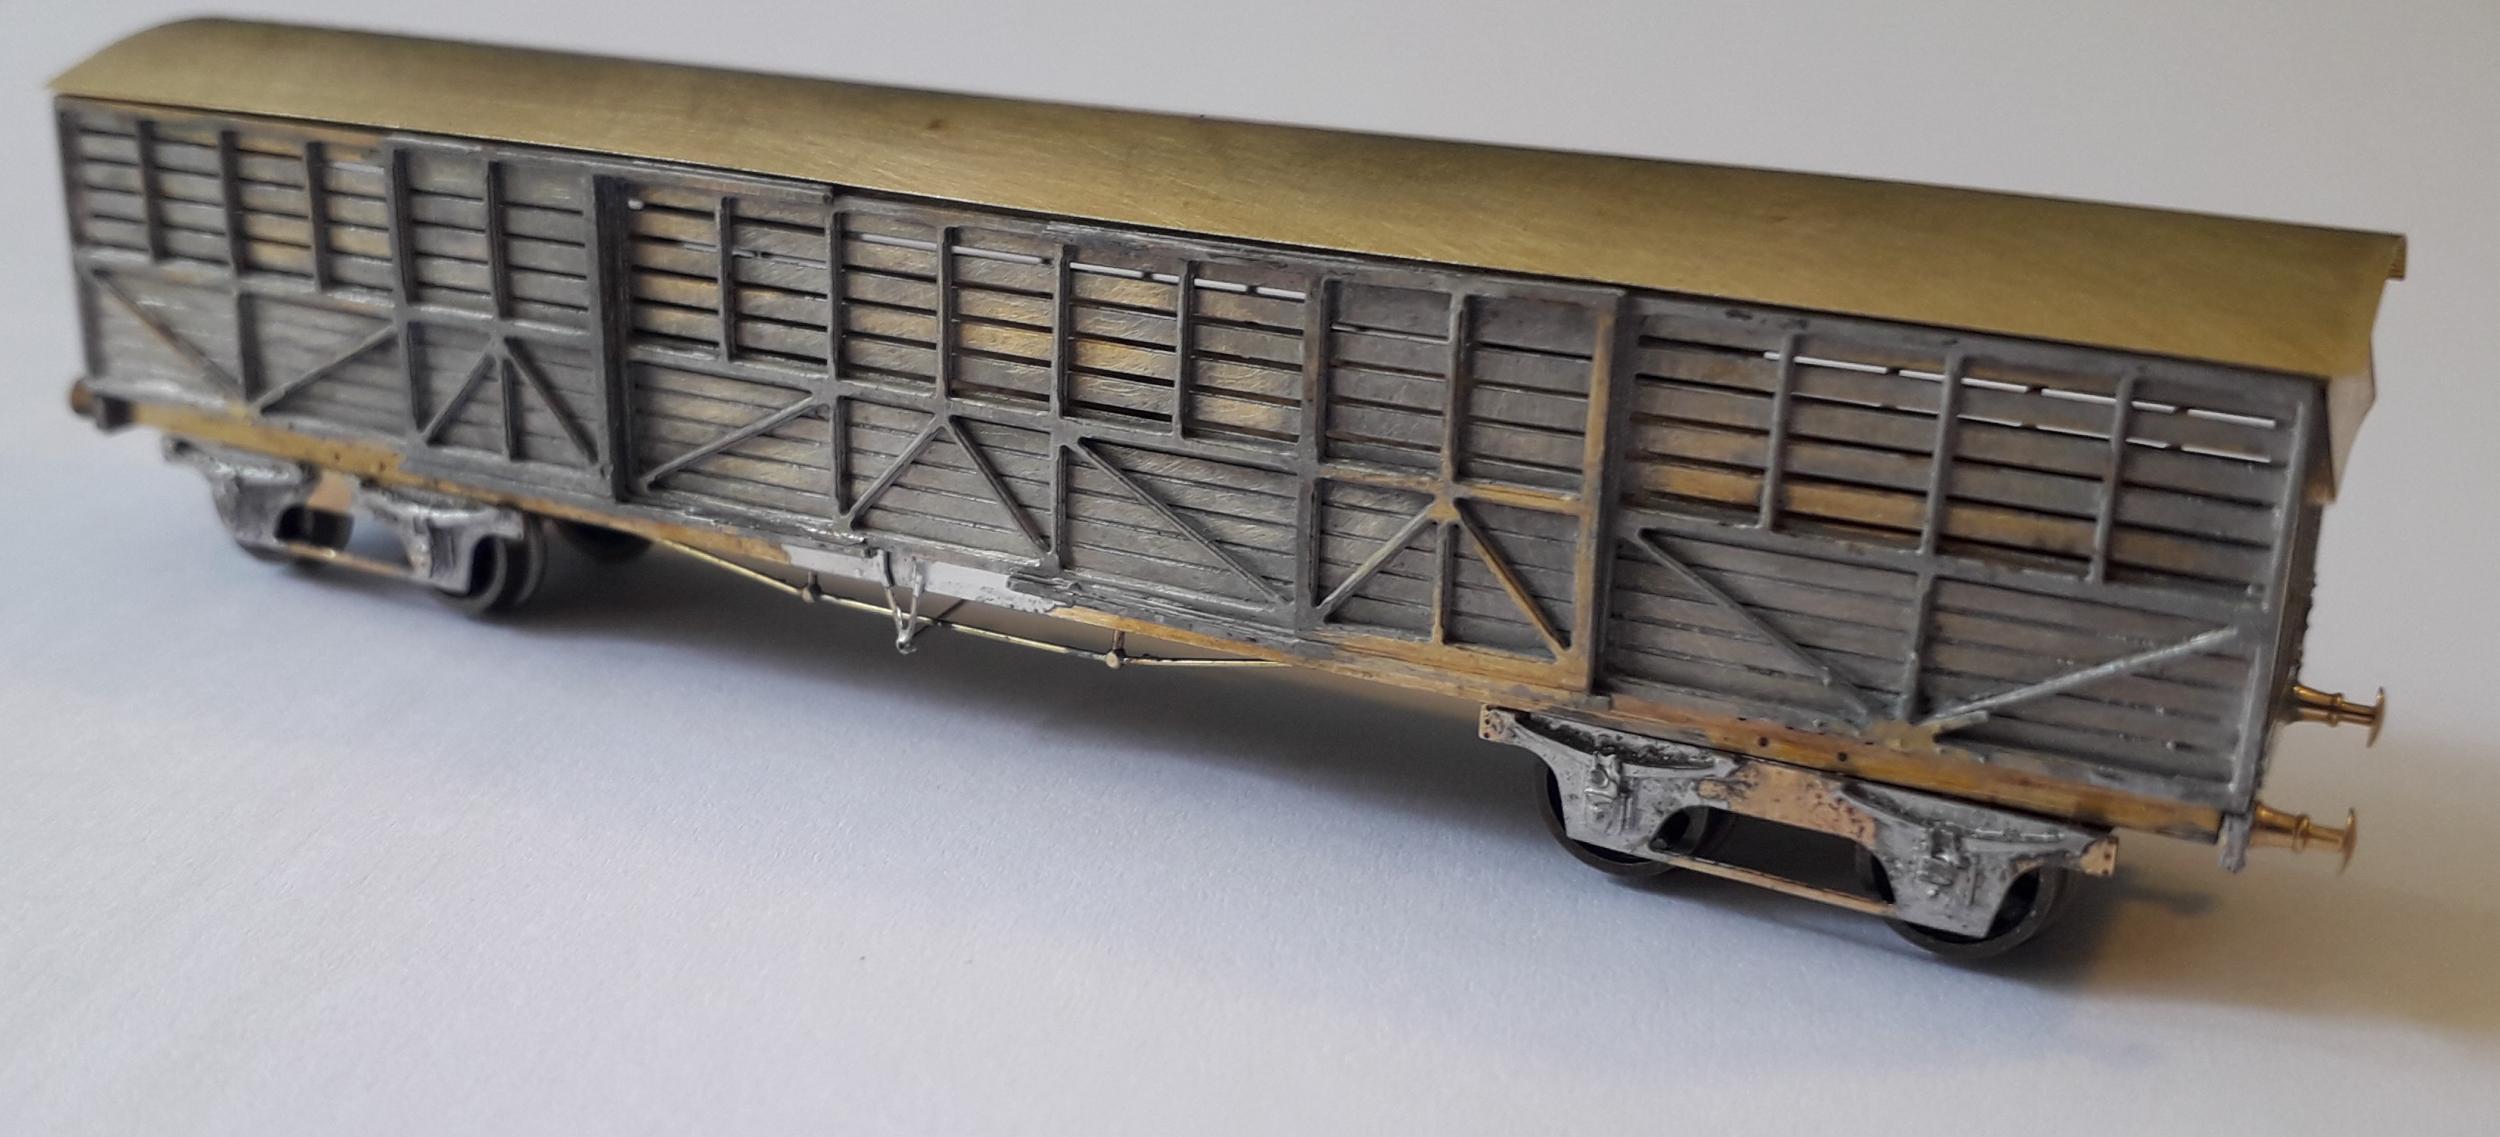
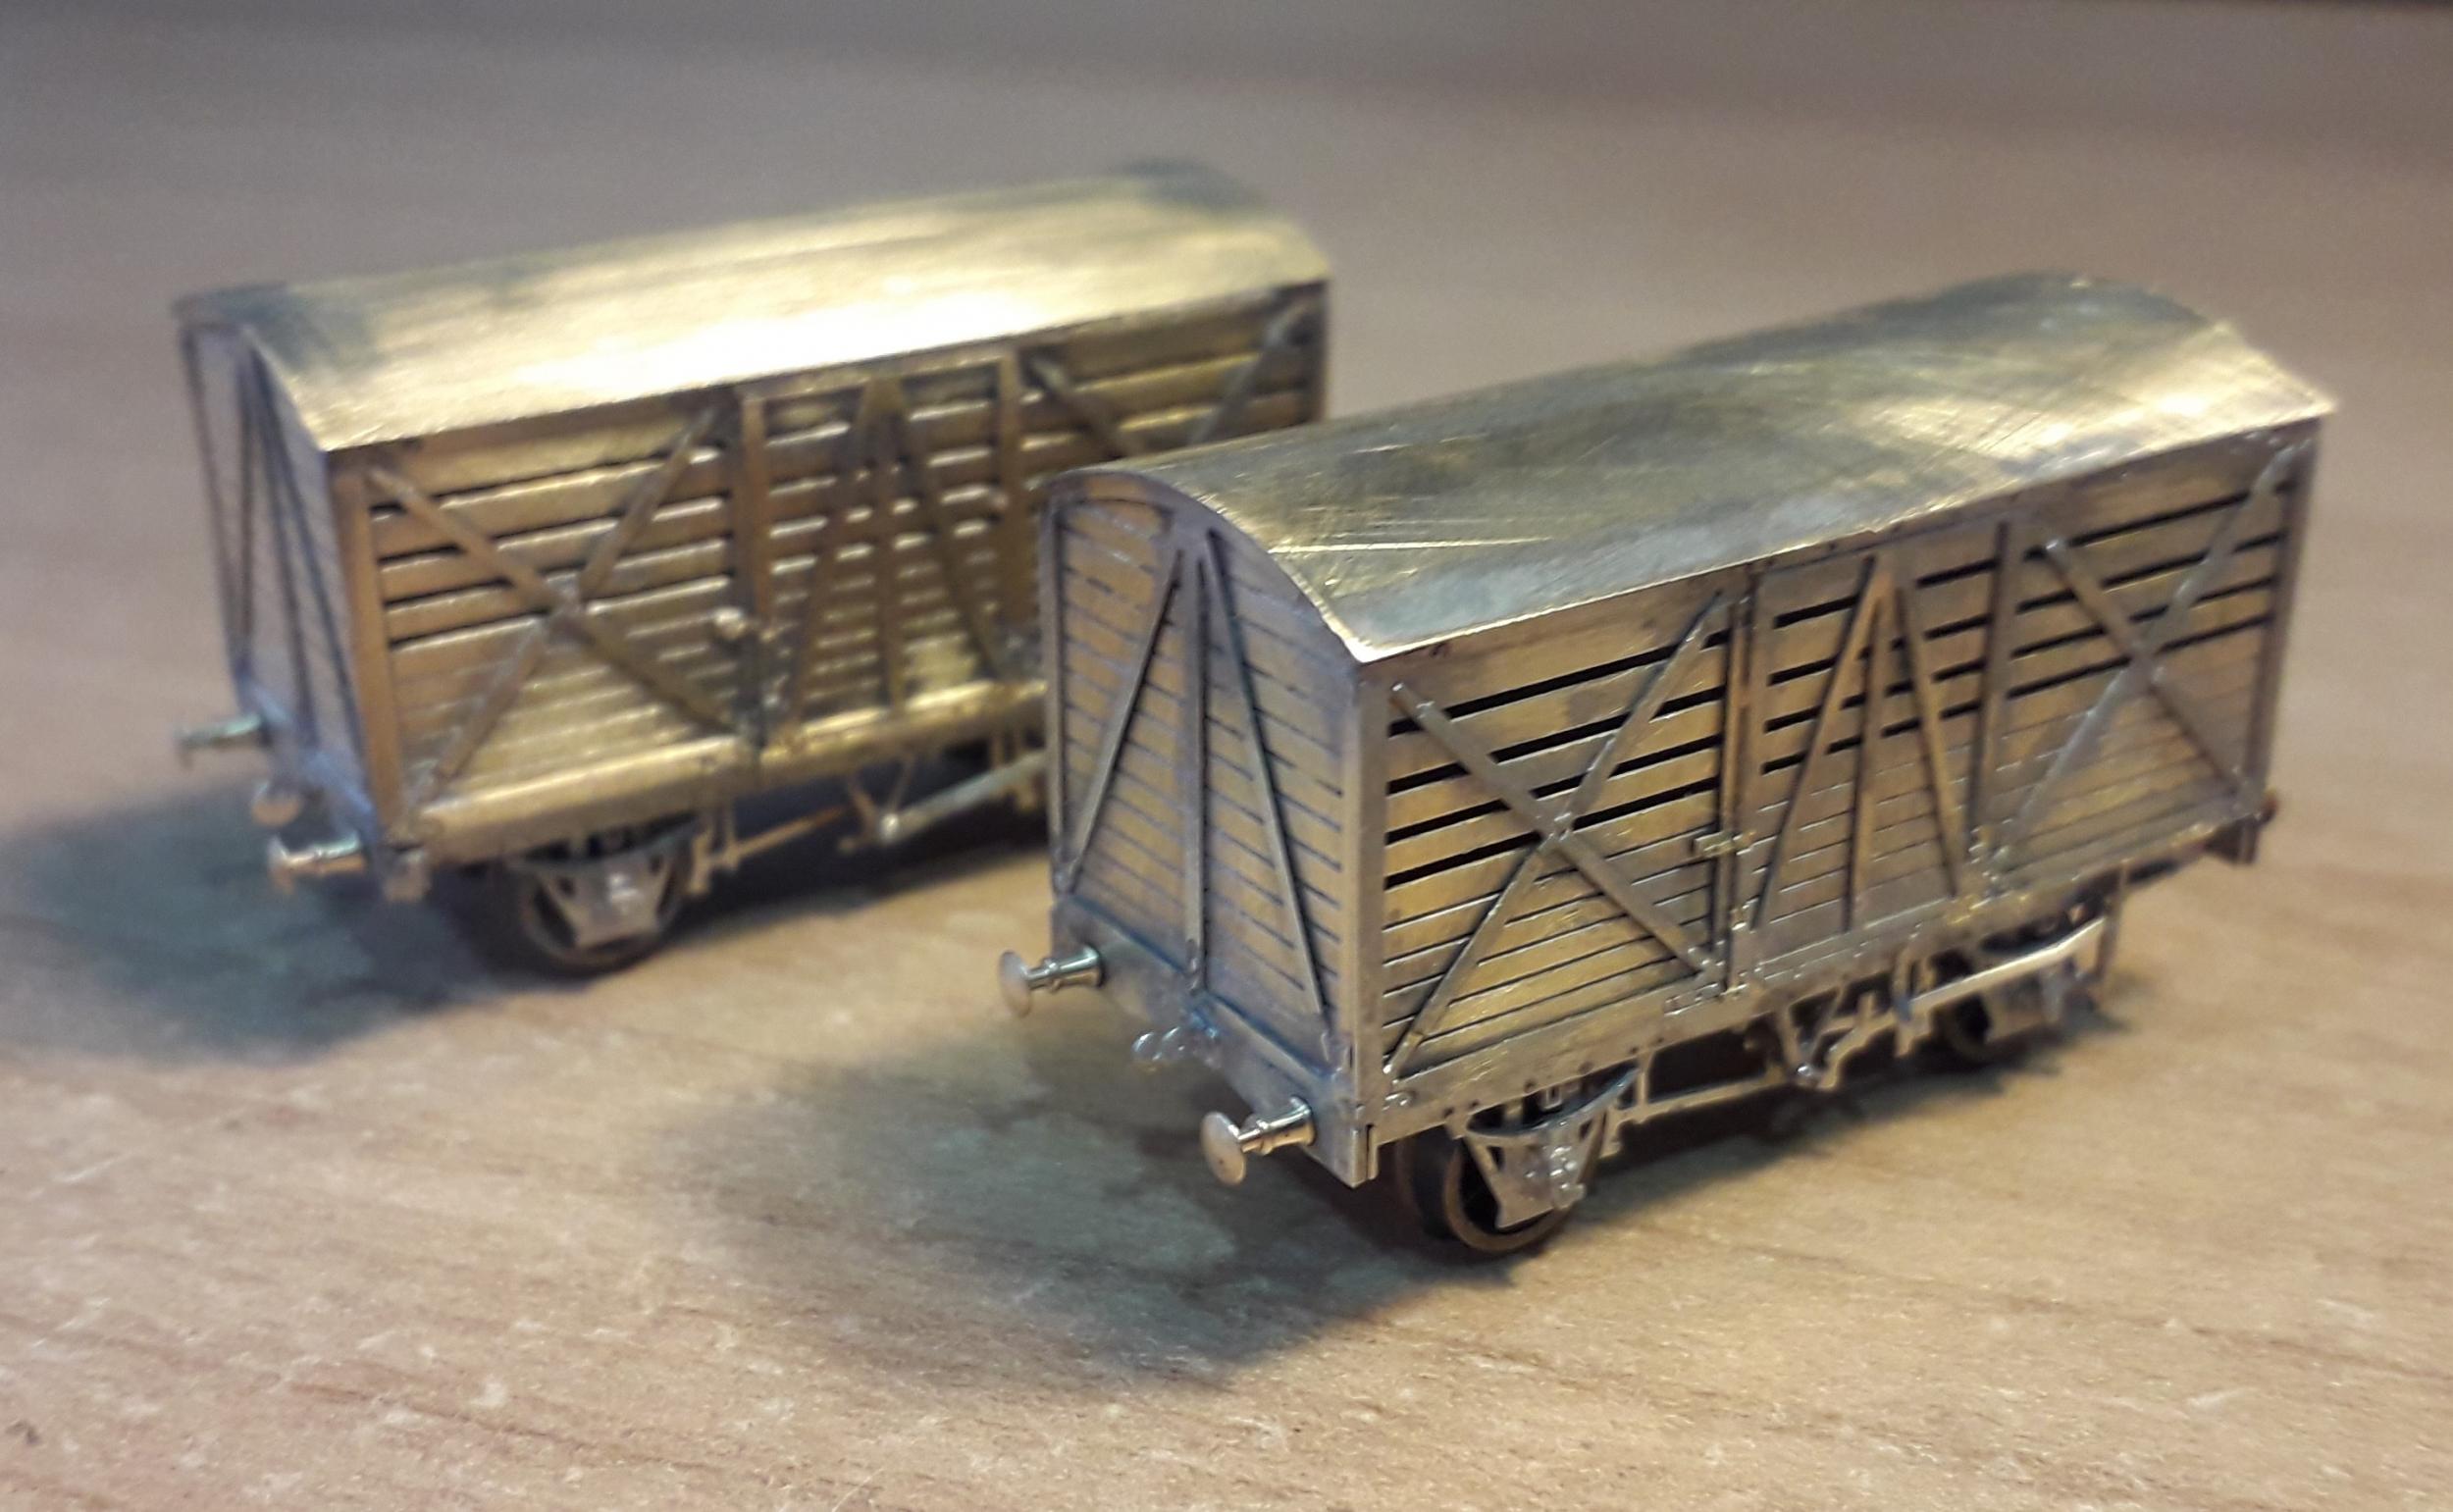
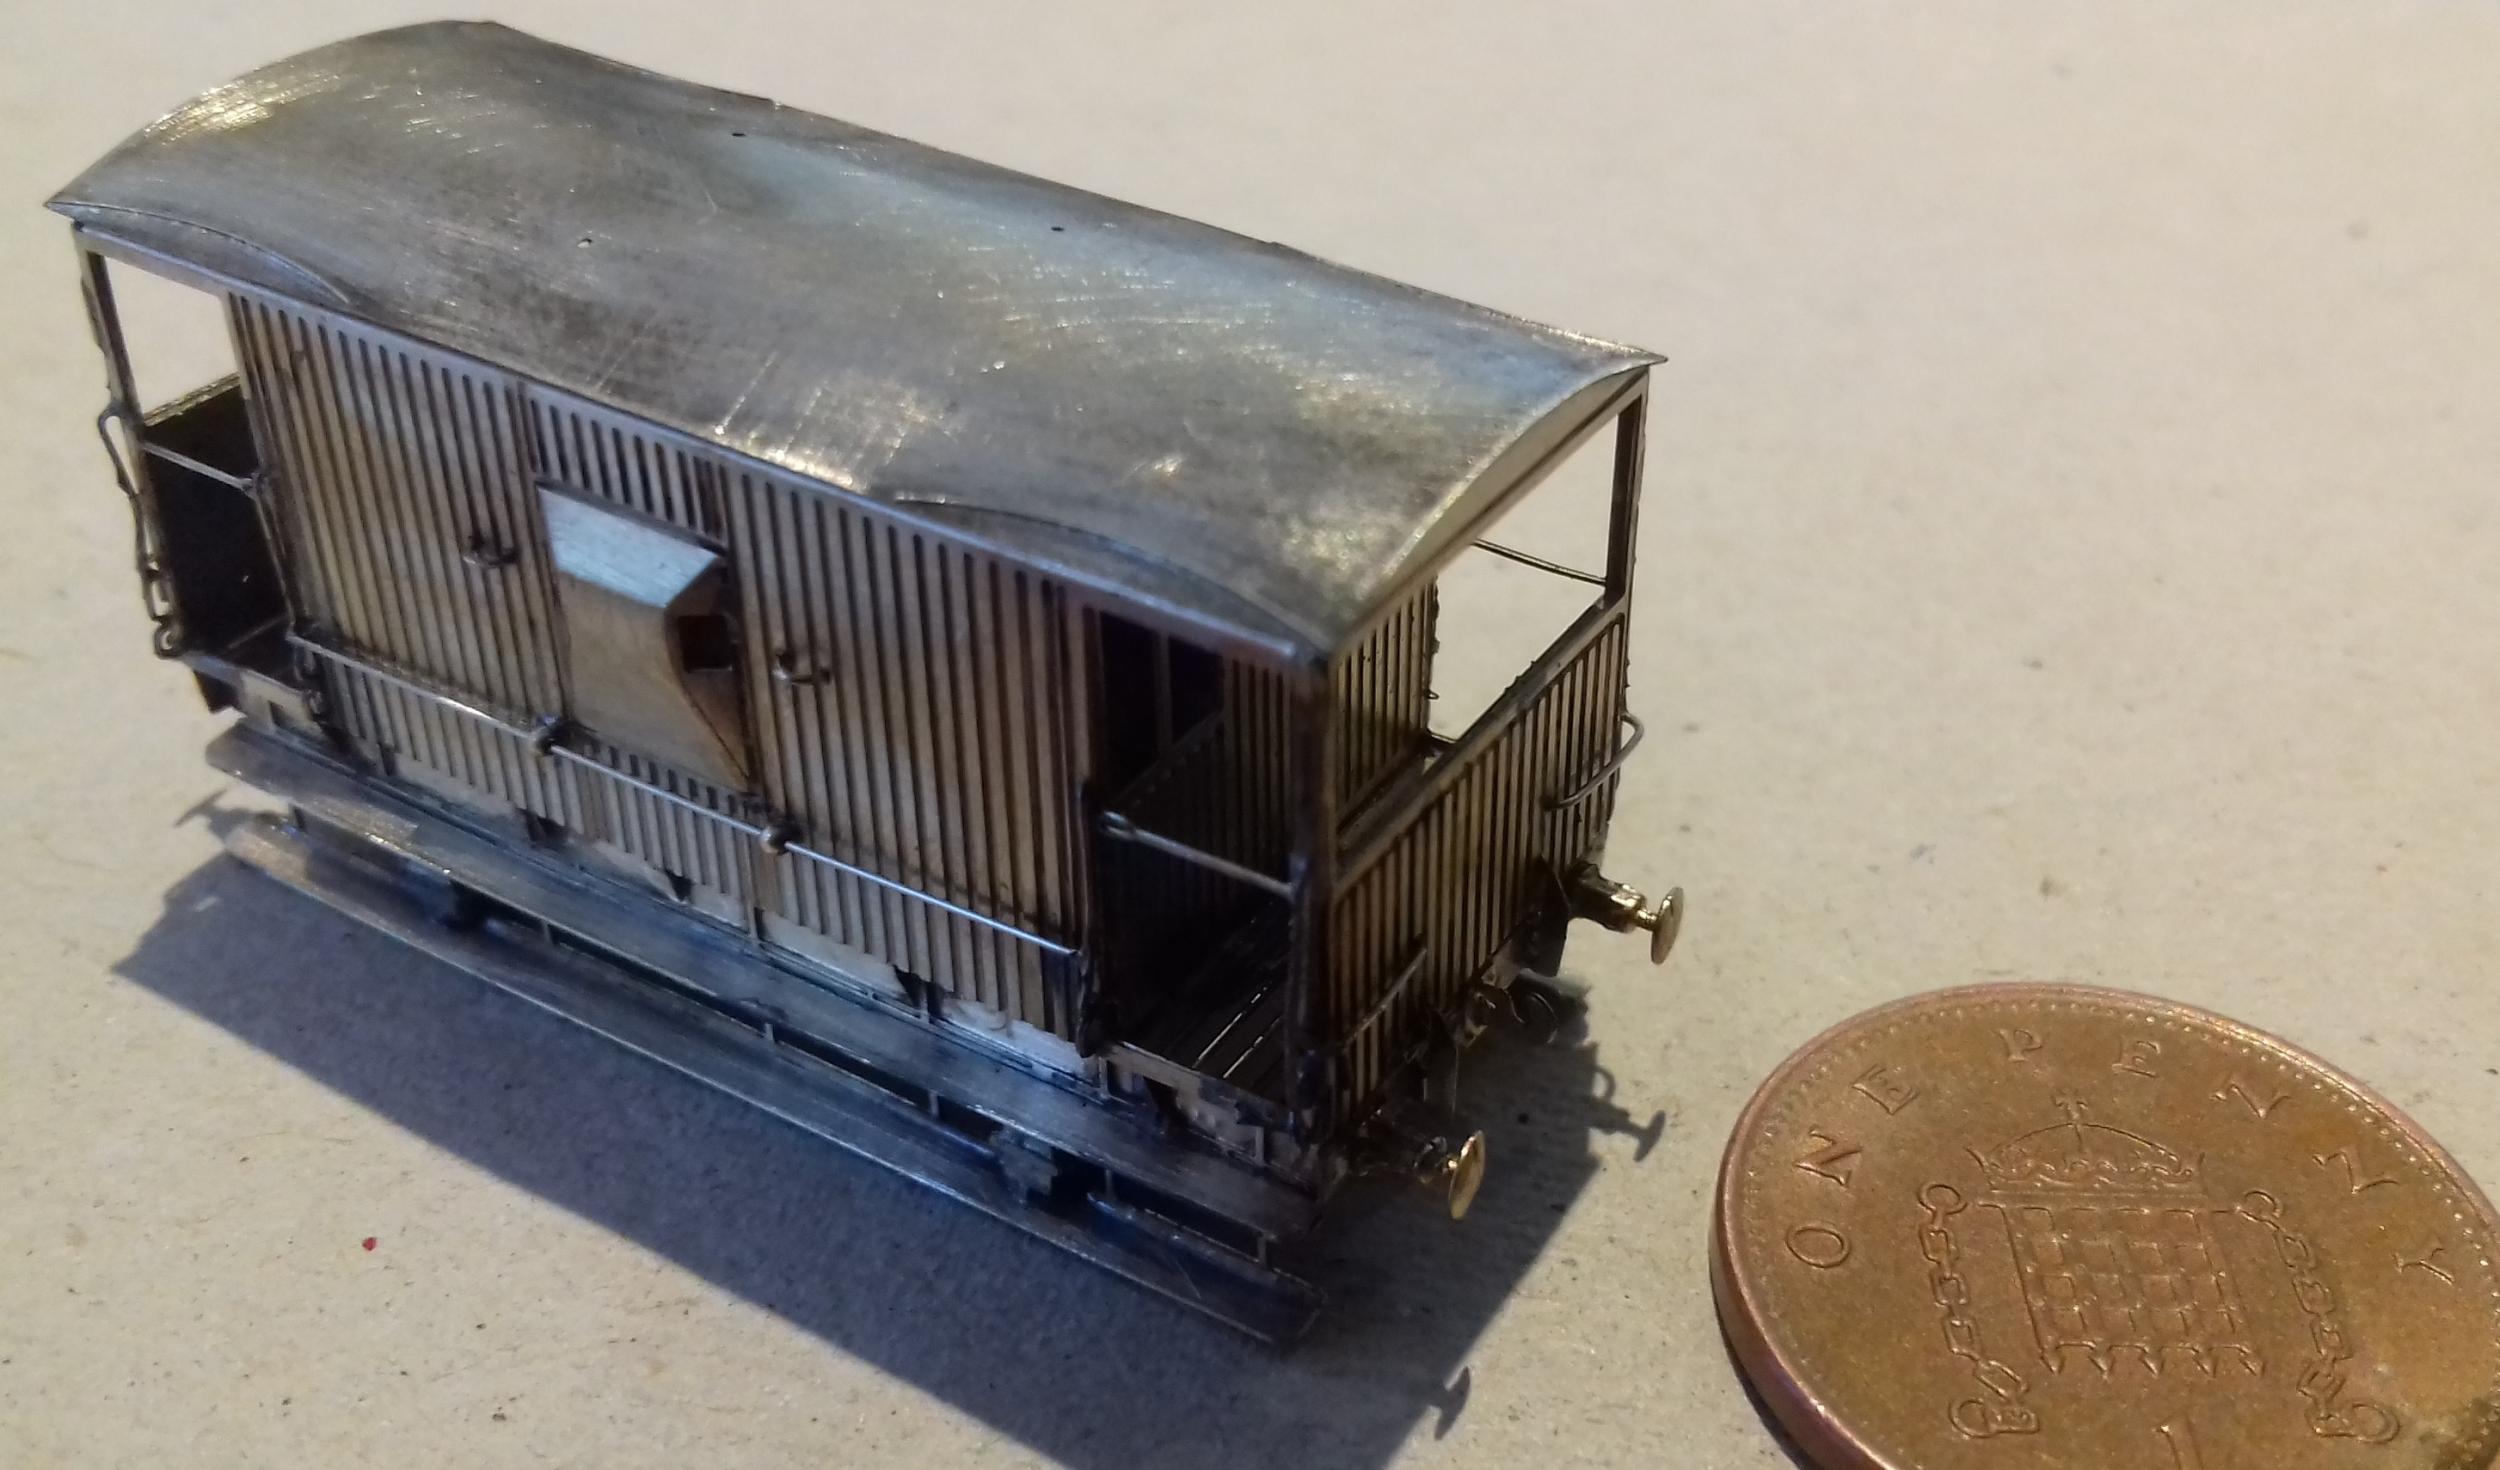
Above is an old BH Enterprise etch for a GNR brake van. While not as detailed as more modern kits, it goes together nicely, with only the handrails providing any real headache. It's designed to fit on a slight modified Peco brake van chassis. As the 2mm Association don't do an equivalent etched kit, I need to purchase the Peco item to complete.

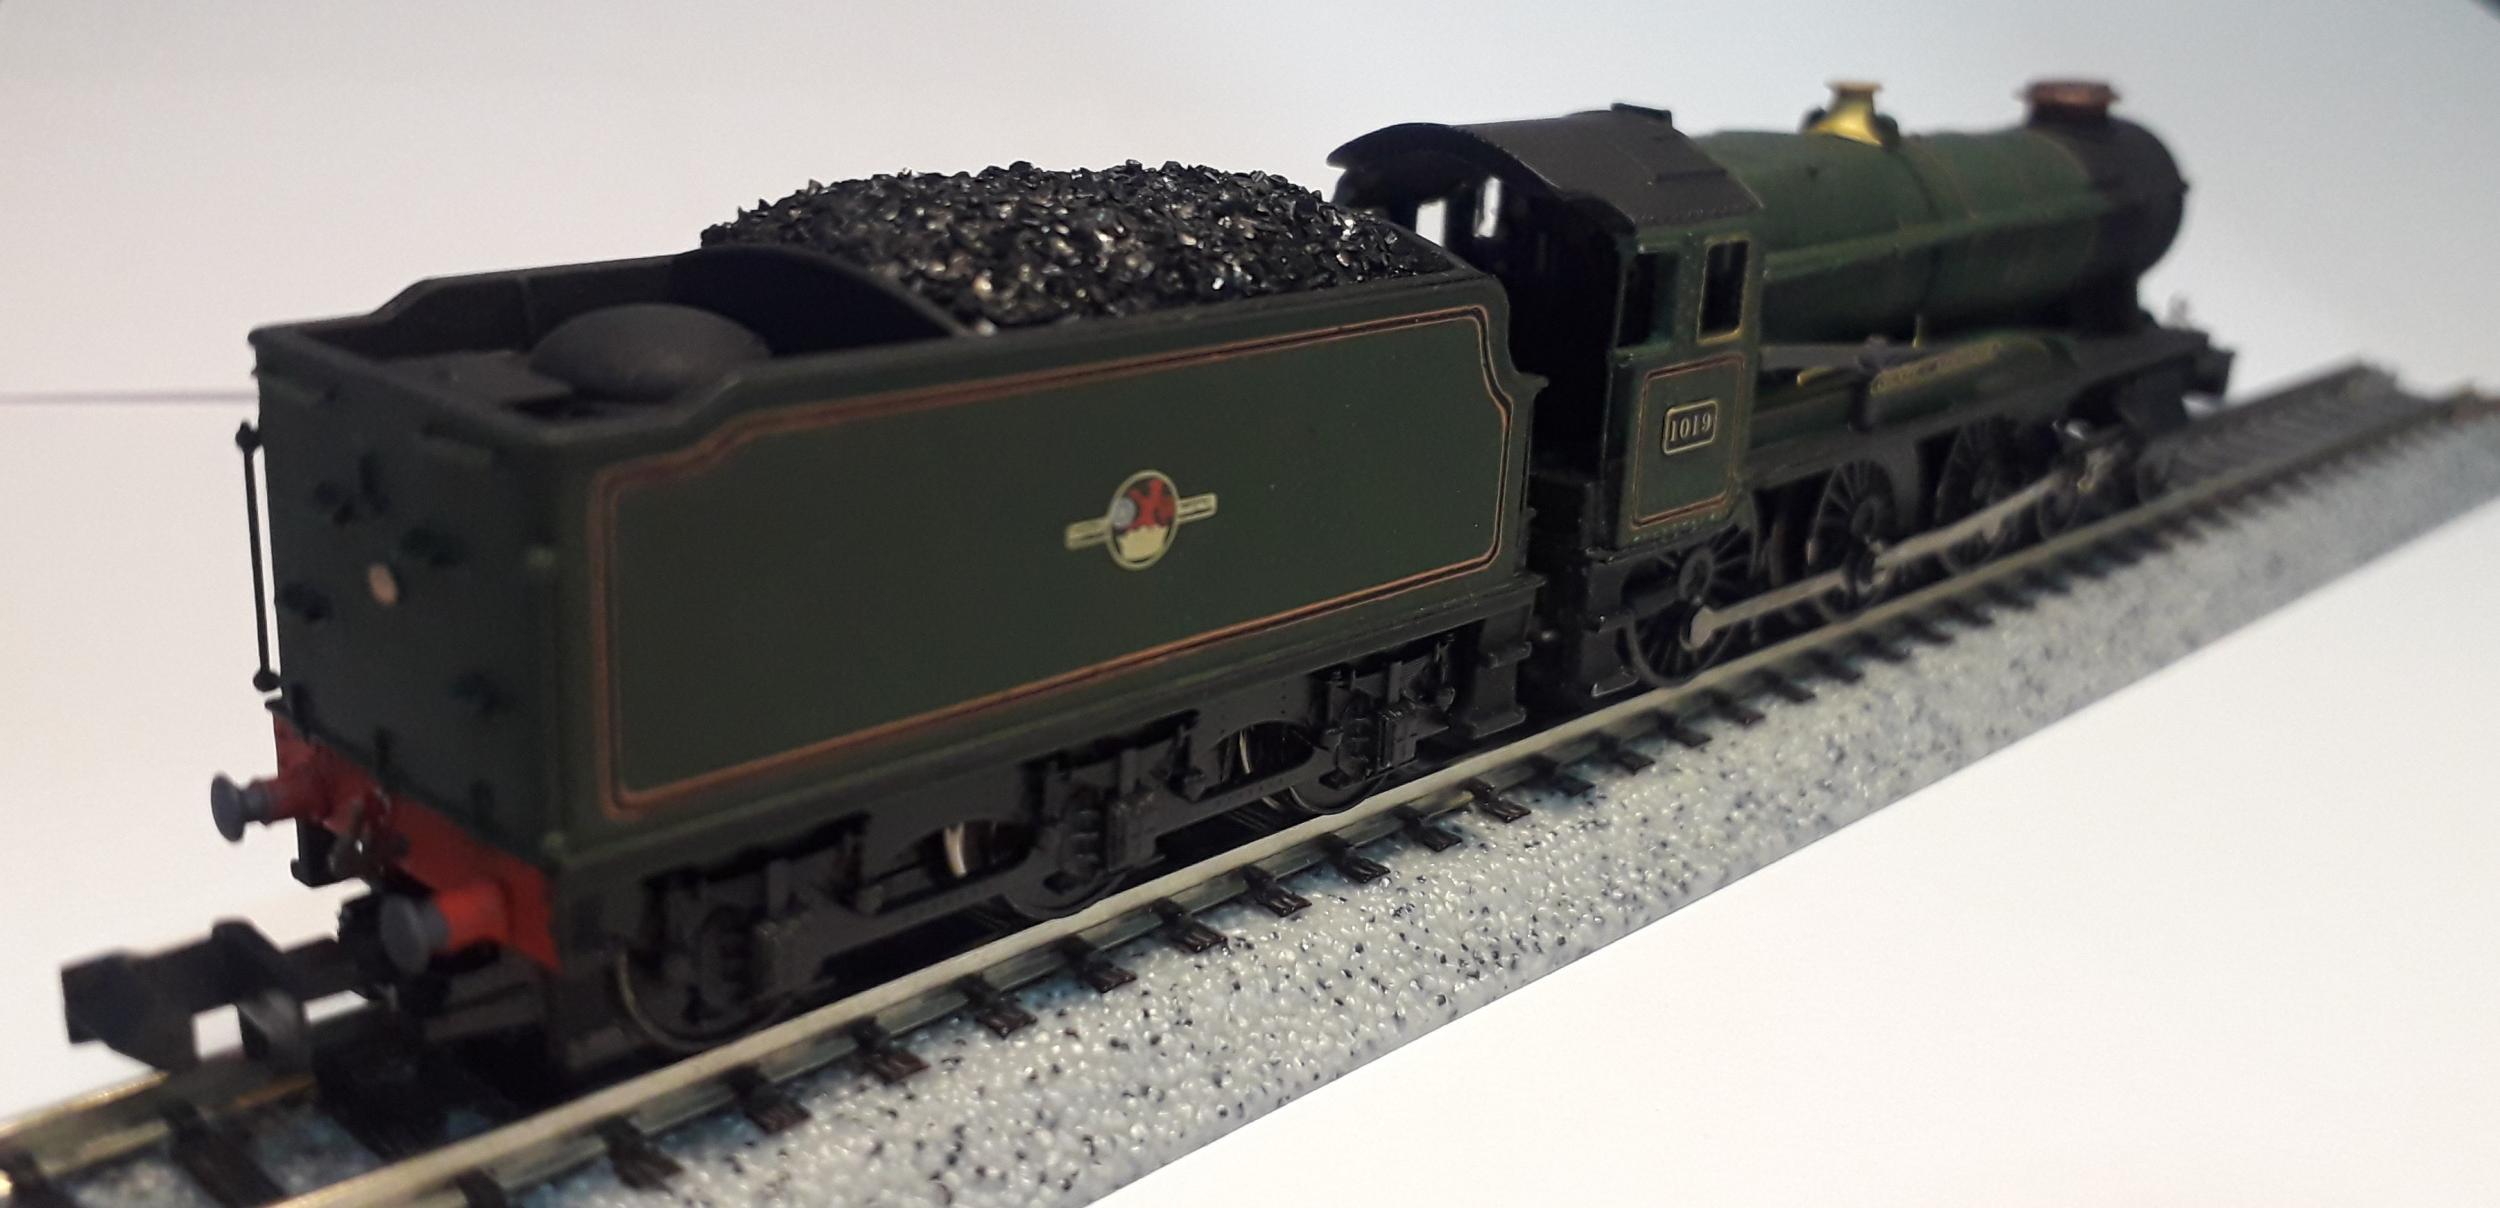
I've also been repainting a black Dapol corridor tender into Doncaster Green to be paired with a loco end which is factory finished in that livery.

Image

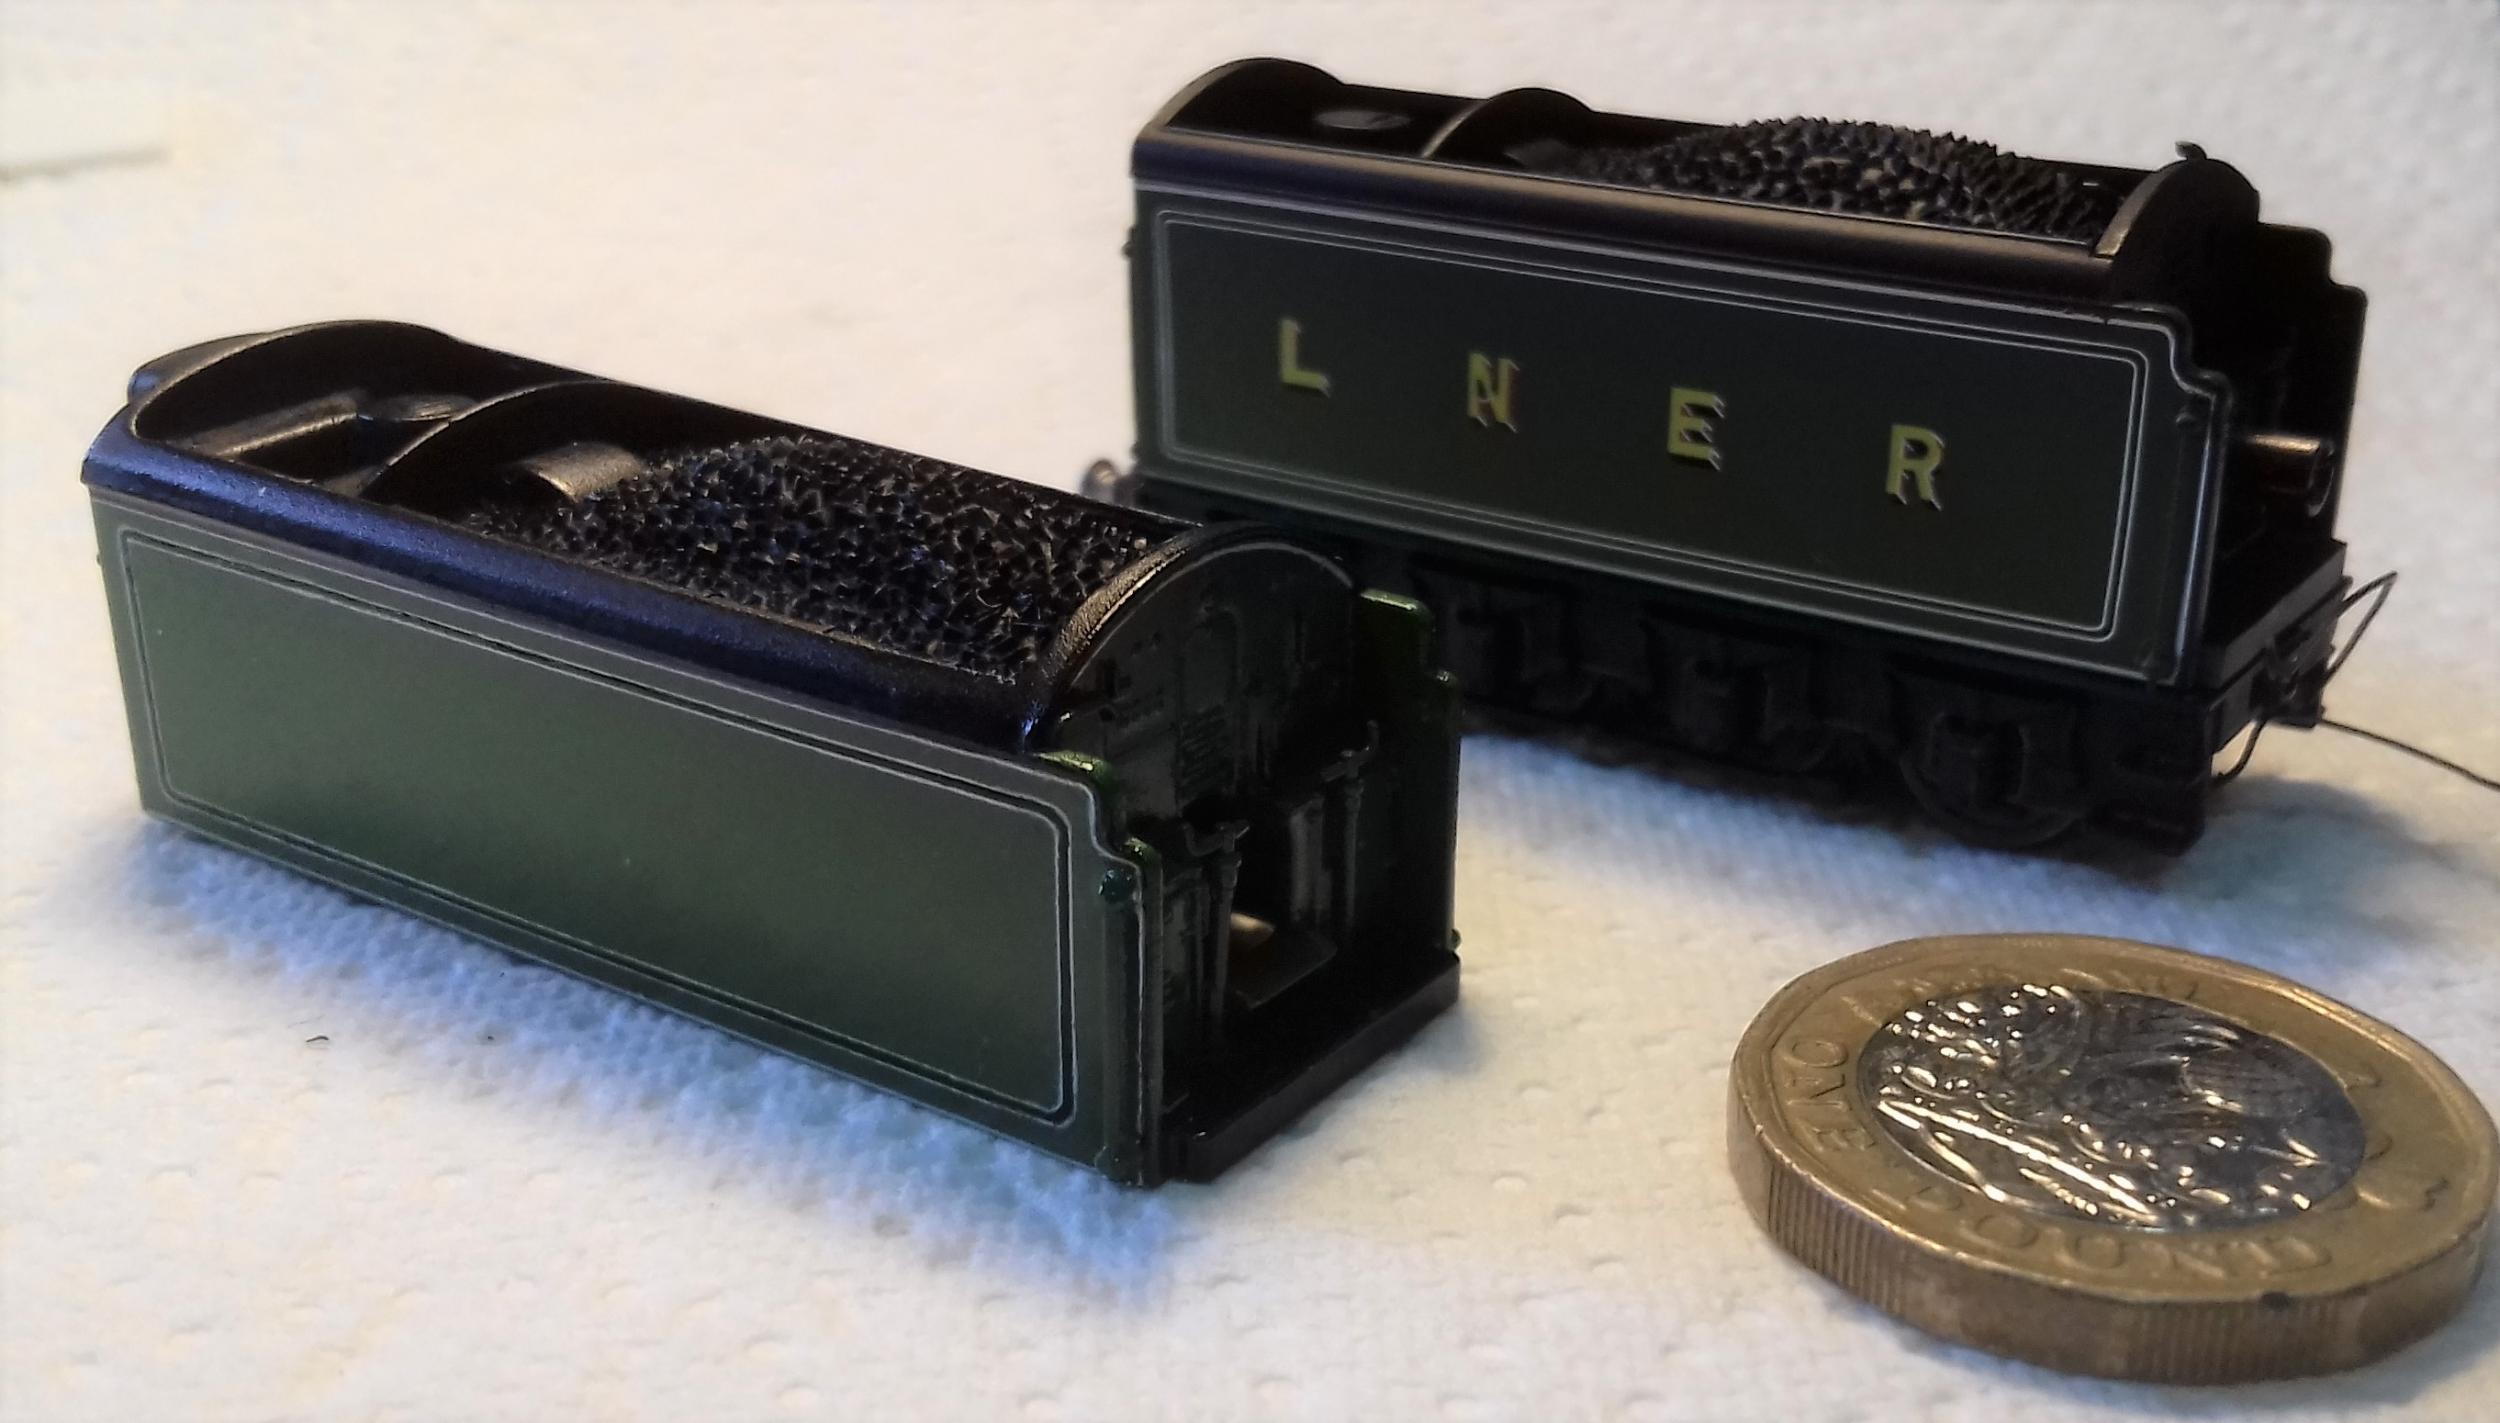
My repainting effort is at the front and the Dapol factory finish that I'm attempting to match is at the back. What the photograph doesn't show up is that mine is a little untidy in places. I'll clean that up as best I can with a little patch painting, but I'm really happy that I've finally cracked doing triple panel lining using my bow pen.

Finally, a couple of long stalled projects that I plan to get finished by the end of the year!

Image

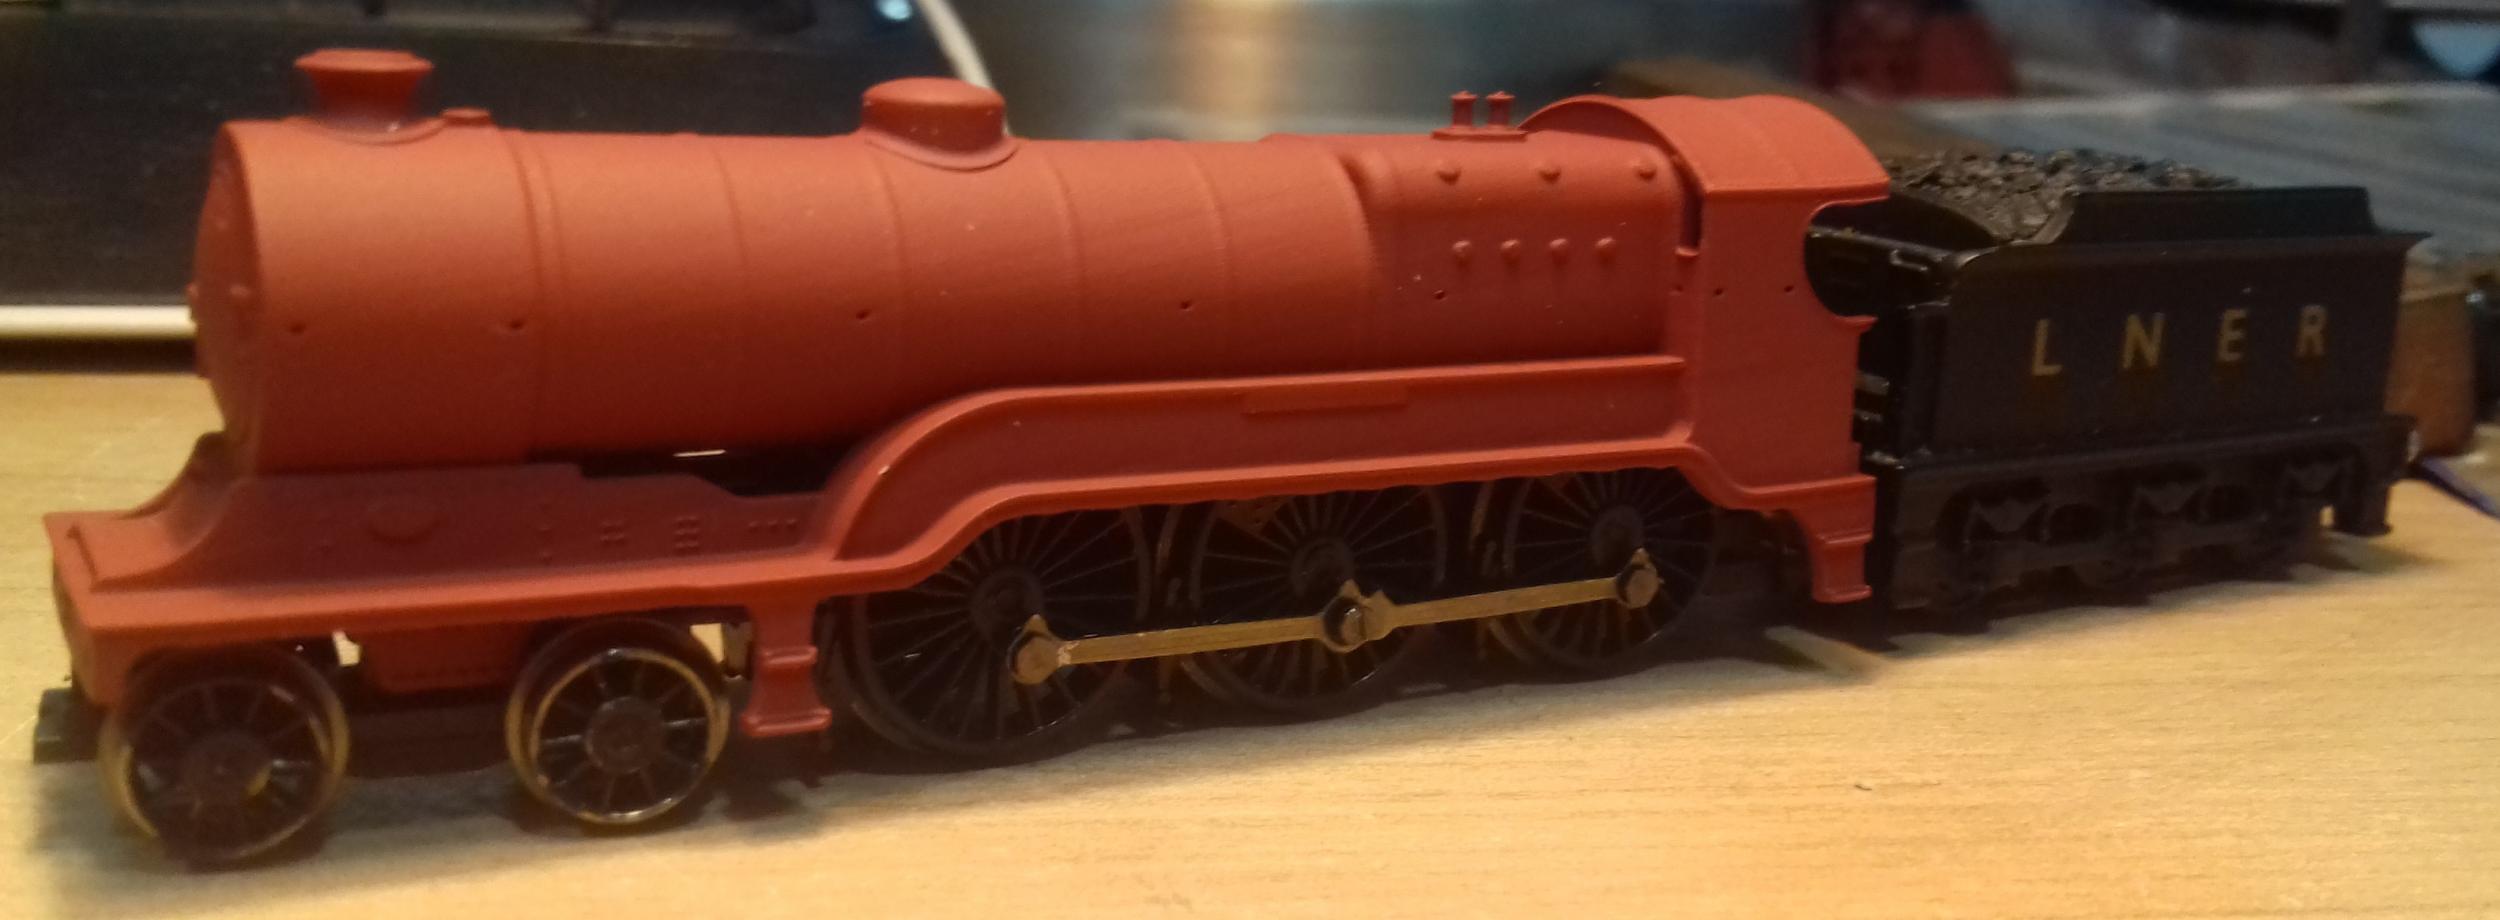
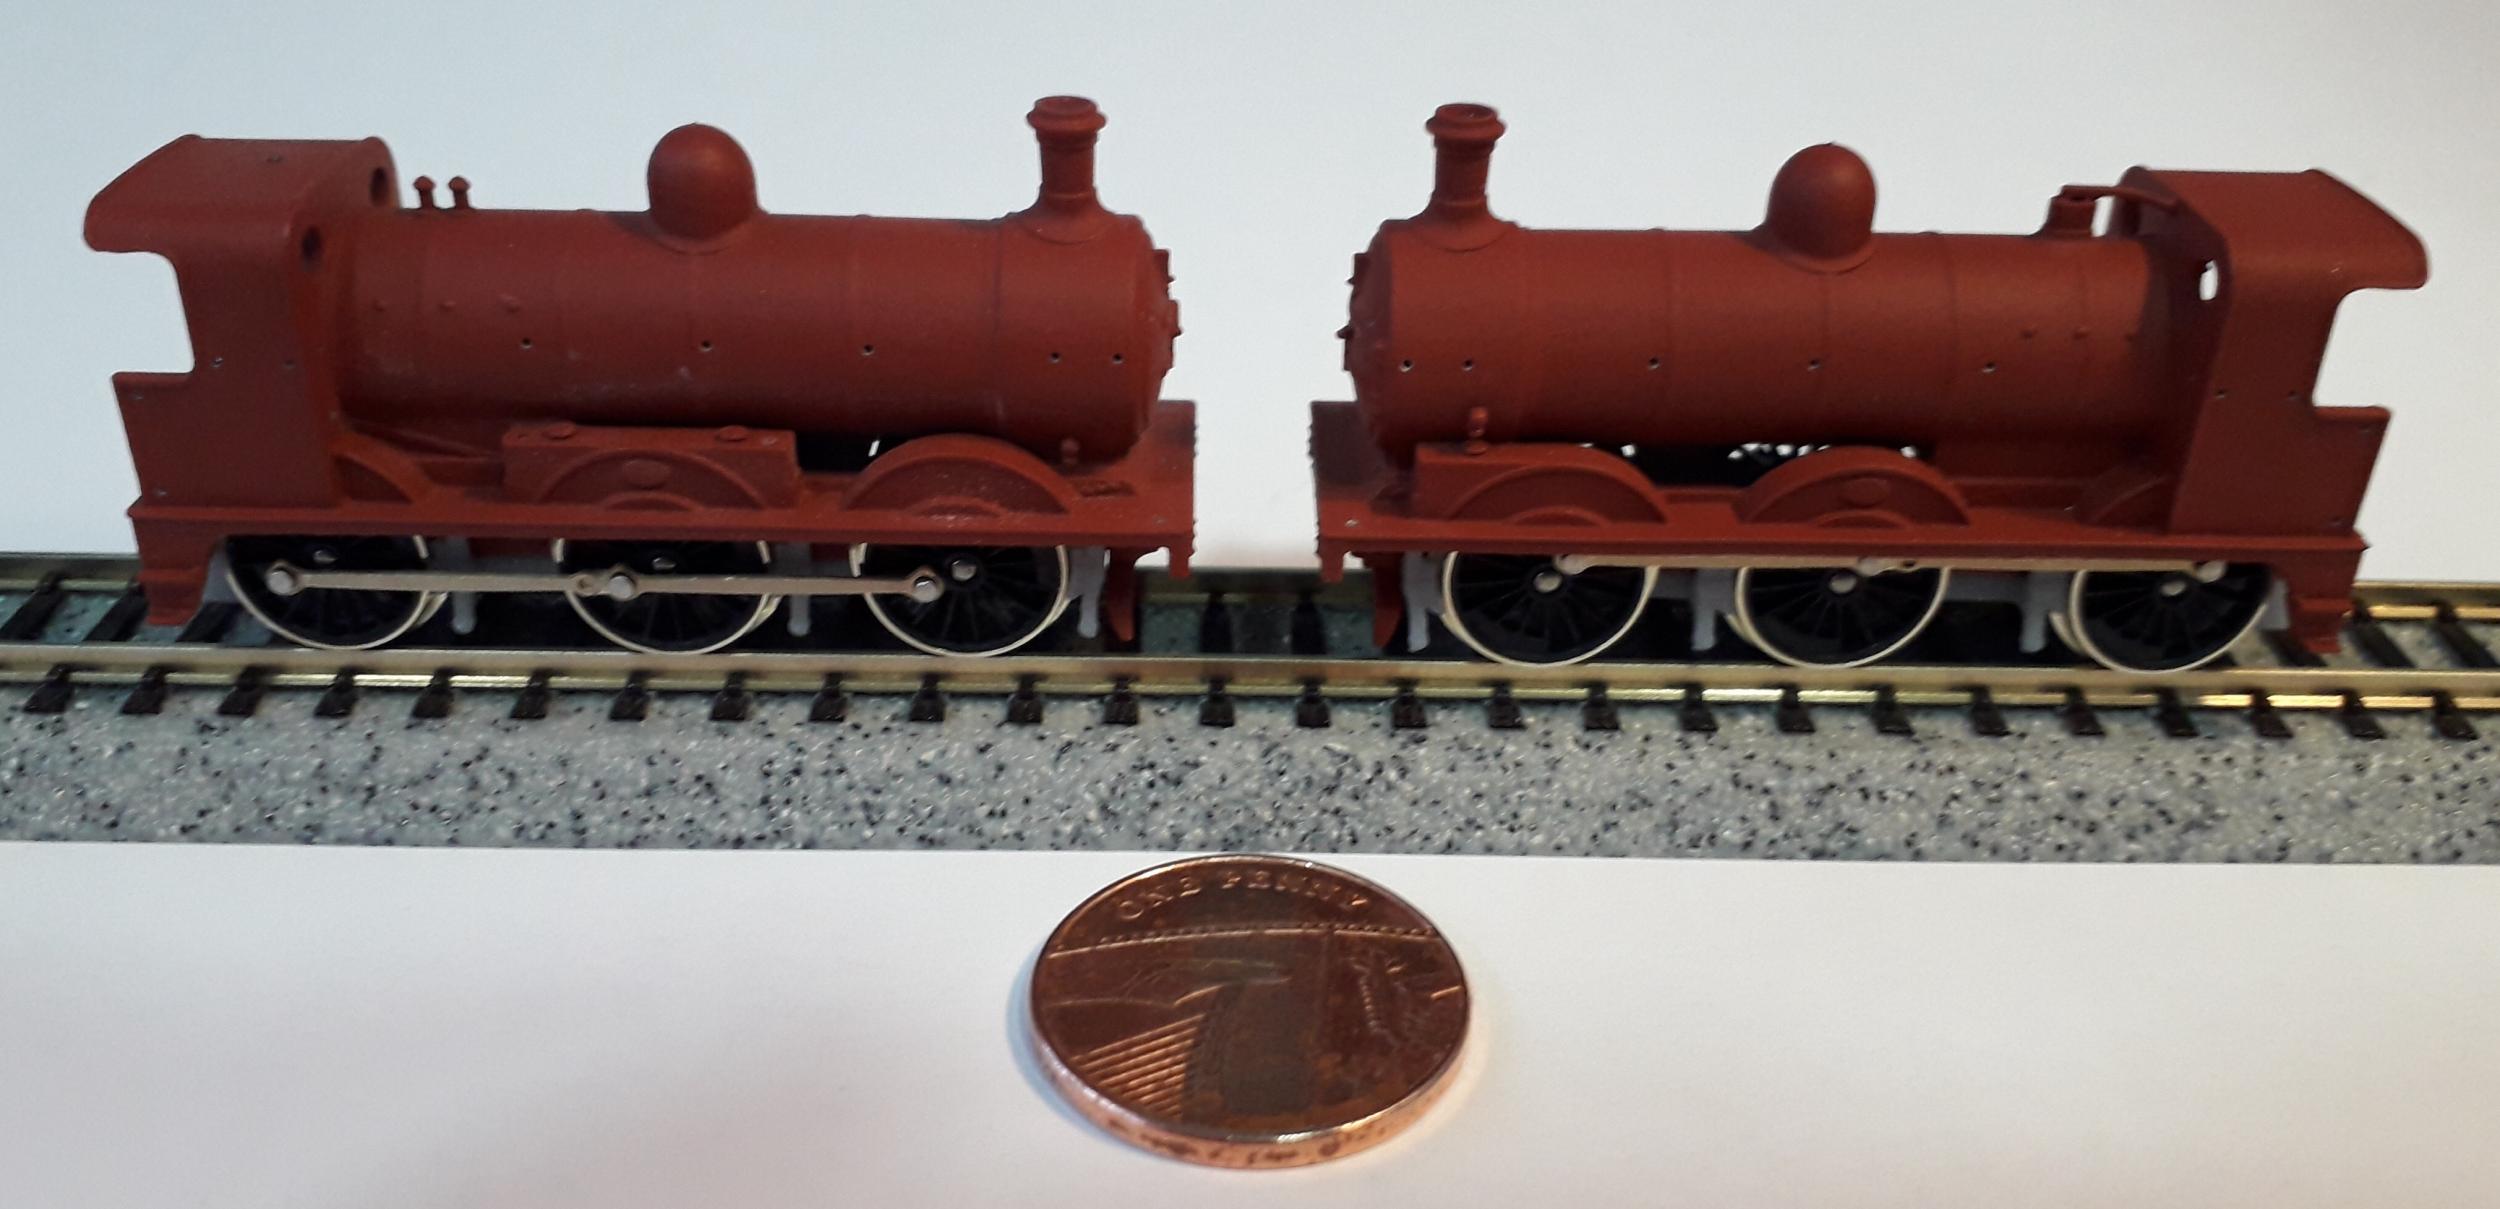
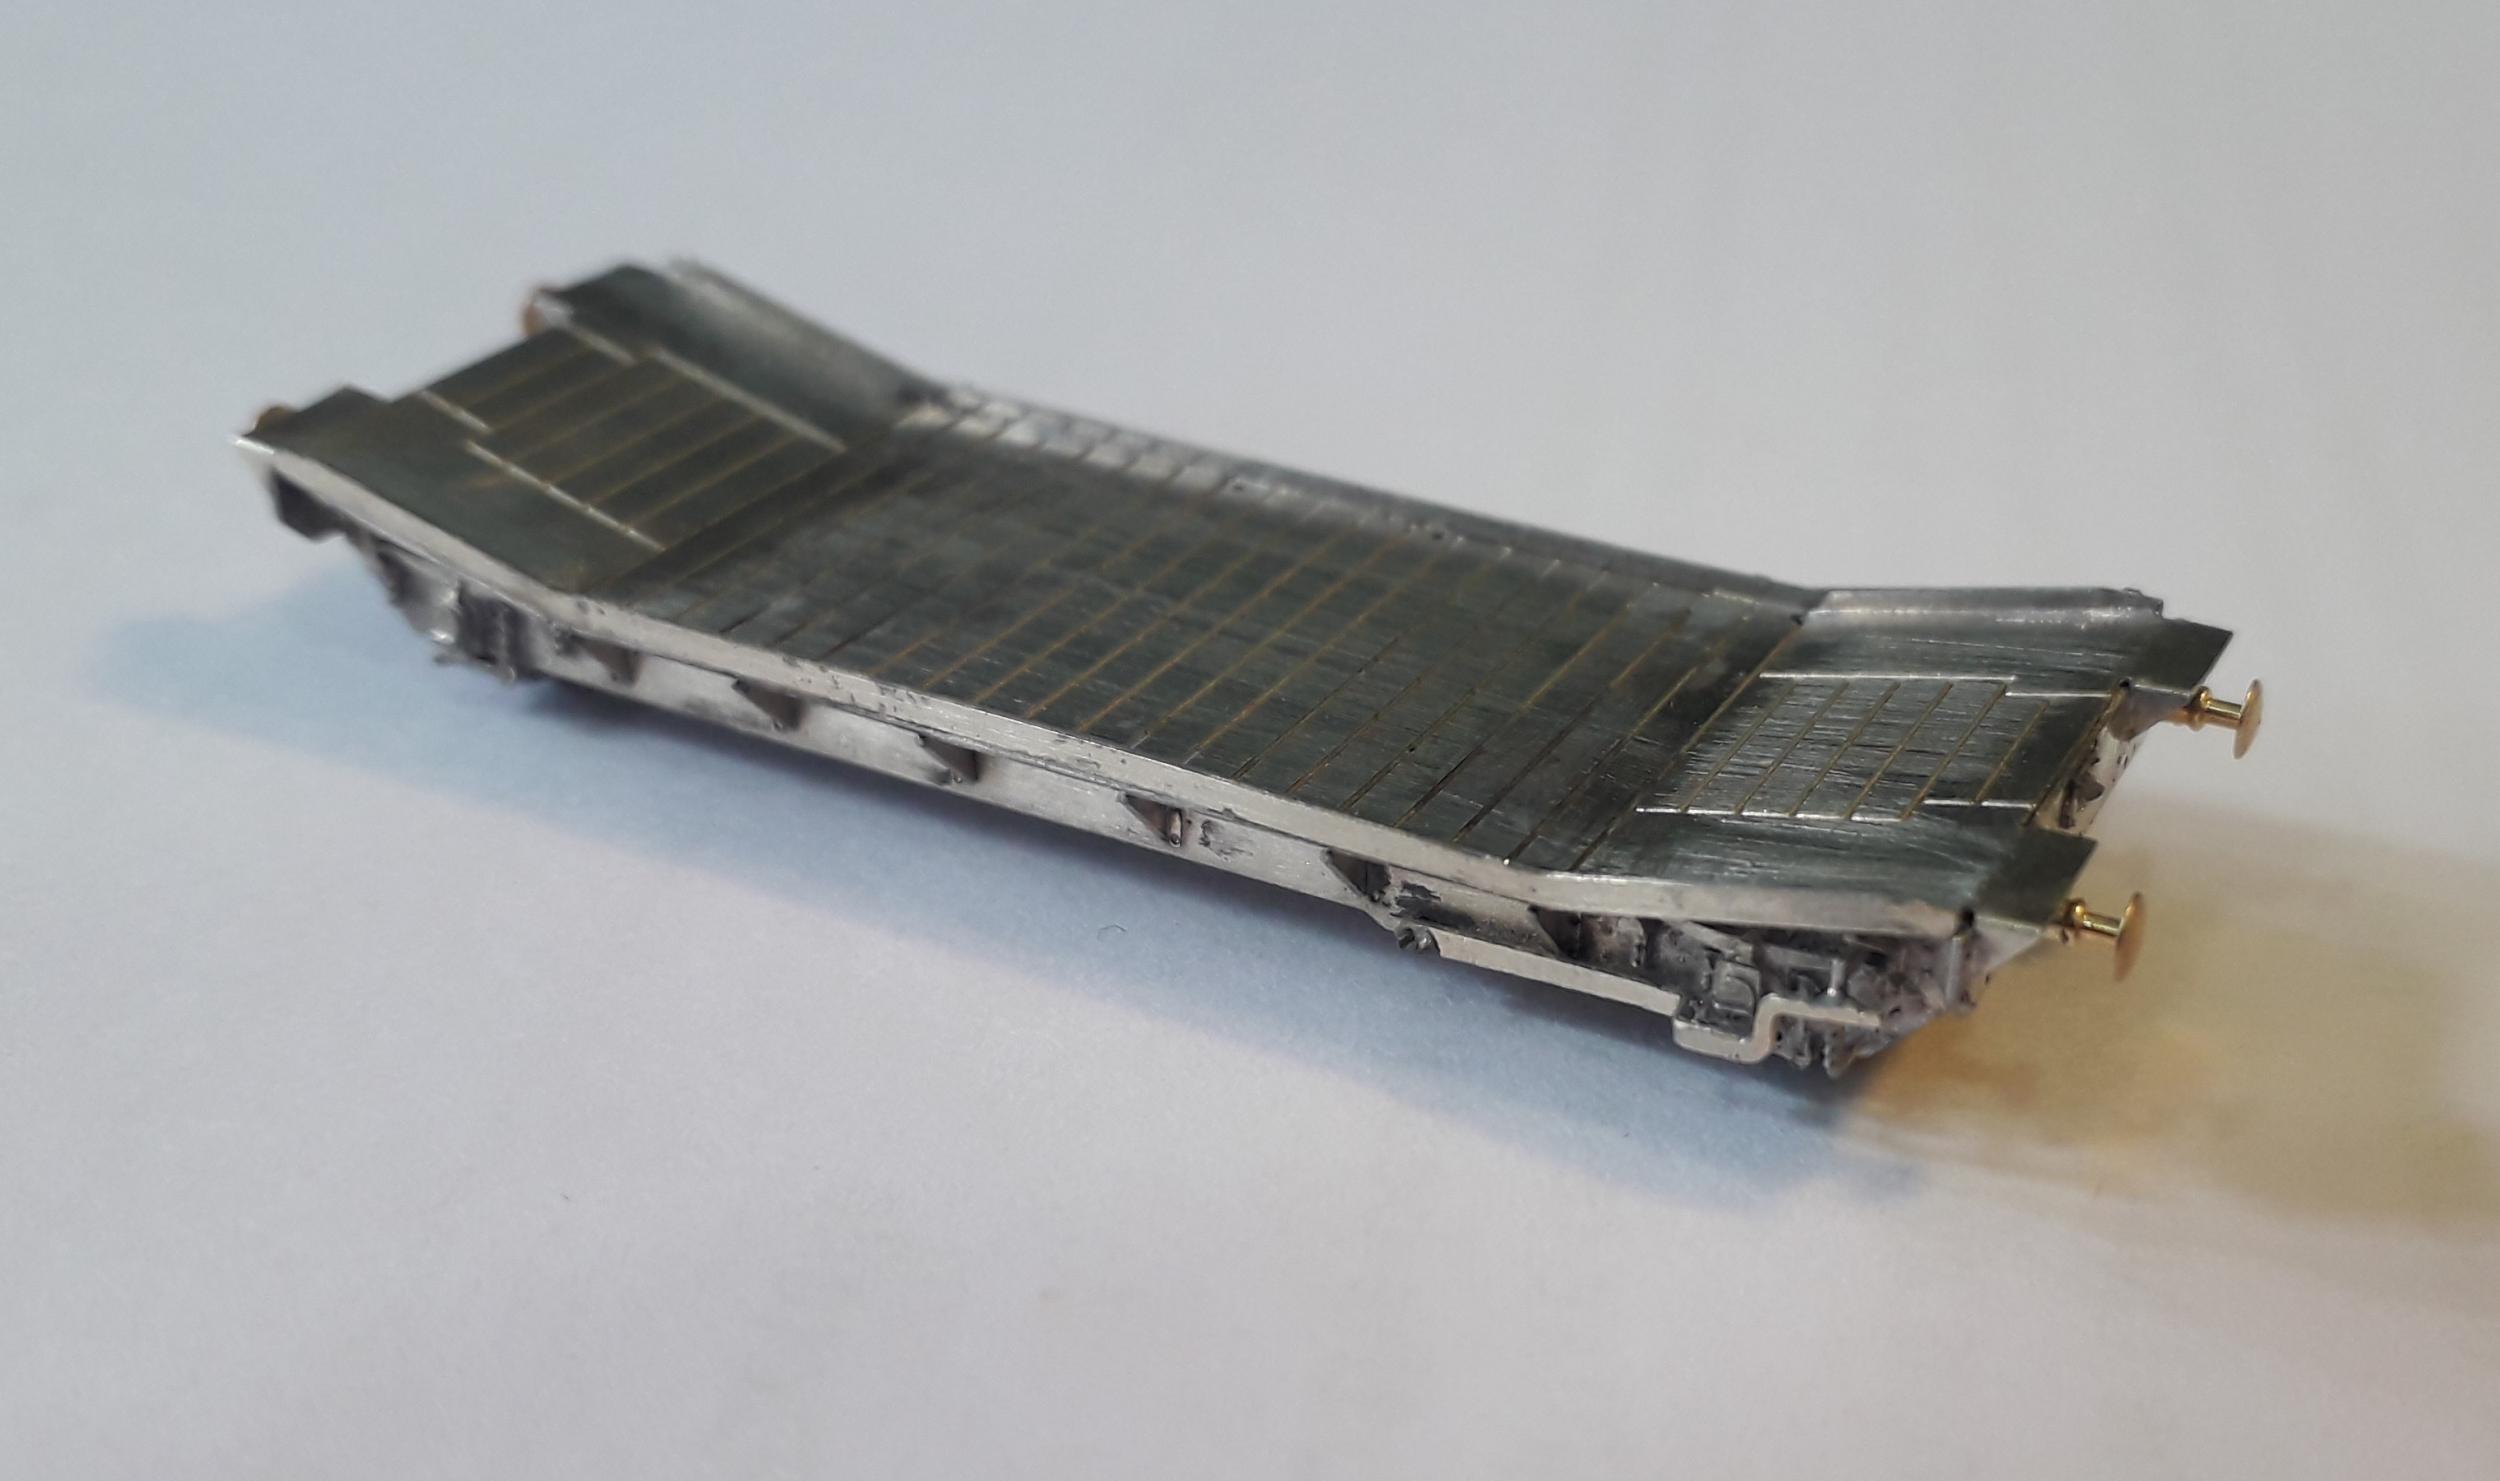
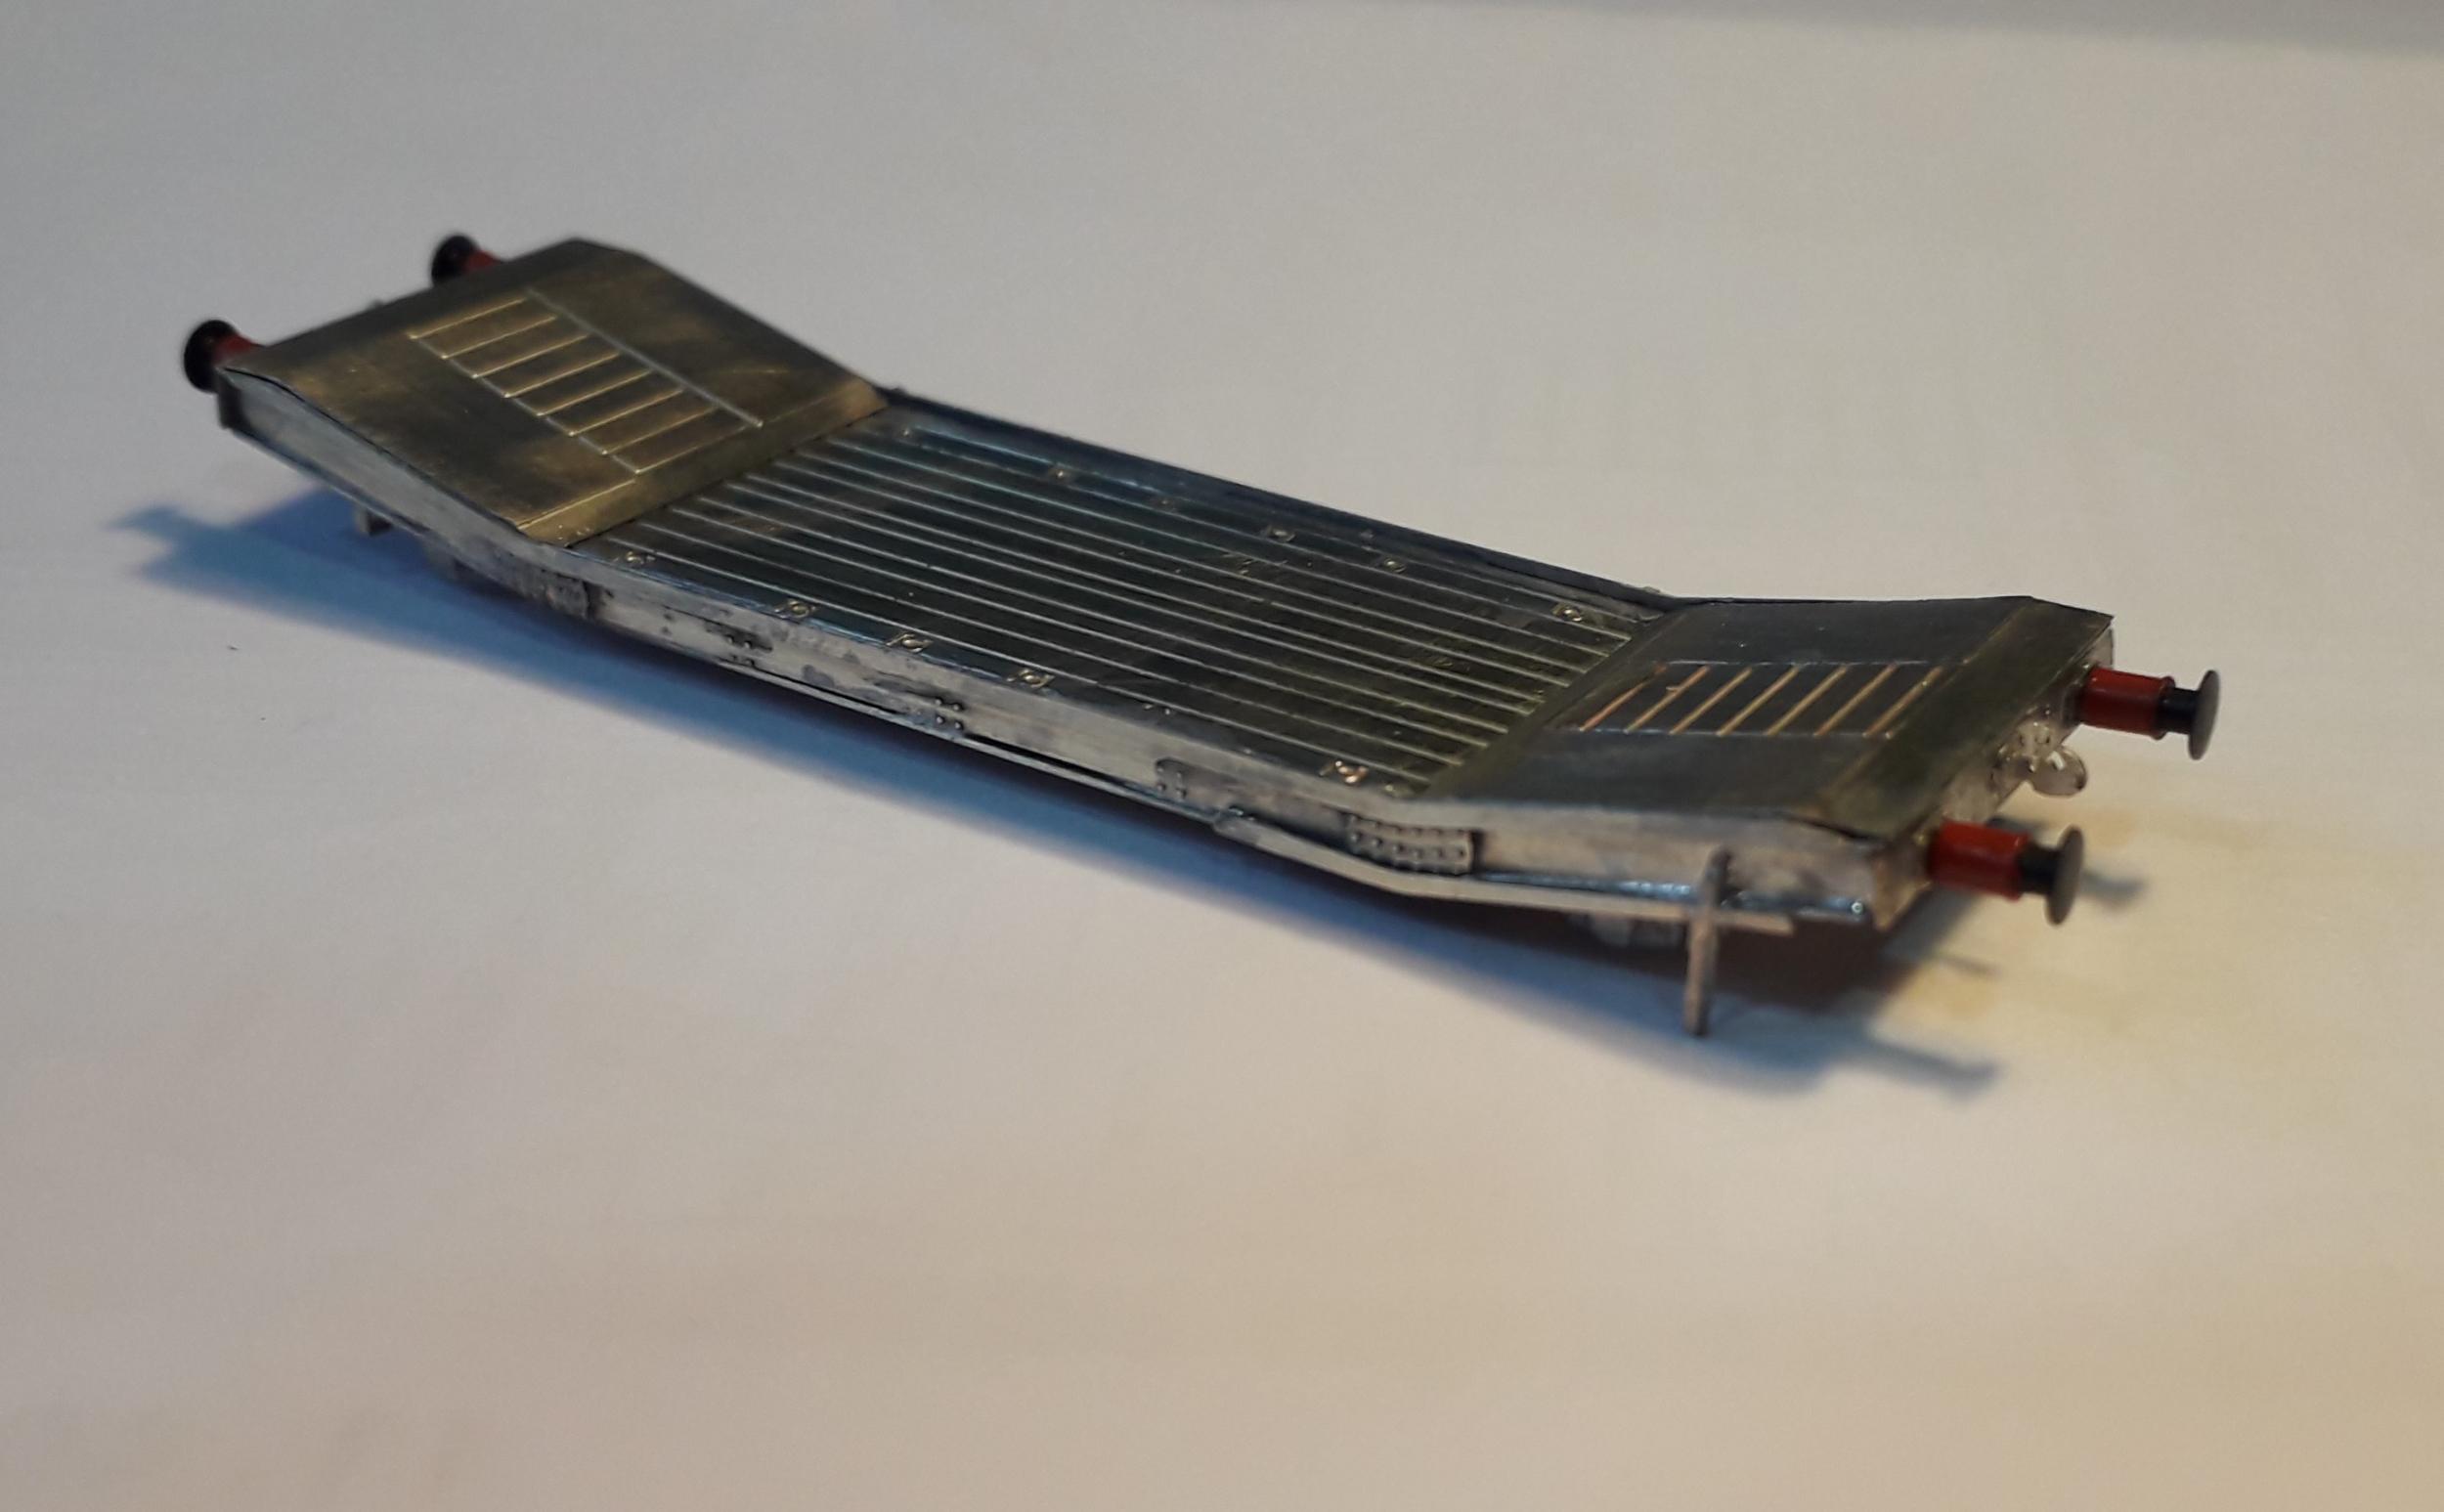
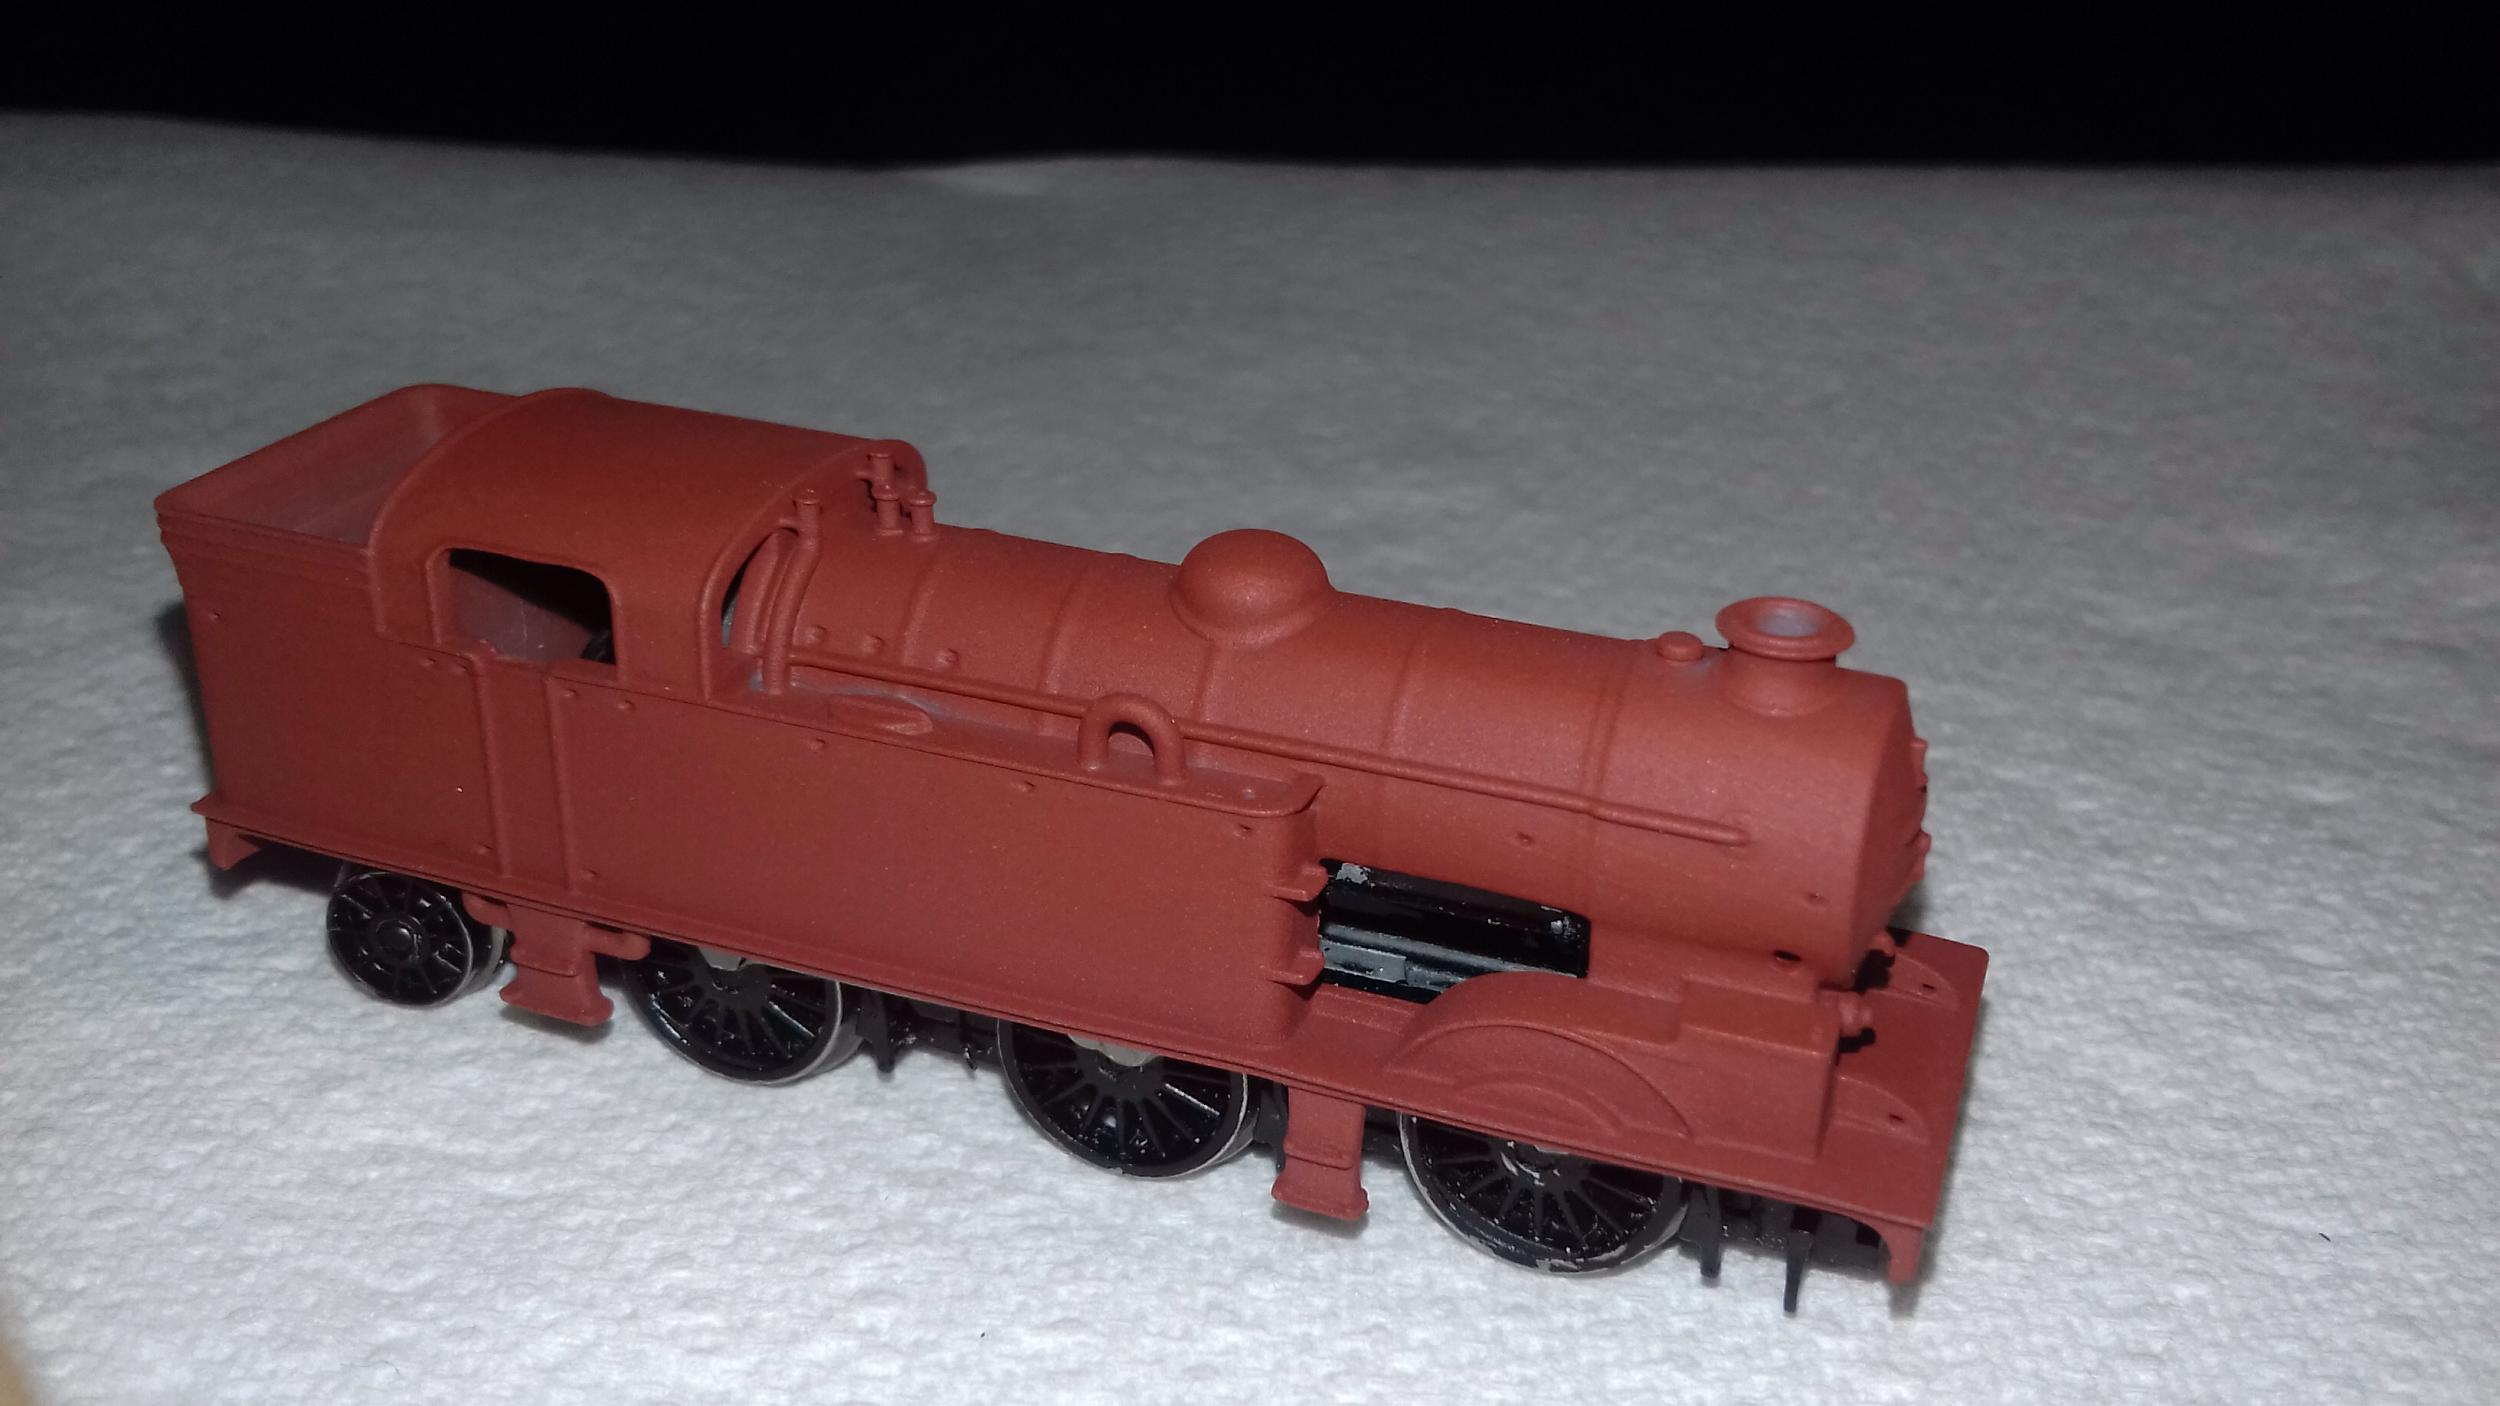
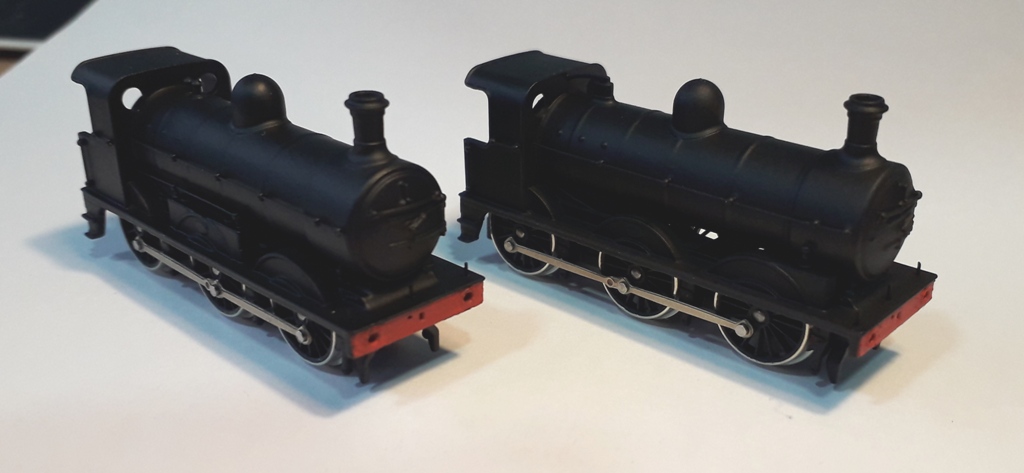
An ex-GCR Sir Sam Fay. The body is my usual 3D printed approach but the chassis is a custom modified/built until from N-Stars in Holland. The loco end is a heavily modified Farish Jubilee while under the Union Mills tender body is a completely scratch build tender drive. The drive unit successfully hauled twelve old bogie coaches up a 1 in 19 gradient before it got sent to me!

Image

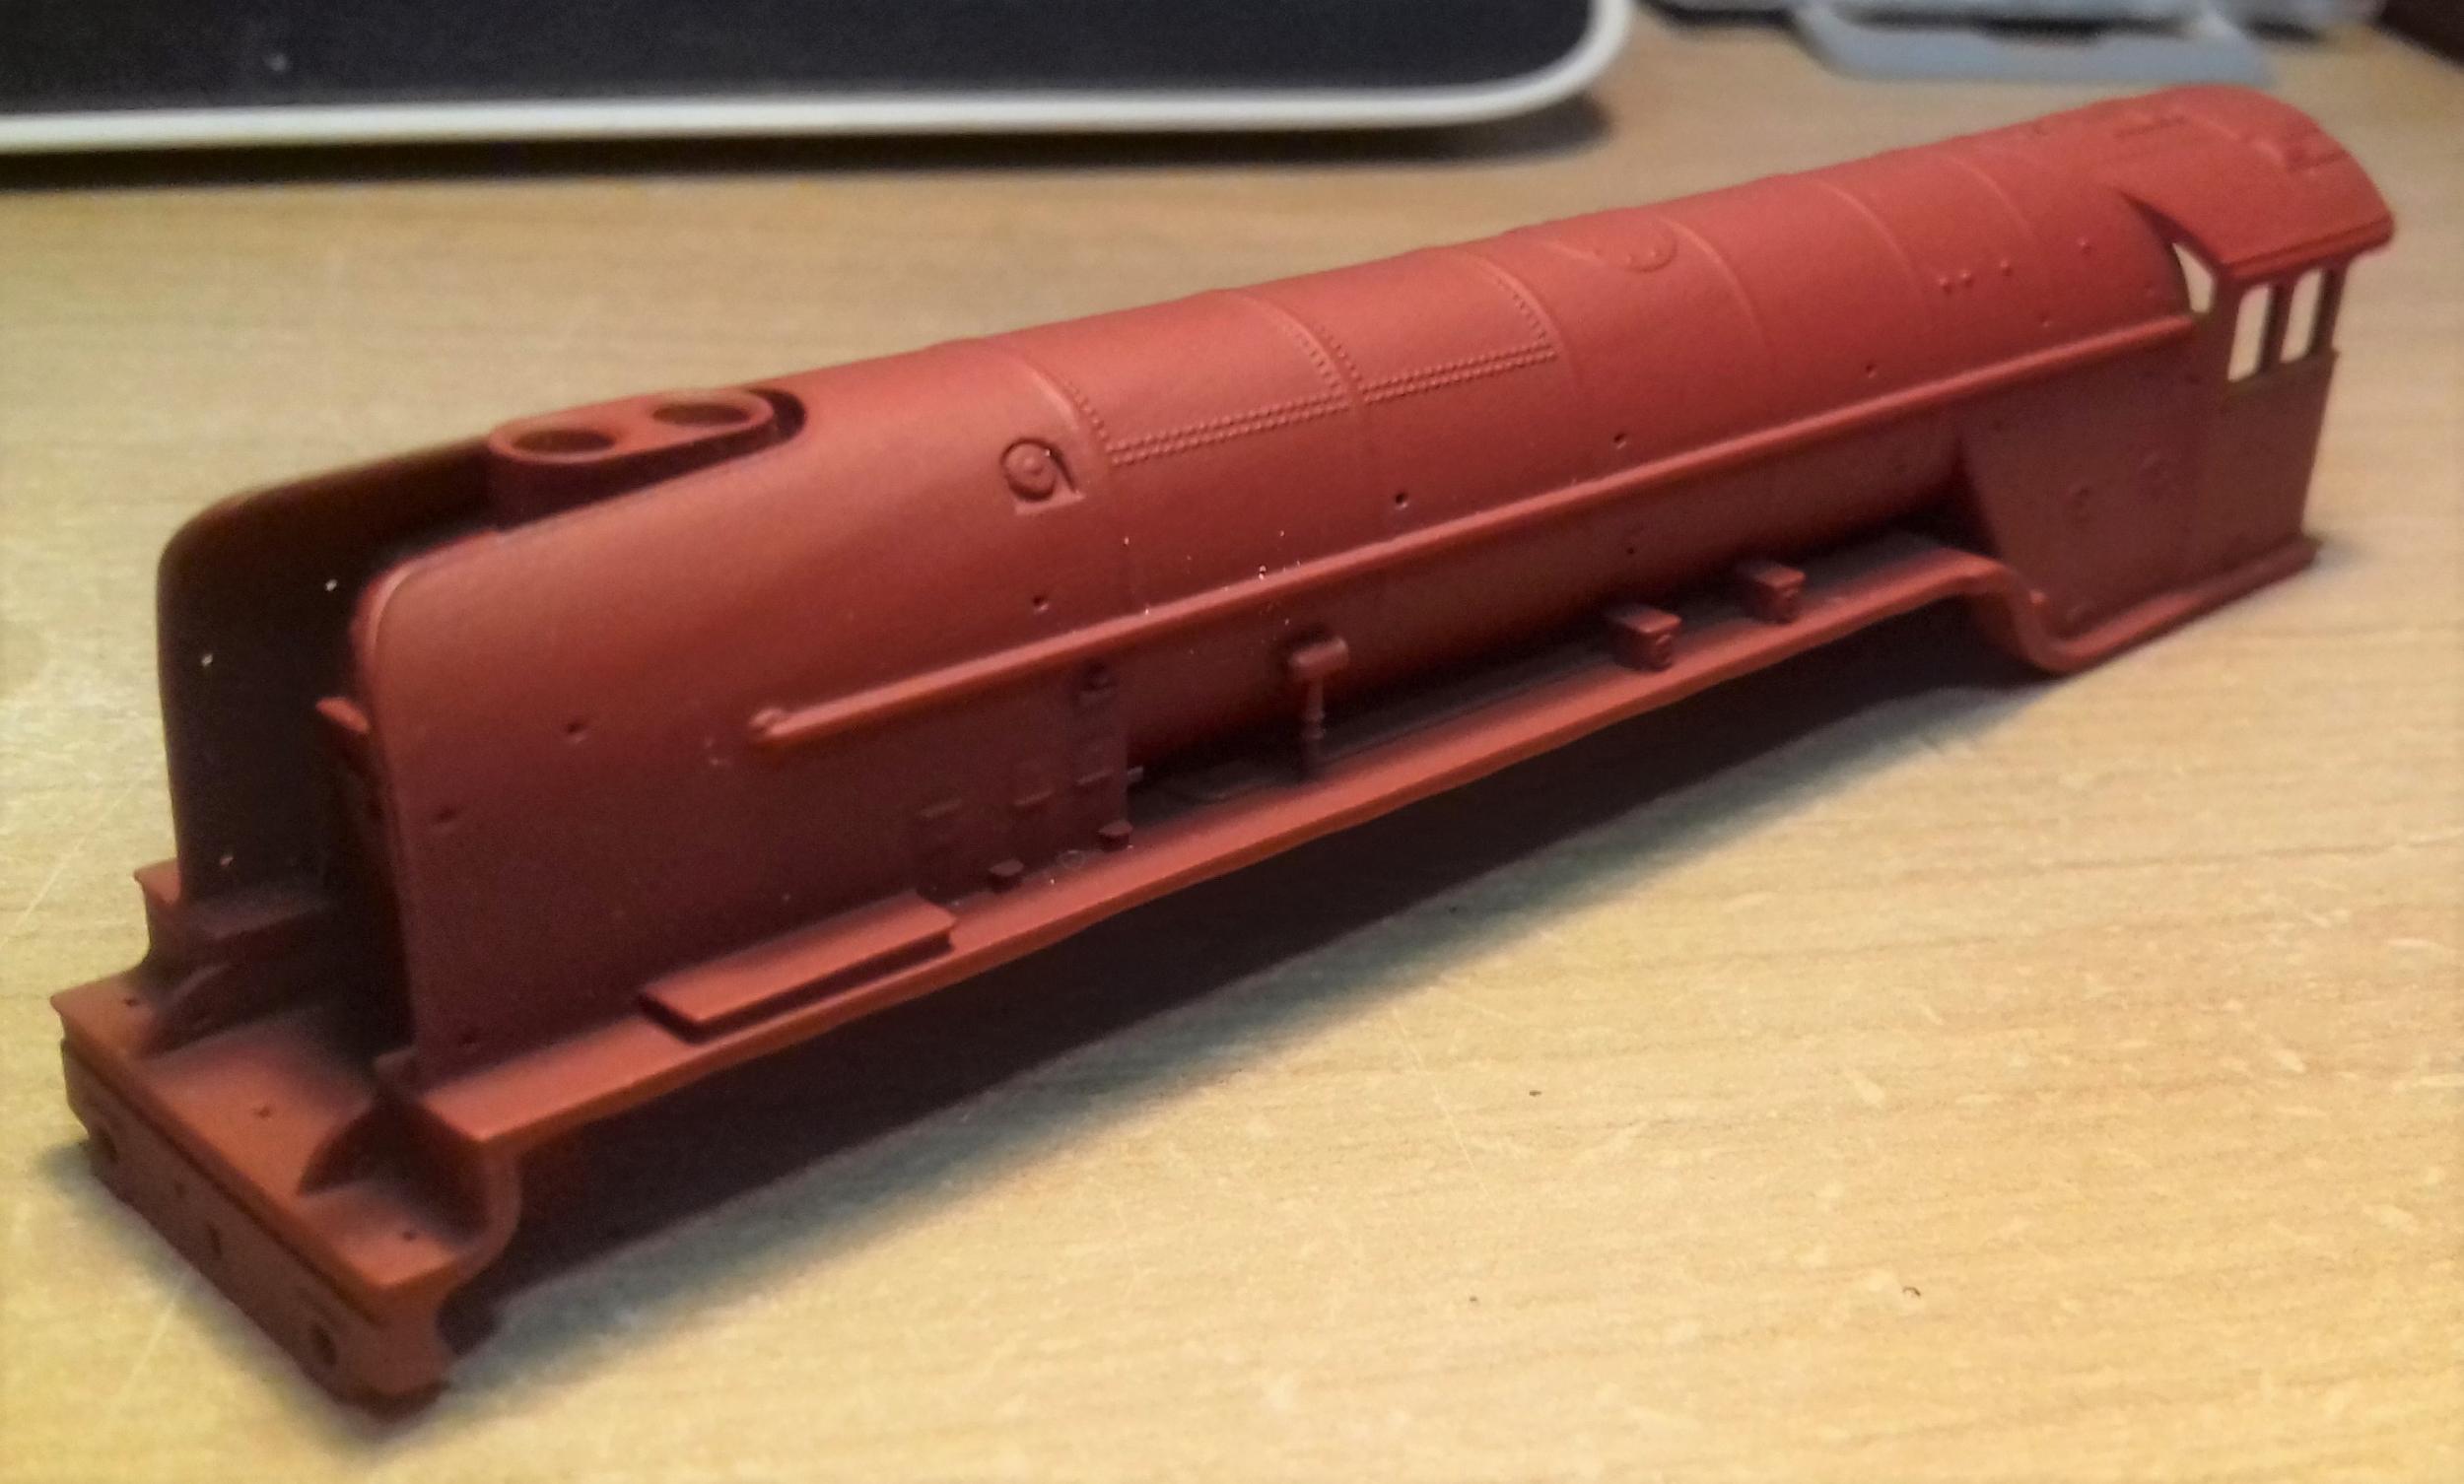
Another stalled project, a P2. I originally hoped to be able to use a Farish A2 chassis as a donor and graft an additional set of wheels onto the front. Unfortunately Farish juggled the wheelbase to fit as close-to-scale driving wheels as possible. While this visually works very well for the A2, it would push the front drivers far too far forward on the P2. As I'd designed this loco body using some original drawings, I didn't want to compromise the accuracy by stretching it. Therefore, this will probably end up with my first ever scratch built chassis! :shock: :shock: :shock:
Steve
User avatar
End2end
Posts: 6010
Joined: Sun Jan 12, 2014 9:58 pm
Location: At the end....... and sometimes at the other end

Re: Mainly 3D Printed LNER Locomotives in N gauge

Post by End2end »

Simply stunning work Atso. :o
You must have the patience of a saint.
There's not enough swear words in the English language for me to take up N gauge modelling. :lol:
Thanks
End2end
"St Blazey's" - The progress and predicaments.
Welcome‎
Planning
Building
St. Blazey's Works & Depot thread
Atso
Posts: 264
Joined: Thu Aug 24, 2006 2:07 pm

Re: Mainly 3D Printed LNER Locomotives in N gauge

Post by Atso »

End2end wrote:Simply stunning work Atso.
You must have the patience of a saint.
There's not enough swear words in the English language for me to take up N gauge modelling.
Thanks End2End. I really don't have much patience, just the experience learnt the hard way that rushing (or corner cutting) is seldom quicker when it's caused you to start again. :lol: :roll: :oops:

Believe me, if I had the space, I would model in 4mm scale and take advantage of all those lovey RTR models that are available! My fault I guess for wanting to represent a mainline run with scale(ish) length trains! :wink:
Steve
Atso
Posts: 264
Joined: Thu Aug 24, 2006 2:07 pm

Re: Mainly 3D Printed LNER Locomotives in N gauge

Post by Atso »

Some more lengths of straight track have been soldered together for Hadley Wood's fiddle yard and most have now been laid. I'm now reaching the end of the second board!

Image

The five Gresley coaches and three wagons are already getting a bit lost in the overall size of the fiddle yard. The center two loops will be able to hold fifteen coaches, or (more importantly) at least forty five coal wagons as well as a loco. Once I've replaced the Rapido couplings with my wire hook/loop arrangement, I'm hoping that the distance between the wagons will close up sufficiently to bring the total to fifty coal wagons. The next two loops will hold the equivalent to twelve coaches (plus loco) and the next two beyond that will hold nine (plus loco). The outermost loops will act as feed/holding lines for the kickback sidings.

You may notice that the loop (currently a siding) nearest to the camera isn't as long as the other seven lines. This is because it will have two turnouts that will feed the inner kickback sidings. These are currently being built as a single unit.

Image

The red box below indicates where this will be located on the trackplan.

Image

In case anyone is interested, I did some rough calculations to work out the number of solder joints in view. Not including the beginnings of the wiring, there are approximate 3,500 solder joins in view in the first picture! :shock:
Steve
Post Reply