Ken's workbench Bagnall meets hacksaw

What are you up to on your workbench
User avatar
Ken Shabby
Posts: 451
Joined: Thu Jan 15, 2009 12:20 pm

Ken's workbench Bagnall meets hacksaw

Post by Ken Shabby »

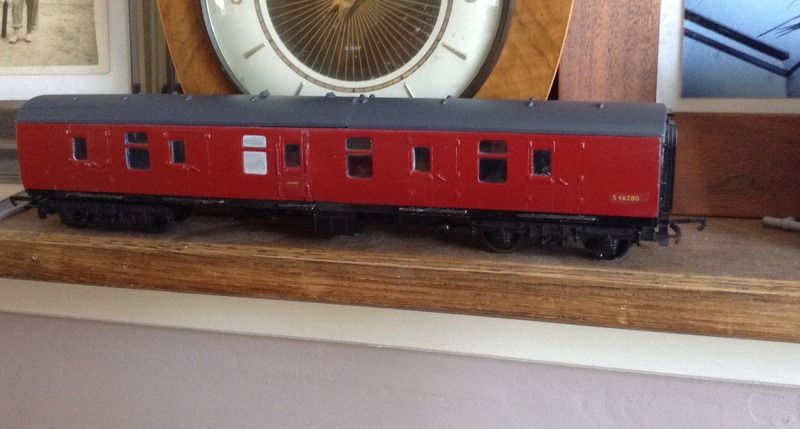
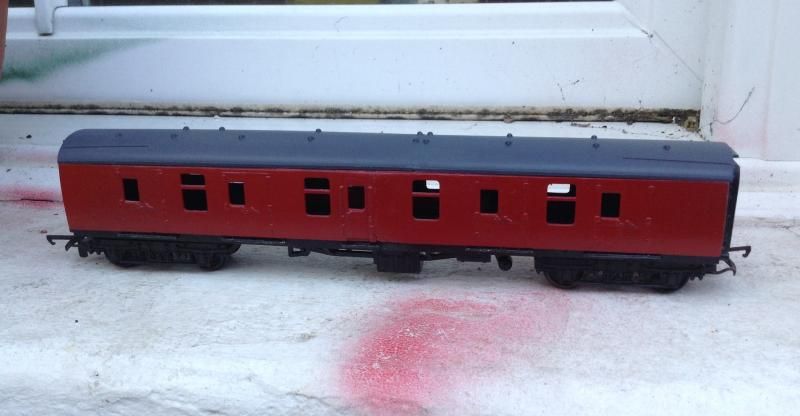
I recently found 2 damaged Triang Mk1 brakes for £1 each and decided to try and build a scale length Mk1 BG.
I used a Bachmann BG as a guide for cutting the sides, roof and chassis to size.
I had planned to do this conversion with a too long Triang BG , but found it was just as easy to use the brake coach sides and fill in one of the doors.
So far its been reasonably straight forward, although removing the molded line along the sides was a very tedious job.
I'm about half way through now, and I've added foot boards under the doors with using thin strips of plasticard.
The next step will be to add some detail to the roof and sort out the interior. This will probably come from the 2 donor coaches.
Ken
Image
Last edited by Ken Shabby on Fri Aug 14, 2020 6:15 pm, edited 2 times in total.
User avatar
Ken Shabby
Posts: 451
Joined: Thu Jan 15, 2009 12:20 pm

Re: Ken's workbench

Post by Ken Shabby »

Image
Some more progress over the weekend, flush glaze windows are now fitted and annoyingly a couple popped out when the roof was refitted :x .
The periscopes have been added to the roof using tiny scraps of plastic and it now awaits some oval buffers.
I'm trying to think of a way to add bars to the windows, maybe drawing them onto clear plastic with a very thin black marker and mounting them behind the flush glaze windows?.
Ken
User avatar
Ken Shabby
Posts: 451
Joined: Thu Jan 15, 2009 12:20 pm

Re: Ken's workbench scratch building a shop

Post by Ken Shabby »

Much tidying to be done, but I'm quite pleased with how this is turning out.
The sides are very thin hard board from a picture frame, the rest is cardboard from a old Lima coach box.
It is strengthened with lolly sticks and the shop interior is a small block of Duplo Lego.
The shop display came from a ruined Superquick kit and the door from a Peco station kit.
The next step will be the drain pipe and guttering.

Ken


photobucket.com/user/WMBTN/media/image.jpg1_zpsipq5qz0o.jpg.html]Image[/URL]
User avatar
Bufferstop
Posts: 13821
Joined: Thu Mar 11, 2010 12:06 pm
Location: Bottom end of N. Warks line

Re: Ken's workbench

Post by Bufferstop »

Missed the coach when you first posted, a nice cut and shut job. Triang's thick plastic does stand up well to cutting and carving :)
Growing old, can't avoid it. Growing up, forget it!
My Layout, My Workbench Blog and My Opinions
User avatar
Ken Shabby
Posts: 451
Joined: Thu Jan 15, 2009 12:20 pm

Re: Ken's workbench

Post by Ken Shabby »

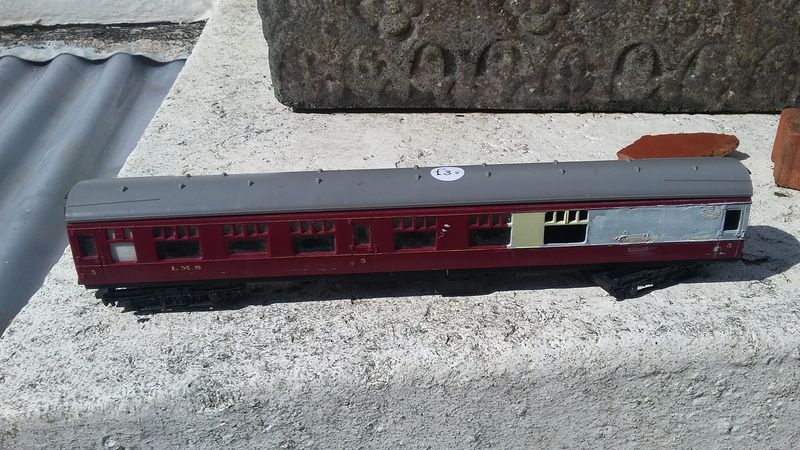
More fun with dirt cheap Mark 1 coaches .
This one is going to be a fictitous prototype careteria car coach, hence the filled in windows at one end.
The other side is unchanged and the interior will be 3 of the original compartments and a scratch built open area with a counter and seating.
Livery will be carmine and cream and I will be attempting to lower the ride height so it does'nt tower of my more modern coaches.
Much work remains, not sure I've I will be able to stand flush glazing it though.

Ken

Image
User avatar
GeraldH
Posts: 1192
Joined: Fri Aug 13, 2010 6:10 pm
Location: Isle of Ballybongle
Contact:

Re: Ken's workbench

Post by GeraldH »

Ken Shabby wrote:...
Some more progress over the weekend, flush glaze windows are now fitted and annoyingly a couple popped out when the roof was refitted :x .
The periscopes have been added to the roof using tiny scraps of plastic and it now awaits some oval buffers.
I'm trying to think of a way to add bars to the windows, maybe drawing them onto clear plastic with a very thin black marker and mounting them behind the flush glaze windows?.
Ken
That's a nice job and what a coincidence! I was trying to do a very similar conversion on my layout thread at almost exactly the same time :) .
Gerald H - BNR Correspondent :-)

My layout: http://www.newrailwaymodellers.co.uk/Fo ... hp?t=28854
User avatar
Ken Shabby
Posts: 451
Joined: Thu Jan 15, 2009 12:20 pm

Re: Ken's workbench Triang Hornby Mk1s

Post by Ken Shabby »

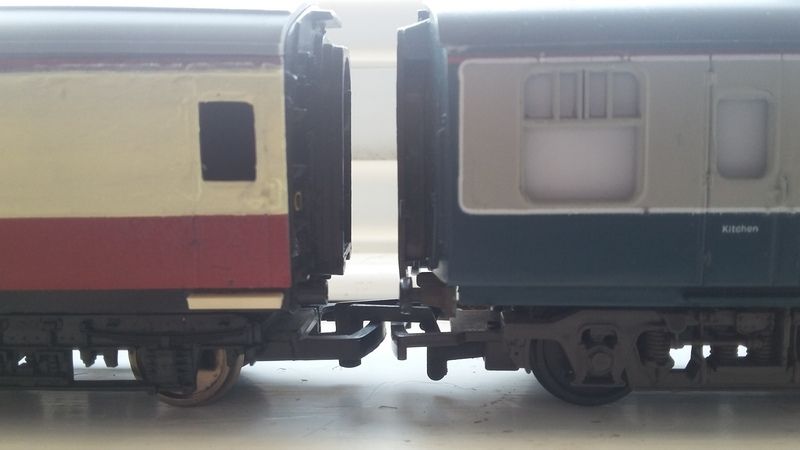
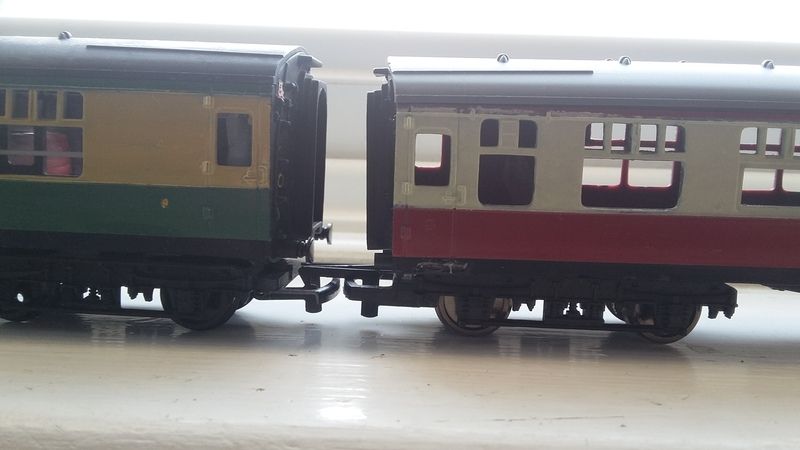
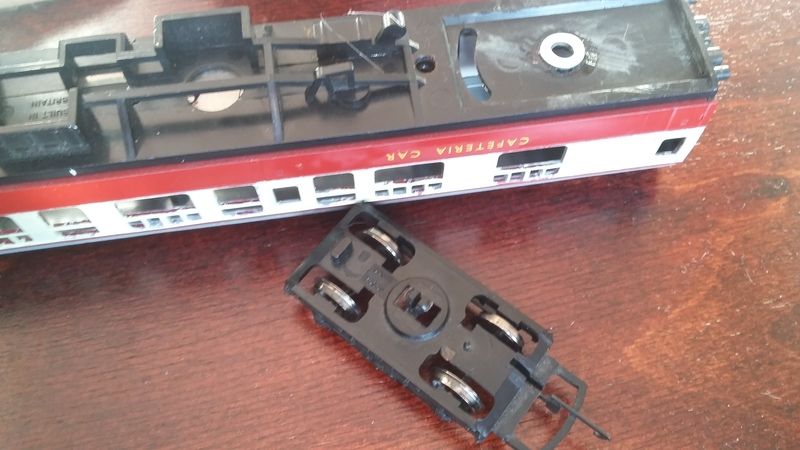
More progress with the fictitious cafeteria car , the coach has now been lowered so that It won't look too out of place amongst my other stock.
To do this I cut through the brass rivet and chucked the bogies in the spares box, and used the later style of push in bogies that Hornby used on all of it's LMS, GWR, SR coaches for years.
The hole where the old bogies were attached were filed flat and a washer was glued over the hole , the new bogies were a easy push fit.
A few test runs were made with the rolling chassis in various positions in a rake of coaches and no derailments occured.
I have started adding footboards under the doors and need to get another can of Ford Rosso red from Halfords, as you can see some tidying up of the paint work is required.
Image

Coupled to a Mainline restaurant coach , with footboard fitted.

Image

Coupled to a unaltered Triang MK1 (in a funny livery)

Image

Modified underframe
retiredoperator
Posts: 143
Joined: Sun Feb 15, 2015 8:25 am

Re: Ken's workbench Triang Hornby Mk1s

Post by retiredoperator »

Hi Ken. I have been thinking about cutting and shutting some Triang GWR Clerestories to LSWR Carriages for so long now, but was put off the idea, because the “ waistband “ or whatever it’s called didn’t match, then I heard about the “ Three Foot “ rule. If I don’t have ago soon I never will. Have you got anything you can tell me about the brittle plastic that might splinter when cut ? Happy Modelling Kev
User avatar
Ken Shabby
Posts: 451
Joined: Thu Jan 15, 2009 12:20 pm

Re: Ken's workbench Triang Hornby Mk1s

Post by Ken Shabby »

Hi Kev,
Sorry I've only just read your post . I have cut up some Clerestory coaches in the past, although not to lengthen them. instead I did quite a common conversion and cut windows in the end to produce a pre grouping Southern push pull set.
To do this I very carefully cut the coach end out so I could cut the window openings with it laid flat. I then glued the modified end back into position. I had no trouble with anything breaking and the coaches were originals from the 60's and not the more recent reissues, so unless the coaches have been weakened by sunlight you should be okay to start cutting.
Maybe a block of wood inside would help support everything during cutting and stop the body bending.
One problem with these coaches I've never fully solved is converting the clerestory roofs to give them a more LBSC/SECR/LSWR look.
I've tried various methods including joining the roofs of 2 and a half of the old Hornby KitKat/Smiths crisps vans, but they've never looked quite right.
Cheers, Ken
User avatar
Ken Shabby
Posts: 451
Joined: Thu Jan 15, 2009 12:20 pm

Re: Ken's workbench

Post by Ken Shabby »

Over the past few years due to becoming frustrated by the the build quality of modern locos and also enjoying Oscar Paisley's YouTube channel , I've become interested in Triang models.
Although this model is probably the most inaccurate Class 08 ever made I think it's not without charm.
The body was bought very cheaply a while back, and although it was heavily over painted in bright blue, all the steps were intact. It was stripped using over cleaner and news transfers were added. That was it for 18 months. I had enough Triang Jinty parts lying around to build a working chassis, but I needed the special L shaped bracket to attach the chassis to the body.
A few weeks before lock down, I managed to find a cheap complete shunter chassis, which only needed the wire resoldering to the pick up strip.
At some point I will need to move the wheels out slightly on the axles ,so she runs through my Peco points. instead of hoping over them, but I think I'll leave it for now.
The loco runs very smoothly, but the body is quite brittle and there is already a hairline crack where the body screws onto the chassis.
Ken
restoredshunter.jpg
User avatar
Mountain
Posts: 5884
Joined: Mon Oct 24, 2016 3:43 pm
Location: UK.

Re: Ken's workbench Triang Hornby Mk1s

Post by Mountain »

The coaches are excellent.

I have one of those lovely Triang diesel shunters. They were well made. I heard that they were designed before the prototypes were made so they took elements of a few designs. They look closer to one of the other early designs then a class 08. They are lovely though. The wheels could do with turning down a bit in a lathe but other then that, and to adjust the back to back a little, they are fine.
I really think they are often overlooked by modellers as an interesting industrial shunter for use shunting things in and out of an industry on a layout. :)
If anyone has bought one and found that the wheel insulators have cracked with age, I believe Peters Spares have replacements.
The only other small downside is that one could do with a half decent controller as Triang locos do tend to draw a little more current then modern locos. The most common issues with them are that age has weakened the magnets. They can either be re-magnetized or they can have modern replacement neo magnets fitted. If the new magnets are too strong, I have been informed that one can add strips of paper between the magnet and the motor which should do the trick.
User avatar
Lysander
Posts: 2348
Joined: Wed Aug 22, 2007 9:53 pm

Re: Ken's workbench Triang Hornby Mk1s

Post by Lysander »

Ken Shabby wrote:Hi Kev, One problem with these coaches I've never fully solved is converting the clerestory roofs to give them a more LBSC/SECR/LSWR look. I've tried various methods including joining the roofs of 2 and a half of the old Hornby KitKat/Smiths crisps vans, but they've never looked quite right. Cheers, Ken
Reducing the raised clerestory section on these roofs is straightforward Ken, but a little fiddley and time consuming. Nevertheless, a satisfactory result can be achieved if you have no other suitable substitute.

See here for how I did it [scroll down just a little way]: https://srmg.org.uk/cambrian-composite

Kevin - surgery on Triang Clerestory coaches is quite trouble-free and the plastic doesn't splinter or split. All you need is a fine razor saw or a similar fret saw. As Ken has said, some internal bracing helps support the moulding as you are cutting. Just cut slowly and constantly check that you are square. Rejoin your parts with normal liquid poly and reinforce from behind with a strip of plastic card for a belt-and-braces finish. Filler [Milliput] can be used to invisibly fill unintended gaps and seams.

Tony
Men with false teeth may yet speak the truth.......
User avatar
Ken Shabby
Posts: 451
Joined: Thu Jan 15, 2009 12:20 pm

Re: Ken's workbench Triang Hornby Mk1s

Post by Ken Shabby »

Thanks for the link Tony, I can see that bracing the roof with plasticard is a good idea before you start cutting . The first time I tried cutting off the clerestory part for few years back now, I didn't do this and I broke the roof.
Last year I tried another method and scratch built a new roof using a strip of thin wood with curved edges I bought in B&Q , The strip of wood was slightly too narrow , so I split it length ways and glued it to a strip of thick cardboard with a slight gap between the 2 pieces .
With a little bit of trial and error I got this to fit quite tightly and match the profile of the coach ends. Once I was happy with the fit I glued a piece of thin card over the top, fitted some white metal ventilators and sprayed the roof with Pound shop grey primer.
This was probably my most successful attempt so far, the only problem the thin card is easily damaged , so clearly plasticard is the answer.
Next time I'll try your method.
Ken
User avatar
Bufferstop
Posts: 13821
Joined: Thu Mar 11, 2010 12:06 pm
Location: Bottom end of N. Warks line

Re: Ken's workbench Triang Hornby Mk1s

Post by Bufferstop »

Looking through some photos of the LMS prototype diesel shunters it looks as though the inside frame chassis was correct for them. It would fit with them being built on withdrawn shunter chassis's. If that's the case the only other outstanding detail is they all seem to have vertical radiator slats, but changing them isn't such a big job. They all seem to have had minor differences. The only one I can remember seeing in the '50s was a jackshaft drive, and the old fitter I knew didn't have a good word for it.
Growing old, can't avoid it. Growing up, forget it!
My Layout, My Workbench Blog and My Opinions
gppsoftware
Posts: 310
Joined: Thu Mar 09, 2006 5:34 am

Re: Ken's workbench Triang Hornby Mk1s

Post by gppsoftware »

The old Triang MKI's actually stand up quite well if suitably finished.

I did a 'cut n shut' on two BSKs to create a BG. It came out pretty well once fitted with Replica B4 bogies. This was in the days before the first 'correct length' BG from Replica.

One thing which really does improve the Triang MKI's is to fit Replica rubber gangway connectors in place of the solid plastic offering.
I fitted Replica Commonwealth bogies to all of mine except the BG. Be aware that the bogie fixing position is a little too far 'outboard' to the ends which is why they look a bit odd. Bring them in and they look a lot better.
In real life, these coaches had 3 foot 6 inch wheels. If correct diameter wheels are used, this can further improve appearance. I think the Hornby bogies have slightly underscale diameter wheels which is why they look like Lima MKI's sitting too high on their bogies.

Good job!
Post Reply