HOW TO--COACH LIGHTING.
Posted: Sun Sep 17, 2006 2:11 pm
Want to light a coach for the price of a bulb?? Here's How.
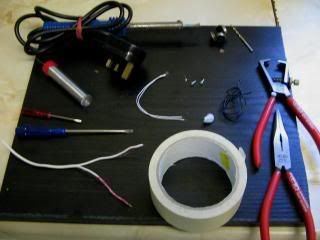
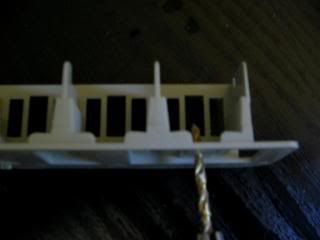
Things you will need. No description. The photo will give you a good idea.
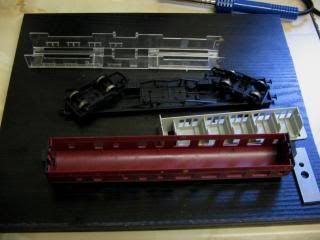
Dismantle the coach ( I am using an LMS Hornby. The construction varies)
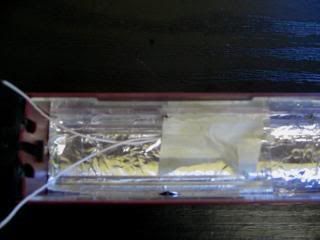
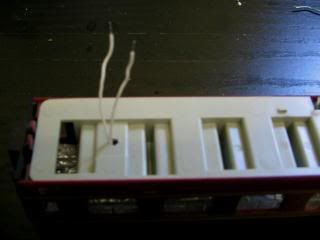
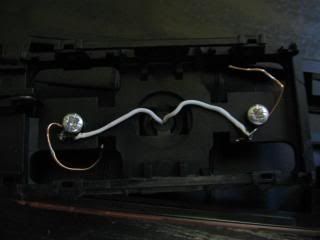
Into the roof glue a strip of alluminium foil (I used PVA glue) then replace the glazing.
Using a piece of masking tape, secure the bulb to the roof. PLEASE MAKE SURE THAT THE BULB IS NOT IN CONTACT WITH THE ROOF AS THIS COULD CAUSE MELTING OF THE PLASTIC. BEND THE BULB END DOWN FROM THE MASKING TAPE TO AVOID THIS. ( the bulb is a 12v 80mA grain of wheat. No resistor needed)
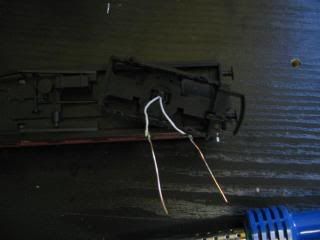
Drill a hole in the interior to pass the wires through.
Now this is fiddly!! Assemble the coach, passsing the wires through the bogie pivot
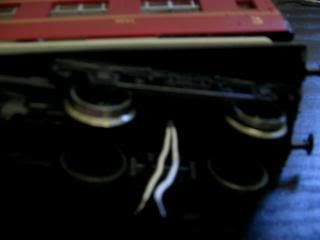
Now, strip some Bell Wire and cut off 2 lengths ( about 1 1/4'') and solder these to the two bulb wires.
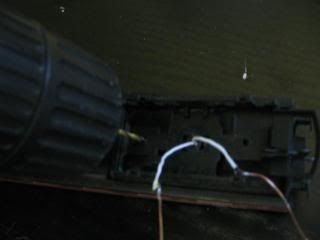
Drill two holes in the underside of the bogie as illustrated. (2mm I think. to take what is a 2BA self tapping screw. The type you use for Hornby couplings)
Use a bit of Blue Tack to stick the screw to the end of the screwdriver.
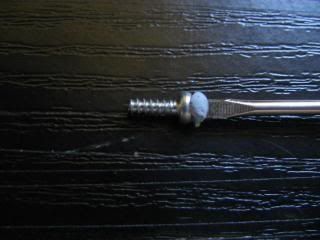
Insert screws a little.
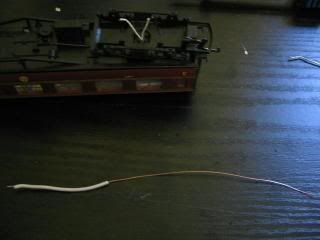
Wind copper contact wire around the screws and tighten.
Now, replace the wheels so they sit on the contact wire. Note- they will not run a free as normal.
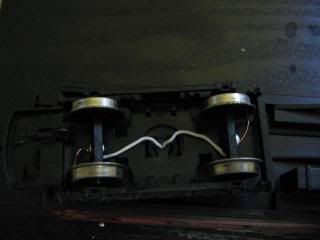
It should be mentioned at this stage that the wheel on this coach are the plastic type with the steel tyre and rim. If your coach has ALL plastic wheel then these should be replaced whith Hornby all steel wheels. A NOTE TO MENTION---- If using the Hornby all steel wheels the contacts can be placed on the INSIDE of the wheel. If derailing is encountered because of the new wheels. Simply pull the wheels gently appart using pliers and situate them on the track so there is little sideways movement between the rails. This should do the trick.
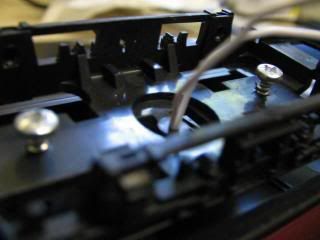
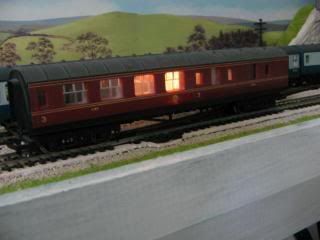
Now comes the tricky part. Put the coach on the track to check it works. It probably will. But will it flicker when running. YES, over points. Your next job is to put it behind a locomotive to see. If it flickers when running then alter the contacts with a small screwdriver. Keep trying. It may take a while to get it right but once right it will stay that way.
GOOD LUCK!!!
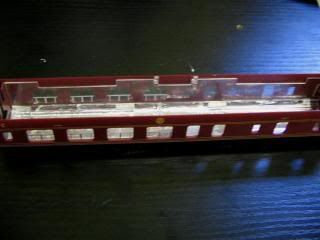
Oh!! By the way. It will not light up ALL the coach but as I remember in the 50s. Coaches were never evenly lit due to the lack of working bulbs.
BILL.
Things you will need. No description. The photo will give you a good idea.
Dismantle the coach ( I am using an LMS Hornby. The construction varies)
Into the roof glue a strip of alluminium foil (I used PVA glue) then replace the glazing.
Using a piece of masking tape, secure the bulb to the roof. PLEASE MAKE SURE THAT THE BULB IS NOT IN CONTACT WITH THE ROOF AS THIS COULD CAUSE MELTING OF THE PLASTIC. BEND THE BULB END DOWN FROM THE MASKING TAPE TO AVOID THIS. ( the bulb is a 12v 80mA grain of wheat. No resistor needed)
Drill a hole in the interior to pass the wires through.
Now this is fiddly!! Assemble the coach, passsing the wires through the bogie pivot
Now, strip some Bell Wire and cut off 2 lengths ( about 1 1/4'') and solder these to the two bulb wires.
Drill two holes in the underside of the bogie as illustrated. (2mm I think. to take what is a 2BA self tapping screw. The type you use for Hornby couplings)
Use a bit of Blue Tack to stick the screw to the end of the screwdriver.
Insert screws a little.
Wind copper contact wire around the screws and tighten.
Now, replace the wheels so they sit on the contact wire. Note- they will not run a free as normal.
It should be mentioned at this stage that the wheel on this coach are the plastic type with the steel tyre and rim. If your coach has ALL plastic wheel then these should be replaced whith Hornby all steel wheels. A NOTE TO MENTION---- If using the Hornby all steel wheels the contacts can be placed on the INSIDE of the wheel. If derailing is encountered because of the new wheels. Simply pull the wheels gently appart using pliers and situate them on the track so there is little sideways movement between the rails. This should do the trick.
Now comes the tricky part. Put the coach on the track to check it works. It probably will. But will it flicker when running. YES, over points. Your next job is to put it behind a locomotive to see. If it flickers when running then alter the contacts with a small screwdriver. Keep trying. It may take a while to get it right but once right it will stay that way.
GOOD LUCK!!!
Oh!! By the way. It will not light up ALL the coach but as I remember in the 50s. Coaches were never evenly lit due to the lack of working bulbs.
BILL.