
It came in brown livery and with a certificate saying it was a limited edition number 061 of 500. If this sort of thing matters to you and you have one you will be pleased to know that your model is now even more limited being 1 of 499 (You're welcome!).
Birmingham New Street and Brettell Road in P4
-
Bufferstop

- Posts: 13821
- Joined: Thu Mar 11, 2010 12:06 pm
- Location: Bottom end of N. Warks line
Re: Birmingham New Street and Brettell Road in P4
Growing old, can't avoid it. Growing up, forget it!
My Layout, My Workbench Blog and My Opinions
My Layout, My Workbench Blog and My Opinions
Re: Birmingham New Street and Brettell Road in P4
Exquisite modelling. Love the Borail with the rusty track load.
Re: Birmingham New Street and Brettell Road in P4
Ive recently been doing a few revisions on the layout.
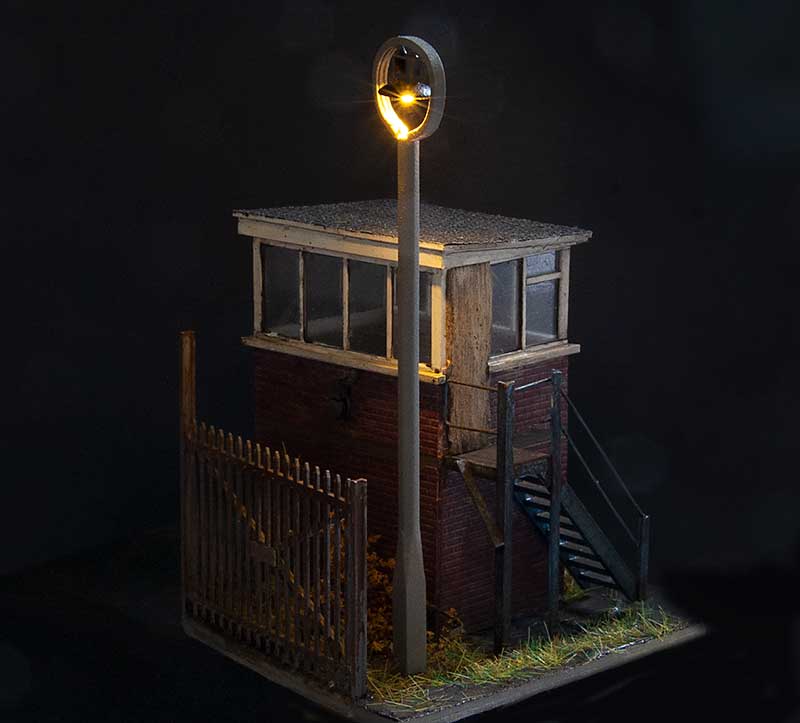
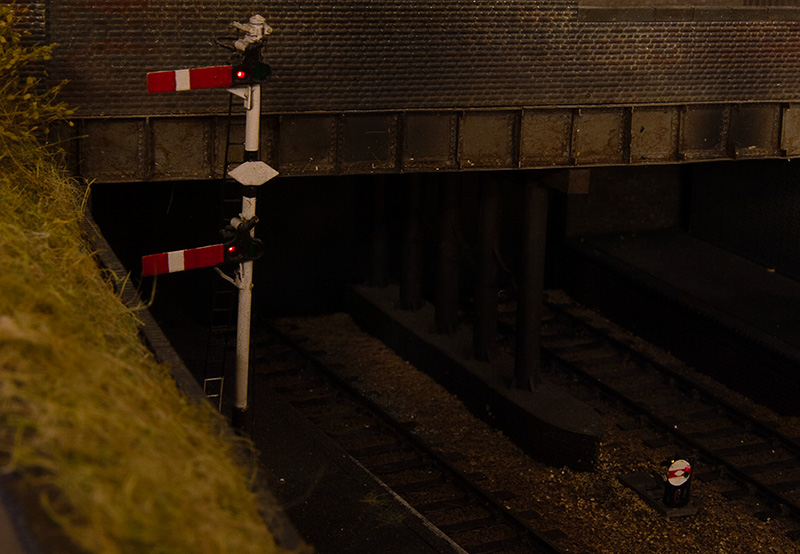
The first was prompted by a failure. It had always irked me a little that the above lamp was a little bit crude and the top wasn't really the distinctive shape the lights at Round Oak had. Being at the back in a dark corner it wasn't noticeable enough to invest any time into. However when it recently failed why not kill two birds with one stone?
So after a bit of tweaking I'm much happier with it now.
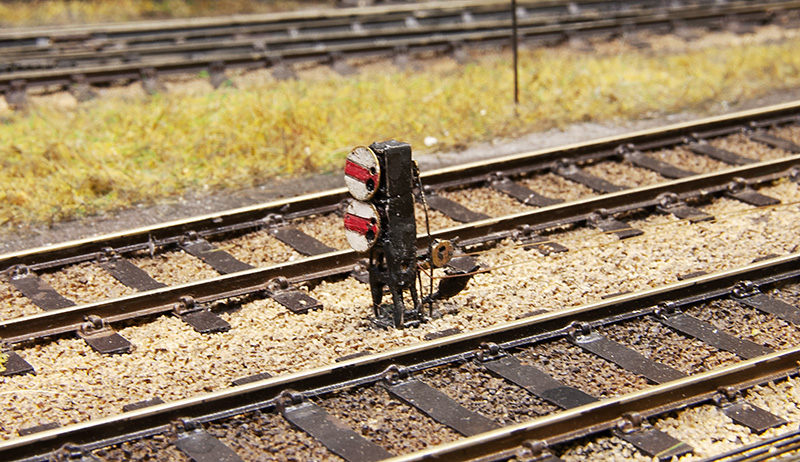
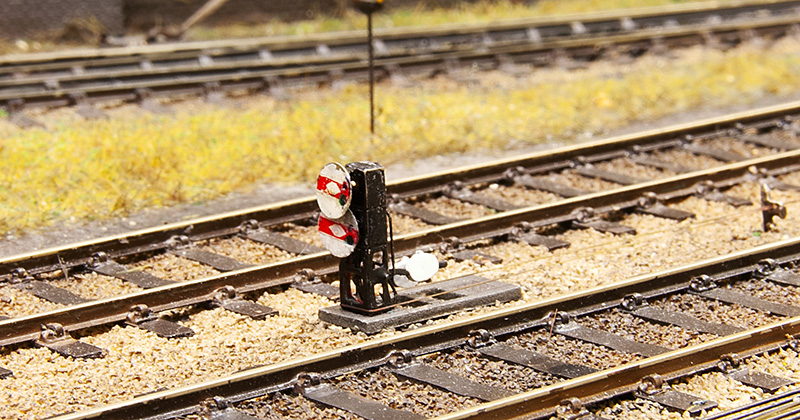
Ground Signals. I originally used the MSE kits but I had found a few drawbacks. First thing was A few had took some knocks while cleaning the track. As they use a whitemetal casting for the main body and legs they really didn't like this at all and were starting to look a bit bent and battered. Secondly as I had fitted lights there wasn't a lot of room to work and I had just drilled out the lamp housing and shoved a nano LED in there with slightly mixed results.
One consequence of this was more light bled out of the bottom than through the signal despite various attempts to fill the hole
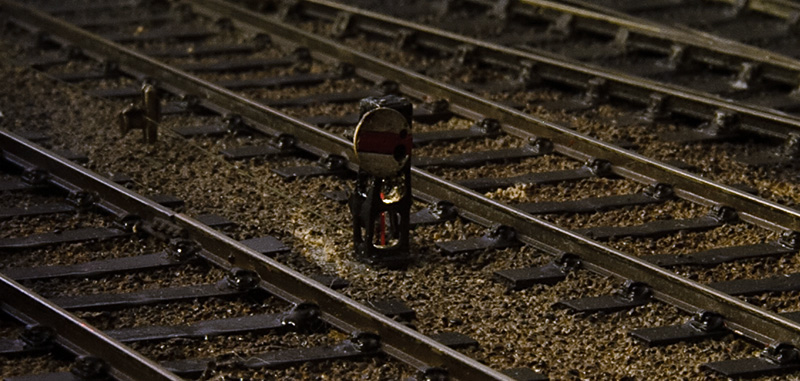
So step in the Palatine models etched kits as a replacement https://www.checksystems.com/palatinemo ... ducts.html . These are hopefully stronger and being an etch theres more room to position the LED in a better controlled way. I say more room but in 4mm scale ground signals are tiny but because of that even a slight gain is a big help. I modified the kits a little to make them work and drilled a couple of holes for the lights. Results are below
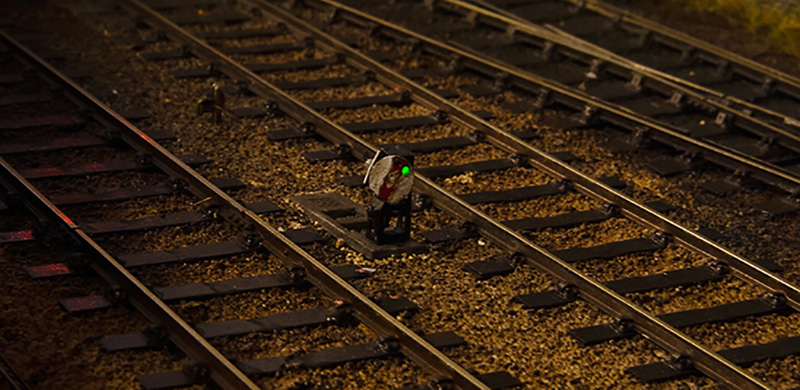
On the subject of signals Ive been playing around with resistors again to try to get the lamps a bit closer to how the real thing looked and less like a modern colour light. I think I'm there now.
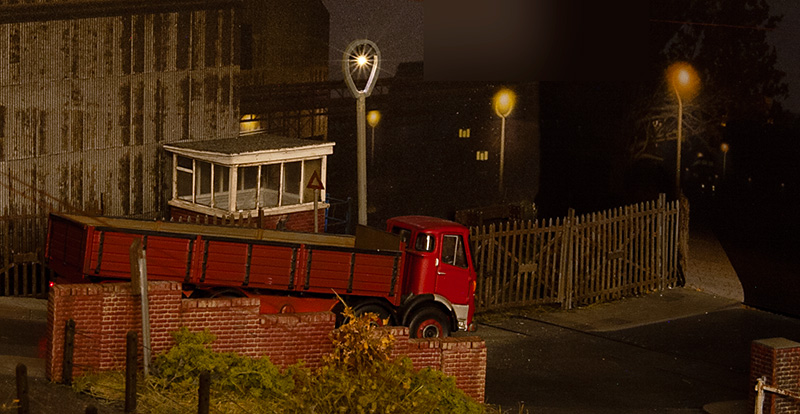
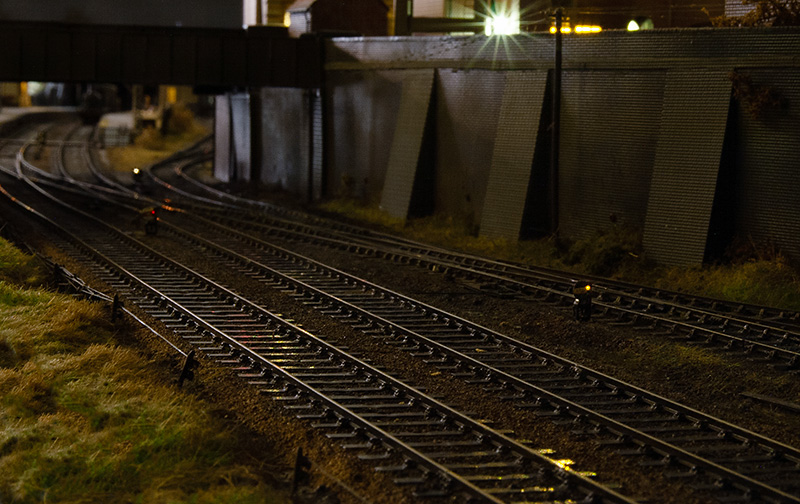
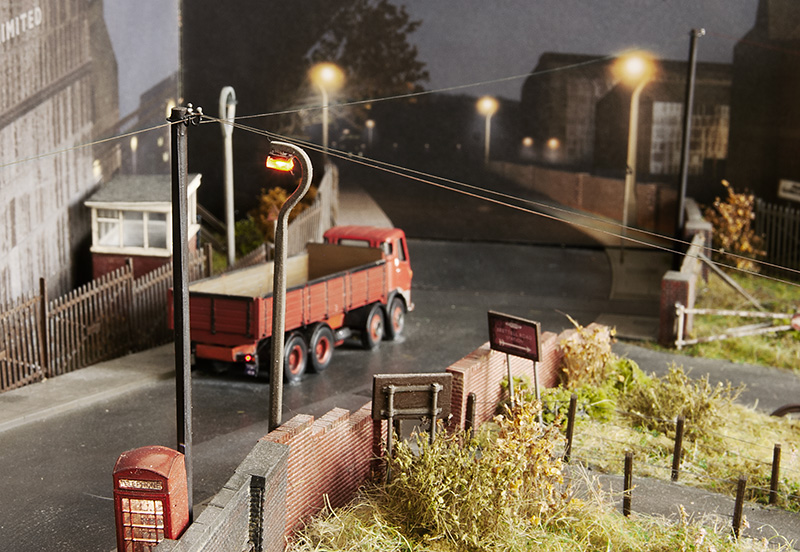
Up on the road Ive added a few telegraph poles meaning I think I can call this area finished now.
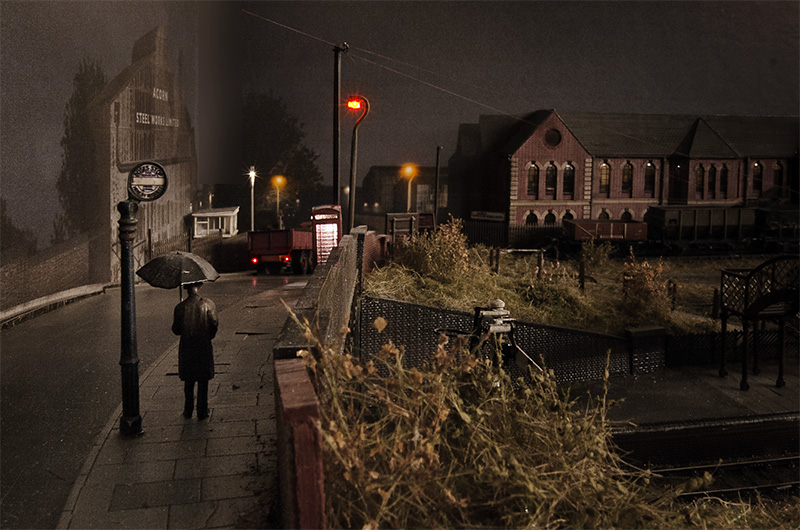
A revisit to my classic (or is that cliché?) scene. This time a wider version.
The first was prompted by a failure. It had always irked me a little that the above lamp was a little bit crude and the top wasn't really the distinctive shape the lights at Round Oak had. Being at the back in a dark corner it wasn't noticeable enough to invest any time into. However when it recently failed why not kill two birds with one stone?
So after a bit of tweaking I'm much happier with it now.
Ground Signals. I originally used the MSE kits but I had found a few drawbacks. First thing was A few had took some knocks while cleaning the track. As they use a whitemetal casting for the main body and legs they really didn't like this at all and were starting to look a bit bent and battered. Secondly as I had fitted lights there wasn't a lot of room to work and I had just drilled out the lamp housing and shoved a nano LED in there with slightly mixed results.
One consequence of this was more light bled out of the bottom than through the signal despite various attempts to fill the hole
So step in the Palatine models etched kits as a replacement https://www.checksystems.com/palatinemo ... ducts.html . These are hopefully stronger and being an etch theres more room to position the LED in a better controlled way. I say more room but in 4mm scale ground signals are tiny but because of that even a slight gain is a big help. I modified the kits a little to make them work and drilled a couple of holes for the lights. Results are below
On the subject of signals Ive been playing around with resistors again to try to get the lamps a bit closer to how the real thing looked and less like a modern colour light. I think I'm there now.
Up on the road Ive added a few telegraph poles meaning I think I can call this area finished now.
A revisit to my classic (or is that cliché?) scene. This time a wider version.
Re: Birmingham New Street and Brettell Road in P4
Never fails to impress !!
Geoff T.
Geoff T.
Remember ... I know nothing about railways.
http://www.newrailwaymodellers.co.uk/Fo ... 22&t=32187 and Another on http://www.newrailwaymodellers.co.uk/Fo ... &sk=t&sd=a
http://www.newrailwaymodellers.co.uk/Fo ... 22&t=32187 and Another on http://www.newrailwaymodellers.co.uk/Fo ... &sk=t&sd=a
Re: Birmingham New Street and Brettell Road in P4
Nearly time to hit the road again. Brettell Road will be appearing at Scalefour Crewe on the 8th and 9th June.
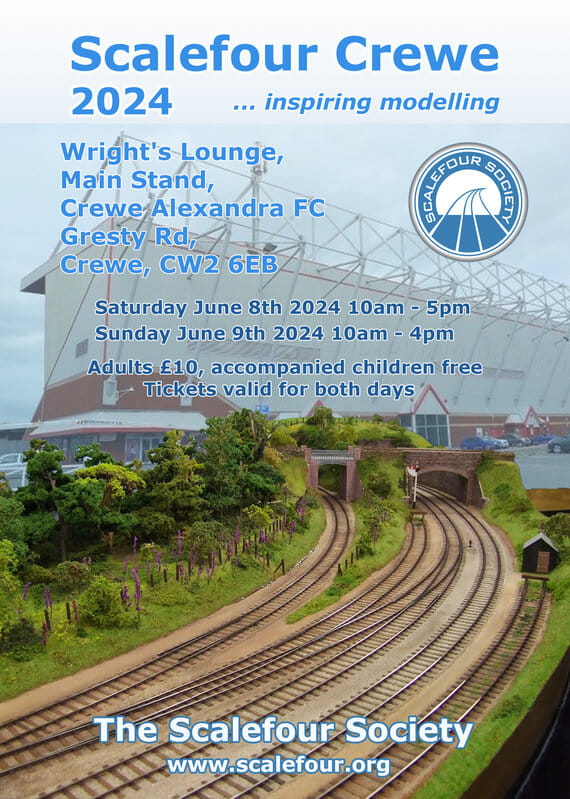
The show guide can be viewed via https://indd.adobe.com/view/68363570-e0 ... acee5b39?f
hope to see some of you there.
The show guide can be viewed via https://indd.adobe.com/view/68363570-e0 ... acee5b39?f
hope to see some of you there.
Re: Birmingham New Street and Brettell Road in P4
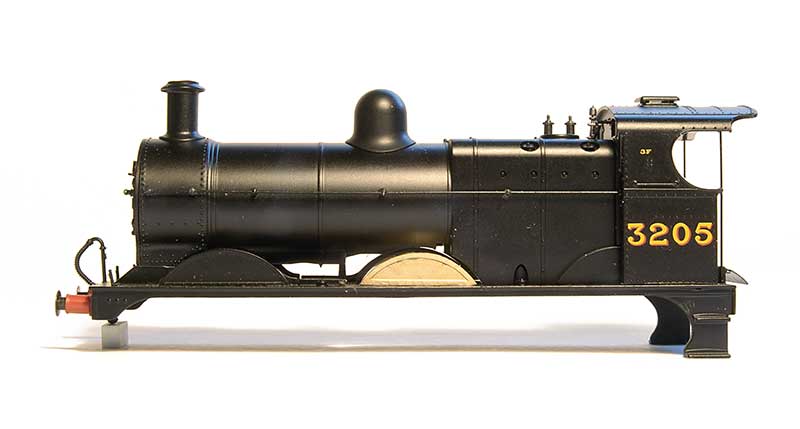
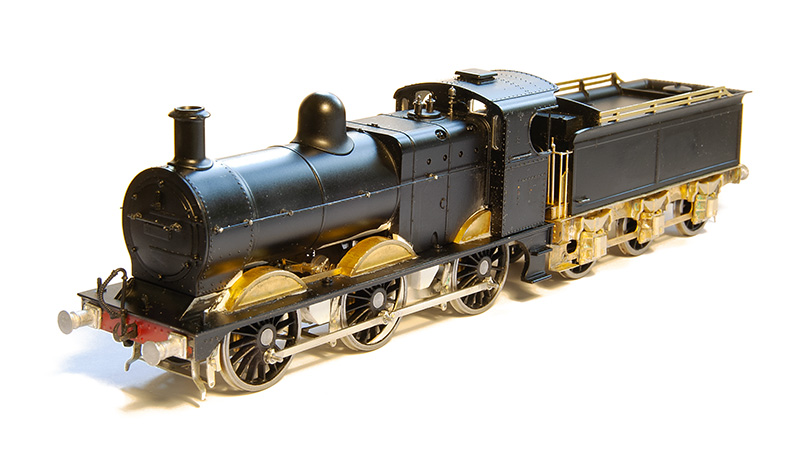
Ive always quite liked the Midland 3f tender locos. They seem to be quite nicely proportioned, more so than the 4F's that looked kind of tall and somewhat top heavy. A while ago in quick succession I picked up a Bachmann body followed soon after by a tender body and a Brassmasters Easychas for it. In the last week or so Ive decided to get some sort of progress on it.
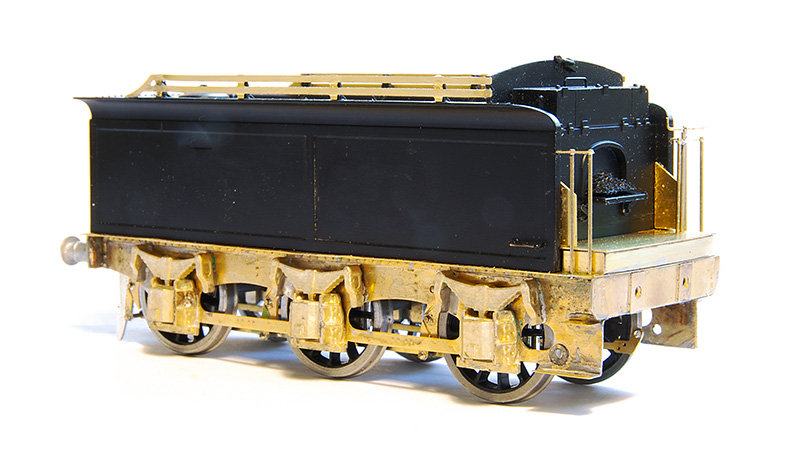
So starting with the tender. I never had the Bachmann chassis and if its anything like most RTR tender chassis it will no doubt have all been a bit flat and kinda naff. Brassmasters do a detailing kit to replace the tender chassis completely so I used that. This is just built as per their instructions.
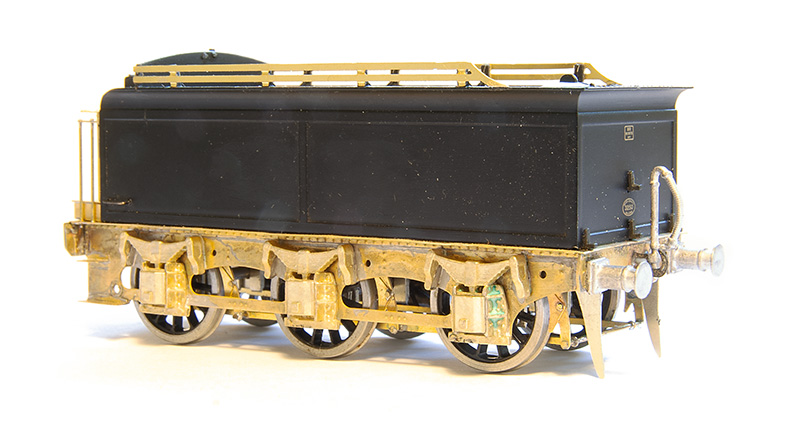
The rear end. Buffers are from Lanarkshire models as is the vac pipe. I think I'll replace the lamp irons too.
On to the loco. If I had the original chassis then based on the 1F I did I'm confident you could have something up and running in a somewhat leisurely afternoon. If you use the Bachmann coupling rods and brakes you might not even need to fire up the soldering iron! However as I didn't have the Bachmann chassis I decided to build the chassis up as a more conventional one by adding spacers left over from a High Level Models Jinty chassis kit. As the easychas caters for EM and p4 the EM spacers are perfect. If you don't have any leftover Jinty bits though Alan Gibson do a neat little etch of spacers.
Before I show you the chassis though some decisions need to be made. The splashers suffer from the usual RTR problem of being too big. Brassmasters do a separate etch for ones that are the right size. The above image shows a comparison so you can decide if it bothers you or not.
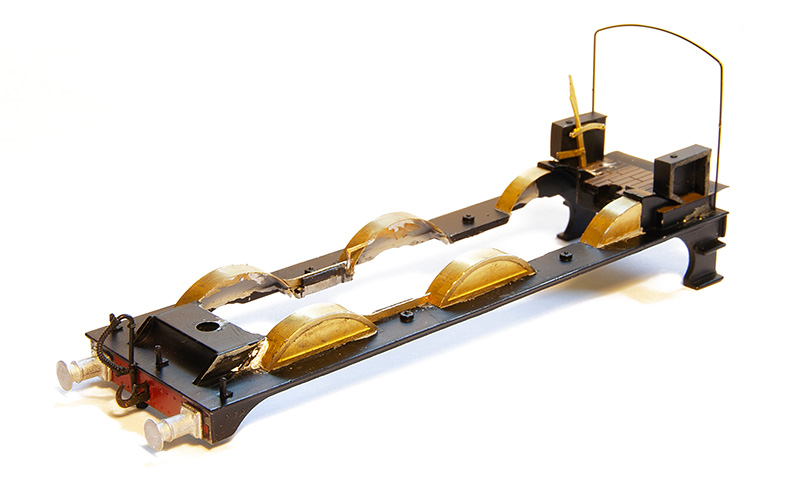
As you can probably guess it bothered me so they were all replaced. The original footplate has a solid floor back to the front of the chassis casting so I cut that out. The new reversing lever is part of the chassis kit and the boxes on the side of the cabs have been thinned down by 2mm as per the instructions.
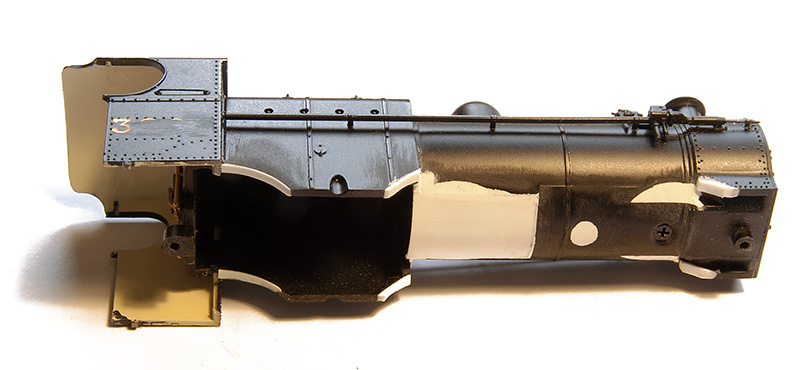
All this means that a little bit of rectification is needed on the body as it had recesses in the boiler for the original splashers that are no longer needed. I believe the Bachmann chassis block comes quite far forward so the base of the boiler was put back in using layers of thin plasticard. Theres not really much else to do to the body other than this.
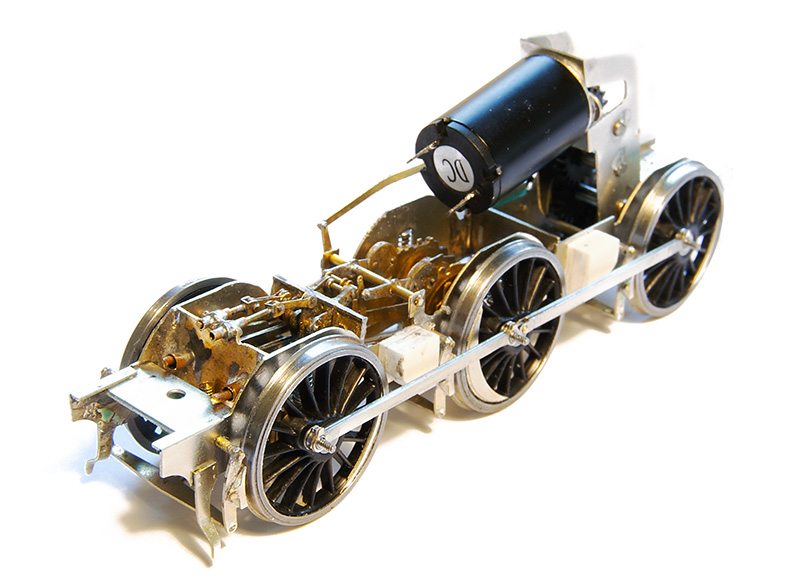
Back to the chassis then - with the inside motion kit from the 4f - You didn't expect me to leave a gaping hole did you? The gearbox is a high level loadhauler+
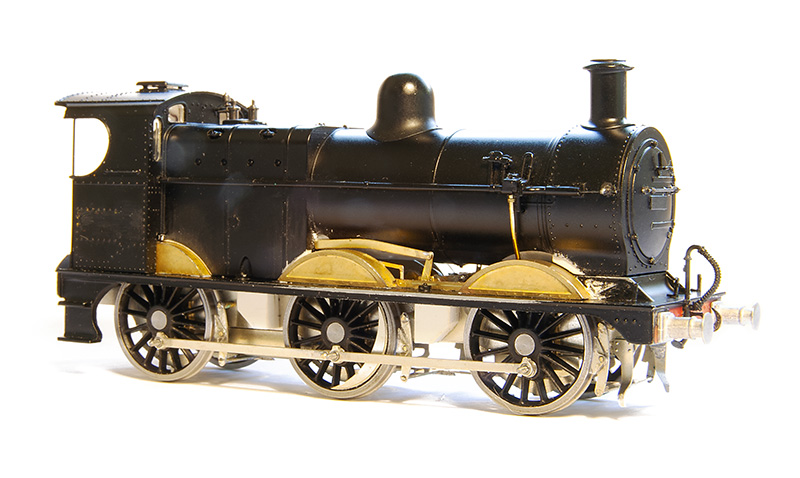
How the loco looks mocked up. I will leave the sandpipes until the very end as they will trap the centre wheels in place.
So starting with the tender. I never had the Bachmann chassis and if its anything like most RTR tender chassis it will no doubt have all been a bit flat and kinda naff. Brassmasters do a detailing kit to replace the tender chassis completely so I used that. This is just built as per their instructions.
The rear end. Buffers are from Lanarkshire models as is the vac pipe. I think I'll replace the lamp irons too.
On to the loco. If I had the original chassis then based on the 1F I did I'm confident you could have something up and running in a somewhat leisurely afternoon. If you use the Bachmann coupling rods and brakes you might not even need to fire up the soldering iron! However as I didn't have the Bachmann chassis I decided to build the chassis up as a more conventional one by adding spacers left over from a High Level Models Jinty chassis kit. As the easychas caters for EM and p4 the EM spacers are perfect. If you don't have any leftover Jinty bits though Alan Gibson do a neat little etch of spacers.
Before I show you the chassis though some decisions need to be made. The splashers suffer from the usual RTR problem of being too big. Brassmasters do a separate etch for ones that are the right size. The above image shows a comparison so you can decide if it bothers you or not.
As you can probably guess it bothered me so they were all replaced. The original footplate has a solid floor back to the front of the chassis casting so I cut that out. The new reversing lever is part of the chassis kit and the boxes on the side of the cabs have been thinned down by 2mm as per the instructions.
All this means that a little bit of rectification is needed on the body as it had recesses in the boiler for the original splashers that are no longer needed. I believe the Bachmann chassis block comes quite far forward so the base of the boiler was put back in using layers of thin plasticard. Theres not really much else to do to the body other than this.
Back to the chassis then - with the inside motion kit from the 4f - You didn't expect me to leave a gaping hole did you? The gearbox is a high level loadhauler+
How the loco looks mocked up. I will leave the sandpipes until the very end as they will trap the centre wheels in place.