Resolving some Hornby N15 issues

Articles which have been discussed in the main article section (7 days+) and are ready to be added to the main site.
Post Reply
redline41190
Posts: 554
Joined: Fri Mar 16, 2007 6:37 pm
Location: United States-Florida, Cymru (Wales...)

Resolving some Hornby N15 issues

Post by redline41190 »

I wasnt quite sure where to put this topic, so if the mods feel that it should belong in the Hornby section so be it, I just thought that it would be more helpful here.

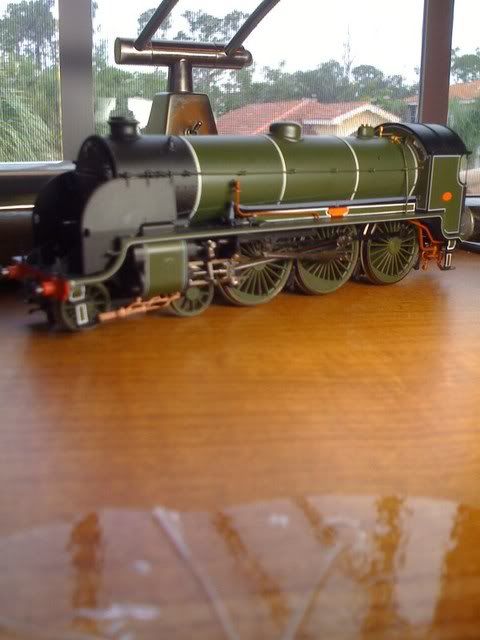
If you have a new model N15, you'll notice that the model is quite a beauty, the detail is superb, but the detail parts provided can interfere with the operation of the locomotive, and the front bogey is unsprung often resulting in de-railments.

First off this is my second N15, my first suffered an accident and was returned to Hattons, for a refund, or rather this N15. So I have some past experience :lol: I curently have R2723 'Etarre' and it is mechanically identical to the other N15 I had (Sir Pelleas). On Sir Pelleas I didnt bother to fit the front steps, but did fit the draincocks.

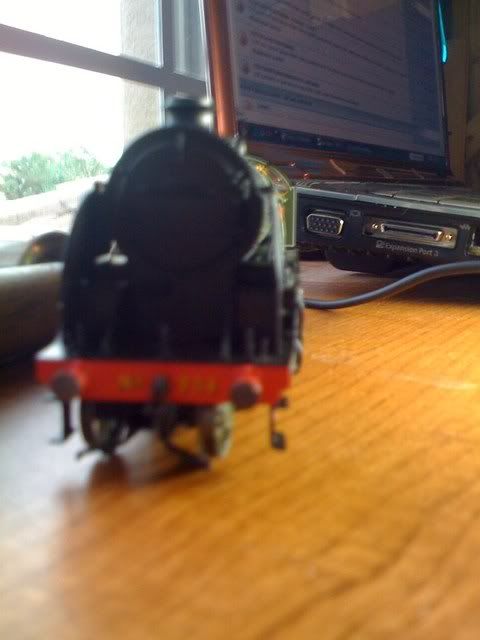
This is the best picture I could find of my modification. The draincocks were cut just after the first vertical bar in them, so that the wheels didnt get pushed off the rails when going around curves. This modification allowed operation on 2nd radius curves with the parts fitted.
Image

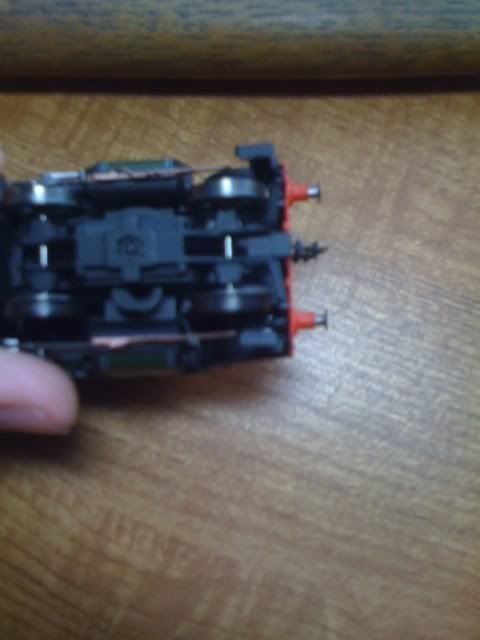
I have no photos of springing the bogey, but I have my own directions:
1. Remove the bogey from the main chassis
2. Unscrew the central shaft from the lug nut
3. Place the central shaft, slotted bar, and lug nut to the side and find a suitably "springy" spring, preferably 1/3 of a bachmann one.
4. Take a little bit of superglue or any other glue, depending on how long you want it to sit for, and put it into the hole where the lug nut goes. Place the lug inside being careful NOT to get glue on the inside of the threads. This just makes it easier to screw in the central shaft again.
5.Place the spring between the bogey and slotted bar with the central shaft inserted into both
6. Screw the central shaft into the bogey, and test "springyness"
7. Re attach bogey to chassis, and test the loco, some springs are too stiff and elevate the first set of drivers, if this is the case, loosen the screw holding the bogey to the chassis, or take the whole thing apart and cut the spring.

This should solve most of the random derailments caused by the bogey not having any pressure on it.

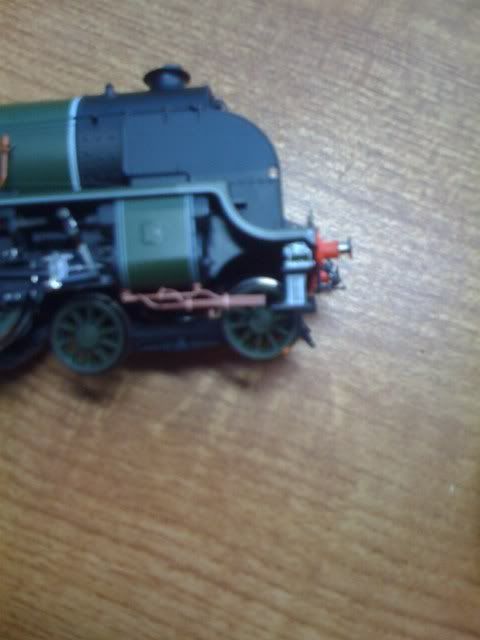
For Etarre I had planned to fit the detail after i was set on my curve radius, but then decided to fit the loco first as it will be the main tester for clearances.


Stay tuned for my final modifications to Etarre, which allow it to run with the steps and draincocks fitted.
(only because I need to go eat :lol: :wink: )
There are two ways to do things... The Great Western way, and the wrong way.
redline41190
Posts: 554
Joined: Fri Mar 16, 2007 6:37 pm
Location: United States-Florida, Cymru (Wales...)

Part 2

Post by redline41190 »

part 2

Ok so now that I explained the bogey spring and the first way to cut the draincocks, lets move on to Etarre. Etarre is an early Urie N15, denoted by the cab roof, this also hints at the front steps it has. If you have an N15 with a backwards letter 'C' in them then this information may not apply to you.

Here we have my finished product, Etarre with its draincocks and front steps fitted, with the ability for a smaller turn radius.
Image

First, when I originally fitted the steps I found that the loco could not negotiate the most generous curves i have (which I believe are a bit larger than 3rd radius, Im using Bachmann E-Z track atm). The steps fit into the two slots that are on either the left or right of the sprung buffers. These slots are by far too close to the bogey wheels, no matter how prototypical they are not practical. I removed the top part of the steps which goes into the slot, and moved them out to where the front bufferbeam curves down. This gives the bogey enough room to take the curves I have, and should take 3rd radius too (I wouldnt run the N15 on anything less than that anyway)
Image

This shows the location from the underside (forgive the picture quality, but it still gives a good general idea)
Image

And finally for shortening the draincocks. Though it is not necessary, as you could just run the pipework behind the relocated steps, it hits the front bogey wheel on turns, causing a derailment, and the loss of the front step it hits. I used a sharp pair of ordinary scissors and cut right before the steps start, as if the pipework would have hit the steps had it kept going.
Image

None of these modifications are difficult, but be warned, the detail pack supplied with the loco is the only one you'll ever get. I emailed hornby who promptly replied telling me that the bags are unavailable separately. If you need more help you can PM me or leave a reply here. I'll be glad to see what I can do :)


Cheers
-Jeremy
There are two ways to do things... The Great Western way, and the wrong way.
Post Reply