Fitting Kadees to Non Nem Stock

Articles which have been discussed in the main article section (7 days+) and are ready to be added to the main site.
mumbles
Posts: 1802
Joined: Sun Nov 12, 2006 11:23 pm
Location: Kent
Contact:

Post by mumbles »

F-UnitMad wrote:The recommended method for fixing Kadees to stock is to always fit them to the body.* That way the bogies ...snip
yeah, don;t you find you always find out stuff like that after they are fitted! having taken stock [ha ha] i think i will rip them off and fit to the bodies
will post pics of that when its done
cheers
michael
F-UnitMad
Posts: 6
Joined: Sun Oct 07, 2007 7:23 pm

Post by F-UnitMad »

Sorry to cause you a bit more work then... :oops: but nice to see someone using the proper Kadee height gauge... I never did myself :roll: but then I was doing US outline HO anyway... now into O scale:- tip:- Kadees get easier to assemble the larger the scale!!! :wink:
mumbles
Posts: 1802
Joined: Sun Nov 12, 2006 11:23 pm
Location: Kent
Contact:

Post by mumbles »

F-UnitMad wrote:Sorry to cause you a bit more work then... :oops: but nice to see someone using the proper Kadee height gauge... I never did myself :roll: but then I was doing US outline HO anyway... now into O scale:- tip:- Kadees get easier to assemble the larger the scale!!! :wink:
hey no problems, although having re-re-reviewd the situation i think i will stick with what i have on the 2 i have done and look at doing future ones to the body rather than the bogies, mainly because i would need a piece of plastic about 10mm to get the right height from the body for both those coaches
cheers
michael
F-UnitMad
Posts: 6
Joined: Sun Oct 07, 2007 7:23 pm

Post by F-UnitMad »

Yes, that's a snag with 4mm stock, being higher off the track than HO models. But you only need to stick to the Kadee height if you want the magnetic un-coupling feature to work- if you run coaches in fixed rakes the intermediate couplers can be at any height to suit you- only the outer ends need to be compatible with the usual standards.
mumbles
Posts: 1802
Joined: Sun Nov 12, 2006 11:23 pm
Location: Kent
Contact:

Post by mumbles »

Last night i fitted a kadee to the tender of Castle Cadbury, no coupler was fitted at the front as i don't intend dragging anything with the front of this loco!

it was a bit of a pain and involved trimming, checking, then trimming again, but it got there in the end

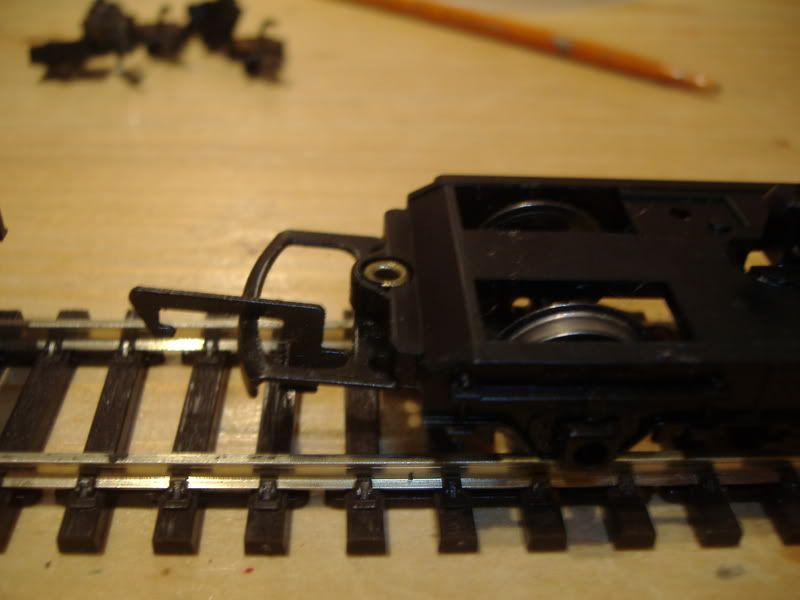
1st bit off wasn't enough
Image
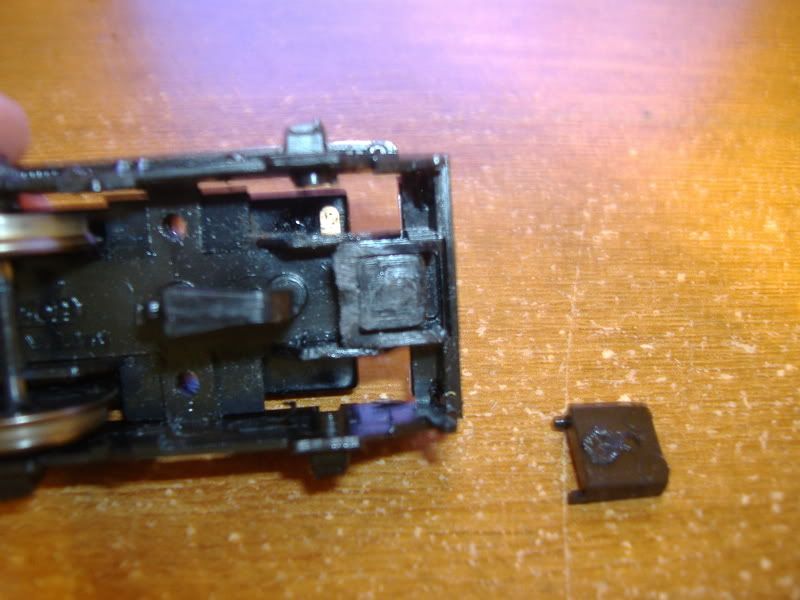
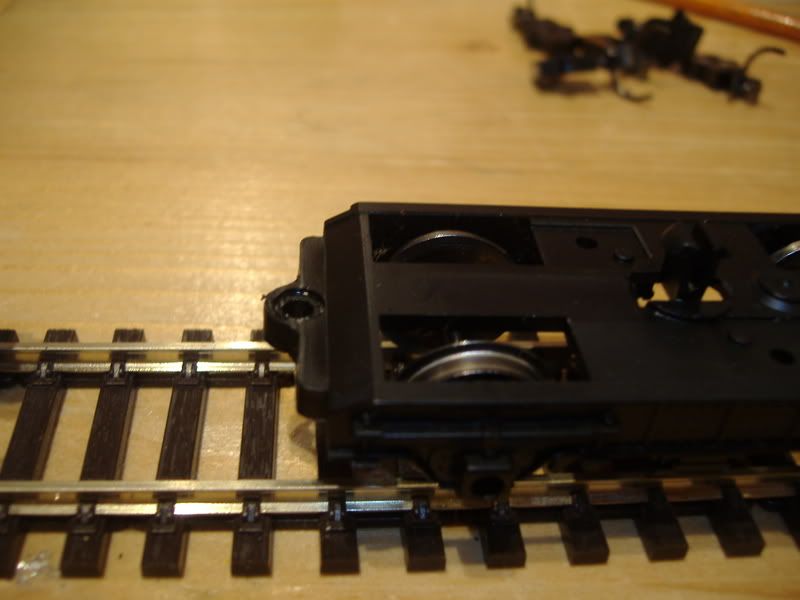
so took further dismantling to remove this much
Image
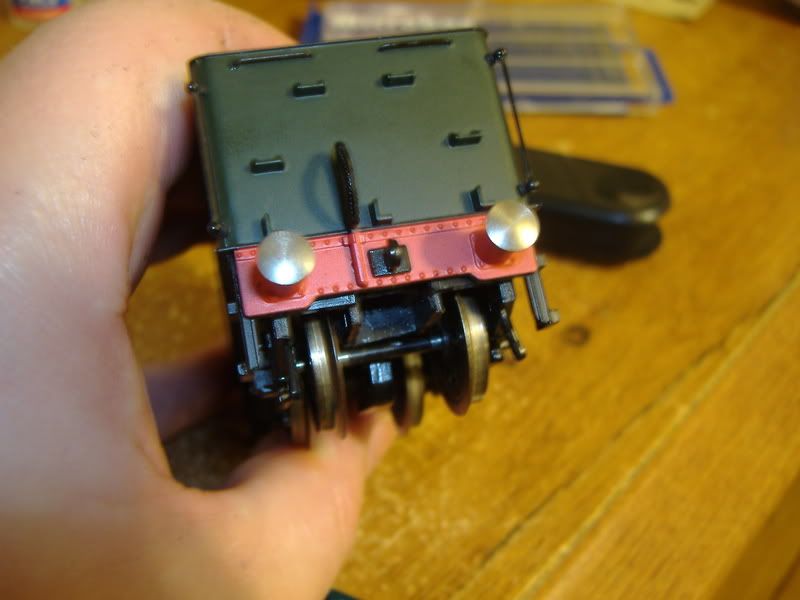
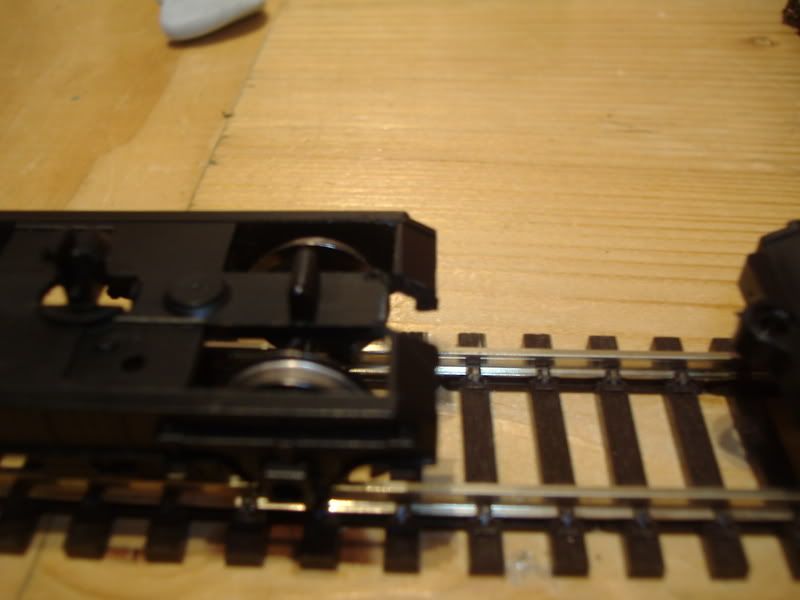
shown with tender body reatached
Image
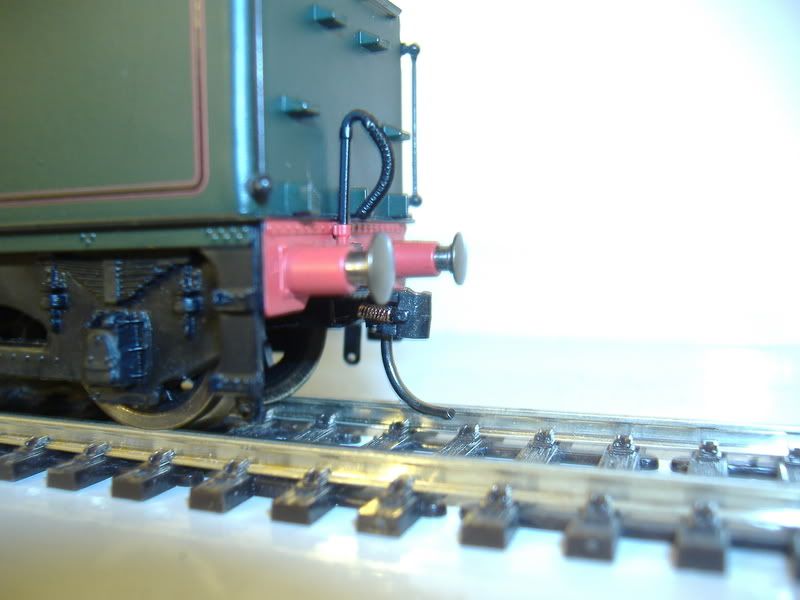
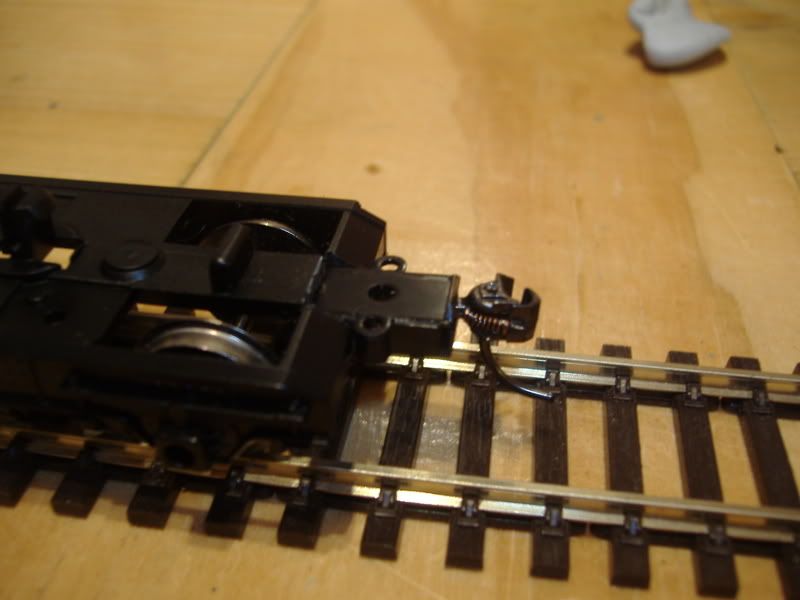
and the de rigeur height check
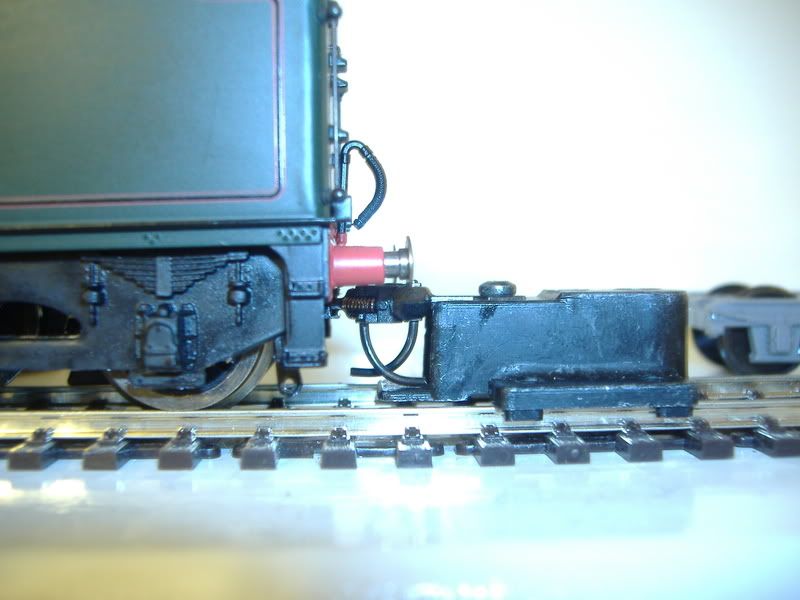
Image
done
Image

then today after fitting a decoder to the above loco.. and head lamp i thought i'd better do the hornby pullmans for it to couple to

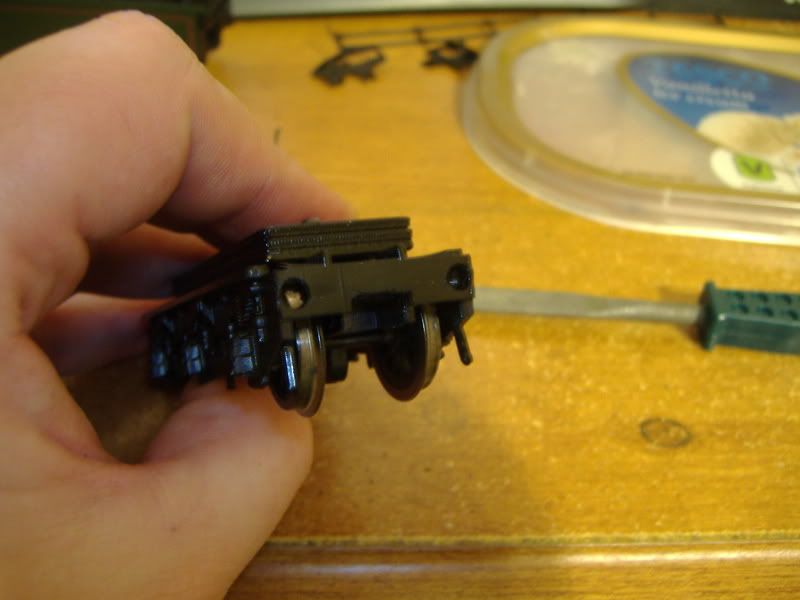
these were pretty straight forward but did involve some serious hacing away of bogies.. did look at fitting to body but was not possible

big smelly old coupling
Image
removed :D
Image
bogie turned round and cut the other end
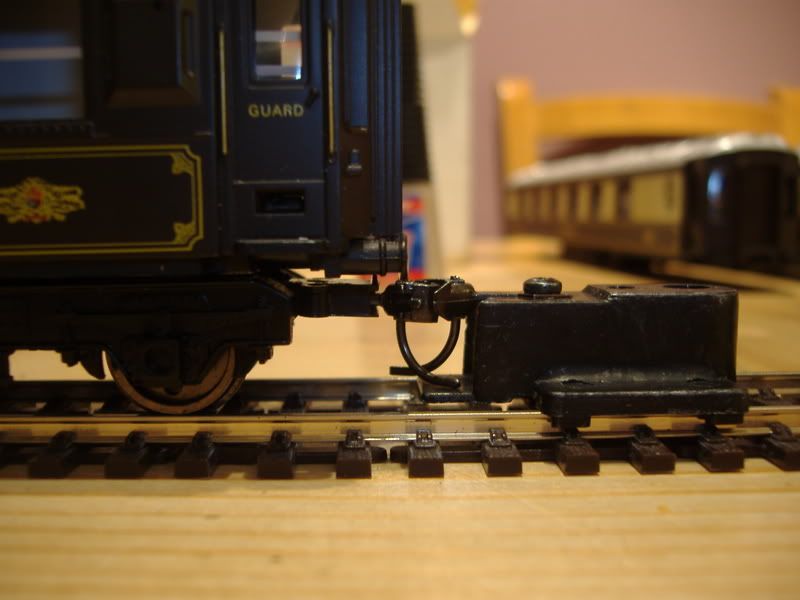
Image
in postition
Image
final height check and done
Image

the final test will be when i run them to check buffers don't lock.. ha ha, pretty screwed if they do!
cheers
michael
User avatar
Ironduke
Posts: 1234
Joined: Mon Sep 26, 2005 12:04 am
Location: Ballarat Victoria Australia
Contact:

Post by Ironduke »

You might need a longer shank on the tender's coupler :^)

I've found that a number 18 or 19 works well if you just secure it into the Hornby coupler mounting slot somehow. It involves hacking the coupler a bit though :^)
Regards
Rob
mumbles
Posts: 1802
Joined: Sun Nov 12, 2006 11:23 pm
Location: Kent
Contact:

Post by mumbles »

Ironduke wrote:You might need a longer shank on the tender's coupler :^)

I've found that a number 18 or 19 works well if you just secure it into the Hornby coupler mounting slot somehow. It involves hacking the coupler a bit though :^)
you may be right about the longer shank, just about to go test it once kids are settled in bed a bit

do you mean an 18/19 for the coach stock, to line up with the hole left by the 'rivet'?
F-UnitMad
Posts: 6
Joined: Sun Oct 07, 2007 7:23 pm

Post by F-UnitMad »

:P :lol: Way to go mumbles - and step-by-step piccys too!!! Well done!

I'd agree with Ironduke re the tender coupler needing a longer shank - as a general guideline as long as the inside rear face of the knuckle (as on your Pullman photo) is level with or beyond the face of the buffers you shouldn't get buffer-locking problems, but if in doubt try a 'dummy run' by putting the Kadee in place with blue-tak and trying it on curves of the sharpest radius you use before fixing more permenantly.
User avatar
Ironduke
Posts: 1234
Joined: Mon Sep 26, 2005 12:04 am
Location: Ballarat Victoria Australia
Contact:

Post by Ironduke »

mumbles wrote:
Ironduke wrote:You might need a longer shank on the tender's coupler :^)

I've found that a number 18 or 19 works well if you just secure it into the Hornby coupler mounting slot somehow. It involves hacking the coupler a bit though :^)
you may be right about the longer shank, just about to go test it once kids are settled in bed a bit

do you mean an 18/19 for the coach stock, to line up with the hole left by the 'rivet'?
No I mean a #18 #19 in the tender in the hole left by the removeable TL coupler. You have to either split the dovetail wider or remove the round bit and then secure it with glue or thin doublesided tape which stops it coming out but isn't so permanent :^)
On my 14xx class I drilled out the pin and clinched the dovetail in with a small self tapping screw but it does look a bit messy :oops:
Image
it's at the perfect height though.
Regards
Rob
mumbles
Posts: 1802
Joined: Sun Nov 12, 2006 11:23 pm
Location: Kent
Contact:

Post by mumbles »

ah, i see what you mean rob, i did try that to start with but wasn't totally happy and went for surgery instead

and i did get buffer lock, but easily sorted with a quick pull out and re-glue

cheers guys, it certainly gets easier as i go.. i have bachman 5 nse mk1s to do, but thats not too much to worry about as i have done that conversion already.

also stilll to do are bachman bullieds. also another steam loco [ a court class or something] that i use to pull some hornby old blood and custard, which i may not do
cheers
michael
Raider
Posts: 1085
Joined: Sun Oct 09, 2005 12:55 am
Location: Wolverhampton

Post by Raider »

Which couplings do you use Mumbles - I've had a look at the Kadee website but there is such a choice that I am totally confused.
mumbles
Posts: 1802
Joined: Sun Nov 12, 2006 11:23 pm
Location: Kent
Contact:

Post by mumbles »

Raider wrote:Which couplings do you use Mumbles - I've had a look at the Kadee website but there is such a choice that I am totally confused.
for the non nem stock i used number 5s
available on ebay for a good price from north wales models or something like that. they sell the multipack which has enough couplings for 20 items of stock, but no screws so either buy them from ebay or local hardware shop, from what i remember the correct type is an 8BA? someone will advise if thats wrong, i tend to fit a screw if i can to strengthen but many can;t and have to suffice with just glue of the super type
martin sold you on them did he? :D
have fun
michael
Raider
Posts: 1085
Joined: Sun Oct 09, 2005 12:55 am
Location: Wolverhampton

Post by Raider »

Thanks for the reply Mumbles.

I must admit I did find the ease of removal of an item of rolling stock appealing.

I shall have a search for the No 5's on e-bay and see what I can find.

What about loco's with an NEM pocket?
mumbles
Posts: 1802
Joined: Sun Nov 12, 2006 11:23 pm
Location: Kent
Contact:

Post by mumbles »

Raider wrote: What about loco's with an NEM pocket?
i found all i used was 19's or 20s
i used north wales models with no problems
it was the 18.95 ones i got of the no5s
michael
Raider
Posts: 1085
Joined: Sun Oct 09, 2005 12:55 am
Location: Wolverhampton

Post by Raider »

Cheers for that Mumbles.

I did notice that North Wales Models have 2 auctions of the number 5's - can't see a difference in the items though
Post Reply