
At last this is where all the info gathering has led to. Thanks to all the help and advice that has been given. It's been inspirational to have discovered this model railway site.
As stated in previous threads this is my return to the hobby after 30 years or so in lost the ether.
When I moved house, about seven years ago, I created an area in my loft, it was half heartedly intended for many different purposes but none really materialized.
It's not a big area but it's well insulated and timber clad. It has a good
ladder and a Velux window, approx 10 ft x 8ft
Two years ago my older daughter and I visited my mun in N Ireland, where I grew up. and after a nice holiday we brought back my old train set. 30 years in a suitcase, and a legacy of teenager abuse. I'm 45 now for any of you mathematicians out there.
My daughter always remarked about the trains which had been placed in the storage area of the loft and forgot about.
Before Christmas I had an Idea, trains + unused loft room.
CHRISTMAS PRESENT!
So thats where it started. Got the suitcase out, looked on the interweb and found this forum then started asking questions. I had six weeks or so to make something happen in time, and on Christmas day the kids opened a "Thomas the tank" train set box and discovered just a loco and lots of sweets to fill the missing areas. "Shall we go to the loft and find the suitcase I suggested"
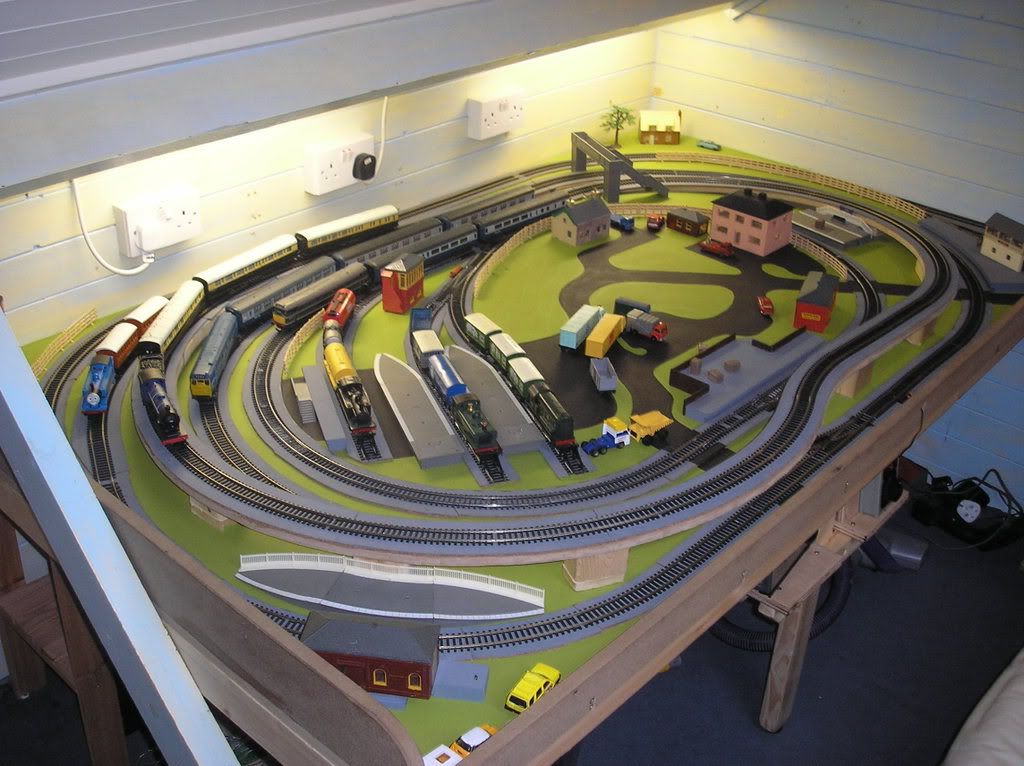
This is what was up there. I had painted the board to make it look less spartan and they loved it.
http://i247.photobucket.com/albums/gg13 ... ins001.jpg
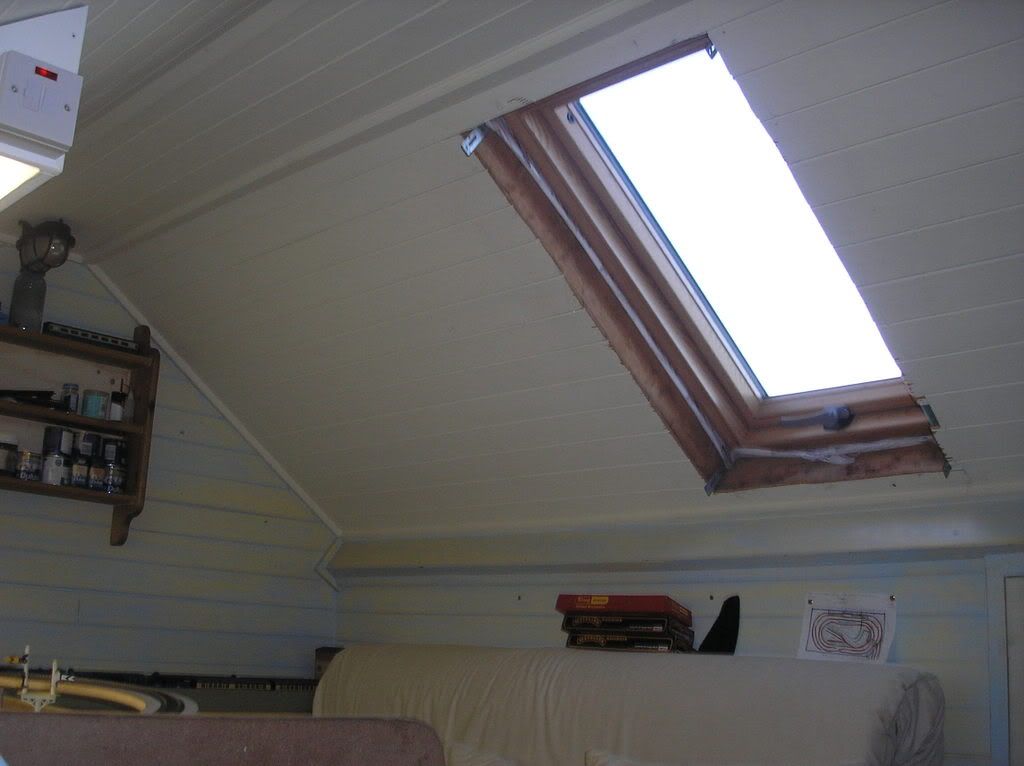
some general loft photo's
http://i247.photobucket.com/albums/gg13 ... 030006.jpg
There's even a nice sofa to veg out on
http://i247.photobucket.com/albums/gg13 ... 030008.jpg
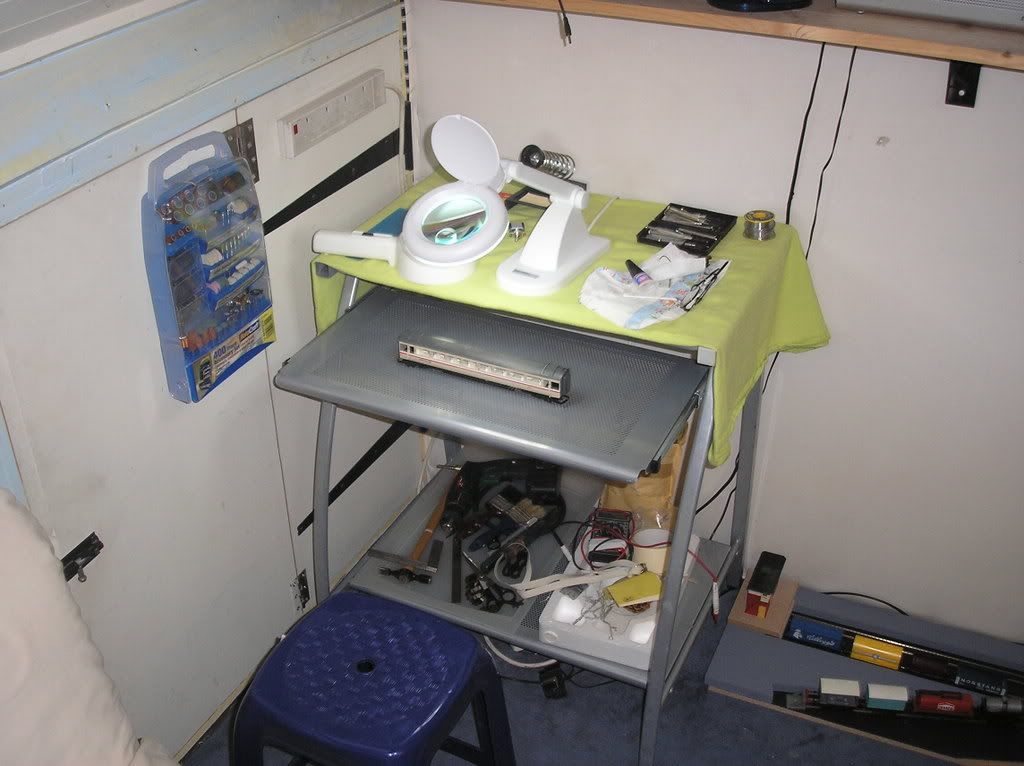
An area to work. This magnifying glass + light £14.99 in Maplins
http://i247.photobucket.com/albums/gg13 ... 030004.jpg
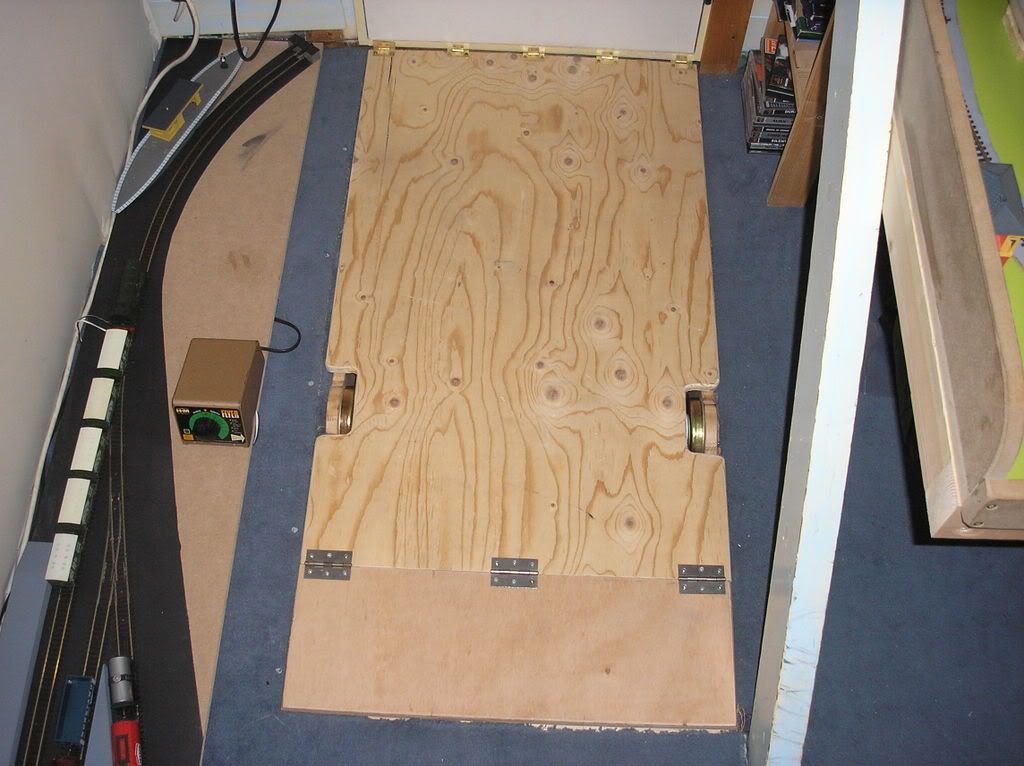
a hatch cover to stop the kids falling out of the loft ( stops wife freaking out. "but they bounce really well you know" )
http://i247.photobucket.com/albums/gg13 ... 030005.jpg
Shunting puzzle. This was created to re-establish waning interest and it worked a treat
http://i247.photobucket.com/albums/gg13 ... 030003.jpg
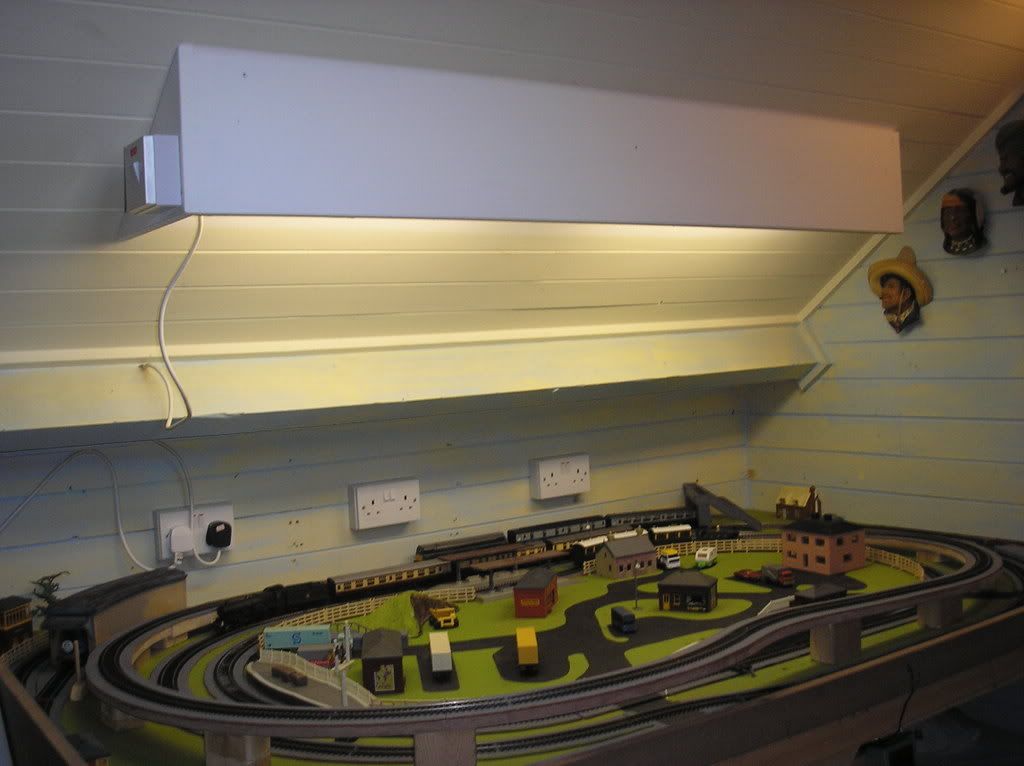
A new light above. Two 24" florescent fittings
http://i247.photobucket.com/albums/gg13 ... 030001.jpg
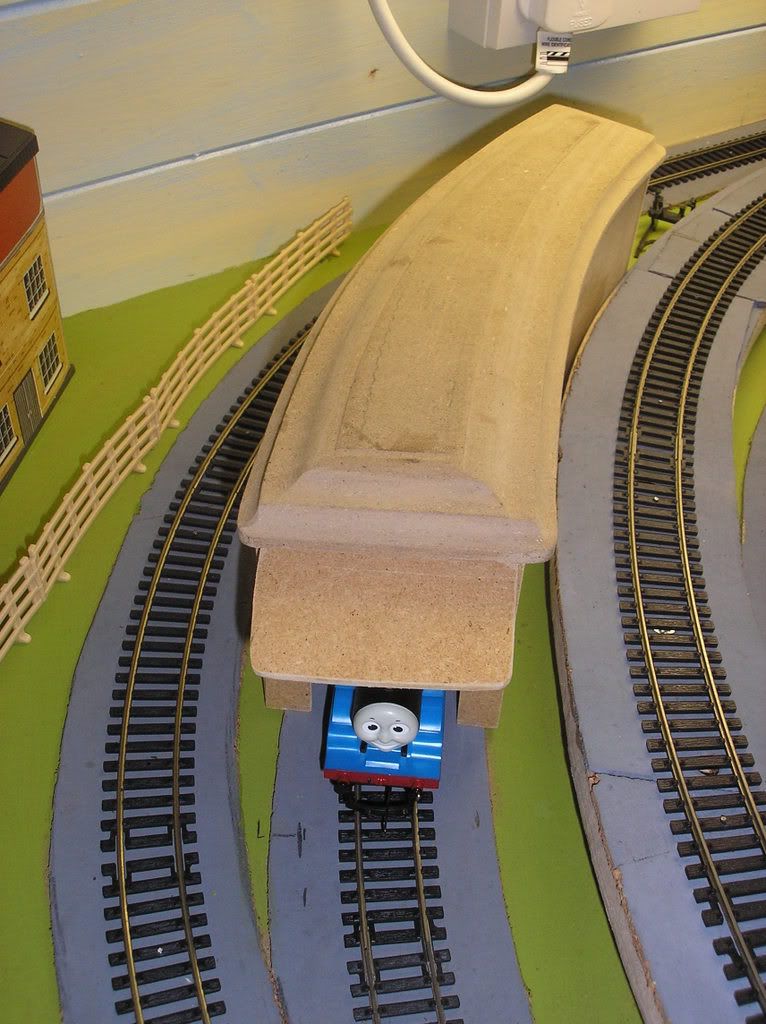
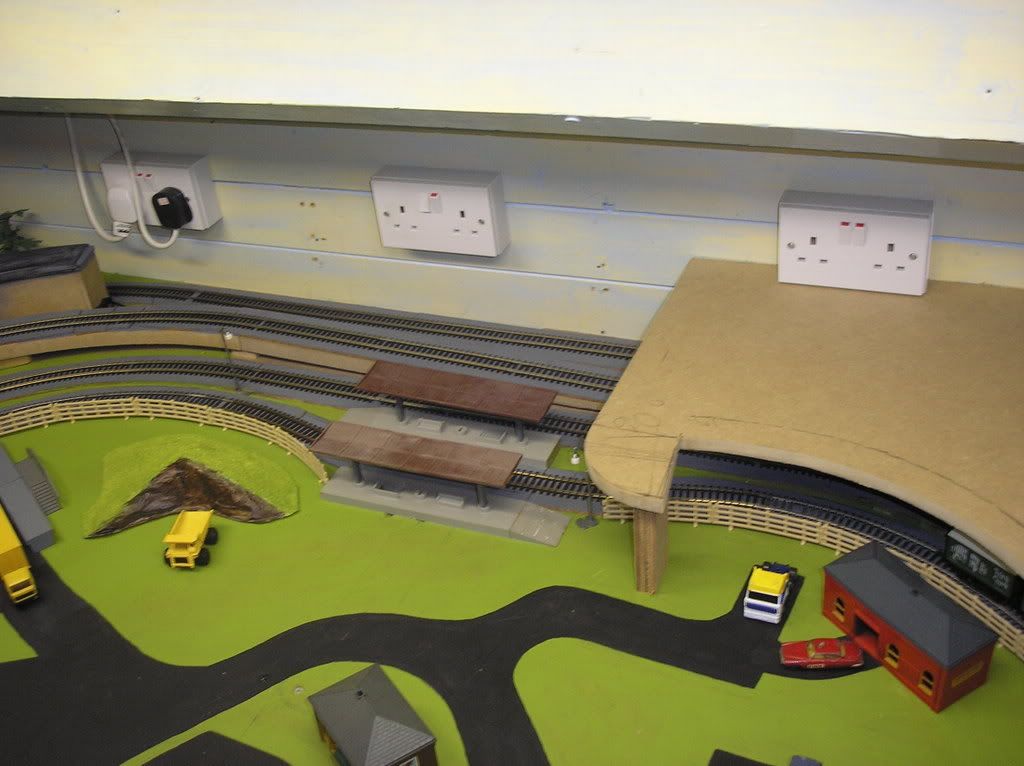
since then I've built an unusual engine shed for Thomas. It bares no real resemblance to any other engine shed but is unusual in that it's curved and also tapers in from front to back.
http://i247.photobucket.com/albums/gg13 ... ins015.jpg
http://i247.photobucket.com/albums/gg13 ... ins016.jpg
http://i247.photobucket.com/albums/gg13 ... s013-1.jpg
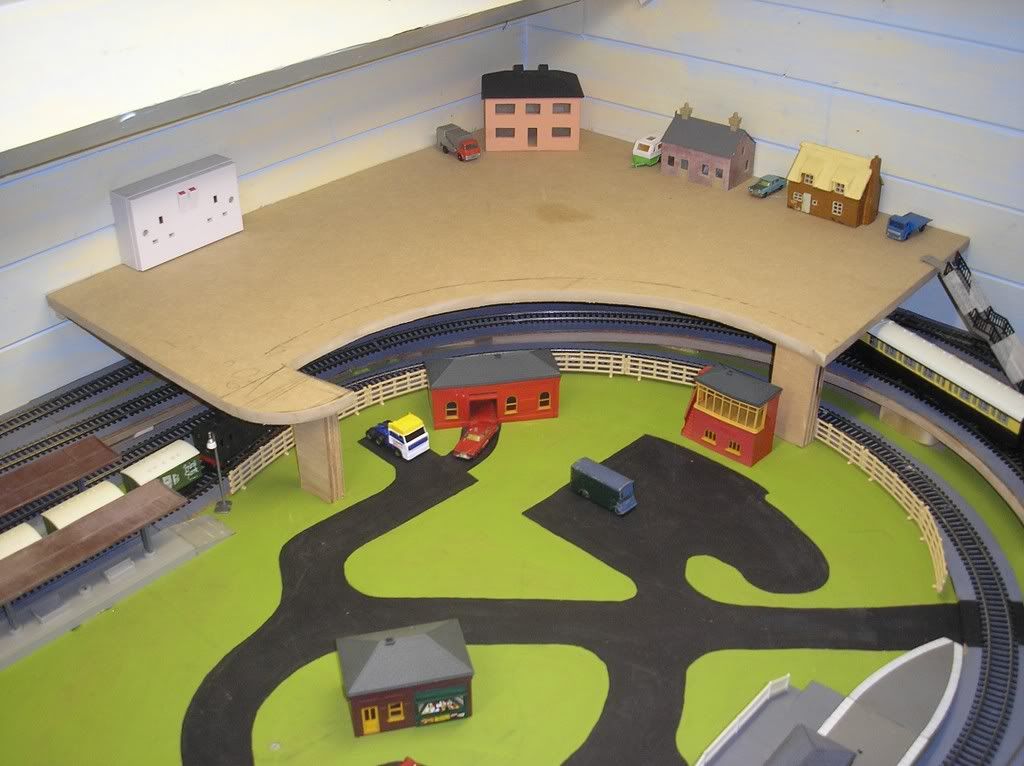
So there we are. The night before last I had along ideas session, as to the purpose of the layout, with my eldest daughter and we come up with the idea that it would be a holiday village and the fiddle yard would represent the trains coming in from all other parts of the UK.
About the mid sixties in era and the inner loop of track is to serve the holiday camp directly, It has had it's sidings removed and they will be replaced with Peco points due to the engines stalling mid point.
There is lots of modeling to do and in fact what has been done so far is like the calm before the storm. ':D' Foundations and all that
What about that blue plastic stool £2.99! Love it
Hope you like it, more to come. Cheers Big Al
Chufferlands Holiday park. Time to rip it up and start again
Chufferlands Holiday park. Time to rip it up and start again
Last edited by Big Al on Wed Jan 27, 2010 10:25 pm, edited 6 times in total.
-
Chuffer Chuff
- Posts: 528
- Joined: Tue Aug 28, 2007 6:55 pm
- Location: Warwickshire, West Midlands (Near The GWSR)
-
smallman28
- Posts: 320
- Joined: Sun Dec 23, 2007 12:54 pm
It does it for me as well.Big Al wrote:Is my computor a bit slow or does this page scroll down slowly on everyone else's.
I think Ive put the right size photo's on there. I'm sure it's the photo size thats doing it
It's just the fact there are 6-7 pictures and some of them are large(ish) will regards to the file size.
I don't think it's a problem though
Hi srp4rky.
The main board is 78" x 46" and the fiddle yard is 51" x 101/2"
2" x 1 timber around the walls and 3 X 2 across the main front section and one side. It has one supporting leg in the middle.
The top is 3/4 MDF with cork under the track.
The center loop of track is 1st radius but will only run short stock and loco's
Cheers mate Big Al
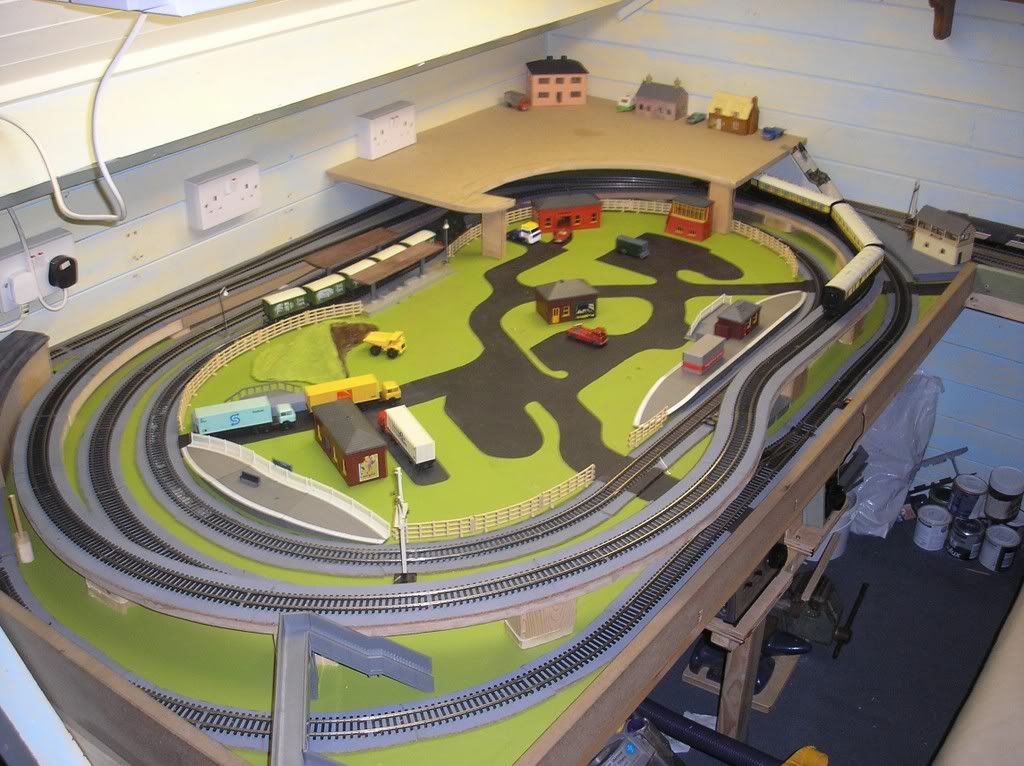
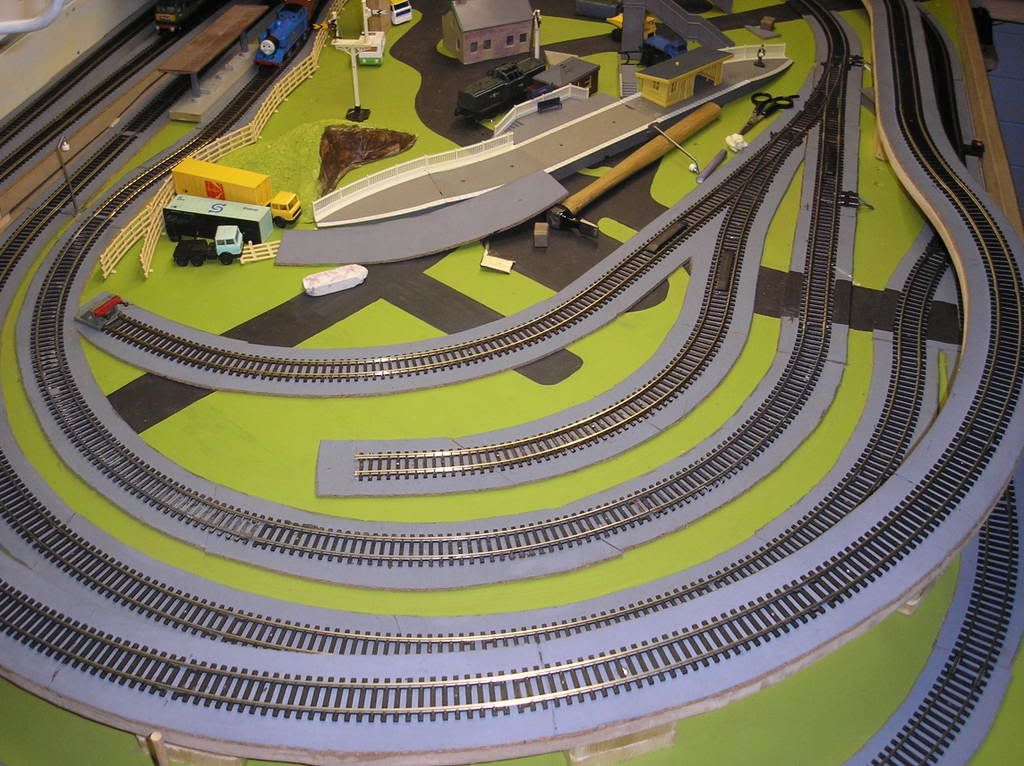
Today I've managed to dodge the rain and have cut the raised section that will effectively create tunnels and more area for actual modeling.
Small batons were fixed to the wall and the section set on there. The next thing I did was to make a jig which was a large u shape laid on its side this was used to transfer the profile of the track onto the top of the new bit. To this I added about 30mm.
The end result is a raised section that follows the track profile plus 30mm.
these GWR coaches are the highest that I have and although it is not so easy to see there is lots of clearance,
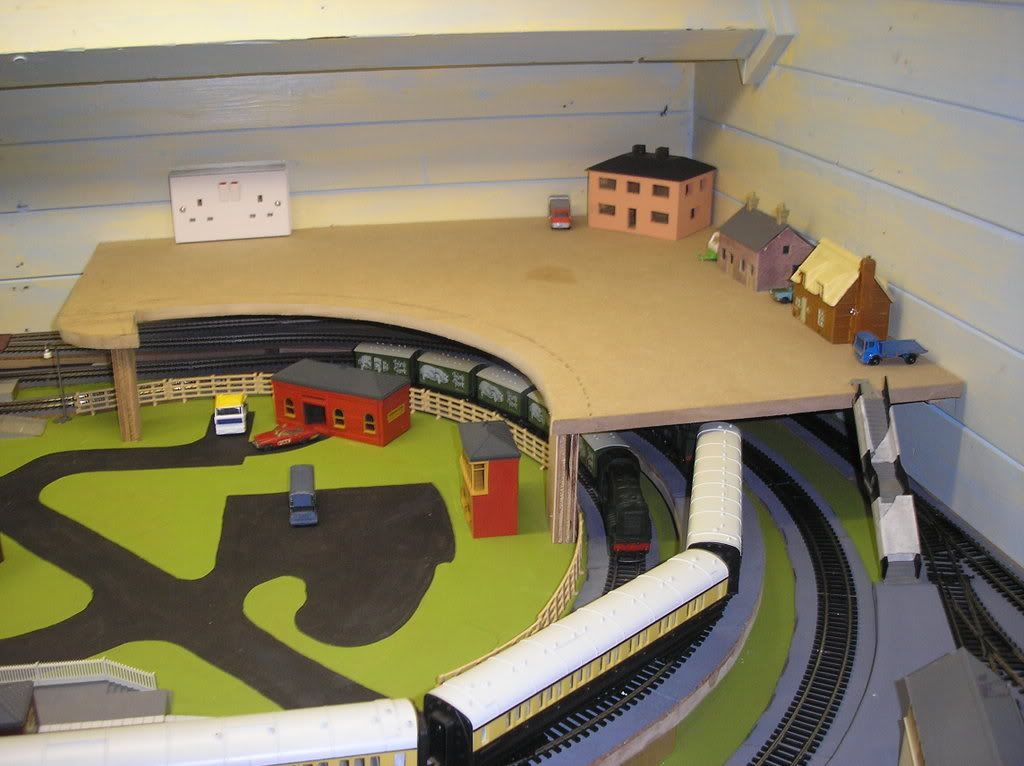
The profile will have a curved retaining wall which will also have a road running down following the curve. The crescent shaped outcrop is the top of the ramp
I intend to have a town square in the middle of the raised section this will be al placed on some 2 or 3 mm material to represent foot path. which will lift of to provide access to the track below (derailments).
So it's getting there after a while when all this structural stuff is done we will get to some detailed work. Cheers Big Al
Small batons were fixed to the wall and the section set on there. The next thing I did was to make a jig which was a large u shape laid on its side this was used to transfer the profile of the track onto the top of the new bit. To this I added about 30mm.
The end result is a raised section that follows the track profile plus 30mm.
these GWR coaches are the highest that I have and although it is not so easy to see there is lots of clearance,
The profile will have a curved retaining wall which will also have a road running down following the curve. The crescent shaped outcrop is the top of the ramp
I intend to have a town square in the middle of the raised section this will be al placed on some 2 or 3 mm material to represent foot path. which will lift of to provide access to the track below (derailments).
So it's getting there after a while when all this structural stuff is done we will get to some detailed work. Cheers Big Al
Thanks sp4ky. Woodwork is one of my long term on and off hobbies. The last 6 years I've done a lot of various jobs indoors (loft room, extension, new kitchen, floors and so on) in my spare time so it had all got a bit hard graft.
But I'm glad to have it on hand at the moment and its much more satisfying when its smaller stuff for the model railway.
The best two tools I have are a band saw and a bench mounted belt sander.
I can cut really thin strips of soft wood and belt sand them really smooth.
By the way here's a great tip for anyone creating curves in sheet material.
I have a lot of sanding belts they are sold in packs of six or so, when they are sold they are all fitted inside each other. This creates a banana shape just run this banana shape around the curve and it will smooth out a treat its like planing around the bends. Brilliant!
Cheers thanks for kooking
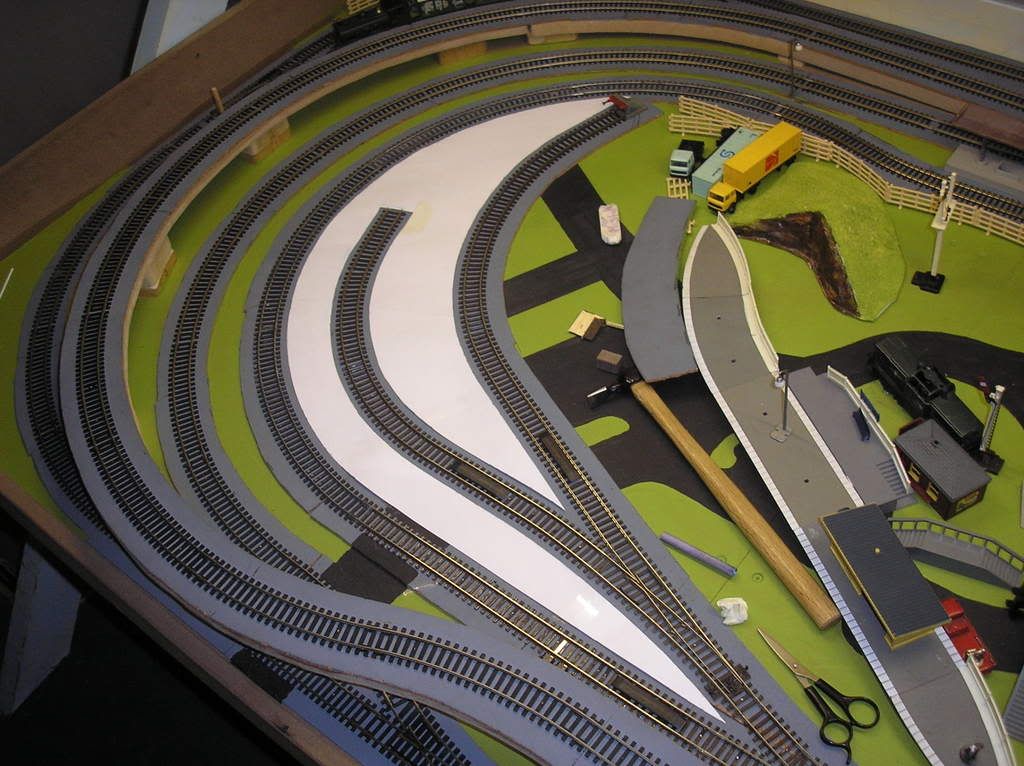
There has been a bit more progress on the layout. We still don't have a name but I have added two sidings in to the center area.
There is not a lot of room so I have gone for curved sidings these are quite small radius. the main problems encountered are the hook and loop couplings will not couple up so easy on curved track. but if we go gently and the couplings are nice and straight they work out OK. If the couplings are bent they can sometimes get on the wrong side of each other and cause derailment. The sprung buffers need a short length of straight track or they can tangle with the buffers on the wagons if the wagons cone up to them at an angle.
The other problem is with coaches and bogie wagons, It's just to tight. But the sidings are intended for small wheel base freight wagons and a sight seeing train with a small loco and some 4 wheel coaches
The idea is there will be a large curved platform area. And we worked out that 12mm from the track was good spacing to allow the wagons to pass without fouling. To make a template we held some sheets of A4 paper on to the layout and marked with a crayon which showed the outline.
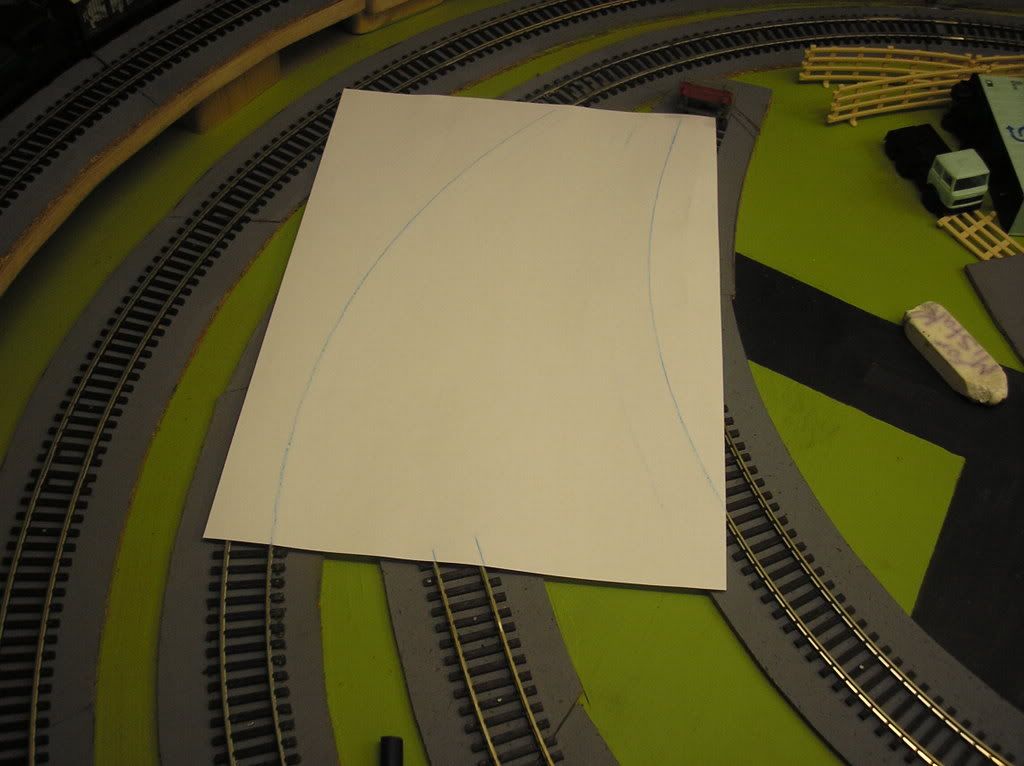
When all the paper was complete this was then marked with a pencil 12mm in from the track then cut out with scissors
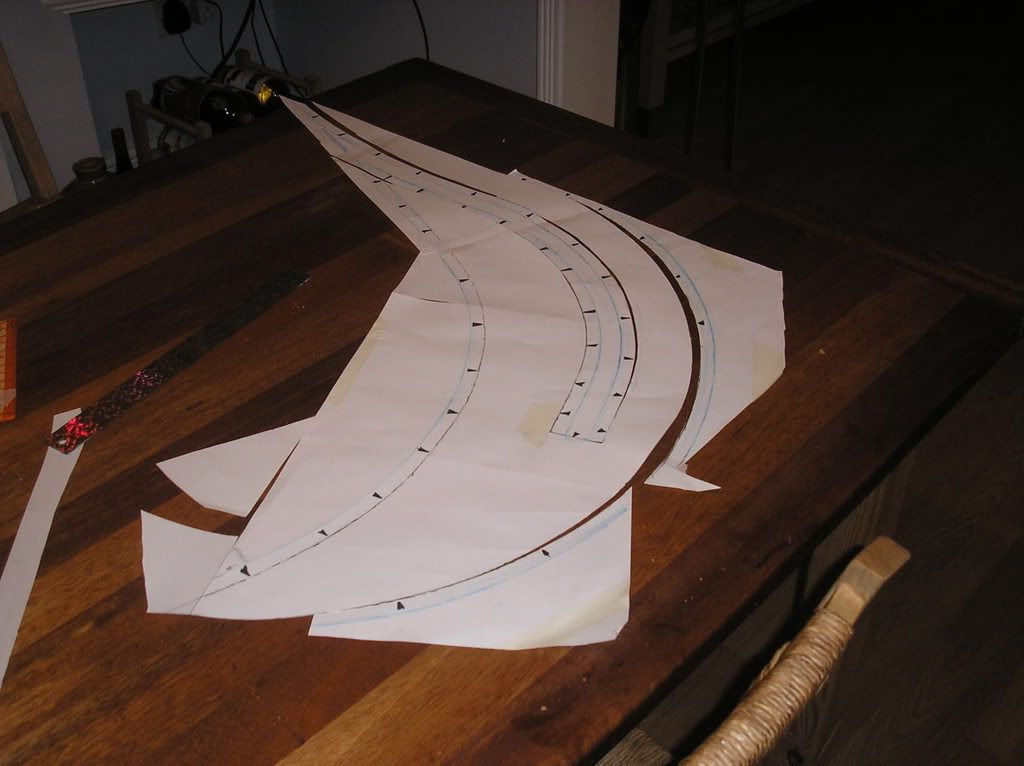
Then when cut out I tried it on the layout for size. I have not thrown away the main center track cut out as this will help with marking on to 18mm mdf, which is to be the platform material.
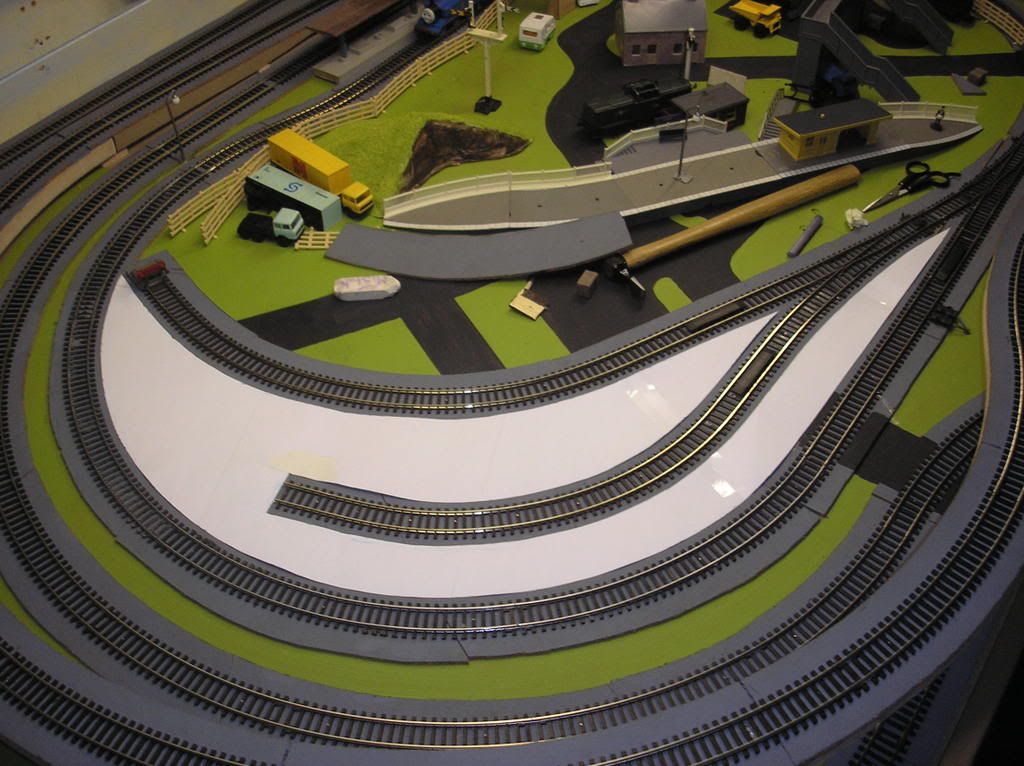
from a different angle.
the next step is hopeful;y at the weekend to transfer the template on to the MDF. and cut out.
There is not a lot of room so I have gone for curved sidings these are quite small radius. the main problems encountered are the hook and loop couplings will not couple up so easy on curved track. but if we go gently and the couplings are nice and straight they work out OK. If the couplings are bent they can sometimes get on the wrong side of each other and cause derailment. The sprung buffers need a short length of straight track or they can tangle with the buffers on the wagons if the wagons cone up to them at an angle.
The other problem is with coaches and bogie wagons, It's just to tight. But the sidings are intended for small wheel base freight wagons and a sight seeing train with a small loco and some 4 wheel coaches
The idea is there will be a large curved platform area. And we worked out that 12mm from the track was good spacing to allow the wagons to pass without fouling. To make a template we held some sheets of A4 paper on to the layout and marked with a crayon which showed the outline.
When all the paper was complete this was then marked with a pencil 12mm in from the track then cut out with scissors
Then when cut out I tried it on the layout for size. I have not thrown away the main center track cut out as this will help with marking on to 18mm mdf, which is to be the platform material.
from a different angle.
the next step is hopeful;y at the weekend to transfer the template on to the MDF. and cut out.
That really takes me back a few years!!! 
First layout I had as a child was a OO twin-loop-with-sidings job - baseboard painted just as you have done. My dad made that for me and my bro and it endured many years with knees all over it and only got dismantled when we changed to 'N' years later. Our trackplan wasn't nearly as complicated as yours though
Keep up the good work!!!!
Paul