I decided that for around £1-2 pound for a small sachet scatter was too expensive, especially when you need to cover a large area, and grass mat too was quite pricey for what it was so decided to make my own scatter.
Step 1) Find a local carpenter. They have loads of sawdust that they can give you for free. Ideally ask for the finer stuff but don't worry too much as it can be sived out so you end up with finer stuff. The grade of the sawdust depends on how you sieve it so if you want multiple grades start course with say a culinder then work your way down to a tea strainer. Personally I found a cullinder was fine enough for me.
Step 2) You will need:
The graded sawdust
Plastic containers, i.e. ice cream tubs ect.
Dylon clothes dye... this being the only thing you would have to buy. Buy the smaller little disk shaped tins at about £1.79. they go a long way, Buy various greens. I bought about 4 greens: Olive Green, Forest Green, Emerald and I forget the fourth.
Step 3)
Put about an inch of warm or hot water in the bottom of your container.
Then add the dye of the colour you want to the water and mix. (you can mix the dyes if you want!) Remember, you will have to get the water a lot darker than the colour you actually want for your scatter, as the yellow of the sawdust will lighten it up. My fist attempt ended up very pale green for this reason. For a standard green for example my water was almost black! This is the only bit of guesswork really and is trial and error.
Step 4) Add enough sawdust to the container until there is no water left, the sawdusk will soak it up very quickly and you will end up with a paste.
Step 5) Leave to dry. This can take days, so do it way in advance of what you are planning to use it for. Regardless of where you try and dry it the rule is the thinner you spread it, the faster it dries, so if you get a dry day, spread it out on a bin liner in the garden as thinly as you can.
Step 6) Repeat the steps above but with different shades of green until you have a batch of dark green, light green, medium ect. When they are all dry you can then mix them to the desired effect you want. Add plain sawdusk to the mix for the yellowy bits of grass for example.
It might be a long process but works out much more economical.
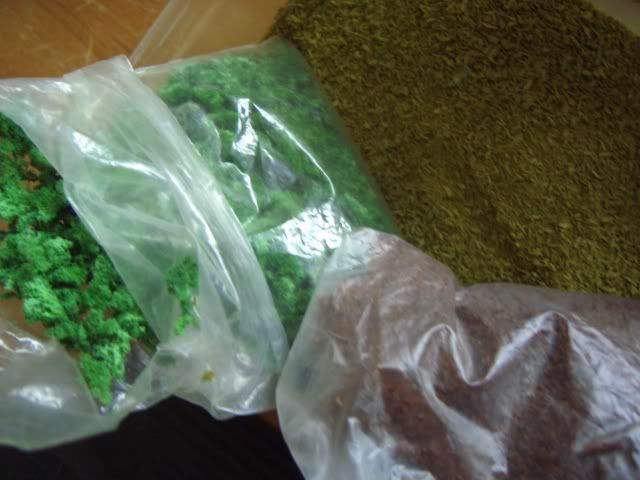
Below is a pic of the medium green I mixed up last night and is yet to dry...