
Chalkhill
-
Bufferstop

- Posts: 13828
- Joined: Thu Mar 11, 2010 12:06 pm
- Location: Bottom end of N. Warks line
Re: A Wagon Display Yard
Whilst you are modifying the frog you might as well convert the points to live frog. Just file up a bit of brass or nickel silver to the shape of the plastic point. Cut the point away then solder the pointed bit to the two rails, then treat it like an electrofrog point. The profile of Wren wheels is the old Hornby Dublo with just a tad off the flange height. It's just wide enough in the tyre to short on the adjacent rail at the frog, so it makes sense to go for electrofrogs.
Growing old, can't avoid it. Growing up, forget it!
My Layout, My Workbench Blog and My Opinions
My Layout, My Workbench Blog and My Opinions
Re: A Wagon Display Yard
Hi Bufferstop,
No excessive modifications, just the infill combined with reducing the B2B measurements by between 0.1 & 0.2 mm
to keep away from catching on the plastic 'V' leading edge.
The right locos have no trouble with Set-track points, even at very slow speeds. Here at 2.0 min you see where this
train had been drawn through a set-track point. In fact St Oval has 3 such points on a lap and this could run all day
at this low speed. Some of these wagons do have Alan Gibson wheels and while they have a little jerk it's acceptable.
https://youtu.be/07Ft649I43c
I can't be bothered to try and measure to within fractions of a mm, but do wonder if these VERY OLD Peco Set-track
points came with fractionally wider flangeways, or even suffer from a degree of wear. Wear on the plastic check rails
opposite the 'V' which could be why I'm having to reduce the B2B settings ?
As to the wide wheels causing shorts at the 'V' it's always best to fit insulated rail joiners at both common crossing
rails, easy with Streamline points, but with rail joiners welded on the Set-track range it's not so easy. Best to add
an IRJ in the adjoining rail, again easier when using flexi track. Although I don't actually ever run very old wide tyred
stock, the tyres on Dapol wheels and filed down flange Lima wheels will cause short circuits when reversed as the
extra sideways pressure from wanting to Jack-knife is just enough to catch the other rail.
This layout, if you call it is simply to display/use some of my excessive stock of wagons and will probably only ever
be used at home.
Geoff T.
Remember ... I know nothing about railways.
http://www.newrailwaymodellers.co.uk/Fo ... 22&t=32187 and Another on http://www.newrailwaymodellers.co.uk/Fo ... &sk=t&sd=a
http://www.newrailwaymodellers.co.uk/Fo ... 22&t=32187 and Another on http://www.newrailwaymodellers.co.uk/Fo ... &sk=t&sd=a
Re: A Wagon Display Yard
Very short comments after today's limited work.
I've stuck some thin card under a point motor area to reduce the vast hole needed to accommodate point
motors attached permanently to point sleepers.
In addition I've secured the engine shed headshunt line with a few drops of superglue to several sleepers
while the track was weighted down with a large building stone on some ply. I've now ballasted around 150 mm.
All this to test out luckymuckelbackit (Jim's) warning about many glues NOT sticking to panel doors !!
Always have the intelligence to test out warnings of possible problems before going too far. I had to get
this far in to be able to undertake a suitable test.
Busy tomorrow so the ballast will have time to harden off before I bang and bump test it's adhesion.
Geoff T.
Remember ... I know nothing about railways.
http://www.newrailwaymodellers.co.uk/Fo ... 22&t=32187 and Another on http://www.newrailwaymodellers.co.uk/Fo ... &sk=t&sd=a
http://www.newrailwaymodellers.co.uk/Fo ... 22&t=32187 and Another on http://www.newrailwaymodellers.co.uk/Fo ... &sk=t&sd=a
Re: A Wagon Display Yard
Apart from a drop in Mojo, this is still progressing slowly.
Will glue stick to the boarding (door) ? the short term answer is yes.
Here we have some experimenting, as in fact is most of this project.
First the great hole cut to accept the rail attached point motor.

Somehow that hole needs to be significantly covered in a way that will be flat and tough
enough to take a layer of ballast, stuck down with the 50/50 PVA/Water mix. Initially I
used part of the Peco point motor header card.

So what happens with that wet ballasting ?

It seems that the card is adequate and so far the hardened ballast appears to be well secured.
In fact an accidental drip of the ballasting mix was smeared out and had some fine Weymouth sand
scattered over it. Can't scratch it off so fingers crossed, certainly short term it's fine, long term ?
we won't know for a couple of years.
Geoff T.
Will glue stick to the boarding (door) ? the short term answer is yes.
Here we have some experimenting, as in fact is most of this project.
First the great hole cut to accept the rail attached point motor.
Somehow that hole needs to be significantly covered in a way that will be flat and tough
enough to take a layer of ballast, stuck down with the 50/50 PVA/Water mix. Initially I
used part of the Peco point motor header card.
So what happens with that wet ballasting ?
It seems that the card is adequate and so far the hardened ballast appears to be well secured.
In fact an accidental drip of the ballasting mix was smeared out and had some fine Weymouth sand
scattered over it. Can't scratch it off so fingers crossed, certainly short term it's fine, long term ?
we won't know for a couple of years.
Geoff T.
Remember ... I know nothing about railways.
http://www.newrailwaymodellers.co.uk/Fo ... 22&t=32187 and Another on http://www.newrailwaymodellers.co.uk/Fo ... &sk=t&sd=a
http://www.newrailwaymodellers.co.uk/Fo ... 22&t=32187 and Another on http://www.newrailwaymodellers.co.uk/Fo ... &sk=t&sd=a
Re: A Wagon Display Yard
Not a lot done in the last couple of days
However all 12 point motors have been tested, another small step.
I've made a double skin panel that will be my stud holding desk, next
trying to sort out all the wiring connections ........ That should be fun !!
Geoff T.
However all 12 point motors have been tested, another small step.
I've made a double skin panel that will be my stud holding desk, next
trying to sort out all the wiring connections ........ That should be fun !!
Geoff T.
Remember ... I know nothing about railways.
http://www.newrailwaymodellers.co.uk/Fo ... 22&t=32187 and Another on http://www.newrailwaymodellers.co.uk/Fo ... &sk=t&sd=a
http://www.newrailwaymodellers.co.uk/Fo ... 22&t=32187 and Another on http://www.newrailwaymodellers.co.uk/Fo ... &sk=t&sd=a
Re: A Wagon Display Yard
Slightly further along the tracks ......
I wouldn't again mount point motors to the points, not because that is in any way less effective,
but simply that the large holes around the motor need concealing under some card that you slide
under the point. The actual thickness is not a real problem, you still have quite flat trackwork.
The mega hole under the 3 way point still has to be ballasted over, but as of today all are enclosed.

The build up process

As these points have all had a previous life I want to be as certain as possible that they are FLAT, Peco
points sometimes develop a slight lift in and around the common crossing. A little superglue under a
few sleepers then quickly add a weight !

My messy working area

The small locos being used for some running tests to check out insulated sections and that what I have
done works.
You know this could still go very wrong, so it's progress is slow and uncertain. Still it's fun playing around
with ideas.
Geoff T.
I wouldn't again mount point motors to the points, not because that is in any way less effective,
but simply that the large holes around the motor need concealing under some card that you slide
under the point. The actual thickness is not a real problem, you still have quite flat trackwork.
The mega hole under the 3 way point still has to be ballasted over, but as of today all are enclosed.
The build up process
As these points have all had a previous life I want to be as certain as possible that they are FLAT, Peco
points sometimes develop a slight lift in and around the common crossing. A little superglue under a
few sleepers then quickly add a weight !
My messy working area
The small locos being used for some running tests to check out insulated sections and that what I have
done works.
You know this could still go very wrong, so it's progress is slow and uncertain. Still it's fun playing around
with ideas.
Geoff T.
Remember ... I know nothing about railways.
http://www.newrailwaymodellers.co.uk/Fo ... 22&t=32187 and Another on http://www.newrailwaymodellers.co.uk/Fo ... &sk=t&sd=a
http://www.newrailwaymodellers.co.uk/Fo ... 22&t=32187 and Another on http://www.newrailwaymodellers.co.uk/Fo ... &sk=t&sd=a
Re: A Wagon Display Yard
A video to show this board being tested.
With so many insulated frog points, but multi rail droppers it would be possible
to end up with either a dead section, or a full short circuit !!
The test shows I got it right first time. The Ruston not the best for these points, but
why make it easy ??
https://youtu.be/h3o2WQsgIGk
Hope somebody likes to see the developments.
Geoff T.
Remember ... I know nothing about railways.
http://www.newrailwaymodellers.co.uk/Fo ... 22&t=32187 and Another on http://www.newrailwaymodellers.co.uk/Fo ... &sk=t&sd=a
http://www.newrailwaymodellers.co.uk/Fo ... 22&t=32187 and Another on http://www.newrailwaymodellers.co.uk/Fo ... &sk=t&sd=a
Re: A Wagon Display Yard
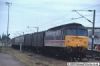
A few wagons for effect.

Not all kit built, items from :- Wrenn, Mainline, Hornby, Bachmann,
Parkside, Cambrian, Ratio, Dapol, Airfix.
Geoff T.
Not all kit built, items from :- Wrenn, Mainline, Hornby, Bachmann,
Parkside, Cambrian, Ratio, Dapol, Airfix.
Geoff T.
Remember ... I know nothing about railways.
http://www.newrailwaymodellers.co.uk/Fo ... 22&t=32187 and Another on http://www.newrailwaymodellers.co.uk/Fo ... &sk=t&sd=a
http://www.newrailwaymodellers.co.uk/Fo ... 22&t=32187 and Another on http://www.newrailwaymodellers.co.uk/Fo ... &sk=t&sd=a
Re: A Wagon Display Yard
From todays work I think I can say this will progress.
!2 point motors need 36 soldered joins. Not a single failed joint and all 12 points work
well. My mimic board doesn't actually exist, but I know which of the crew heads operate the
various points. I should draw on track outlines, but first I need to secure the board which is
floating still.
I will admit that my wiring IS MESSY, functionality being my only aim !! Zero planning doesn't halp.

A couple of overall situation photos covering the points board.


More ballasting to do, a slow old job that I do by 'Stitching' a small length at any one place in an
attempt to reduce the amount of water deposited on the board at one one place and time.
Geoff T.
!2 point motors need 36 soldered joins. Not a single failed joint and all 12 points work
well. My mimic board doesn't actually exist, but I know which of the crew heads operate the
various points. I should draw on track outlines, but first I need to secure the board which is
floating still.
I will admit that my wiring IS MESSY, functionality being my only aim !! Zero planning doesn't halp.
A couple of overall situation photos covering the points board.
More ballasting to do, a slow old job that I do by 'Stitching' a small length at any one place in an
attempt to reduce the amount of water deposited on the board at one one place and time.
Geoff T.
Remember ... I know nothing about railways.
http://www.newrailwaymodellers.co.uk/Fo ... 22&t=32187 and Another on http://www.newrailwaymodellers.co.uk/Fo ... &sk=t&sd=a
http://www.newrailwaymodellers.co.uk/Fo ... 22&t=32187 and Another on http://www.newrailwaymodellers.co.uk/Fo ... &sk=t&sd=a
-
Bufferstop
- Posts: 13828
- Joined: Thu Mar 11, 2010 12:06 pm
- Location: Bottom end of N. Warks line
Re: A Wagon Display Yard
There's another job to do, turn around the braces on the shed doors, so that there bottom end is next to the hinge, so that they are in compression.
As someone pointed out to me when I made my loco shed!
As someone pointed out to me when I made my loco shed!
Growing old, can't avoid it. Growing up, forget it!
My Layout, My Workbench Blog and My Opinions
My Layout, My Workbench Blog and My Opinions
Re: A Wagon Display Yard
Ahh, Good old Hornby.
Not something I'll have to change, I can live with it.
The thing is all the wiring has worked, I can't say I took that as a given !!
Now I need to buy some 6.0 mm furniture fixings to anchor side beams to
hold the two parts together. So confident I had enough a few years back I
gave loads away !!
Geoff T.
Remember ... I know nothing about railways.
http://www.newrailwaymodellers.co.uk/Fo ... 22&t=32187 and Another on http://www.newrailwaymodellers.co.uk/Fo ... &sk=t&sd=a
http://www.newrailwaymodellers.co.uk/Fo ... 22&t=32187 and Another on http://www.newrailwaymodellers.co.uk/Fo ... &sk=t&sd=a
Re: A Wagon Display Yard
Ah yes! Giving stuff away that hasn't been touched for years.Dad-1 wrote: So confident I had enough a few years back I
gave loads away !!
Geoff T.
Then wanting them a week later.
Glencairn
To the world you are someone. To someone you are their world.
I Cannot Afford the Luxury of a Negative Thought
I Cannot Afford the Luxury of a Negative Thought
Re: A Wagon Display Yard
So true Glencairn,
Still not ordered the inserts. Been laying ballast and tonight used some black paint
to weather the loco stand areas in those short sidings by the small engine shed.

A job I don't fancy doing is cutting some mounting board to give the small engine shed
a concrete floor & that should be next. Can't finish ballasting the shed track until that's
in place.
So far my thin card filling around the point motors has worked O.K. no sagging when wet
with PVA/Water.
Certainly no sign of glues failing to adhere to the door, the door luckymucklebackit was trying
to use must have been a better quality and finished surface than these.
Geoff T.
Still not ordered the inserts. Been laying ballast and tonight used some black paint
to weather the loco stand areas in those short sidings by the small engine shed.
A job I don't fancy doing is cutting some mounting board to give the small engine shed
a concrete floor & that should be next. Can't finish ballasting the shed track until that's
in place.
So far my thin card filling around the point motors has worked O.K. no sagging when wet
with PVA/Water.
Certainly no sign of glues failing to adhere to the door, the door luckymucklebackit was trying
to use must have been a better quality and finished surface than these.
Geoff T.
Remember ... I know nothing about railways.
http://www.newrailwaymodellers.co.uk/Fo ... 22&t=32187 and Another on http://www.newrailwaymodellers.co.uk/Fo ... &sk=t&sd=a
http://www.newrailwaymodellers.co.uk/Fo ... 22&t=32187 and Another on http://www.newrailwaymodellers.co.uk/Fo ... &sk=t&sd=a
Re: A Wagon Display Yard
It turned out that I'd prepared the mounting plates with furniture fixings.
So all the end legs done. How to support at the central join ???
Designed an extension to rest on top of my fold out trestles, it may look
rather Heath-Robinson, but functional.

For the first time all at the designed height. I can't progress fixing the sidings until
I have the side latches, that should be with me by Tuesday.


A shame, but the Peckett W4 is not happy running slowly over the set-track points.
It's all to do with the wheelbase length, the rather shorter WB on my Ruston 48DS
and 0-4-0 Sentinel gets then over the points O.K.
Geoff T.
So all the end legs done. How to support at the central join ???
Designed an extension to rest on top of my fold out trestles, it may look
rather Heath-Robinson, but functional.
For the first time all at the designed height. I can't progress fixing the sidings until
I have the side latches, that should be with me by Tuesday.
A shame, but the Peckett W4 is not happy running slowly over the set-track points.
It's all to do with the wheelbase length, the rather shorter WB on my Ruston 48DS
and 0-4-0 Sentinel gets then over the points O.K.
Geoff T.
Remember ... I know nothing about railways.
http://www.newrailwaymodellers.co.uk/Fo ... 22&t=32187 and Another on http://www.newrailwaymodellers.co.uk/Fo ... &sk=t&sd=a
http://www.newrailwaymodellers.co.uk/Fo ... 22&t=32187 and Another on http://www.newrailwaymodellers.co.uk/Fo ... &sk=t&sd=a