Leopard Street, LNER 1930's

Post pictures and information about your own personal model railway layout that is under construction. Keep members up-to-date with what you are doing and discuss problems that you are having.
aleopardstail
Posts: 226
Joined: Thu Apr 29, 2021 9:48 pm

Leopard Street, LNER 1930's

Post by aleopardstail »

Ok, enough procrastination, I can do more of that some other day, construction on Leopard steer has begun..

evidence:

Image http://www.aleopardstail.com/IMG_3031.JPG

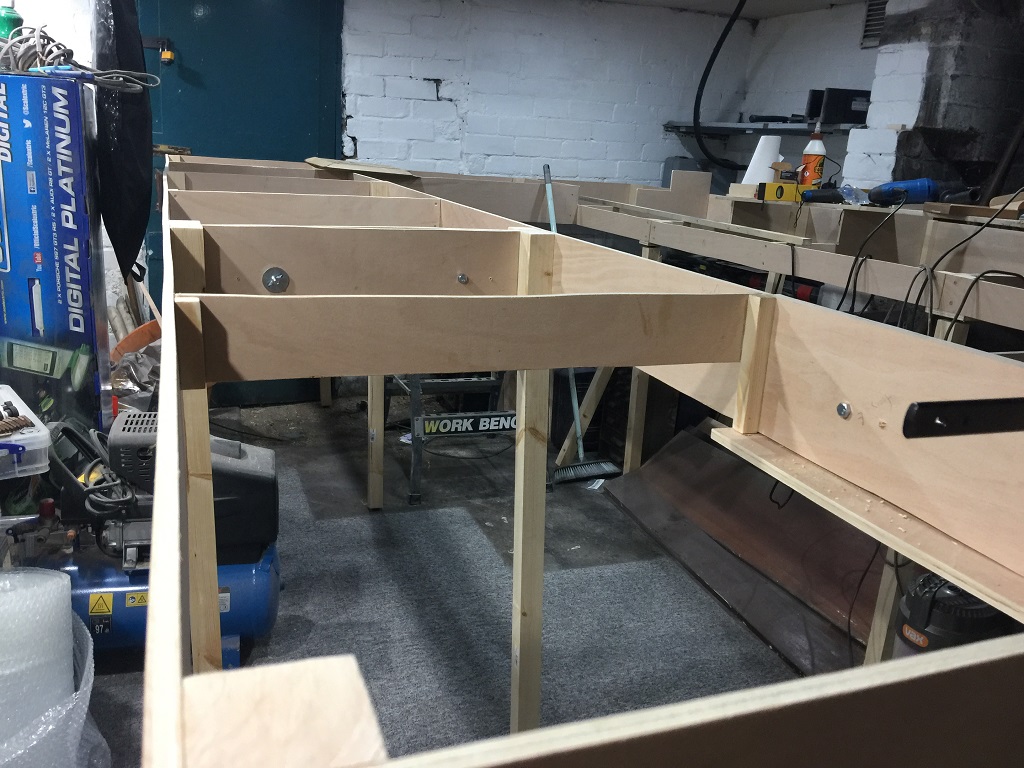
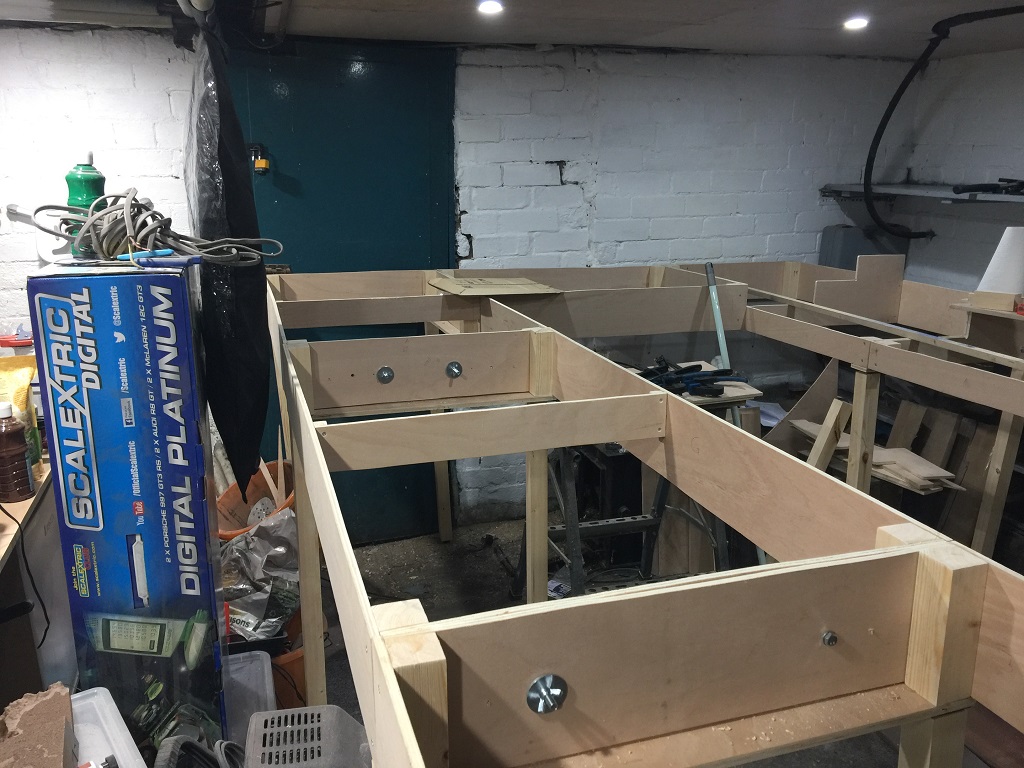
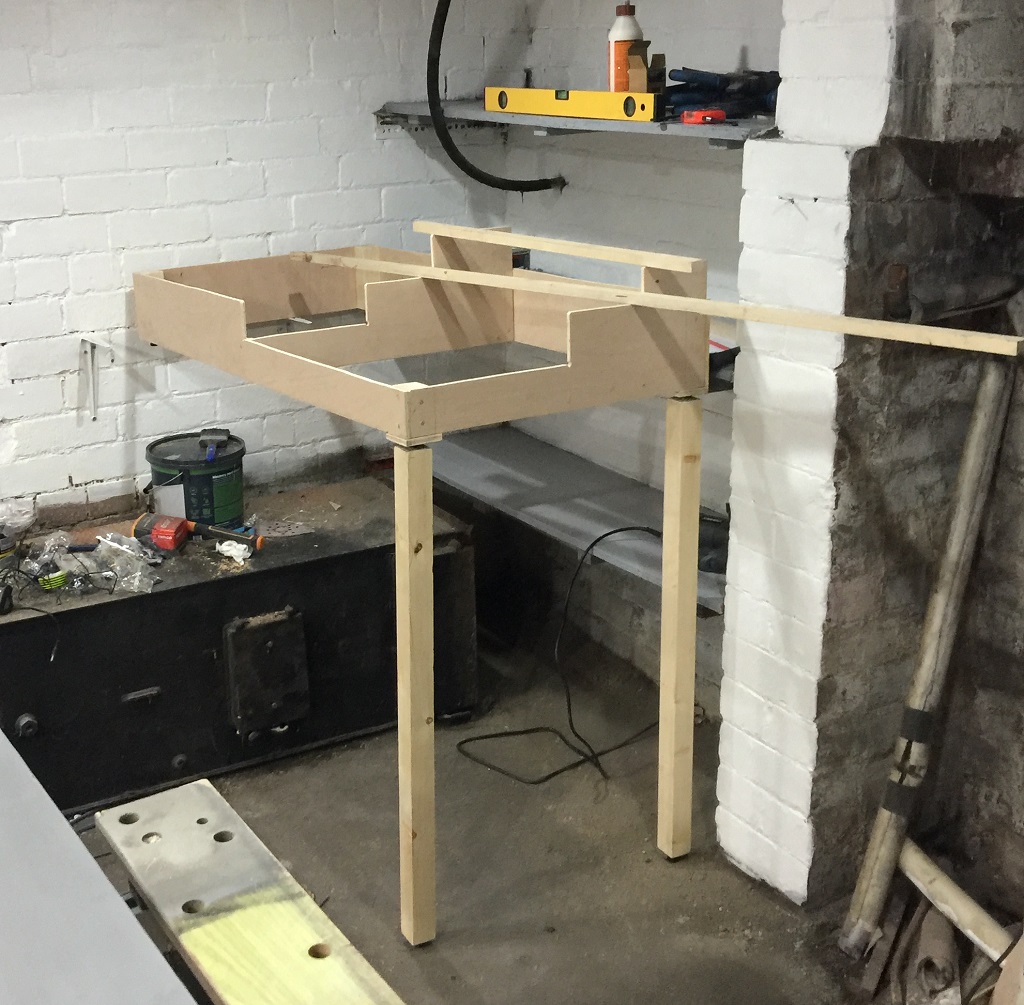
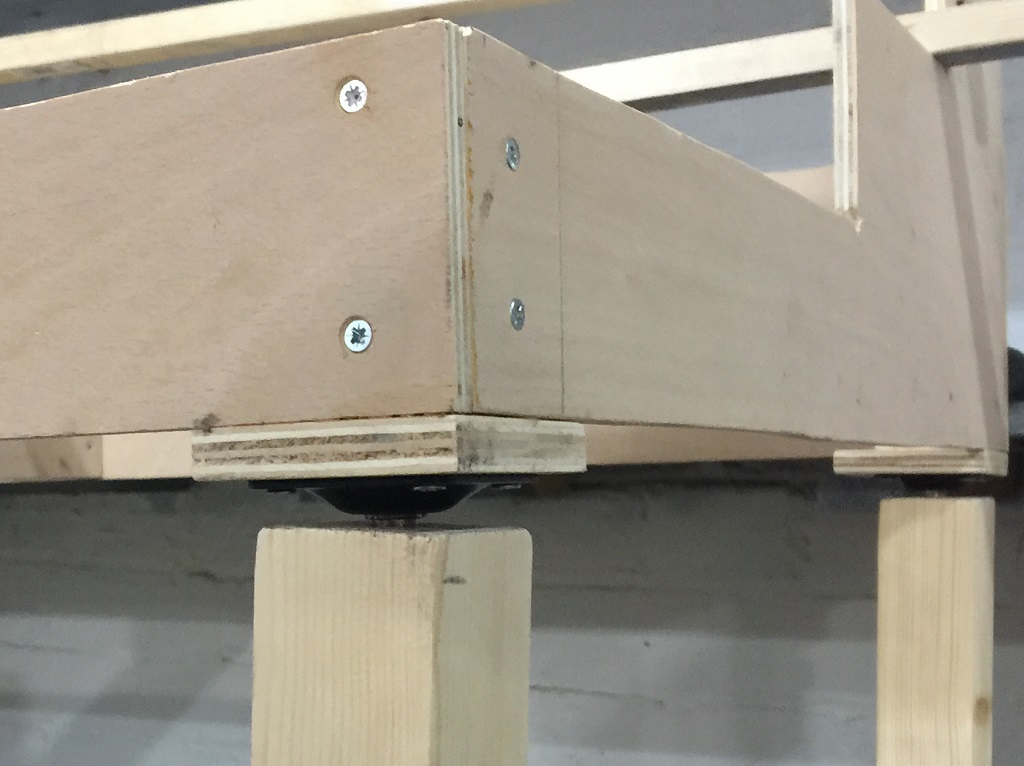
"Board A", aka the back left corner. one end supported by a shelf (the grey bit of wood bottom left, waiting for primer to dry so not in place on the wall brackets.. hence the whole thing not being even close to level).

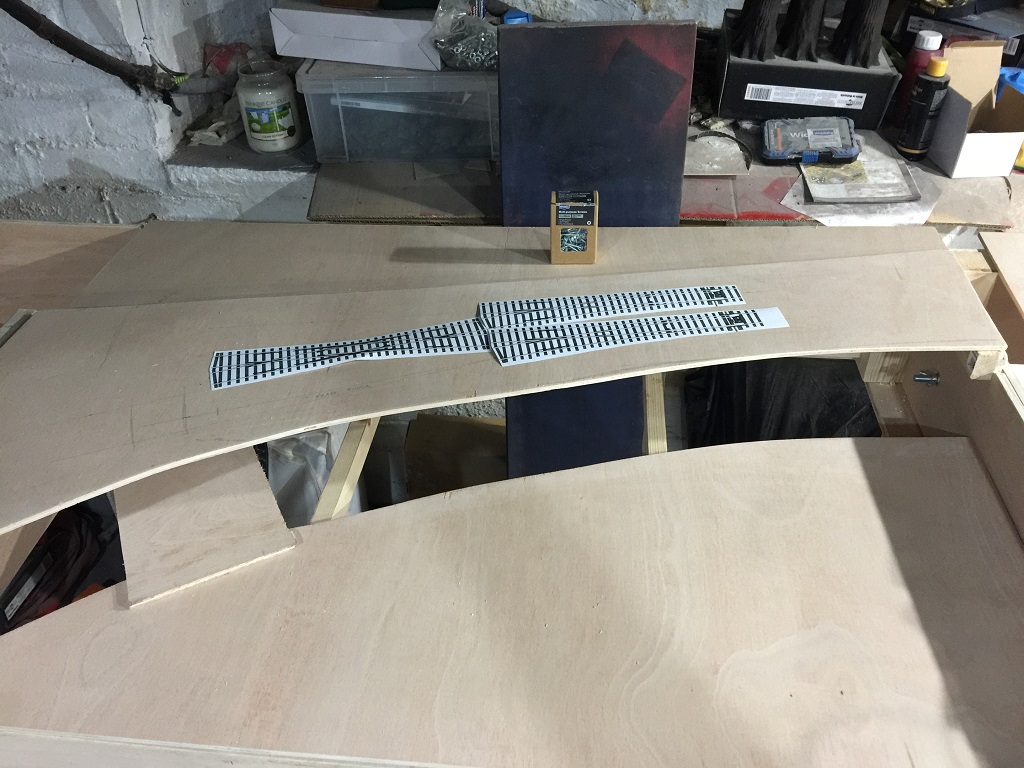
2'x4' module, three levels, the lowest is datum -3", this will be a purely scenic area, next is the start of what will be a 1:82 climb with a gentle transition at either end - there is a diagonal brace yet to be added to help with this in the corner to support the curved tracks. higher level is a 1:50 gradient the other way which will curve round 90 degrees on roughly a 19" & 21" radius curve.

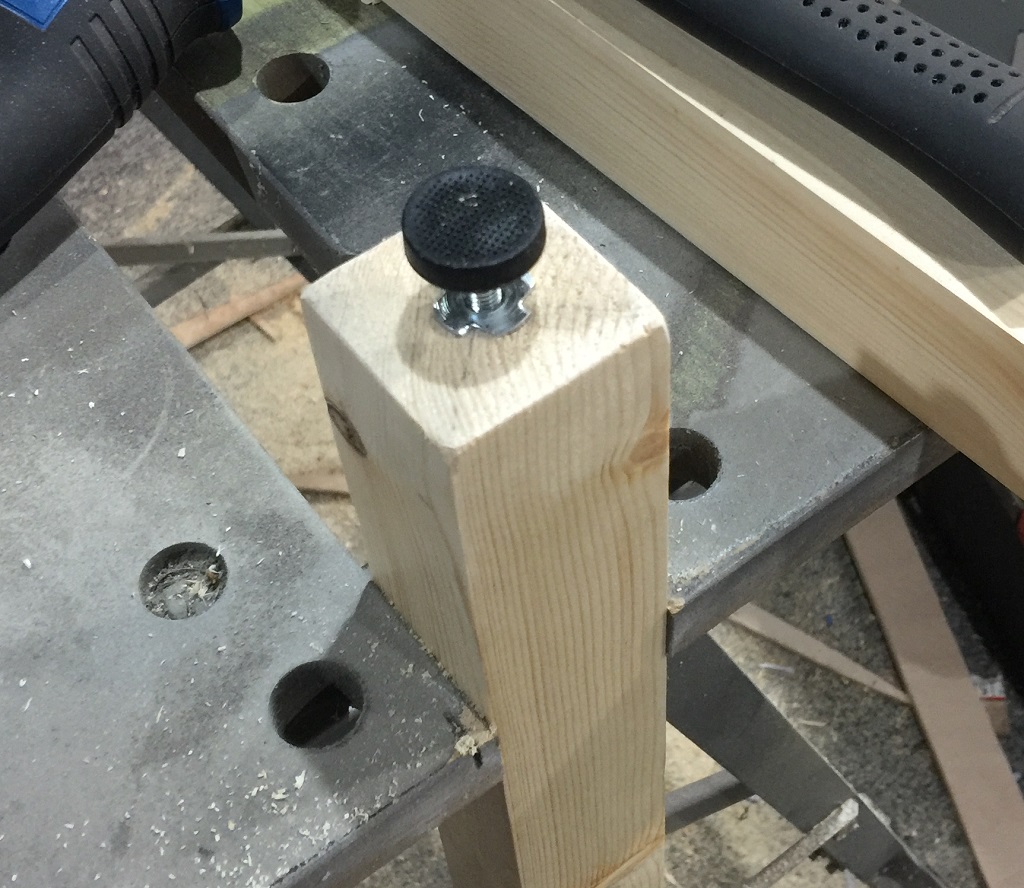
very basic, the end near the wall has small adjustable feet, as do the bottom of the legs (also keeps the wood of the leg off the floor)

Image http://www.aleopardstail.com/IMG_3028.JPG

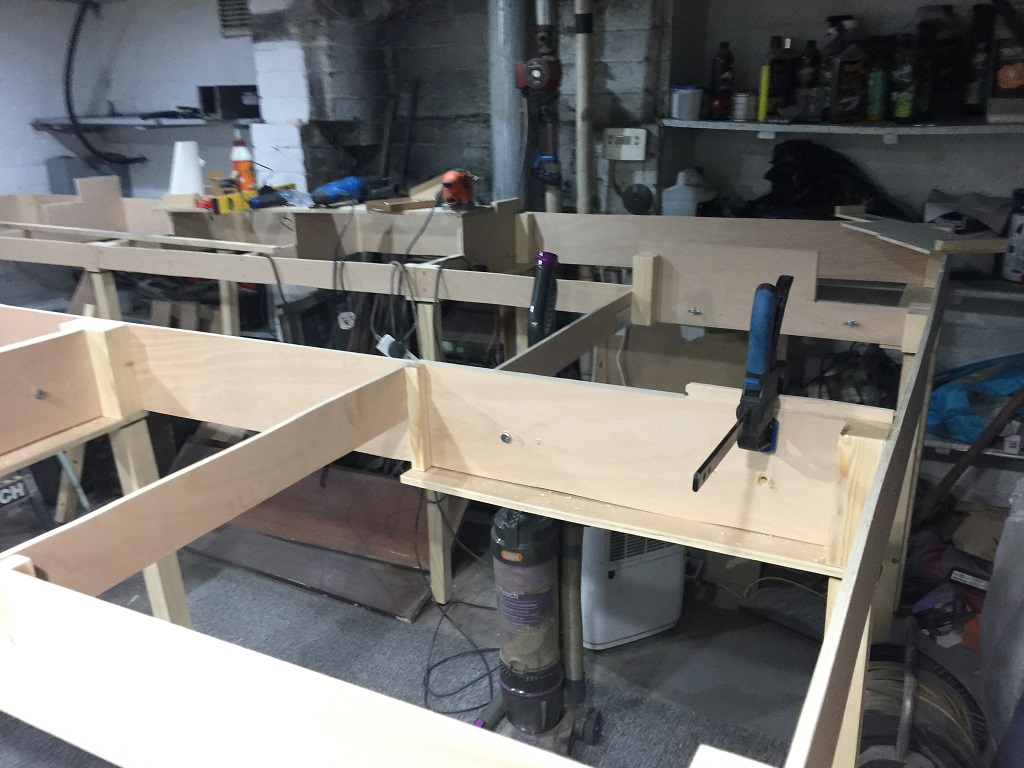
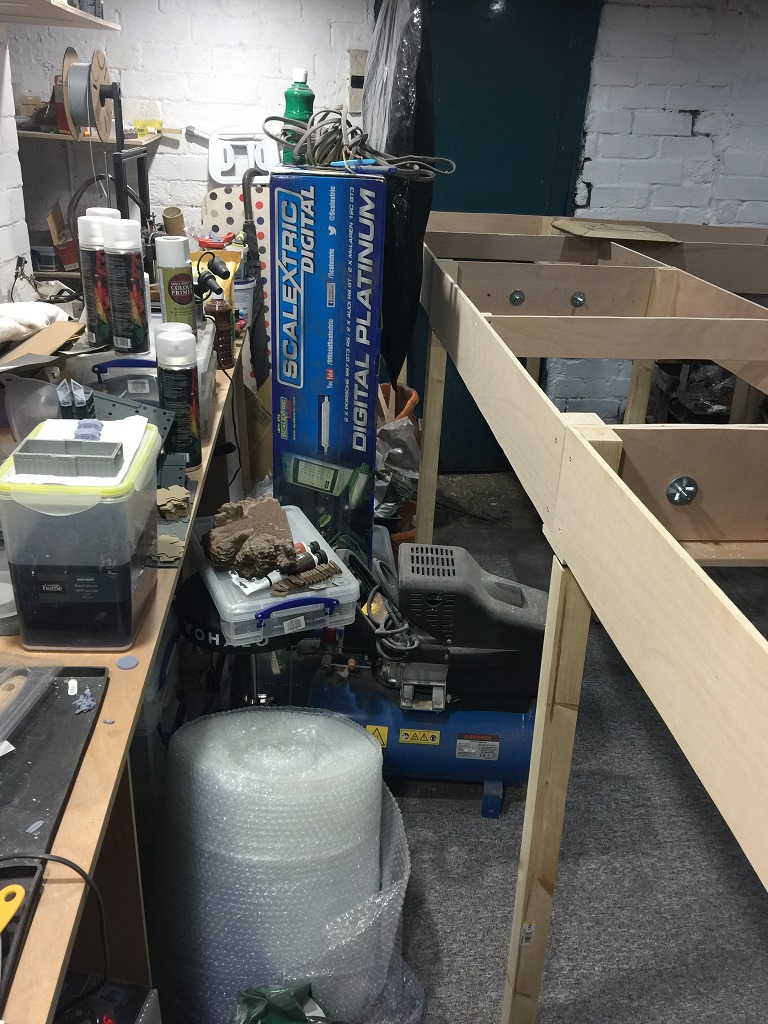
and the legs have a screw fixing to the board (hence the lack of any cross braces)

Image http://www.aleopardstail.com/IMG_3034.JPG

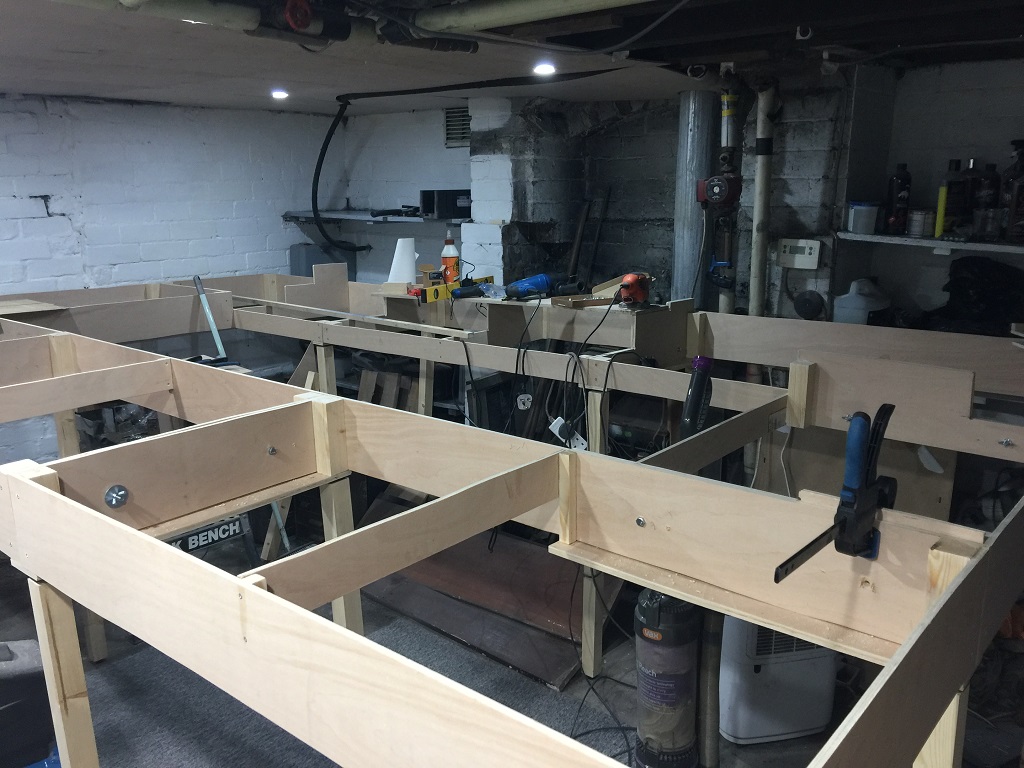
means the legs are both adjustable and quite easy to remove

slight irritations, Wickes don't seem to have 2" square timber, so the legs fixing plate needed a small fillet of 12mm ply adding, probably stronger this way.

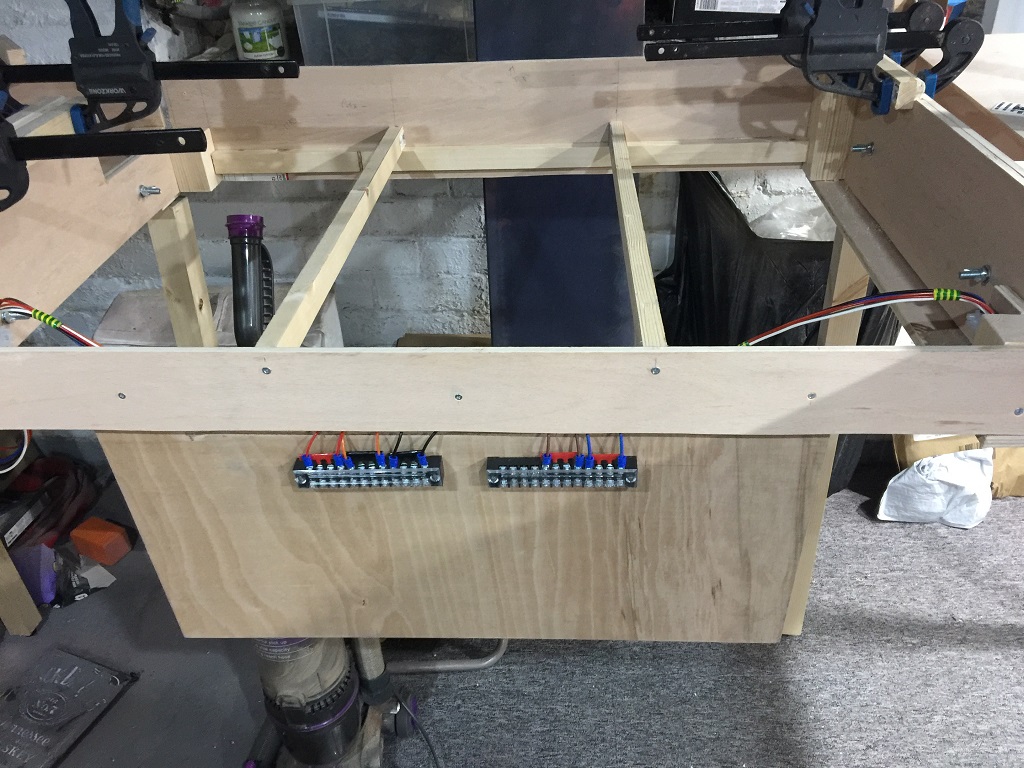
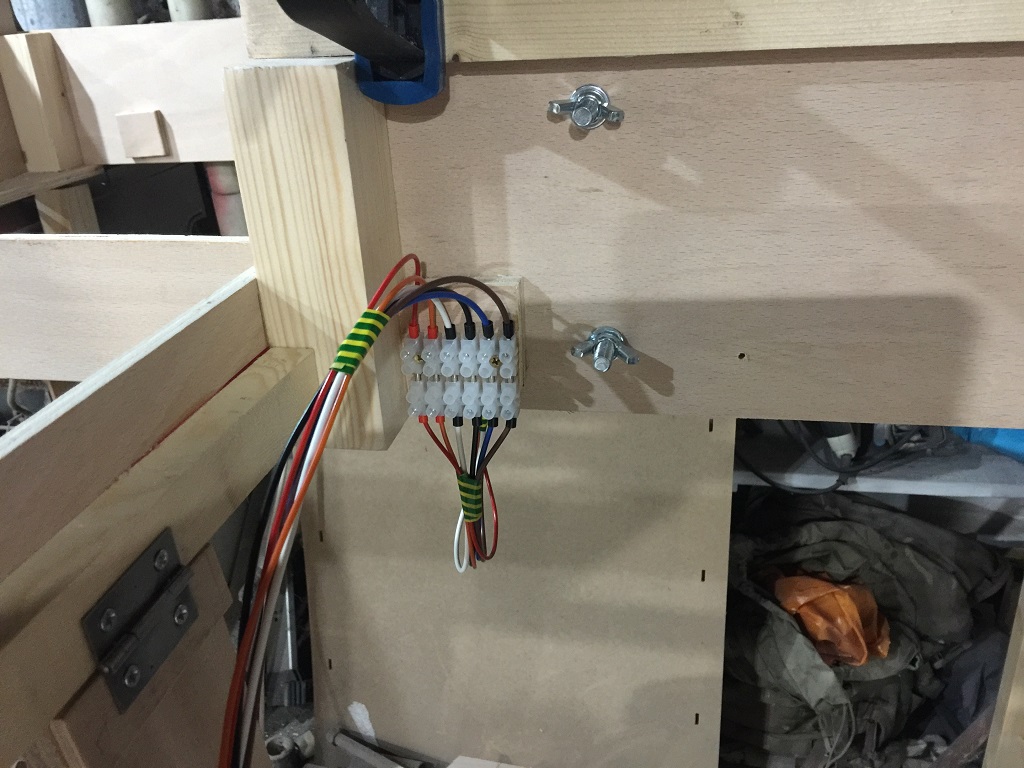
framing is 9mm plywood, track deck likely will be the same, there may also be more cross bracing added or the ply decks will gain stripwood bracing, not decided yet. aim is to build the whole frame - three modules long, in two rows, with smaller joining boards, and get that completed prior to adding the track deck to allow easier adding of bus wires and similar cruft.

board alignment holes not yet added, will be done when I have a few of the frames, likely method is sticking some stripwood to the inside face of the ends then using the DCC Concepts alignment dowel.

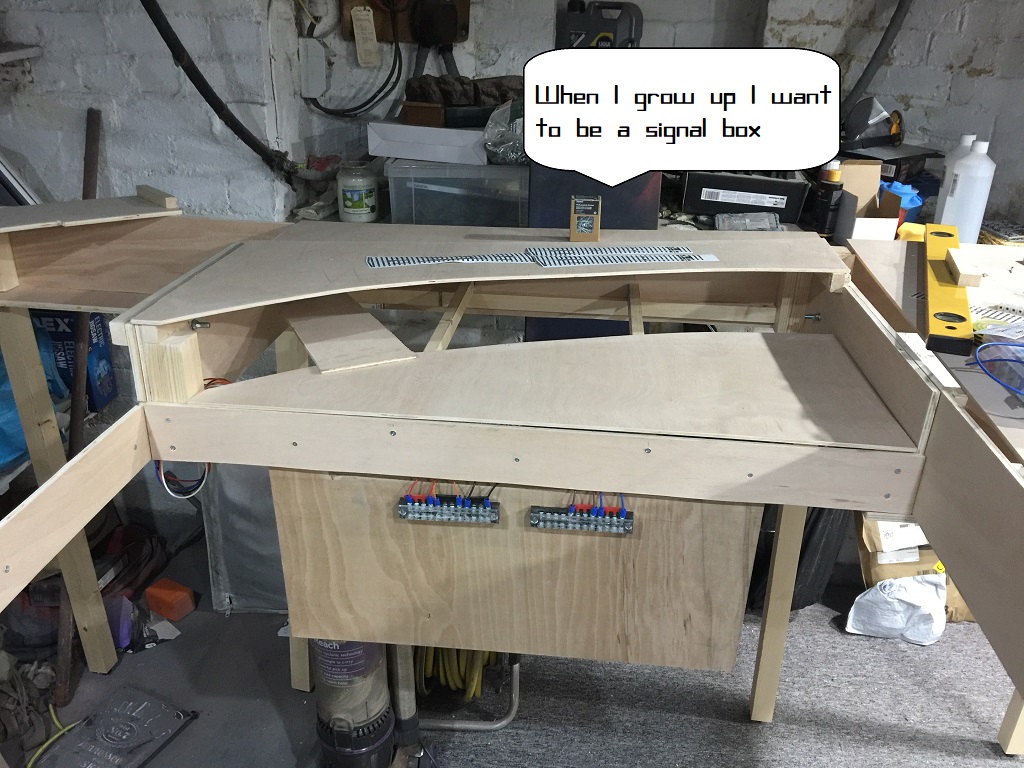
a backscene will be added eventually, this is quite a long way off

However it is progress, aim to build a second module tomorrow, and depending on how it all goes a third
User avatar
glencairn
Posts: 4909
Joined: Sat Aug 30, 2008 6:09 pm
Location: Both sides of the Border

Re: Leopard Street, LNER 1930's

Post by glencairn »

A hard part over -- Getting started.

Well done

Glencairn
To the world you are someone. To someone you are their world.
I Cannot Afford the Luxury of a Negative Thought
aleopardstail
Posts: 226
Joined: Thu Apr 29, 2021 9:48 pm

Re: Leopard Street, LNER 1930's

Post by aleopardstail »

indeed, always the first hump. figure better something that needs fettling than nothing but a perfect plan.

anyway, more progress, plan for this thread is a post only when its answering a direct question or there is actual progress related to the layouts build/testing. will leave the pontification about 'maybe' on the planning thread.

Image http://www.aleopardstail.com/IMG_3036.JPG

now have the first three boards part complete and standing, the legs need a bit of the above mentioned fettling to get them square, the nearest board needs the mid section recutting and putting back (managed to mirror image half of it, thankfully before the glue had fully cured. also both end boards need a diagonal to carry the tracks round the curves.

a few bits I hope to do during the week there, also need to spend a bit of time and get it level, its not far off but not quite there, will then probably move my little test plank to sit on it and experiment with the two gradients to see how well they go(the only bit of flat ground on this side of the layout is a dropped scenic only section to the front.

still, its a start, have a lot of clearing up to do, need to then dismantle things to finish painting the shelving to the rear so some of the clutter can be sorted and put away.

hopefully will start the other side of the layout next weekend and next week, leaving just the two small joining sections and an odd shaped diagonal bit that will carry part of a reverse loop - though that may wait until I'm ready to put the loops in, not decided yet.

not bad for a weekend

no accurate measurements were harmed, or indeed involved
aleopardstail
Posts: 226
Joined: Thu Apr 29, 2021 9:48 pm

Re: Leopard Street, LNER 1930's

Post by aleopardstail »

pics tomorrow, glue currently setting however the six primary boards, with associated legs now exist. some final set up for one of the joins to have the required holes drilled to do once its standing.

potentially tomorrow (or Monday) will get the three remaining plywood sheets to complete all of the framing and then start thinking about adding a track carrying deck, bus wiring etc.
aleopardstail
Posts: 226
Joined: Thu Apr 29, 2021 9:48 pm

Re: Leopard Street, LNER 1930's

Post by aleopardstail »

More progress, the primary baseboard framing is done, more secondary cross bracing will be added where needed as the track beds go in (happy for 9mm to go a 24" span supported all around so no part is more than 12" from support but for narrower say 3" wide track beds figure every 12" at least is needed - however they will be done in the more traditional way of a cross brace then a riser that can be set and glued as needed.)

Image http://www.aleopardstail.com/IMG_3040.JPG

low angle looking along where the main storage roads will be eventually "some day" with a high level terminus above

Image http://www.aleopardstail.com/IMG_3041.JPG

panning to the right we have the first of the shorter 3' spanning join boards, this will get a pair of cross braces, possibly a triplet as I want to experiment here - this is where track laying will begin as I have the pointwork for the double junction that will be here - track curving to the left in two pairs after - one to an incline the other descending back to the track datum

Image http://www.aleopardstail.com/IMG_3042.JPG

similar but pulled back to allow the rear side which is essentially two pairs of track and planned for scenery and plain running. shows the board needs some serious levelling and also shows the old maxim that a railway board gathers clutter. this doesn't even have a deck yet..

Image http://www.aleopardstail.com/IMG_3043.JPG

back along the wall, the second 3' span, this will be the start of the two storage roads alongside the running roads. what isn't shown (as it doesn't yet exist) is the "italic L" shaped diagonal section that will carry the return loops - these are a later phase of the board and the board itself will follow later. being omitted for now to access that far end more easily. access will be via an 18" square-ish access about where than Amazon packaging has ended up

Image http://www.aleopardstail.com/IMG_3044.JPG

finally along the desk side of the layout, all this clutter will be rehomed, and this will also end up slightly wider as the whole layout will be shifting about 3" closer to the other wall once some pipes have been removed and an electrical outlet raised to be out of the way (and to make it more accessible than being below)

overall quite happy. 12'x7', in modules, for now the central module along the desk will soon be removed making the central well "walk in" for sanity while laying track as the pointwork for here will be the final track laid.

next step is to start mapping out the actual plywood deck, a mix of largely solid and open frame sections, get that in and get further bracing in considering where pointwork will be. this will be done in stages, the first board noted above and the ones to either side first, then gradually work anti-clockwise one board at a time with the "next" one in place to take tails of track.

fingers crossed in about three weeks (have to wait to order the track) trains will be running, at least over a short length of this
User avatar
Bufferstop
Posts: 13840
Joined: Thu Mar 11, 2010 12:06 pm
Location: Bottom end of N. Warks line

Re: Leopard Street, LNER 1930's

Post by Bufferstop »

aleopardstail wrote:
framing is 9mm plywood, track deck likely will be the same,
Save yourself some cash, 6mm is quite enough for track bed providing there are enough supports, and it's easier to start and end transitions. I used it for sides and ends 100mm deep with 25mm square cross battens and double thickness where legs are anchored and boards are bolted together. A couple of 5kg and one 10k exercise weights came in useful for holding things down, and subjecting completed boards to my rigidity test, put 5k weight in centre, attempt to lift it by one corner, it's ok if nothing bends.
Growing old, can't avoid it. Growing up, forget it!
My Layout, My Workbench Blog and My Opinions
aleopardstail
Posts: 226
Joined: Thu Apr 29, 2021 9:48 pm

Re: Leopard Street, LNER 1930's

Post by aleopardstail »

Bufferstop wrote: Mon May 27, 2024 10:36 pm
aleopardstail wrote:
framing is 9mm plywood, track deck likely will be the same,
Save yourself some cash, 6mm is quite enough for track bed providing there are enough supports, and it's easier to start and end transitions. I used it for sides and ends 100mm deep with 25mm square cross battens and double thickness where legs are anchored and boards are bolted together. A couple of 5kg and one 10k exercise weights came in useful for holding things down, and subjecting completed boards to my rigidity test, put 5k weight in centre, attempt to lift it by one corner, it's ok if nothing bends.
having a spare sheet of 6mm, well 5.5mm for %REASONS% in the cellar I lobbed that loose to see, and on one of the modules where it would essentially be a solid sheet with just the central cross brace (so a pair of 2x2 squares really) 6mm does seem decent, ta for the hint, hadn't considered it.

had been thinking 9mm with bracing, though for bracing I was pondering (say for a twin track and a bit of space width over 2' lengths taking a bit of stripwood to the underside of the 6' gap to make the whole thing into a "T" shape, or a "U" with similar along either side. not seeing why that wouldn't work with 6mm

will pick up a couple of sheets Thursday to experimentificate with. even if it turns out to be unsuitable will be perfect for purely scenic areas so won't be wasted.

board framing here is 9mm, typically 6" deep, reduced to 3" where it will be a lowered scenic area in front of track. previous layout used 4" which worked though I want more space to fix the electronics stuff to
User avatar
luckymucklebackit
Posts: 3720
Joined: Mon Jul 18, 2011 7:05 am
Location: Eaglesham (Again)
Contact:

Re: Leopard Street, LNER 1930's

Post by luckymucklebackit »

Top class carpentry there sir!

Jim
This Signature Left Intentionally Blank, but since I have written this and I intended to do it, this Signature is intentionally not blank. Paradox or What?
My layout - Gateside and Northbridge
Image
aleopardstail
Posts: 226
Joined: Thu Apr 29, 2021 9:48 pm

Re: Leopard Street, LNER 1930's

Post by aleopardstail »

luckymucklebackit wrote: Tue May 28, 2024 1:11 pm Top class carpentry there sir!

Jim
when you look closer is most definitely is not, somewhere there is a woodwork teacher crying. amazing how much a jigsaw blade wanders. did try a "fence" to run alongside and even that didn't work with the blade starting to bend as it wandered. hopefully its "good enough" and the deck can be levelled off.

today order for the wires and power supplies has gone in (15V 7Amp, 12V 2.5Amp and 5V 2Amp) which will love on a board, suitable mains power lead etc for it as well
aleopardstail
Posts: 226
Joined: Thu Apr 29, 2021 9:48 pm

Re: Leopard Street, LNER 1930's

Post by aleopardstail »

Started work on the wiring, already noticed the boards need (slightly) adapting to allow the inter-board 6 way jumpers to fit. base plates for the jumpers added, some ply needs removing below them. three of the board jumpers made, 10" wire lengths to hang between the boards from plug & socket terminals. 4th to go to the as yet unmade power board is waiting to be made.

5V and 12V converters are here, need the 15V one to size the enclosure for them. also ordered three of the voltage & current meters, while they won't work for track DCC draw they will work nicely on the three DC supply voltages to keep an eye on things (and go dark when the supply is off).

actual bus work on the boards paused slightly, taking inspiration (or blatantly pinching ideas) from Charle at Chadwick Model Railway the plan is to add some fold down boards to handle the electronic gubbins - trip to Wickes planned for tomorrow to get a bit of 12mm ply to cut up, stripwood and hinges to mount stuff to such that its out of the way but also easily accessible without faffing about. likewise some terminal strips with bus rails are due to arrive tomorrow.

pondering on painting all the woodwork to protect it (or at least varnishing it all), welcome thoughts on that. the fronts need doing for cosmetic reasons, may do the rest as well - would be after the trackbed has gone down so essentially all the woodwork is completed.

finally started to print out the PECO templates to get a feel for the actual look of things and to work out the cutting plans for the track deck.

aim is to try to get the bus wiring and its flippy boards done this weekend for the end of the layout I'm starting work on, with ideally the track bed ply also laid on the first four, possibly five boards, maybe even more.

depends how much "stuff" turns up tomorrow
aleopardstail
Posts: 226
Joined: Thu Apr 29, 2021 9:48 pm

Re: Leopard Street, LNER 1930's

Post by aleopardstail »

More actual progress

trip to Wickes this morning (day off work playing taxi in the early hours, stopped on my way home) now have the timber I hope to actually complete the lower level, decking & bracing.

first job, add an electrical panel to board "E" (the first one to be worked on) and wire it up. this is a folding flap of 12mm ply (overkill but means its got enough depth screws don't go through and poke out)

Image http://www.aleopardstail.com/IMG_3045.JPG

so far only the bus wires in and out are connected, given there is no track as yet, or anything else, like power, this is not impacting operations too much. each of the connections has a wire in and out then six useful positions to connect to other things, for this board thats plenty.

also shows how the inner reinforcement will be fitted, though small cross beams (18mm x 28mm) couldn't make the frame on their own but really make the 9mm ply rigid, vertical supports can be added as needed and will support the upper deck at roughly 12" intervals.

simple 6 way plug & socket jumpers go between boards, this is the only one fully installed so far, and the other board isn't wired up yet

Image http://www.aleopardstail.com/IMG_3046.JPG

all jumpers will be identical and interchangable, the connection from the as yet unbuilt power board (waiting for the correct 5V AD-DC converter that can take the cables I have to arrive to build that). means any individual board can be powered up on its own for testing. boards have female connectors both ends, the jumpers are male both ends

the panel is hinged, it was meant to have a magnetic catch to hold it, the ones I have cried when I tried that, moving to a small sliding bolt arrangement.

also started work on the track deck, this is not secured down and needs a bit more with a sander to smooth it

Image http://www.aleopardstail.com/IMG_3047.JPG

the lower area will be purely scenic, the bit of scrap is where a road will go under the railway level, which itself is a gradual incline. the board behind it will get cut in length, its going to be level, a bit below the track height but not much, signal box will end up here eventually with steps down to the roadway on the left. need to remove this from the layout to properly fit it and add the extra supports to make sure its all square as its slightly off currently, the scenic deck at the front will add a lot of bracing even though its only thin.

slightly higher angle

Image http://www.aleopardstail.com/IMG_3048.JPG

rough overview of the junction that will live here breaking the lower loops off to the inclined tracks, large radius points, which exist in a box, though not with any of the fishplates that will come with a track order in a few weeks.

this is one of the smaller end boards, 3'x2' total, off to the right will be the high level terminal station so a chunk of that low level bit will end up as an embankment and retaining walls, off to the left is the curves around for the incline and the loops, which will be entirely scenic, there is space for a through station but there is only going to be plain track, the rear corner bit will get a few buildings as that road curves off to the left.

progress slowed by waiting for adhesives to fully cure and a lack of clamps.. have made the next two electrical panels that will go in. another will be completed tomorrow prior to dismantling this end of the layout to get it all installed.

On plan I think for powered movements towards the end of June on a short section
Phred
Posts: 530
Joined: Thu Feb 02, 2023 10:53 pm
Location: Queensland Australia

Re: Leopard Street, LNER 1930's

Post by Phred »

All looking very well thought out and professional. 8)
aleopardstail
Posts: 226
Joined: Thu Apr 29, 2021 9:48 pm

Re: Leopard Street, LNER 1930's

Post by aleopardstail »

Bit more today, two more wiring boards added, the cross bracing added on one and a half boards (doing more means dismantling it all), the bracing for the wiring boards on another three (more terminal strips on order) and the all important strips to carry the deck level across the board joins added for two board joins - will be left overnight to cure the glue as these are just glued without screws, will then have to be sanded to get them exactly flat.

the "duck under" bit is a pain, not so much the lack of space, there is three foot clearance, more my jeans sticking to my legs.. grr, very glad I went with the 7' width giving a 3' access well though, slightly makes the layout better but gods it makes the central bit a lot easier to work in.

sometime soon, potentially tomorrow as its easier doing the big stuff at weekends, one end is dismantled, the rest of the bracing can go in, some garbage on the wall can be removed, wall painted etc as the bits for the power box should be here this week coming - not about next weekend for %REASONS%, still aiming to have the ability to power up the bus wires reasonably soon even with nothing connected to them yet - really so when the track down go down it can be tested easily.

aim is full current sense block detection, I've worked the block pattern out, initially likely all just connected directly to the bus though apart from one board. need to clear off and dismantle the old layout to salvage various bits.

choice made on points though, I was going with relays for the frog switching, likely going back to microswitches mounted on the servos, partly for sanity but mostly so points can be manually positioned before all that gubbins is powered up and still get the frogs right
User avatar
Mountain
Posts: 5932
Joined: Mon Oct 24, 2016 3:43 pm
Location: UK.

Re: Leopard Street, LNER 1930's

Post by Mountain »

Certainly a lot of work going on there with a fair amount of wood. Must have cost a fortune! Worth it though. It is looking good!
aleopardstail
Posts: 226
Joined: Thu Apr 29, 2021 9:48 pm

Re: Leopard Street, LNER 1930's

Post by aleopardstail »

Mountain wrote: Sun Jun 02, 2024 11:09 am Certainly a lot of work going on there with a fair amount of wood. Must have cost a fortune! Worth it though. It is looking good!
probably close to £250 on wood so far (excluding the wood cladding), getting there. was going to be adding a bit more today but discovered the decommissioned boiler would respond to brute force and bad language, its now gone and the central alcove has its first coat of white paint - rest of the week will be additional coats.

while the layout is in bits again there will be a bit more bracing going in, have cut the top deck for one end of the fiddle yard, mostly to work out how to brace it, likely going to be a bit of spare wood screwed in place short term to hold shapes while supports get added to the underside.

still, its coming along and keeping me, mostly, out of trouble
Post Reply