
Wouldn't I just love to spend some time with you Jim.
Watching and being given a talk through as you progress.
I know you have the tools, but without the ability to use
them they just become more 'stuff' in a box.
Geoff T.
Brassmasters Duchess test build
Re: Brassmasters Duchess test build
Remember ... I know nothing about railways.
http://www.newrailwaymodellers.co.uk/Fo ... 22&t=32187 and Another on http://www.newrailwaymodellers.co.uk/Fo ... &sk=t&sd=a
http://www.newrailwaymodellers.co.uk/Fo ... 22&t=32187 and Another on http://www.newrailwaymodellers.co.uk/Fo ... &sk=t&sd=a
Re: Brassmasters Duchess test build
After a longer gap than would have liked attention had returned to my Duchess build.
Starting with the lower firebox and damper operating rod.
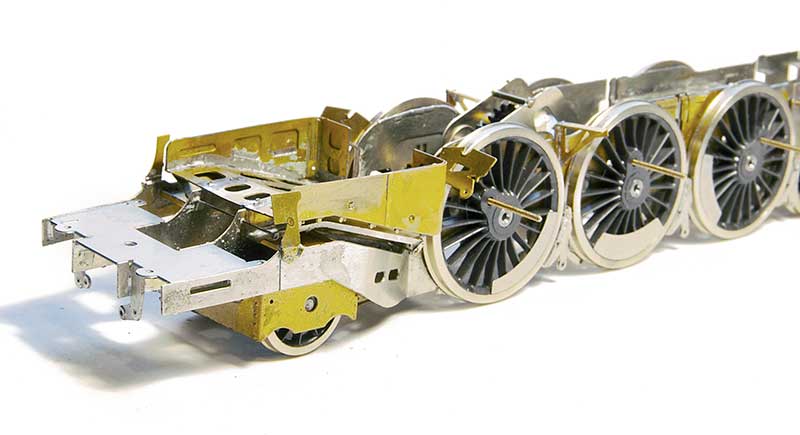
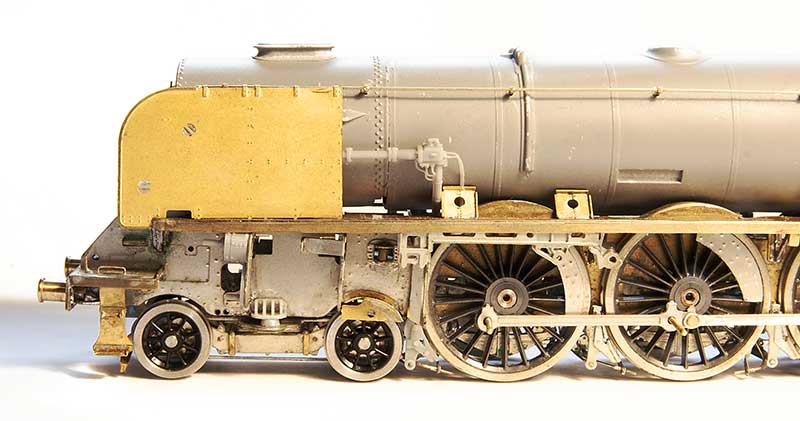
Next up the brakes. As can be seen clearance is kind of on the minimal side. Theres no springs fitted yet either so the chassis sill sit a little higher than is seen here.
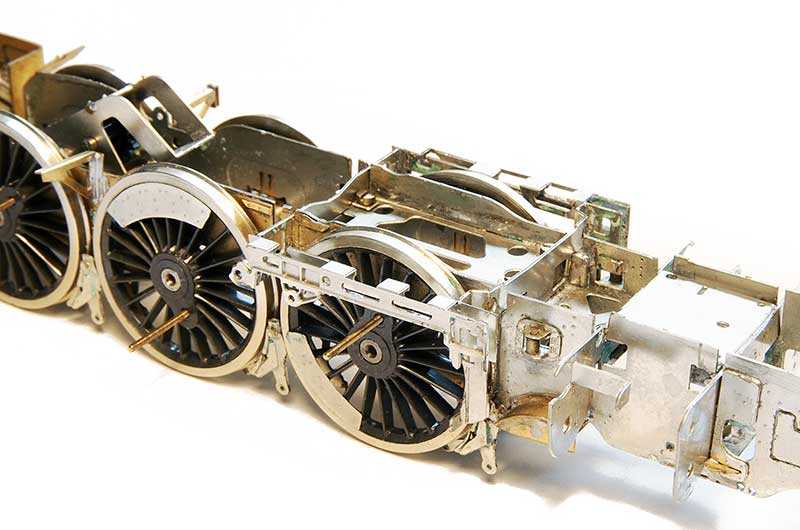
The motion brackets. Again theres not a lot of clearance between the bracket and the leading driving wheel.
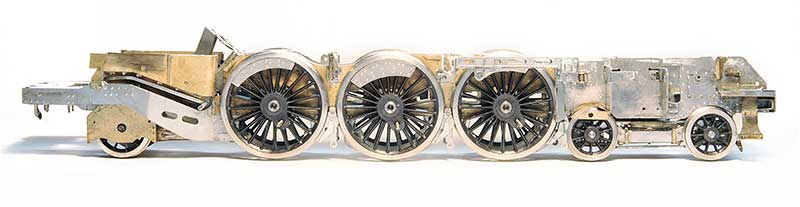
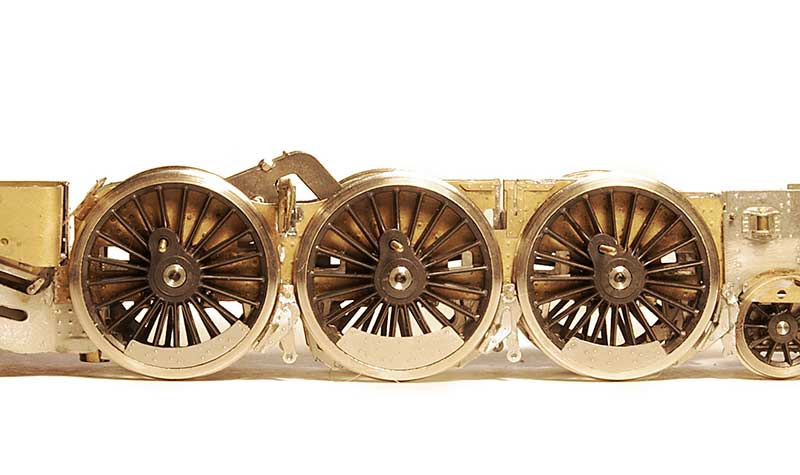
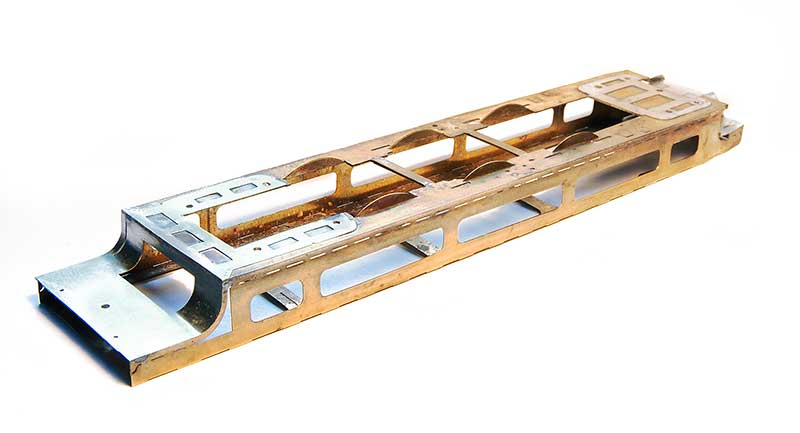
The chassis so far.
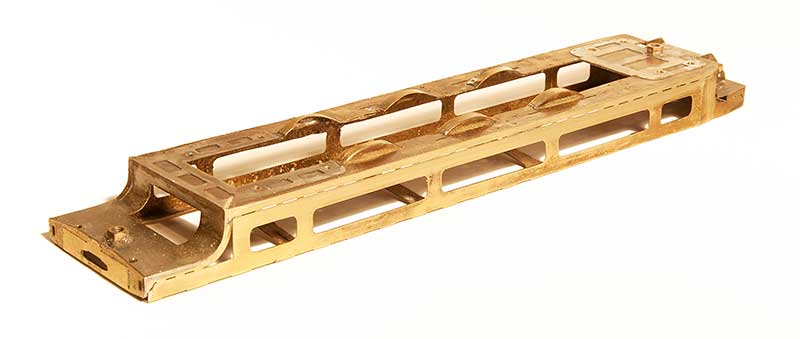
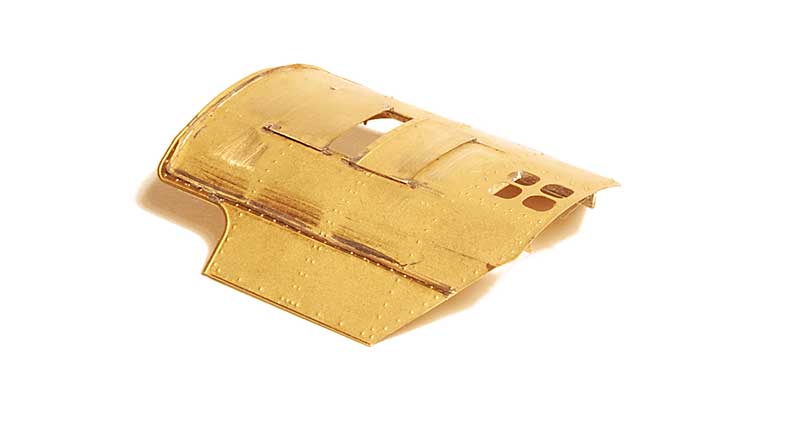
Moving on the next stage is the footplate, seen here in its assembly jig.
Starting with the lower firebox and damper operating rod.
Next up the brakes. As can be seen clearance is kind of on the minimal side. Theres no springs fitted yet either so the chassis sill sit a little higher than is seen here.
The motion brackets. Again theres not a lot of clearance between the bracket and the leading driving wheel.
The chassis so far.
Moving on the next stage is the footplate, seen here in its assembly jig.
Re: Brassmasters Duchess test build
That's all looking appropriately massive and rather wonderful.
There's a case for making this a R/C battery powered dead track model; just so many metal components in realistically close proximity to all the wheel tyres.Jim S-W wrote:... As can be seen clearance is kind of on the minimal side...
Re: Brassmasters Duchess test build
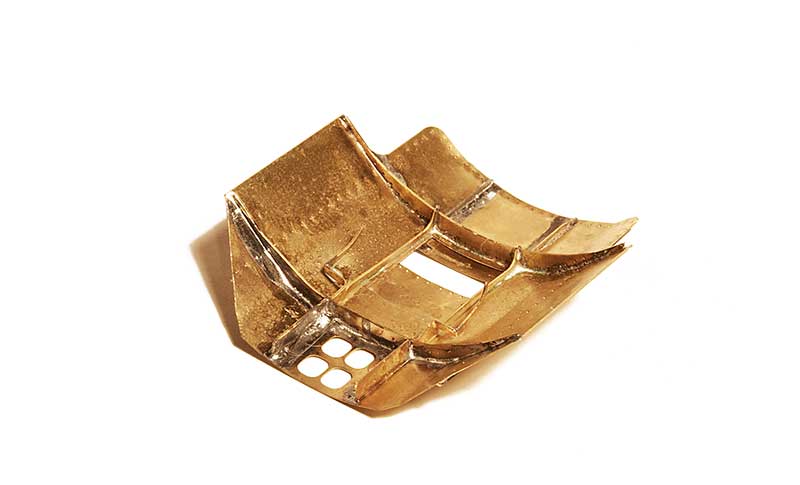
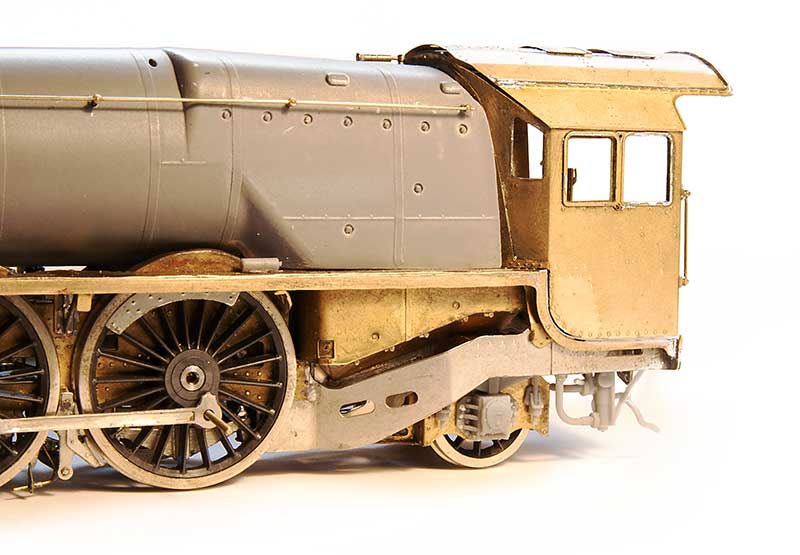
Footplate with mounting bolts and Splashers in place and tided up ready for separating from the jig.
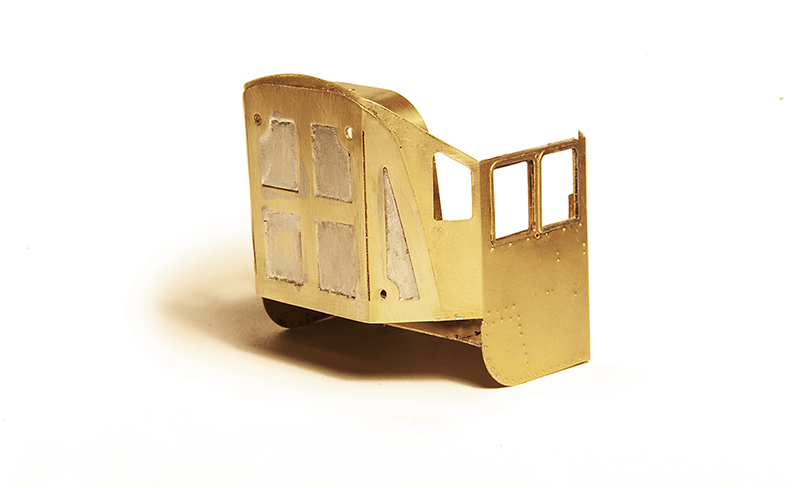
But before I can do that need to fit the cab, firebox, boiler and smoke box so that theres something to give it a degree of rigidity. This is the basic cab assembly.
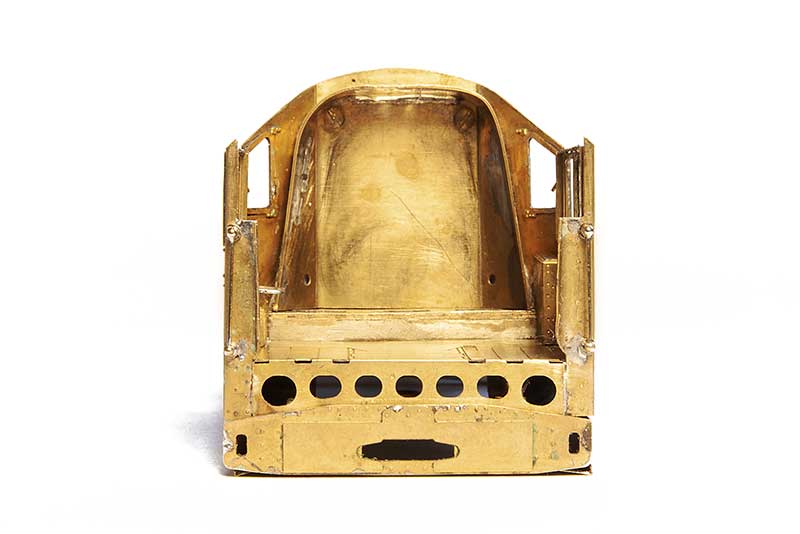
And inside mounted to the footplate. The seats are posable!
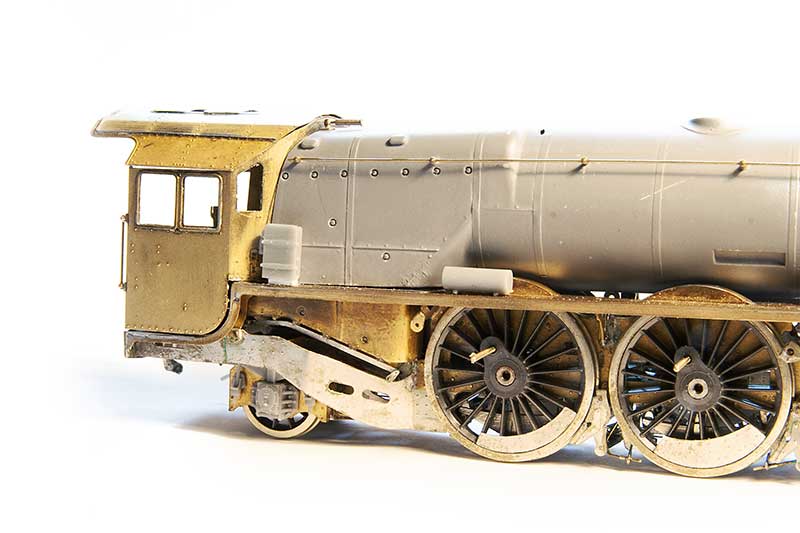
The cab roof. This builds up on its own mini jig too.
Underside from the front end.
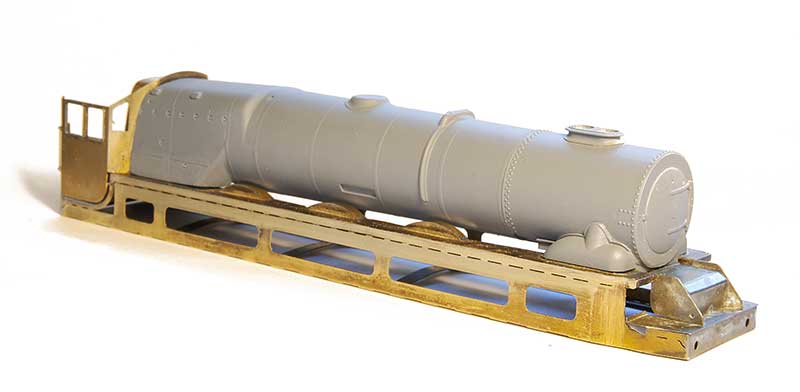
The main super structure comes in 3 parts cast in resin. The firebox and boiler. The smokebox saddle and the smoke box. There are 3 types. A round single chimney. The flattened top double chimney from the ex streamlined locos and a round double chimney as seen here.
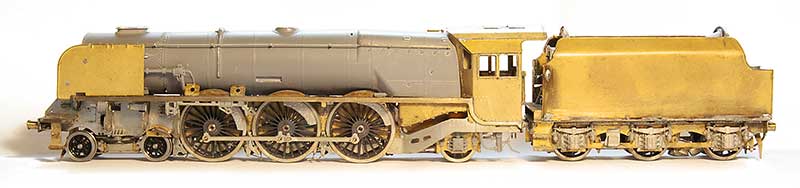
The body removed from the jig, tidied up and fitted to the chassis.
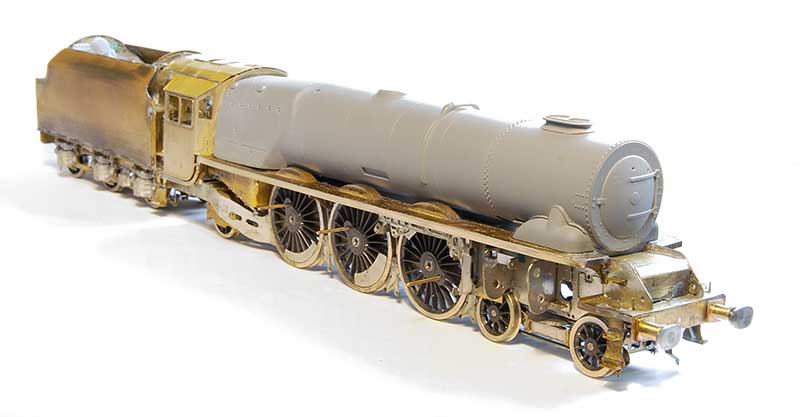
Finally - I couldn't resist!
Re: Brassmasters Duchess test build
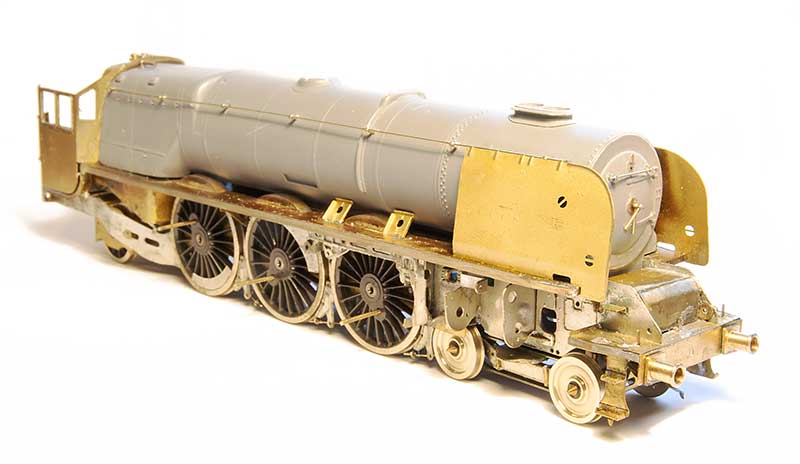
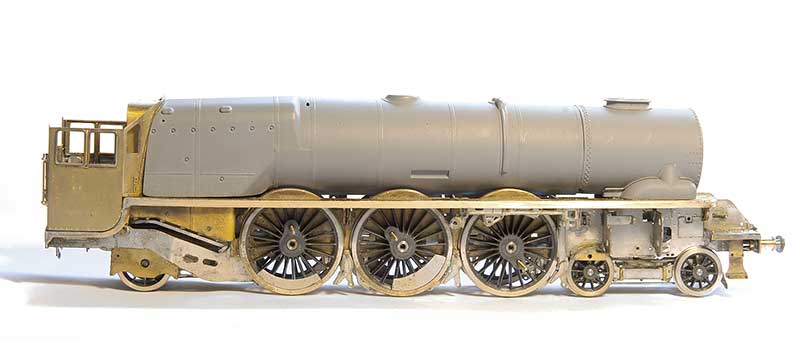
Just a little update this time - Been fitting some of the details to the body. Bogie wheels are temporary as I was doing a little testing (read that as shuffling it around on Brettell Road). I never realised how big these actually are. Right on the limit of the loading gauge!
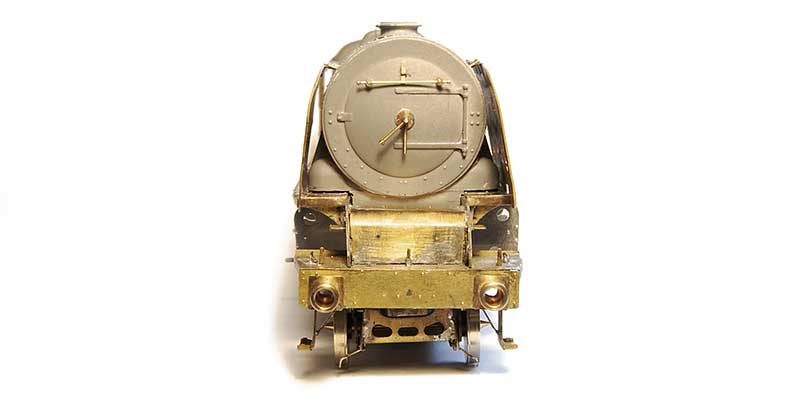
Head on view

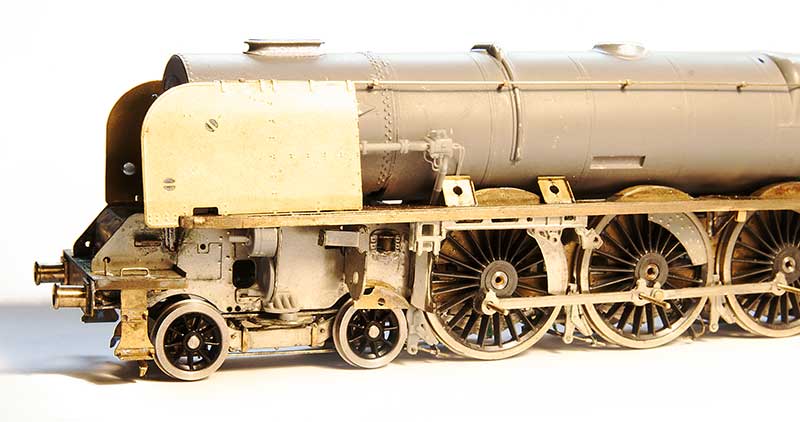
Left hand side. - In addition to the body details Ive also added the sandpipes and springs. The latter in both senses as I've fitted the main functional springs to the model as well as the cosmetic ones behind the wheels
Re: Brassmasters Duchess test build
That is just wonderful workmanship Jim,
All so clean, some very tidy soldering.
A pleasure to see such a monster taking shape.
Geoff T
All so clean, some very tidy soldering.
A pleasure to see such a monster taking shape.
Geoff T
Remember ... I know nothing about railways.
http://www.newrailwaymodellers.co.uk/Fo ... 22&t=32187 and Another on http://www.newrailwaymodellers.co.uk/Fo ... &sk=t&sd=a
http://www.newrailwaymodellers.co.uk/Fo ... 22&t=32187 and Another on http://www.newrailwaymodellers.co.uk/Fo ... &sk=t&sd=a
Re: Brassmasters Duchess test build
That's coming along handsomely.
Those solid discs confer a North American appearance...Jim S-W wrote:... Bogie wheels are temporary ...
Re: Brassmasters Duchess test build
Yeah they do dont they?
Re: Brassmasters Duchess test build
Progress on the Princess Coronation build continues with some test 3d prints for some of the details. These are only testing out ideas at this stage.
Above we see the bogie bearing pads and bracket, cylinder fronts, Ejector and brakes.
I admit that i had quite a wow! moment when I first saw the ejector. We are exploring the idea of 3d prints for the brake shoes as it allows you to position them closer to the wheels without risking a short. Where the front one squeezes in between the front driving wheel and the rear bogie wheel seems particularly advantageous.
Pony truck axlebox and springs along with some of the under cab pipework. One of the small AWS cylinders can be seen on the footplate
More AWS bits - this time on the firemans side. The roof is still a loose fit at this stage.
State of play so far.
Re: Brassmasters Duchess test build
Looking better yet!. The clarity of the frame extension completely separate from the firebox casing is very striking. Having non-conductive static detail parts adjacent the wheel tyres has to be a good plan. While all metal equivalents are intrinsically strong and easy to reliably attach by soldering, the risk of intermittent shorts while the loco is in motion are only too well known.
Is it too early to ask what livery is intended for the finished model?
Is it too early to ask what livery is intended for the finished model?