
Michaela’s workbench

Re: Michaela’s workbench, loco weathering
Ooh. You have a "Percy".
Modelling On A Budget ---》 https://www.newrailwaymodellers.co.uk/F ... 22&t=52212
-
Michaelaface
- Posts: 429
- Joined: Wed Nov 02, 2011 1:51 am
Re: Michaela’s workbench, loco weathering
it was broken and doesnt run, and I've since used it for spare partsMountain wrote:Ooh. You have a "Percy".
Re: Michaela’s workbench, loco weathering
If the body has its main structure complete it is an ideal candidate to use with a Smallbrook Studio conversion kit. The conversion kit does not need the chimney or cab. It relies on the main body structure. The kit has parts to widen the footplate and provides a new smokebox door, cab, chimney and details. The chassis is a standard Hornby 0-4-0 chassis. An easy conversion into one of these:-
- Attachments
-
Modelling On A Budget ---》 https://www.newrailwaymodellers.co.uk/F ... 22&t=52212
-
Michaelaface
- Posts: 429
- Joined: Wed Nov 02, 2011 1:51 am
Re: Michaela’s workbench, loco weathering
That's a nice conversion, sadly the body on mine was already destroyed by its previous owner
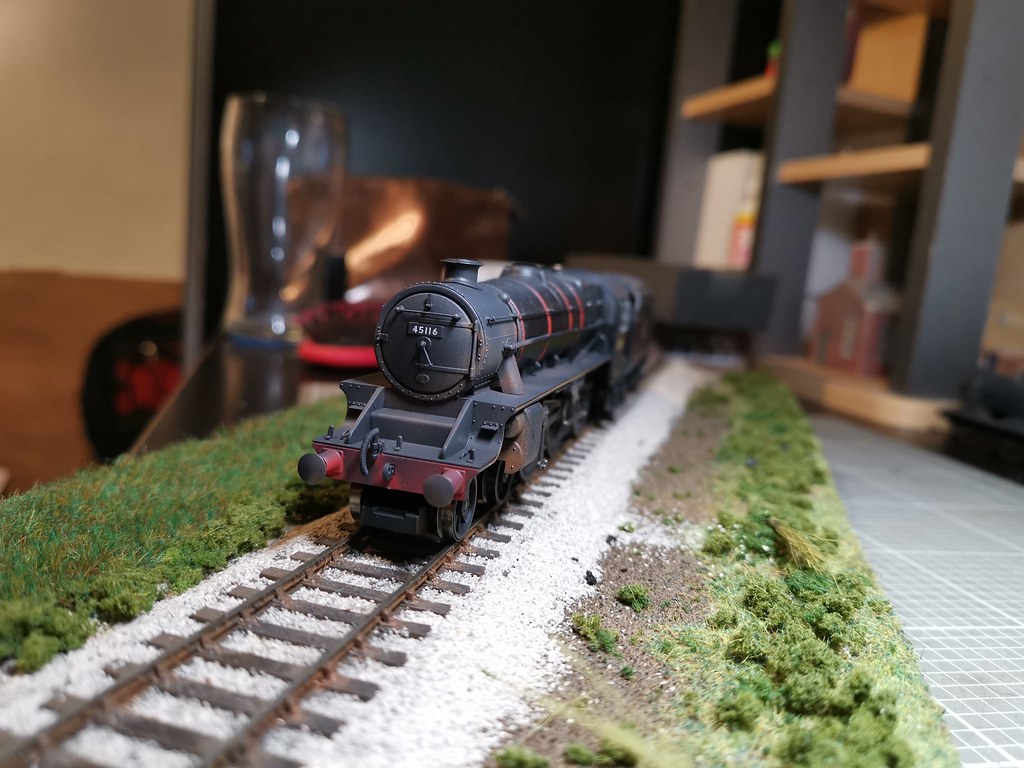
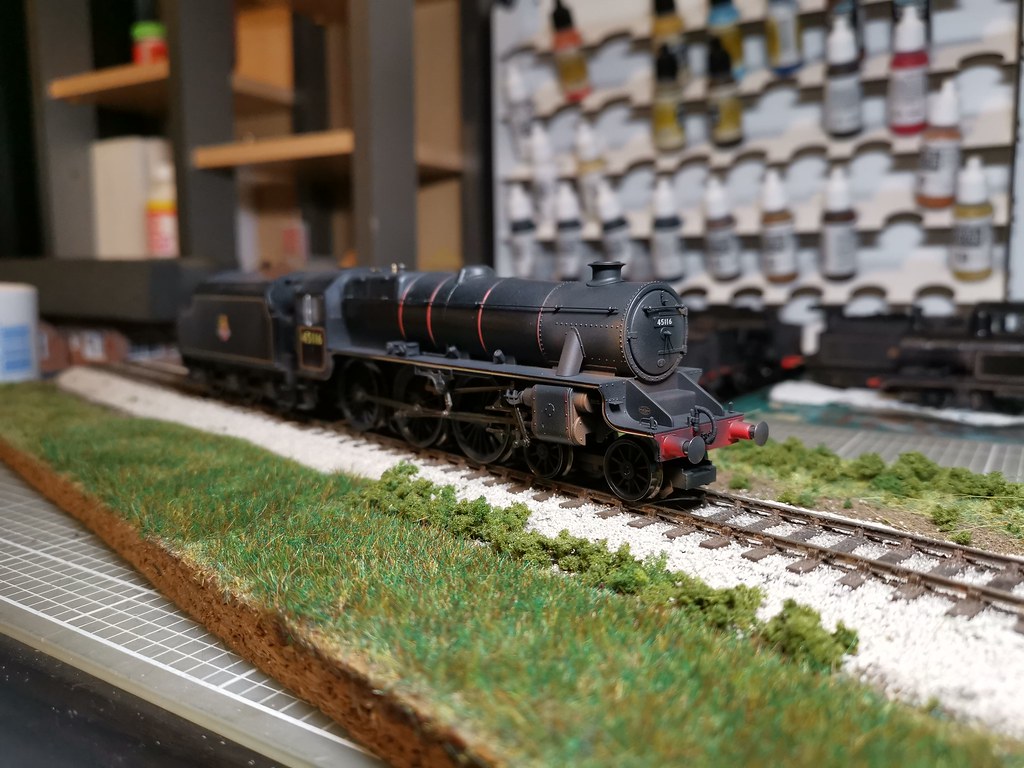
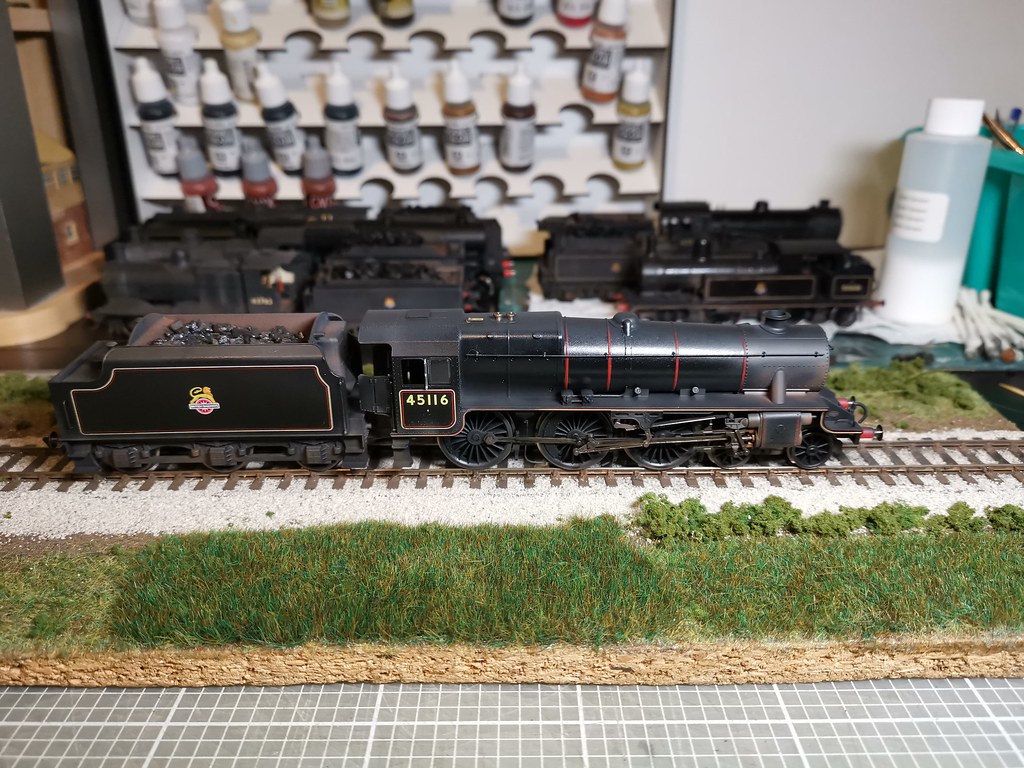
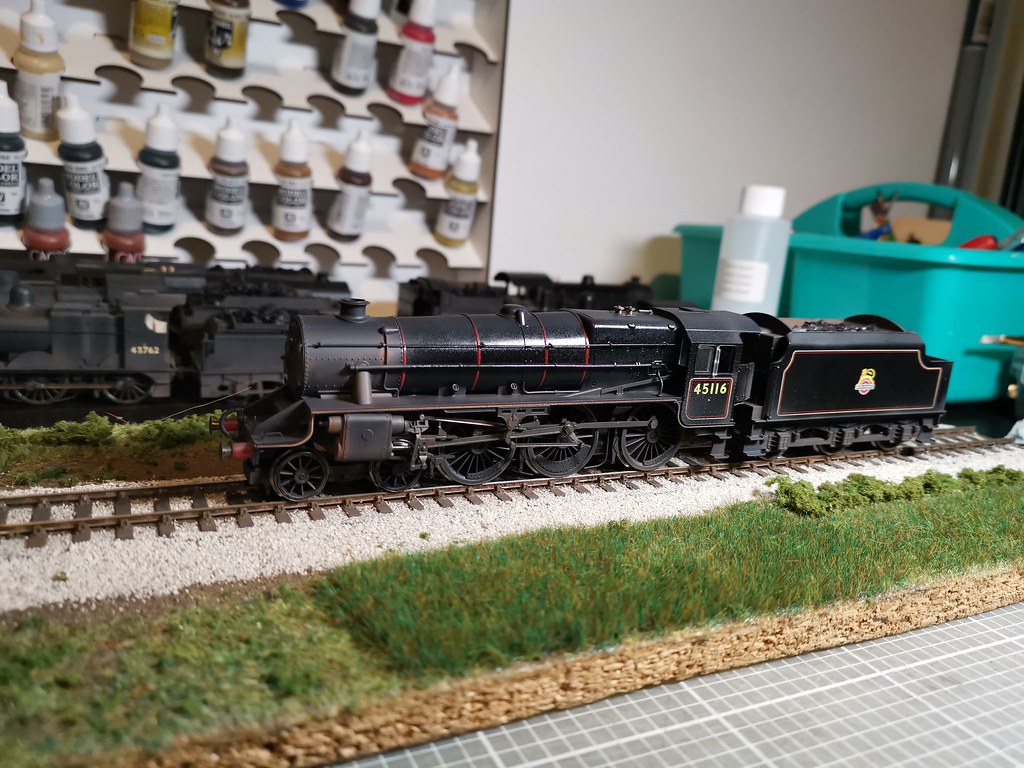
anyway back to my weathering, today's victim was my all time most expensive loco, my TTS Black 5, went for a "clean but worked" look for this one, which meant a gloss finish with light weathering over it, here are the results
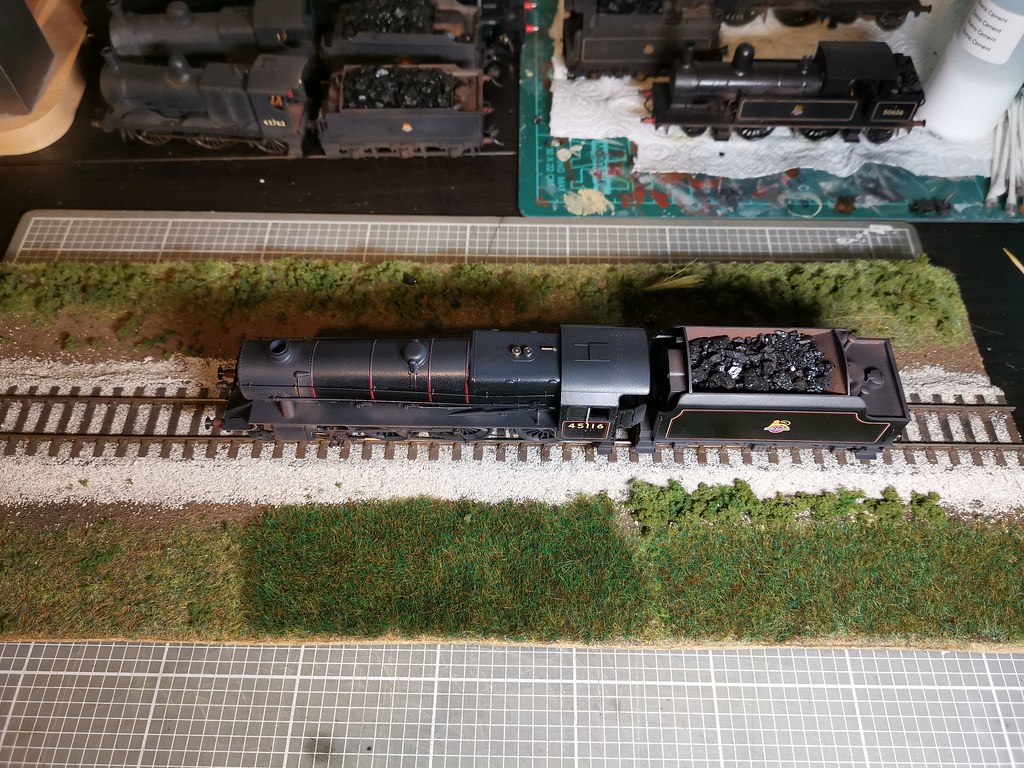
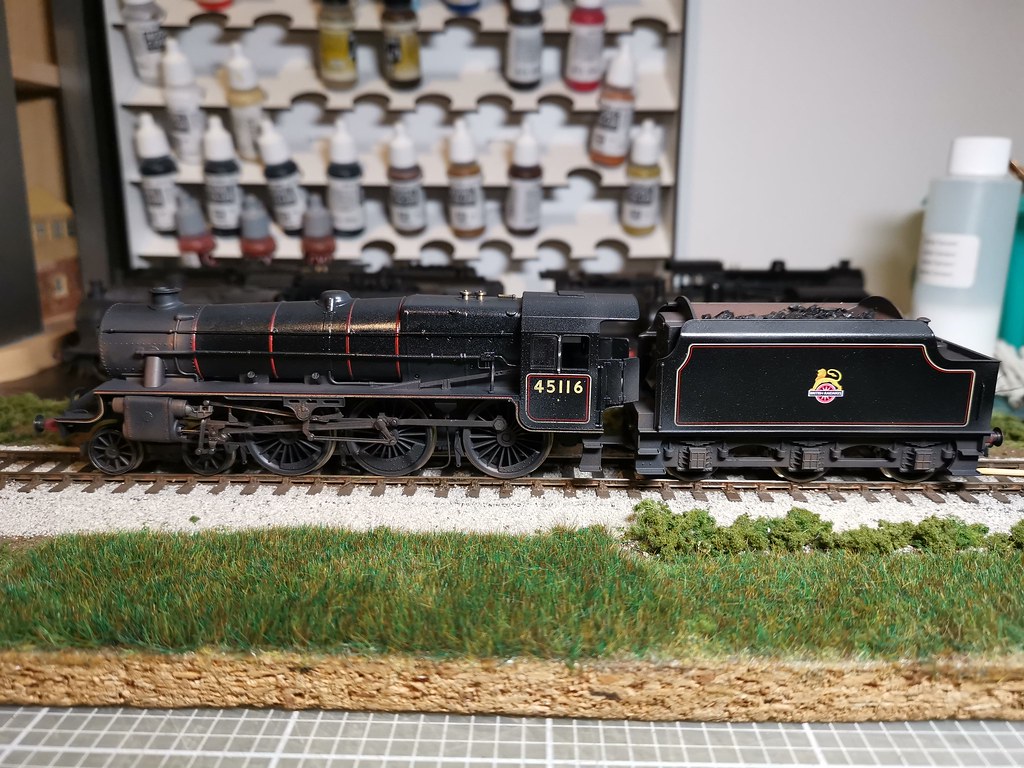
anyway back to my weathering, today's victim was my all time most expensive loco, my TTS Black 5, went for a "clean but worked" look for this one, which meant a gloss finish with light weathering over it, here are the results
Re: Michaela’s workbench, loco weathering
Looking good there Michaela, you are certainly developing an eye for portraying these engines.
-
Michaelaface
- Posts: 429
- Joined: Wed Nov 02, 2011 1:51 am
Re: Michaela’s workbench, building buildings
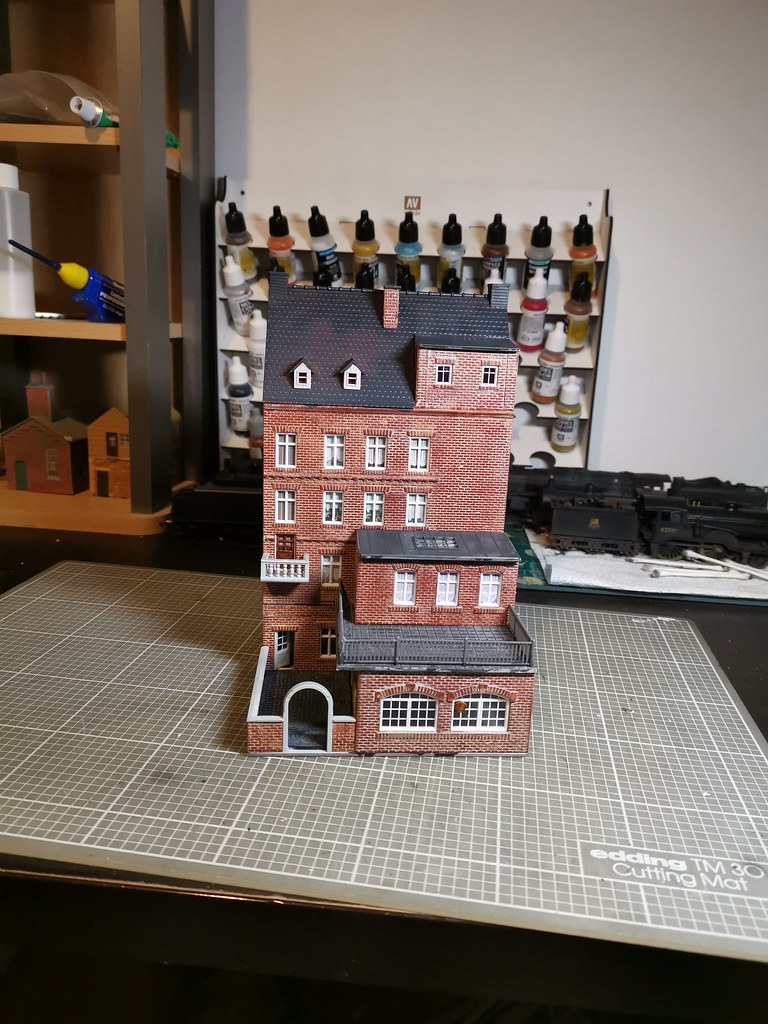
right, enough of that weathering lark for a bit, got back on with finishing up the cafe I'd be working on, needs a bit of weathering, but I've earned a break from weathering now I think

-
Michaelaface
- Posts: 429
- Joined: Wed Nov 02, 2011 1:51 am
Re: Michaela’s workbench, building buildings
lets have another go at this scratch building lark then
Re: Michaela’s workbench, building buildings
Go for it !
That already reminds me of Yorkshire - Vague memories
of Bradford, Halifax, Leeds and such where large square
finished stone blocks were used a lot.
Is it really 20+ years since I used to Rep up there ?
Geoff T.
That already reminds me of Yorkshire - Vague memories
of Bradford, Halifax, Leeds and such where large square
finished stone blocks were used a lot.
Is it really 20+ years since I used to Rep up there ?
Geoff T.
Remember ... I know nothing about railways.
http://www.newrailwaymodellers.co.uk/Fo ... 22&t=32187 and Another on http://www.newrailwaymodellers.co.uk/Fo ... &sk=t&sd=a
http://www.newrailwaymodellers.co.uk/Fo ... 22&t=32187 and Another on http://www.newrailwaymodellers.co.uk/Fo ... &sk=t&sd=a
-
Michaelaface
- Posts: 429
- Joined: Wed Nov 02, 2011 1:51 am
Re: Michaela’s workbench, building buildings
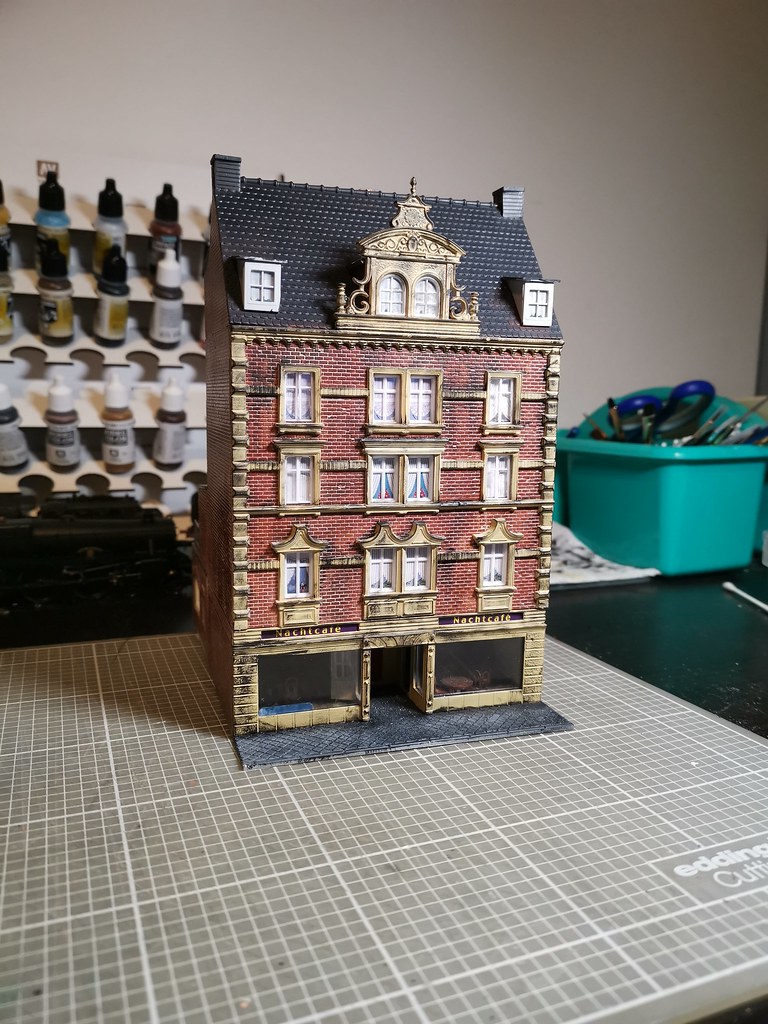
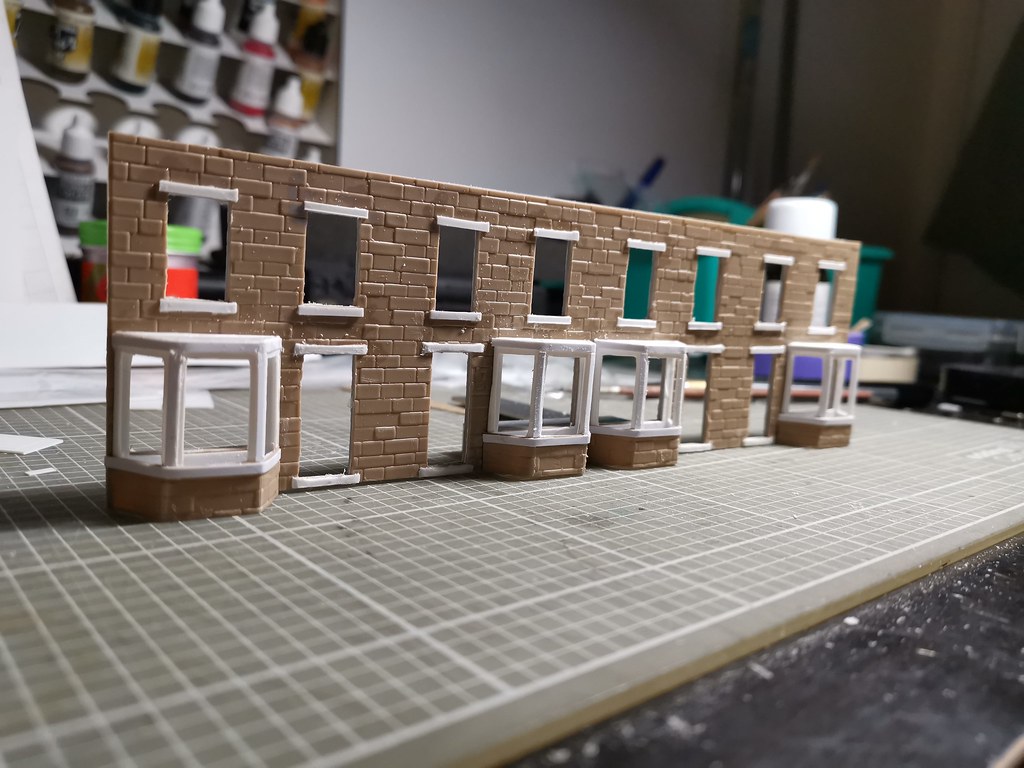
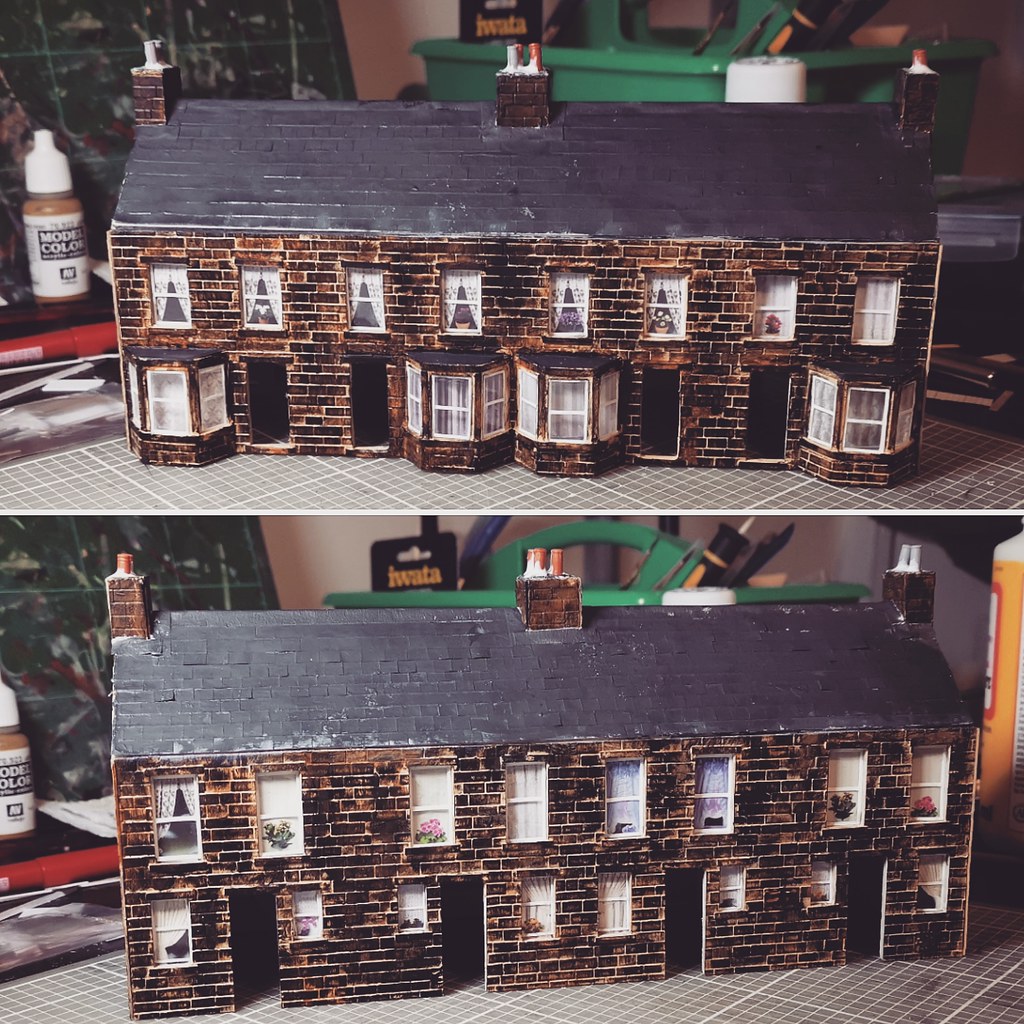
yes that area, plus the ELR, is my main inspiration for buildings, not sure why, just like the look of them, and layouts full of them
here's where I'm up to now, with sore fingers
just a test fit before I finish painting and put all the windows in
not entirely sure why but this one seems to be going a lot better than my previous scratch builds
here's where I'm up to now, with sore fingers
just a test fit before I finish painting and put all the windows in
not entirely sure why but this one seems to be going a lot better than my previous scratch builds

Re: Michaela’s workbench, building buildings
Your buildings are really rather good. I like the Black Five finish too, good to see a tender that hasn’t just had its interior sprayed matt back. The rusty in-use effect works well.
Tony
Tony
Men with false teeth may yet speak the truth.......
-
Michaelaface
- Posts: 429
- Joined: Wed Nov 02, 2011 1:51 am
Re: Michaela’s workbench, building buildings
thank you, I can't remember where I saw it or got the ideaLysander wrote:Your buildings are really rather good. I like the Black Five finish too, good to see a tender that hasn’t just had its interior sprayed matt back. The rusty in-use effect works well.
Tony
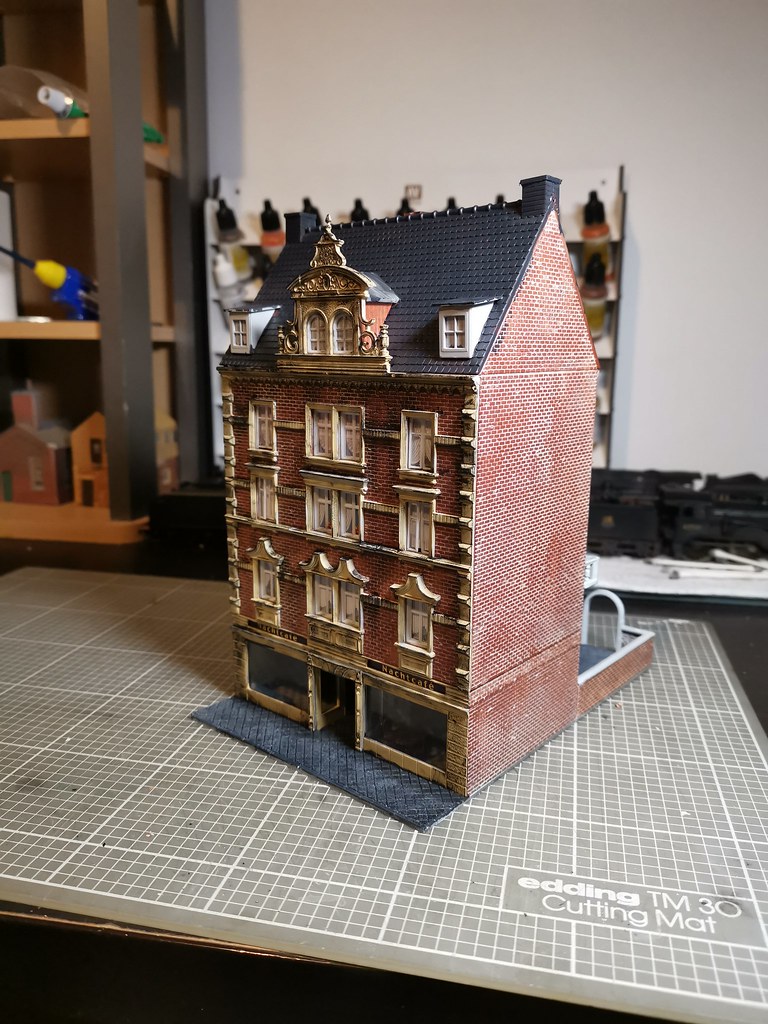
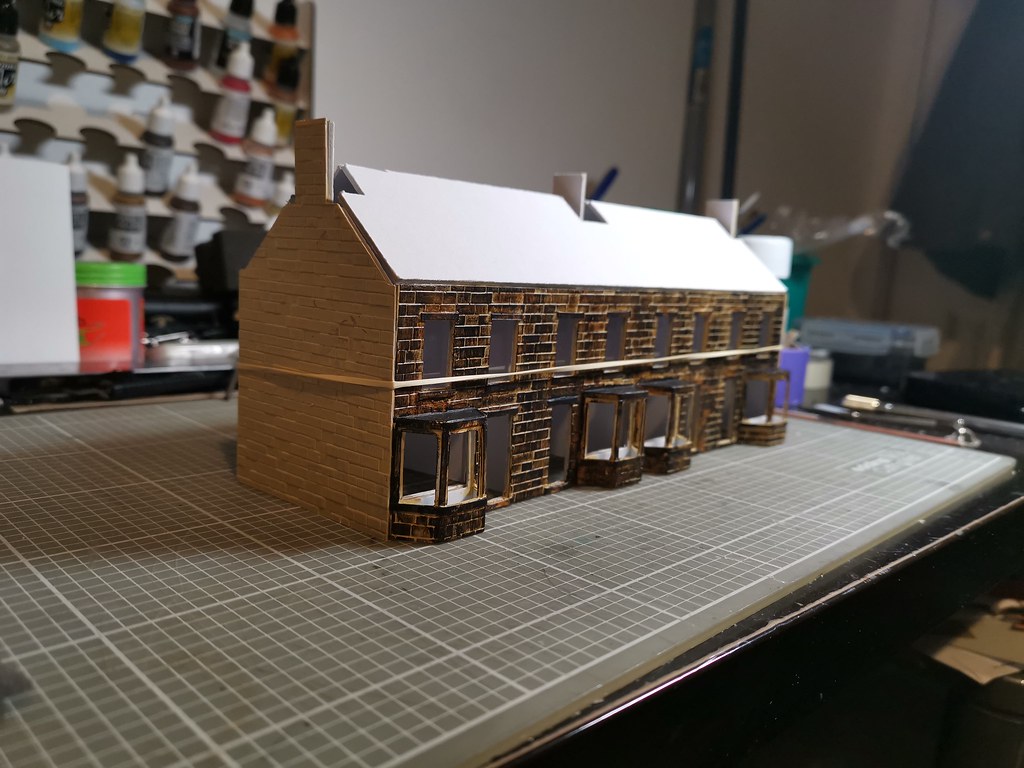
anyways here's where my scratch build is up to, going to go about my next one completely differntly as the speed of my work is slowed dramatically, just got to add doors and work out how I'm going to do the guttering now

Re: Michaela’s workbench, building buildings
I love the flowers in the windows, great detail!
I know you can get plastic guttering kits, but I've always wondered whether you could approximate the downpipes at least with paperclips. I'm nearly at the guttering point on my scratch built terraced houses too, so I'd be interested to know what you do!
I know you can get plastic guttering kits, but I've always wondered whether you could approximate the downpipes at least with paperclips. I'm nearly at the guttering point on my scratch built terraced houses too, so I'd be interested to know what you do!
Frontington & Backwoods Railway: https://www.matthewdawkins.co.uk/catego ... way-build/
LocoSound - sound effects for DC model railways: https://mafu-d.github.io/loco-sound
LocoSound - sound effects for DC model railways: https://mafu-d.github.io/loco-sound
-
TimberSurf

- Posts: 2536
- Joined: Wed Jan 08, 2014 5:47 pm
- Location: N.Wales
- Contact:
Re: Michaela’s workbench, building buildings
Drain pipe should be 1-1.2mm dia, similar half round plastic strip can be had from plastruct/evrgreen/China and for joints see here

-
Michaelaface
- Posts: 429
- Joined: Wed Nov 02, 2011 1:51 am
Re: Michaela’s workbench, building buildings
aha thanks but they're not my doing, when you buy kits from kibri they often come with a sheet of window interior thingies you can cut out, had a load spare and they fit these windows perfectly, I have some of the wills guttering kits, but I'd rather see if I can make something from scratch ideally without buying anything firstminipix wrote:I love the flowers in the windows, great detail!
I know you can get plastic guttering kits, but I've always wondered whether you could approximate the downpipes at least with paperclips. I'm nearly at the guttering point on my scratch built terraced houses too, so I'd be interested to know what you do!
I have some of the rounded strip which was going to use for drains, dont have any half round though, was hoping to find a solution without buying anything thoughTimberSurf wrote:Drain pipe should be 1-1.2mm dia, similar half round plastic strip can be had from plastruct/evrgreen/China and for joints see here
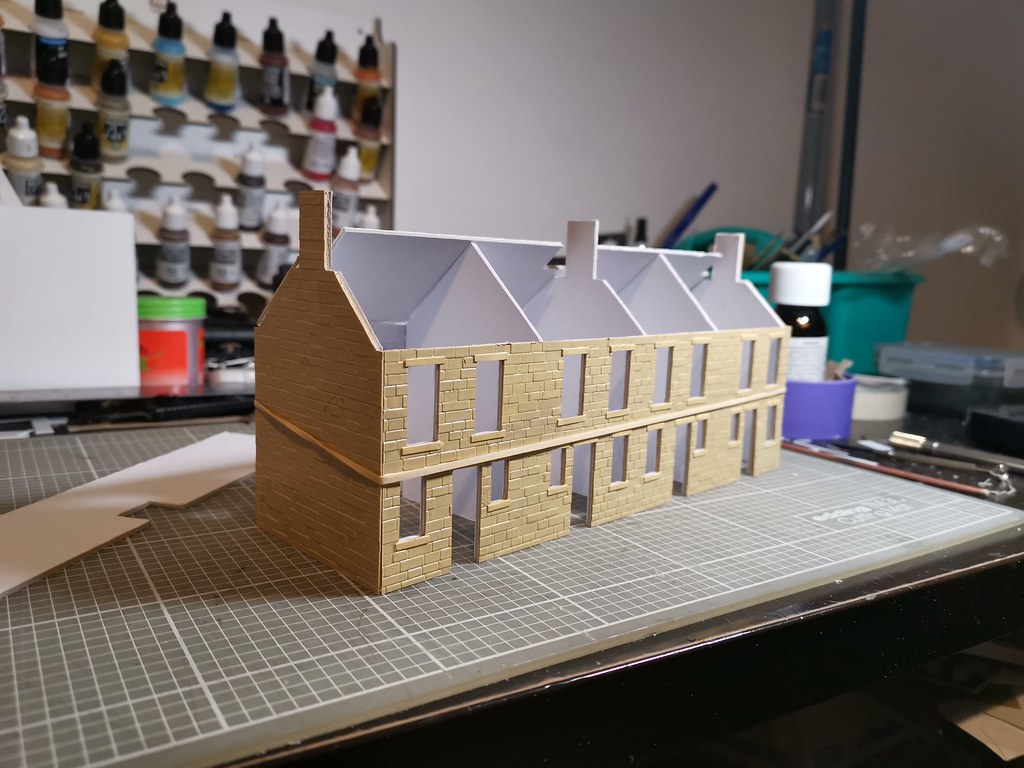
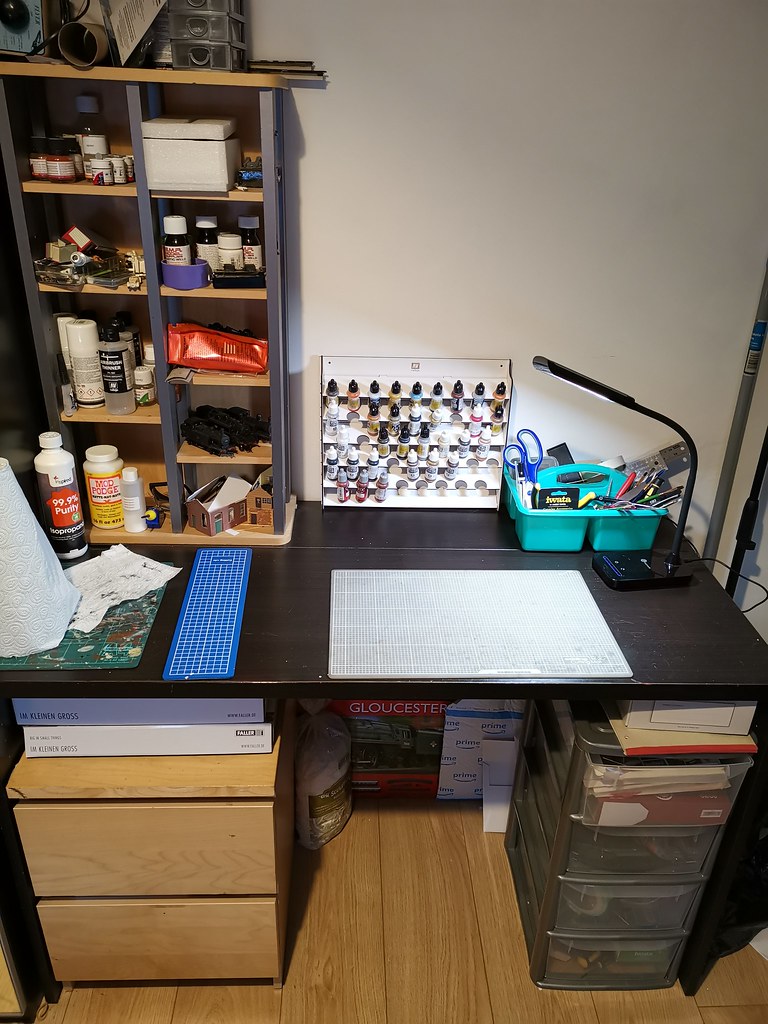
moving on, while I thought about how I was going to do the drains I thought I'd have a go at a few of the ideas I had building those terraces, here's my work so far
firstly time to clean up and "tidy" the work area
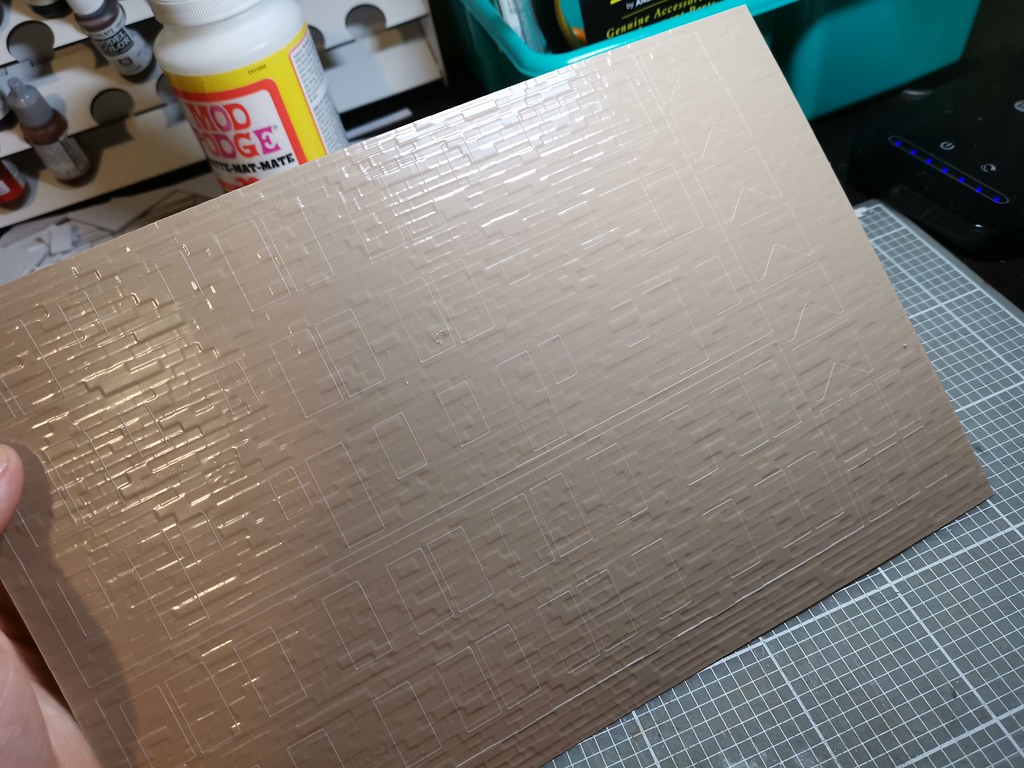
used a helpful machine to scribe my design onto mounting board
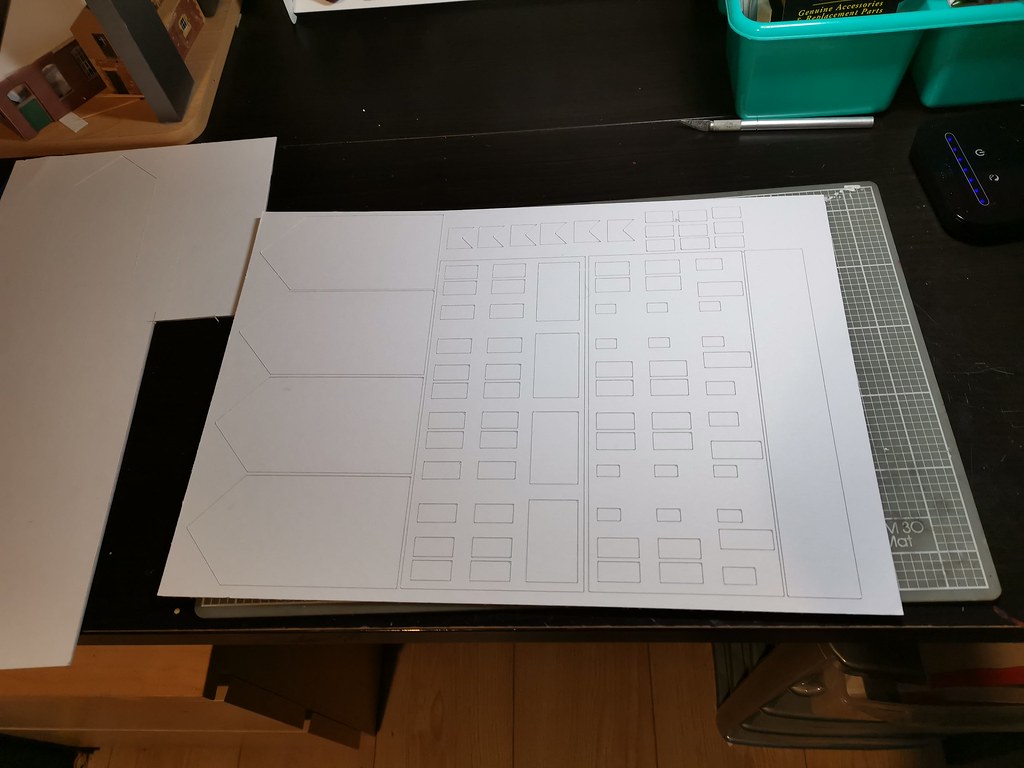
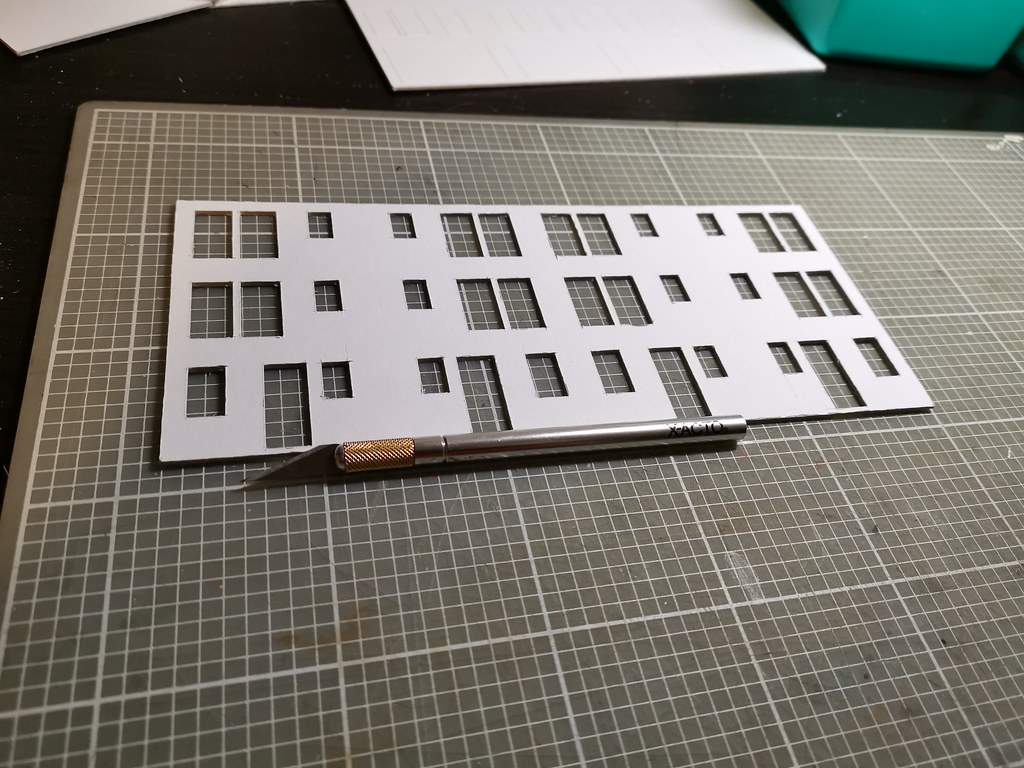
still requires a lot of carefully cutting out, but it does make it considerably easier
works on plasticard too
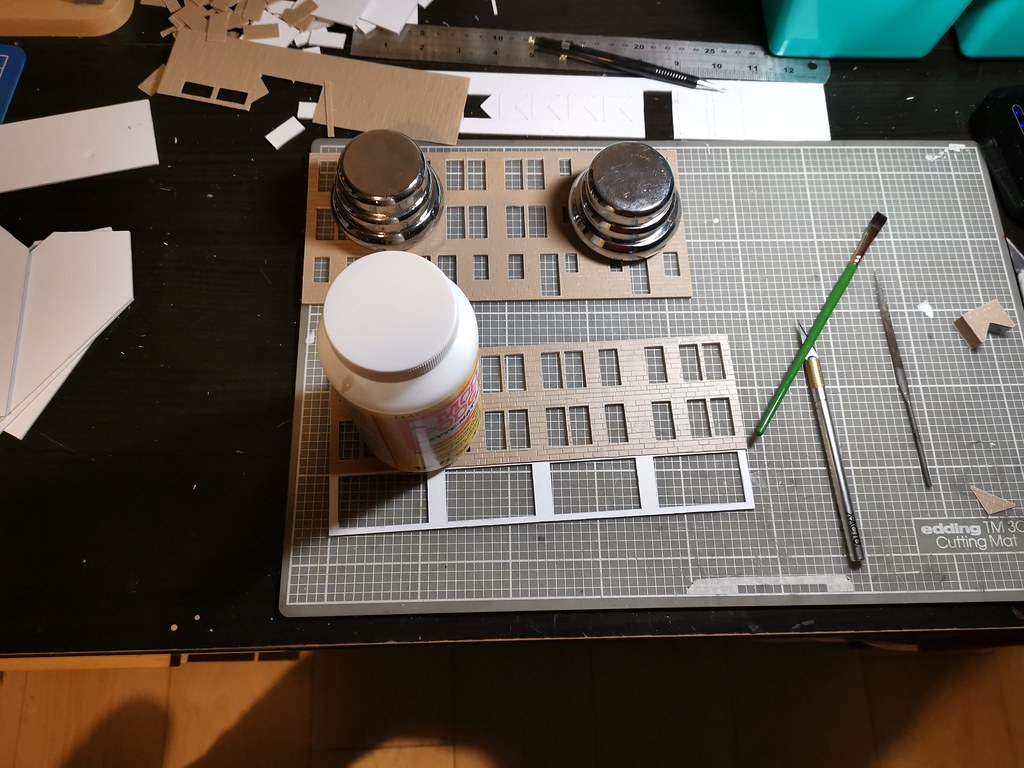
the plan is for this one to have shops on the ground floor, I've loosely based the design for the front off a wills kit
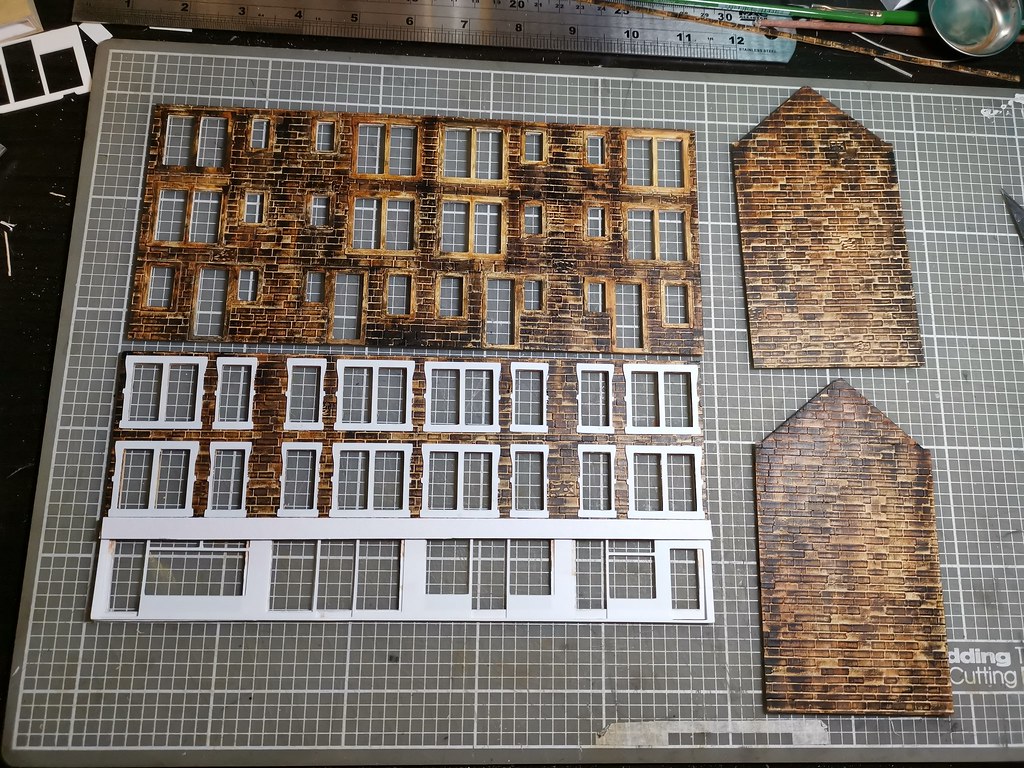
and here's where I'm currently up to, just added in the windows on the back
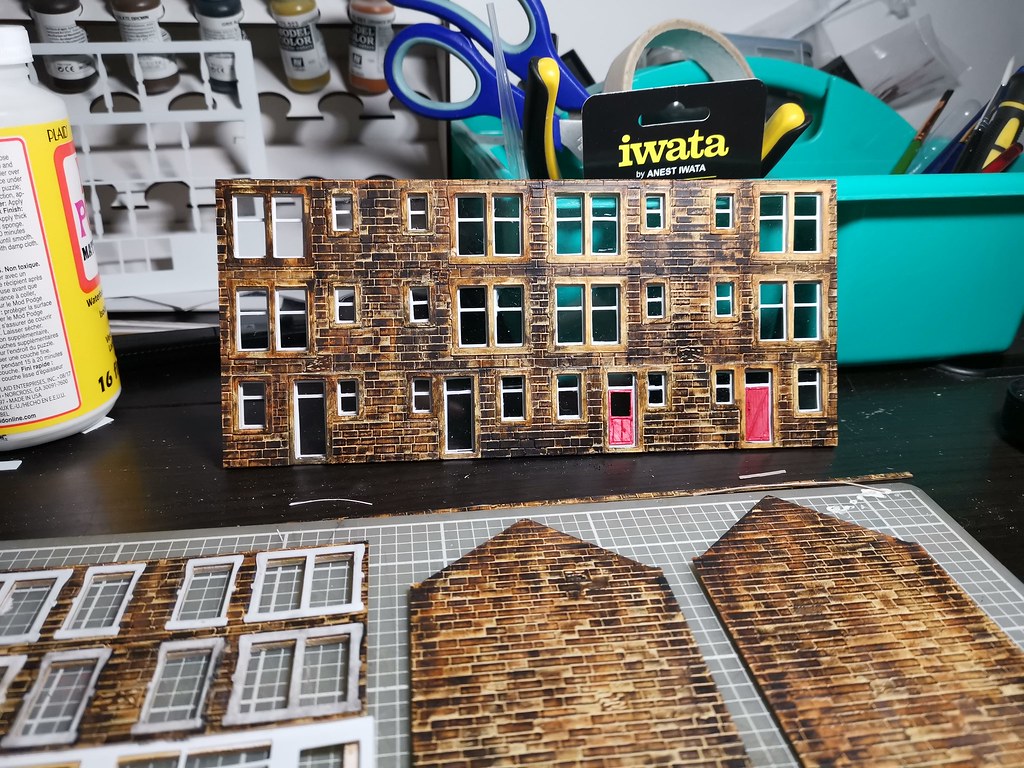
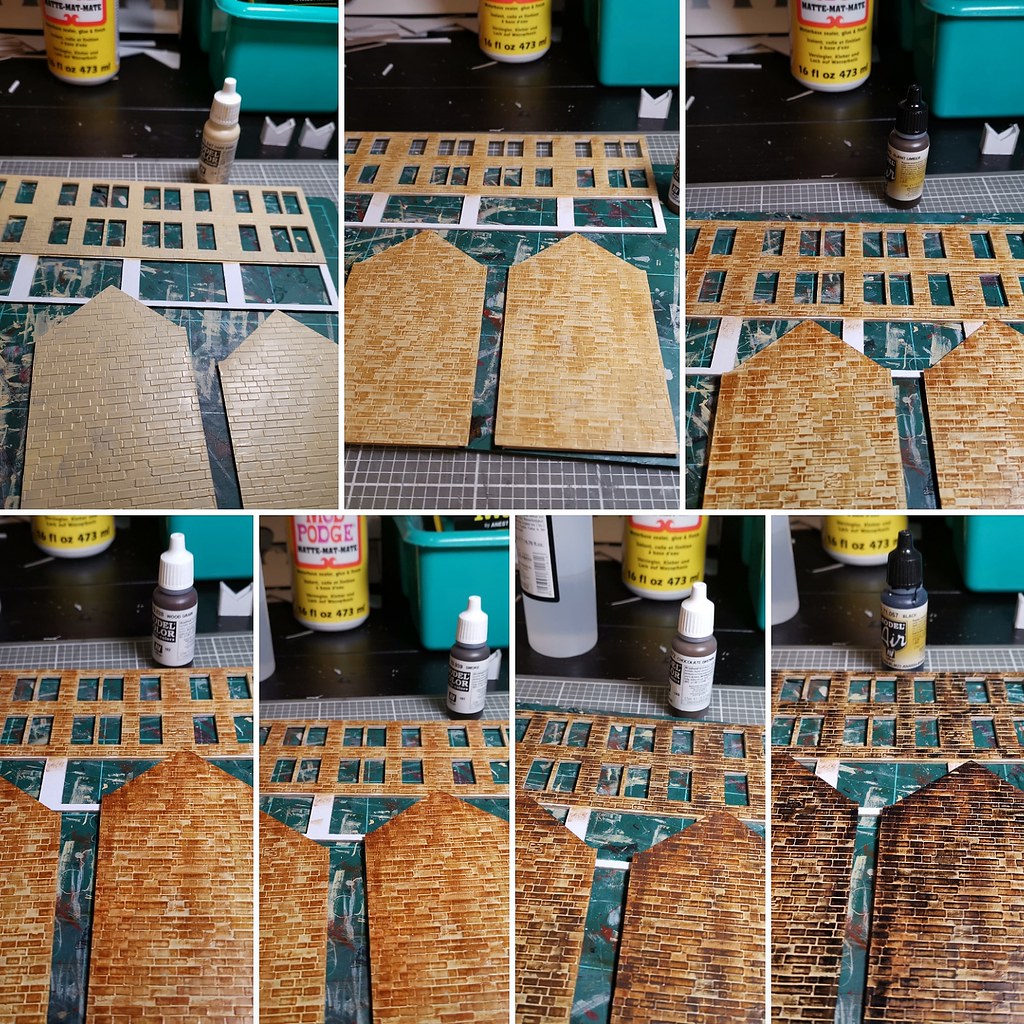
also I got asked on my instagram how I paint these, so here's a shot showing the stages if anyone is interested here
the paints are dark sand > flat earth > burnt umber > wood grain > smoke > chocolate > black
Re: Michaela’s workbench, building buildings
Wow. What an impressive works area in regards to your choice of pints. It looks like you went into a model shop and asked for some paint. "Certainly madam... Which colour would you like? I want them all please including the display!" 
When I had H0e, I had lots of little waggons I purchased secondhand and they included the origional shop displays. I gave all my H0e collection to a friend as he had started with 009, and by then my attention was swayed towards 0-16.5 as an easier and cheaper option to model in.
When I had H0e, I had lots of little waggons I purchased secondhand and they included the origional shop displays. I gave all my H0e collection to a friend as he had started with 009, and by then my attention was swayed towards 0-16.5 as an easier and cheaper option to model in.
Modelling On A Budget ---》 https://www.newrailwaymodellers.co.uk/F ... 22&t=52212