
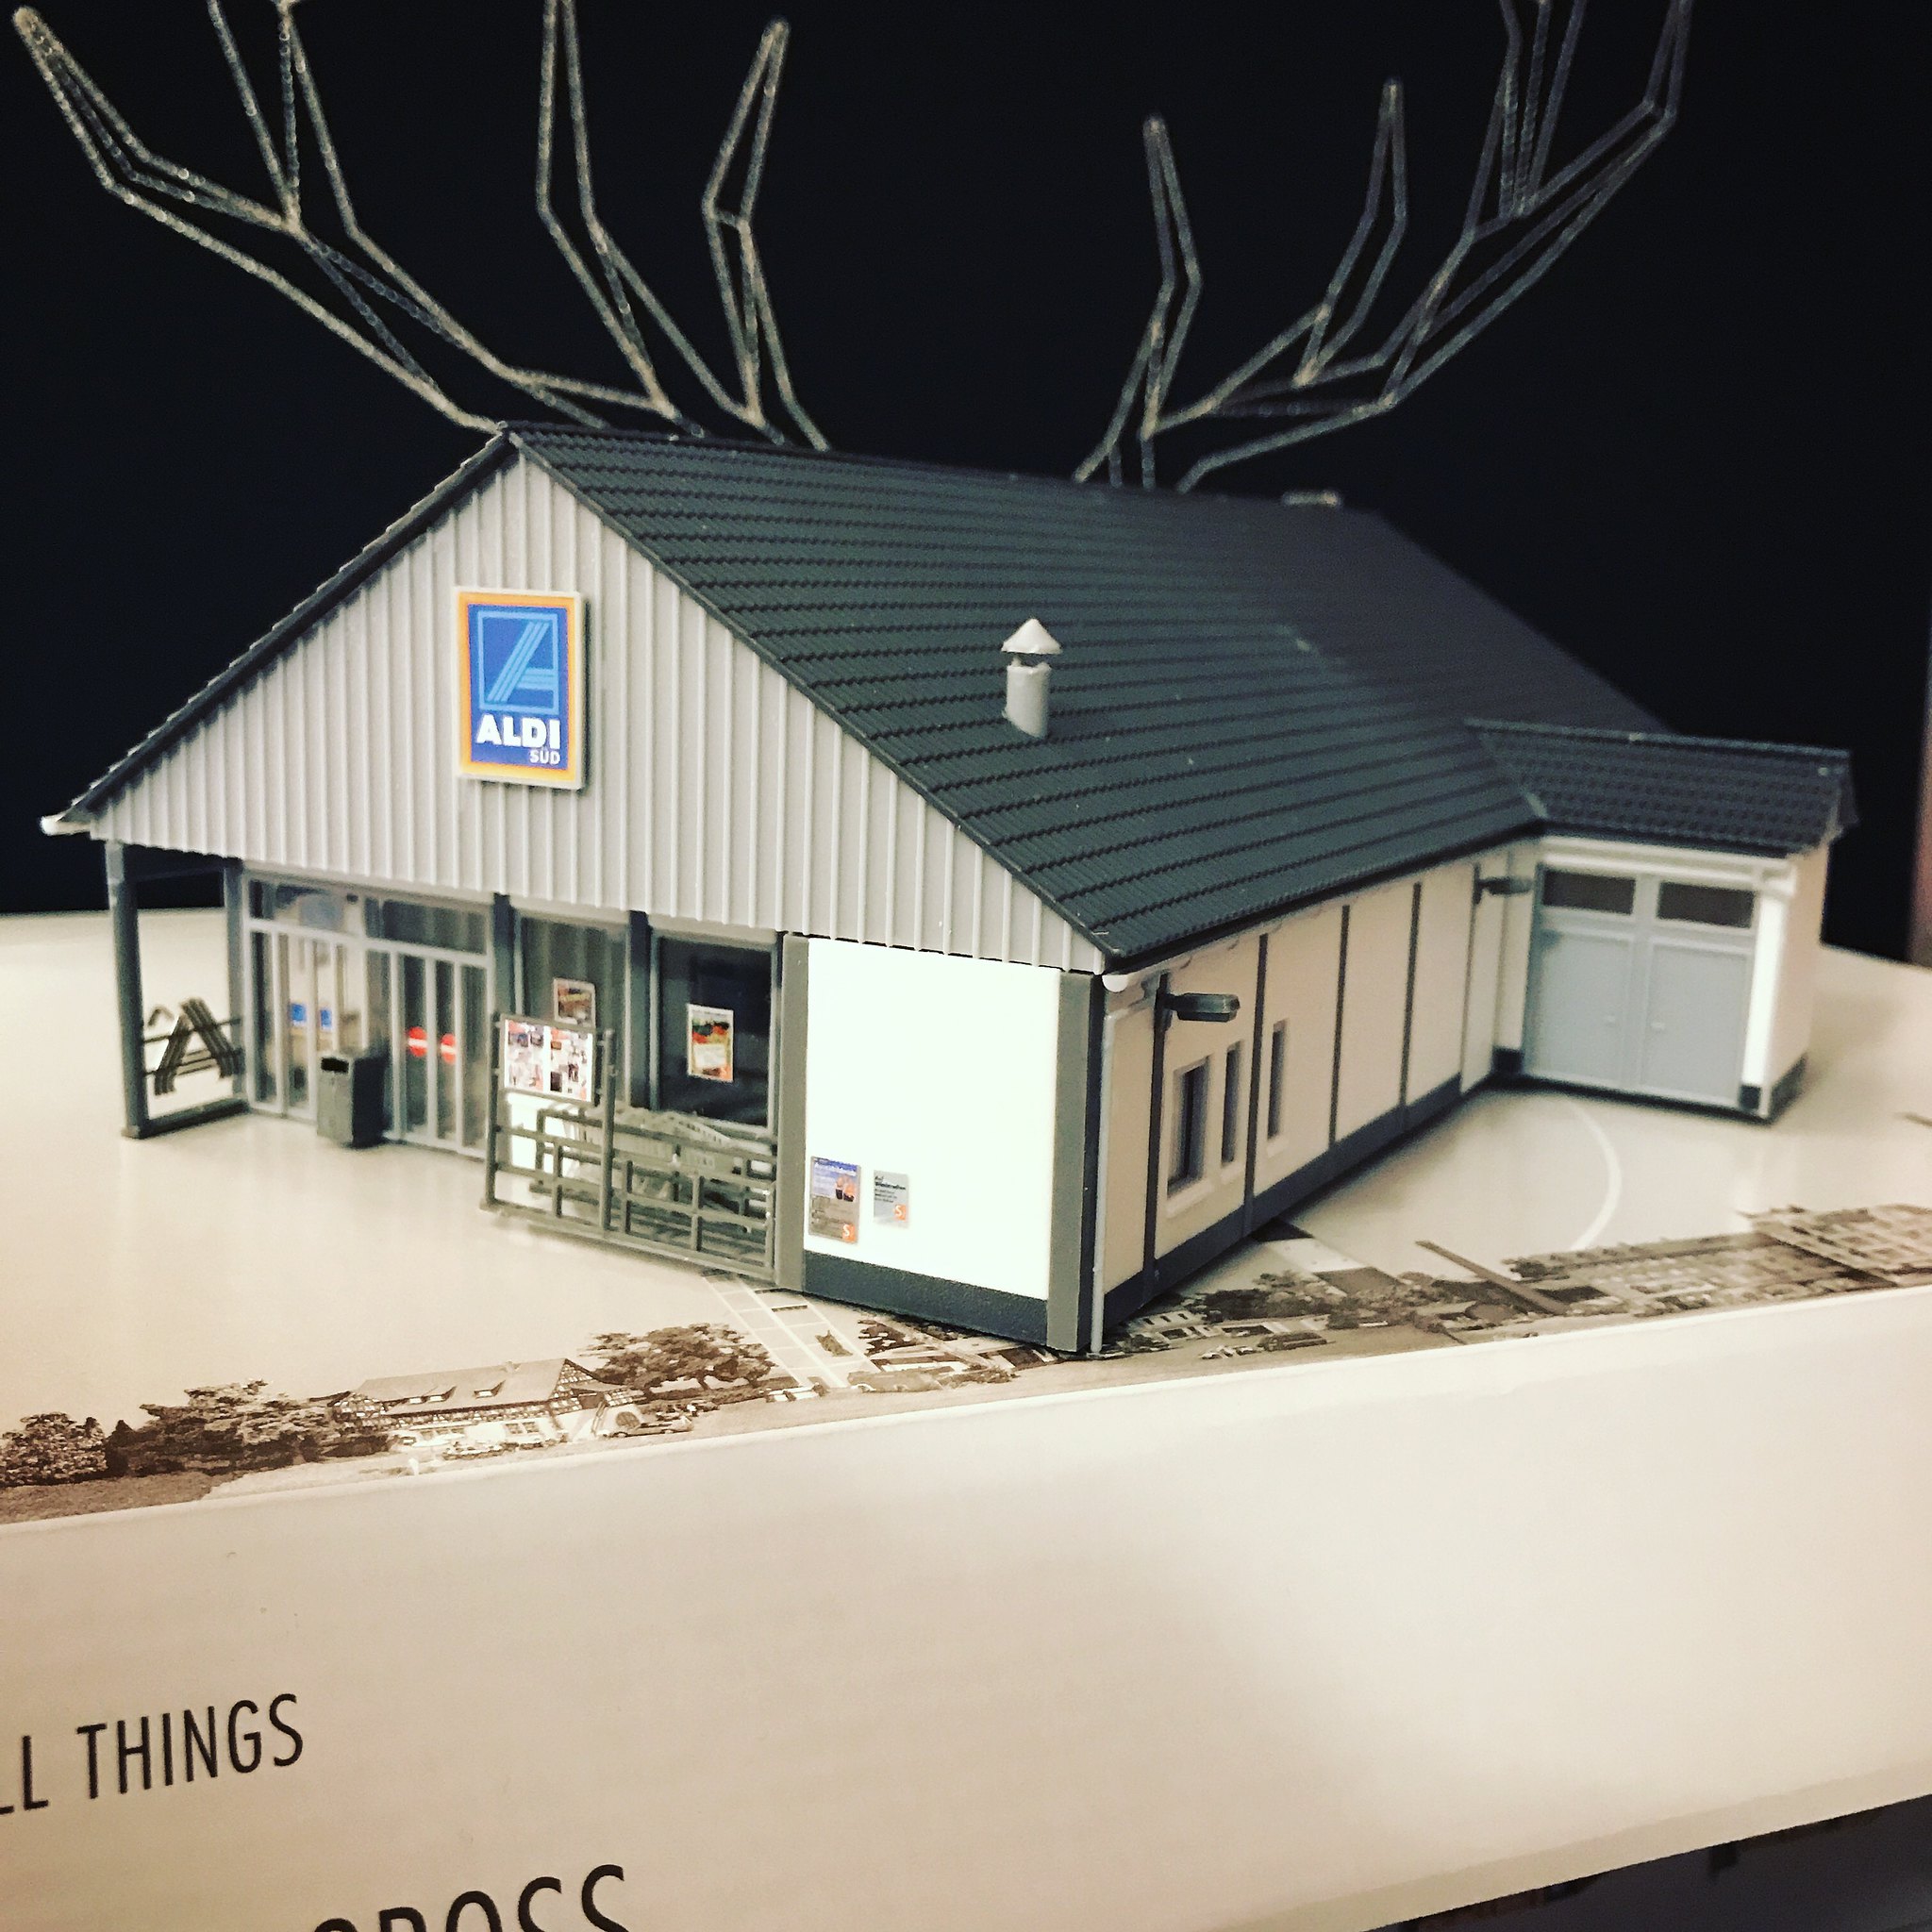
might not fit your railway era, but its definitely a good model of an Aldi storeMichaelaface wrote:meant to post this yesterday as this was yesterday's build, but here it is, to totally ruin the immersion into my 1950s BR steam era layout, an Aldi...
(ps yes I bought a load of kits and have been building them on my days off)
Michaela’s workbench
Re: Michaela’s workbench
-
Michaelaface
- Posts: 429
- Joined: Wed Nov 02, 2011 1:51 am
Re: Michaela’s workbench
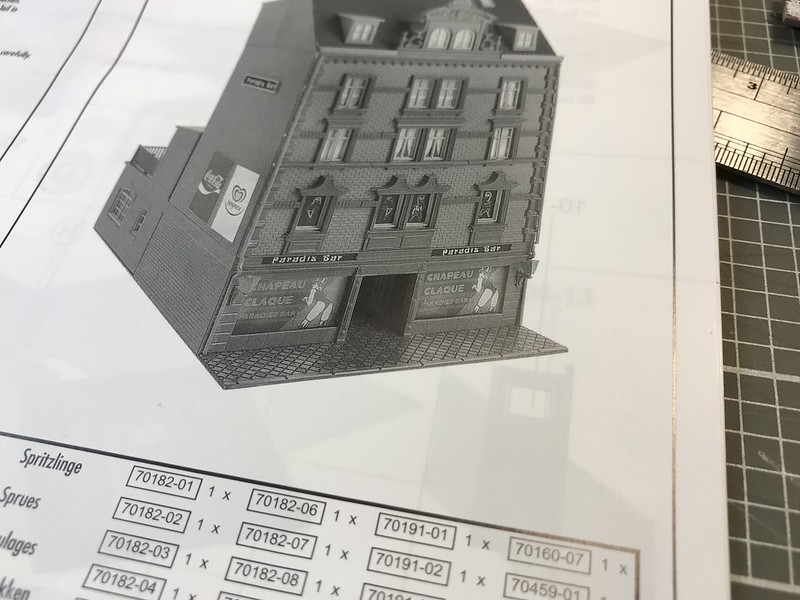
hello group, I'm back with another build, this time it's another kibri townhouse, really like these kits and how easy they are to assemble, misplaced the instructions for this one so I had to guess at how things went together, I like to paint everything too so it's usually easier for me to ignore the instructions anyway
So firstly I assemble the walls, without the windows


Then comes the painting, I used an airbrush for this one, first a primer layer

then a "dark sand" layer to get that sorta yorkshire sandstone building feel (I also scratch built and added an interior to this one, you can see the flooring in this shot, it's just a picture of wood flooring I found on google and then printed out)

and then add in some LEDs and the windows and I'm here

all that's left now is for me to be brave enough to start weathering my buildings
So firstly I assemble the walls, without the windows
Then comes the painting, I used an airbrush for this one, first a primer layer
then a "dark sand" layer to get that sorta yorkshire sandstone building feel (I also scratch built and added an interior to this one, you can see the flooring in this shot, it's just a picture of wood flooring I found on google and then printed out)
and then add in some LEDs and the windows and I'm here
all that's left now is for me to be brave enough to start weathering my buildings

Re: Michaela’s workbench
Stunning models. Thanks for sharing.
Glencairn
Glencairn
To the world you are someone. To someone you are their world.
I Cannot Afford the Luxury of a Negative Thought
I Cannot Afford the Luxury of a Negative Thought

Re: Michaela’s workbench
That came up a treat. I think the sandstone look is great.
Yes weathering... but once you do start doing it, you wont look back
Yes weathering... but once you do start doing it, you wont look back
-
Bufferstop

- Posts: 13795
- Joined: Thu Mar 11, 2010 12:06 pm
- Location: Bottom end of N. Warks line
Re: Michaela’s workbench
The IKEA kitchen planning tool is great for pictures of wood, they do thumbnails of the door fronts in various finishes. You can also use pictures of marble finishes for marble floors, the scale doesn't seem to matter it still looks like marble. I put a very thin grey grid over the sample of marble with 3:1 shaped tiles, re-arrange the columns then re arrange the rows. It looks like a floor made up of a random selection of tiles from the same source. the final size can be almost anything you want, marble tiles vary from the things you stick on the bathroom walls to huge slabs in public buildings.I also scratch built and added an interior to this one, you can see the flooring in this shot, it's just a picture of wood flooring I found on google and then printed out)
Growing old, can't avoid it. Growing up, forget it!
My Layout, My Workbench Blog and My Opinions
My Layout, My Workbench Blog and My Opinions
-
Michaelaface
- Posts: 429
- Joined: Wed Nov 02, 2011 1:51 am
Re: Michaela’s workbench, how much detail is too much detail?
oo I'll have a look at that thenBufferstop wrote: The IKEA kitchen planning tool is great for pictures of wood, they do thumbnails of the door fronts in various finishes. You can also use pictures of marble finishes for marble floors, the scale doesn't seem to matter it still looks like marble. I put a very thin grey grid over the sample of marble with 3:1 shaped tiles, re-arrange the columns then re arrange the rows. It looks like a floor made up of a random selection of tiles from the same source. the final size can be almost anything you want, marble tiles vary from the things you stick on the bathroom walls to huge slabs in public buildings.
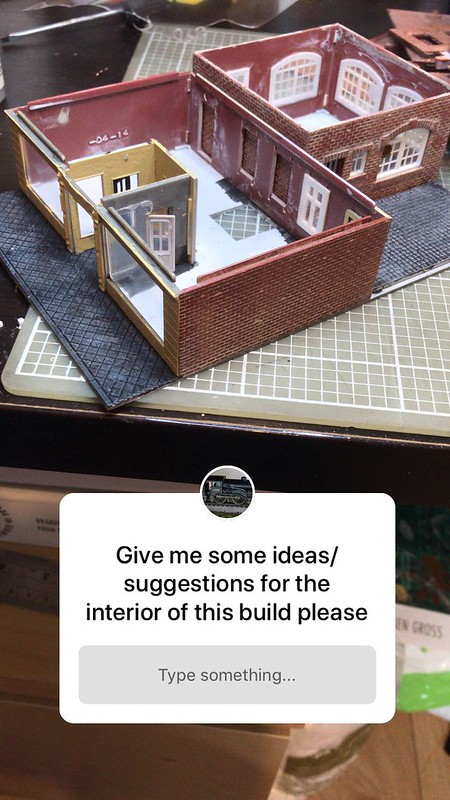
anyway, onto the next project, got this kit for Christmas and as amusing as a strip club may be, I found the ground floor to look a bit plain, so continuing the trend of my last few builds it's time to scratch build an interior, well more kit bash from some spare sprues in this case
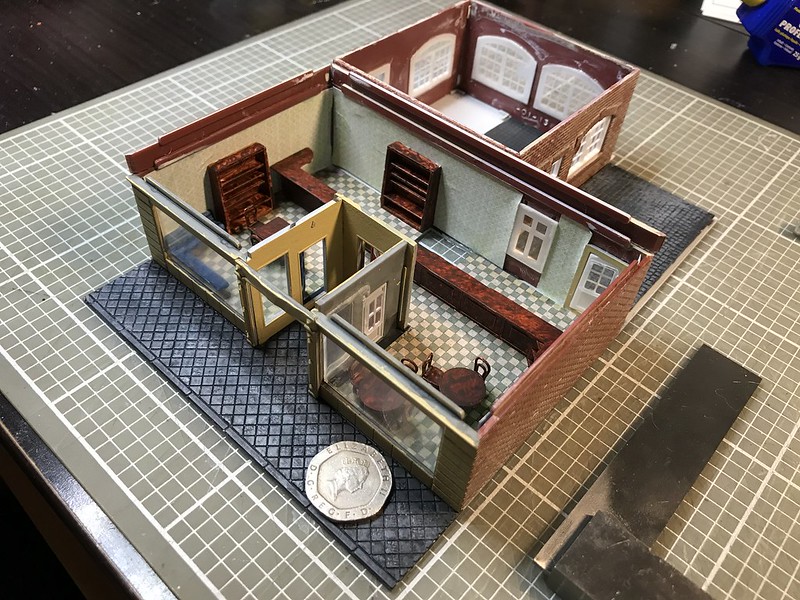
Had a quick poll on my instagram account for suggestions of what to do with the interior and every single reply was "café" so café it is! also showing the start point
and here we are! I found this one quite pain free and the only time consuming part was watching the paint dry... quite pleased with how this one has come out, just needs some people
Re: Michaela’s workbench, how much detail is too much detail?
You should be extremely excited by how that came out. I love the table and chairs. But all of it looks quite perfect. The flooring sets it off I think.
Whats your handle on Instagram?
Whats your handle on Instagram?
Re: Michaela’s workbench, how much detail is too much detail?
Amazing. Fantastic. When do you open and what's on the menu? 
Well done.
Glencairn
Well done.
Glencairn
To the world you are someone. To someone you are their world.
I Cannot Afford the Luxury of a Negative Thought
I Cannot Afford the Luxury of a Negative Thought
-
Michaelaface
- Posts: 429
- Joined: Wed Nov 02, 2011 1:51 am
Re: Michaela’s workbench, how much detail is too much detail?
thank you! the tables and chairs were actually part of the kit but for some sort of balcony section round the back, but I thought they were better used like that, my instagram is MBHmodelrailwaysjoshv8 wrote:You should be extremely excited by how that came out. I love the table and chairs. But all of it looks quite perfect. The flooring sets it off I think.
Whats your handle on Instagram?
thank you! we open when I get the confidence to actually finish off build my layout and stop distracting myself with kit builds and other projects (although both are intended at developing the skills I'll need to build my layout)glencairn wrote:Amazing. Fantastic. When do you open and what's on the menu?
Well done.
Glencairn
Re: Michaela’s workbench, how much detail is too much detail?
What can I say other than super tidy work.
Nothing wrong being distracted from layout building. Like many I find
scenic work the best part so you're still making progress.
Geoff T.
Nothing wrong being distracted from layout building. Like many I find
scenic work the best part so you're still making progress.
Geoff T.
Remember ... I know nothing about railways.
http://www.newrailwaymodellers.co.uk/Fo ... 22&t=32187 and Another on http://www.newrailwaymodellers.co.uk/Fo ... &sk=t&sd=a
http://www.newrailwaymodellers.co.uk/Fo ... 22&t=32187 and Another on http://www.newrailwaymodellers.co.uk/Fo ... &sk=t&sd=a
-
Michaelaface
- Posts: 429
- Joined: Wed Nov 02, 2011 1:51 am
Re: Michaela’s workbench, how much detail is too much detail?
ahaha, since making a start on this I've gone and distracted myself even further by starting building a small N-gauge layout so I could practice various things but on a smaller scale and not on my main layout, and I'm now distracting myself from that by working on the main layout againDad-1 wrote:What can I say other than super tidy work.
Nothing wrong being distracted from layout building. Like many I find
scenic work the best part so you're still making progress.
Geoff T.
all is good though, its actually been really good practice doing everything like that, building a load of cheap N-gauge building kits helped me develop a good technique to get the brickwork on the cafe building
-
BrightonMan

- Posts: 326
- Joined: Tue Jan 30, 2018 5:18 pm
- Location: Eastbourne
Re: Michaela’s workbench, how much detail is too much detail?
I'll say it has, your buildings look spot on, nice work.Michaelaface wrote:helped me develop a good technique to get the brickwork on the cafe building
Yep, I'm the same, which is why it's taking so long to get the track up & running on my layout..I keep getting distracted by scenic stuffDad-1 wrote:Like many I find
scenic work the best part
-
Michaelaface
- Posts: 429
- Joined: Wed Nov 02, 2011 1:51 am
Re: Michaela’s workbench, how much detail is too much detail?
I’m doing it the other way round atm, want to get my layout running perfectly before I commit to scenery, which is the bit I always seem to get stuck at 
-
Michaelaface
- Posts: 429
- Joined: Wed Nov 02, 2011 1:51 am
Re: Michaela’s workbench, loco weathering
was tidying up after getting the wiring on my layout finished and moved a few locos out of the way into "safe" locations for the time being and one of them got placed in the centre of my spray booth and I thought, hmm while it's there might as well step out of my comfort zone and have a go at weathering it with an airbrush, here are my results
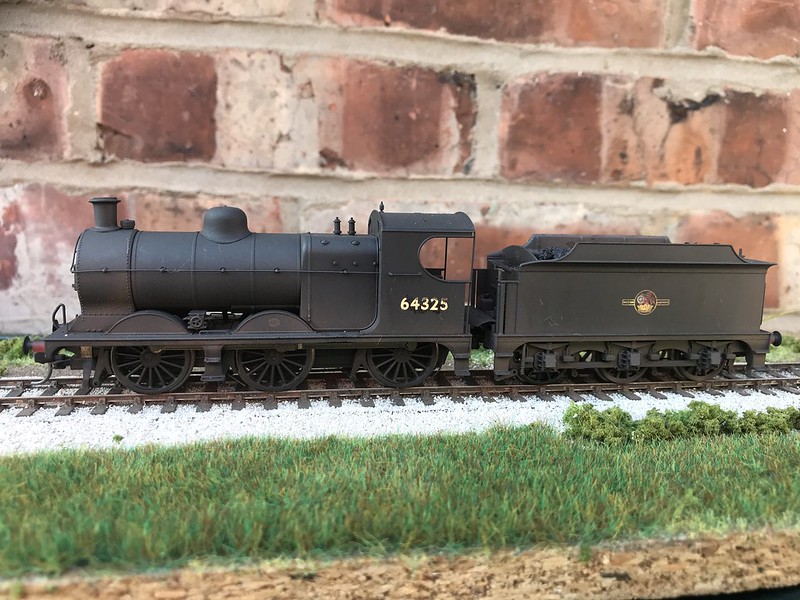


Re: Michaela’s workbench, loco weathering
Lovely job - what colours did you use, and what were the various stages?
Presumably the base colour of the loco all over prior to working on it was the "clean" black behind the numbers?
Presumably the base colour of the loco all over prior to working on it was the "clean" black behind the numbers?