
PNP's O-16.5 Workbench
Re: PNP's O-16.5 Workbench
Good prices! May I ask what brand and confirm that you're pleased with the quality (not all styrenes/plastics are created equal).
-
PinkNosedPenguin

- Posts: 1683
- Joined: Tue Oct 01, 2013 10:23 pm
- Location: Wiltshire
Re: PNP's O-16.5 Workbench
The link I posted takes you straight to them - the 'brand' is MAQUETT. Yes they were nice quality...Strider wrote:Good prices! May I ask what brand and confirm that you're pleased with the quality (not all styrenes/plastics are created equal).
Re: PNP's O-16.5 Workbench
Thanks, I used the link, after decades of using the two main manufacturers, I'd not heard of them - good to hear your recommendations, thank you.
-
PinkNosedPenguin
- Posts: 1683
- Joined: Tue Oct 01, 2013 10:23 pm
- Location: Wiltshire
Re: PNP's O-16.5 Workbench
I have now moved straight onto the next warehouse; the one with opening doors to let the trains through 
I found a nice kit from Kitwood Hill Models of some sliding doors which is very nicely designed and made:
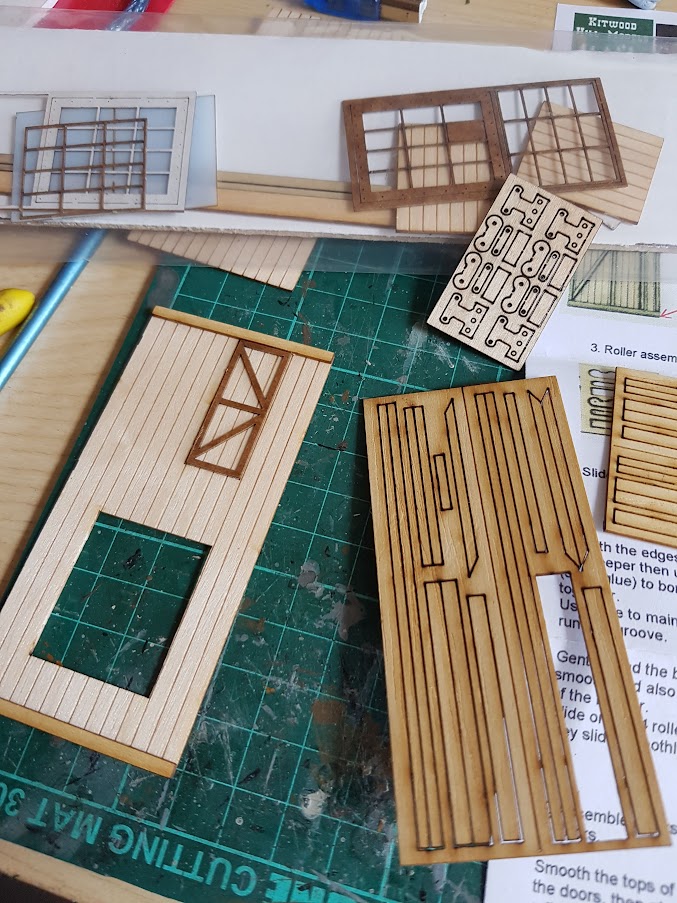
Although a British manufacturer, the kits are On30 and US outline. Not sure if this is normal for American kits but some of the parts are 'Peel and stick!', making it very quick and easy to assemble:
In an attempt to make it look more British, I decided to paint the doors - lets face it, our climate does not favour bare timber . I went for Dark Green matt spray (left over from 'Ted') with Grass Green window frames (left over from 'Mabel'). Here are the doors posed in front of the building facade in Palight:

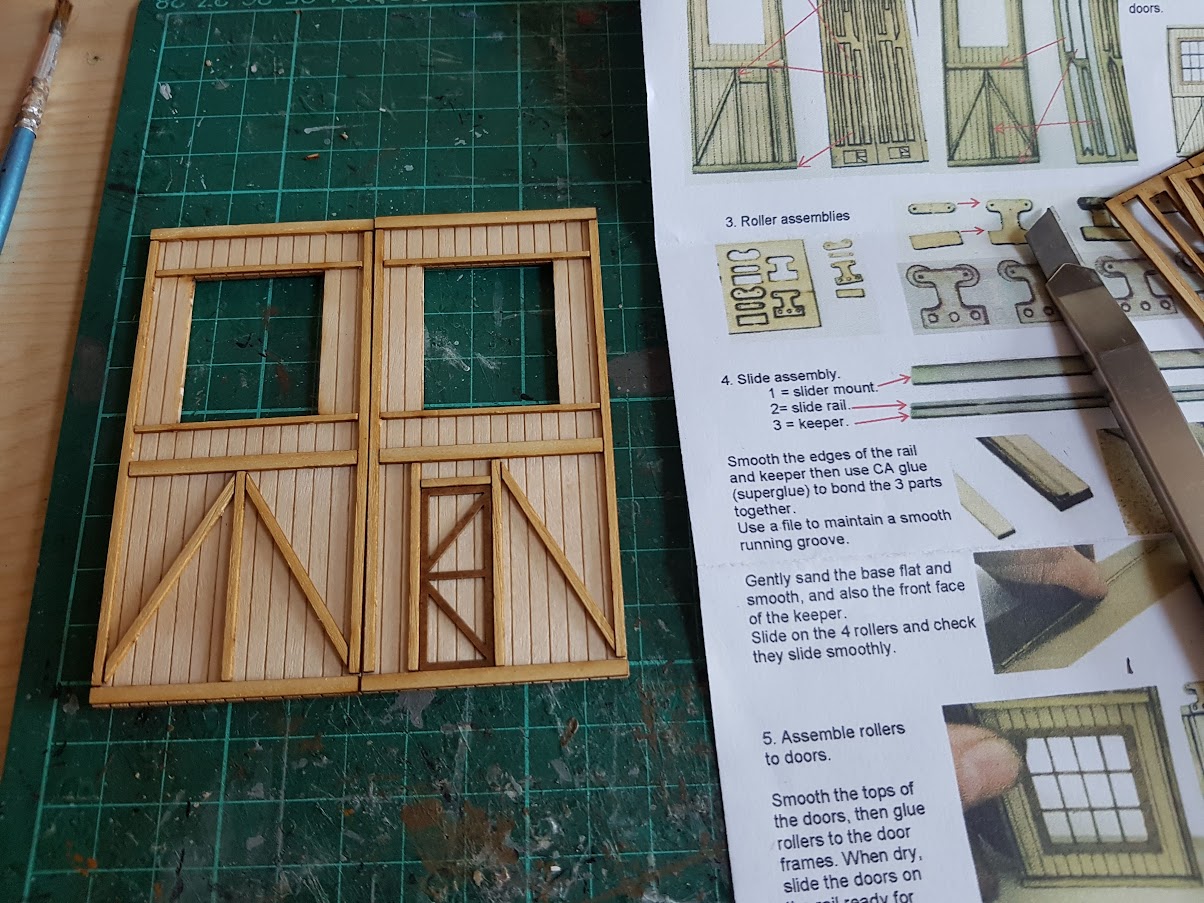
The thing that attracted me to this kit was the working runners for sliding action . The 'rollers' are static (thin wood) but slide nicely along the rail when all contact surfaces are gently smoothed with fine sandpaper:

The name was applied using Railtec transfers - I'm sure you can work out why I called it that?
I found a nice kit from Kitwood Hill Models of some sliding doors which is very nicely designed and made:
Although a British manufacturer, the kits are On30 and US outline. Not sure if this is normal for American kits but some of the parts are 'Peel and stick!', making it very quick and easy to assemble:
In an attempt to make it look more British, I decided to paint the doors - lets face it, our climate does not favour bare timber
The thing that attracted me to this kit was the working runners for sliding action
The name was applied using Railtec transfers - I'm sure you can work out why I called it that?
Re: PNP's O-16.5 Workbench
Looking amazing already.
Great quality kit, love the ease of assembly too. I've got a very similar quality product from Kitwood, modified to represent a small GWR turntable, Ive yet to build it, looks superb, good company too. Usual caveats apply I'm a happy customer.
Great quality kit, love the ease of assembly too. I've got a very similar quality product from Kitwood, modified to represent a small GWR turntable, Ive yet to build it, looks superb, good company too. Usual caveats apply I'm a happy customer.
-
PinkNosedPenguin
- Posts: 1683
- Joined: Tue Oct 01, 2013 10:23 pm
- Location: Wiltshire
Re: PNP's O-16.5 Workbench
Some progress on the stone facade of this ware house building.
I gave the whole thing a coat of Gunship Grey and then gently scraped the paint out of the mortar courses. Lintels and window sills were picked out in a lighter Stone Grey:
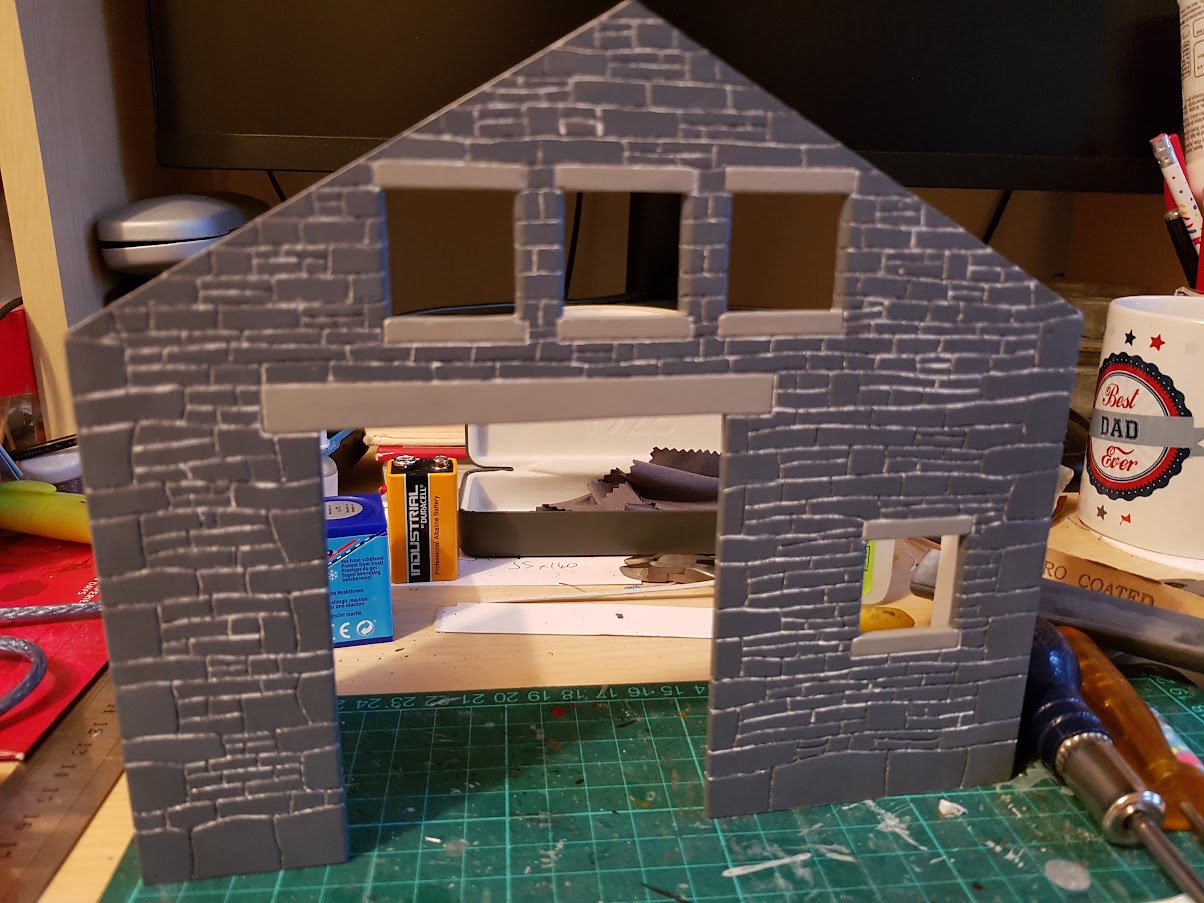
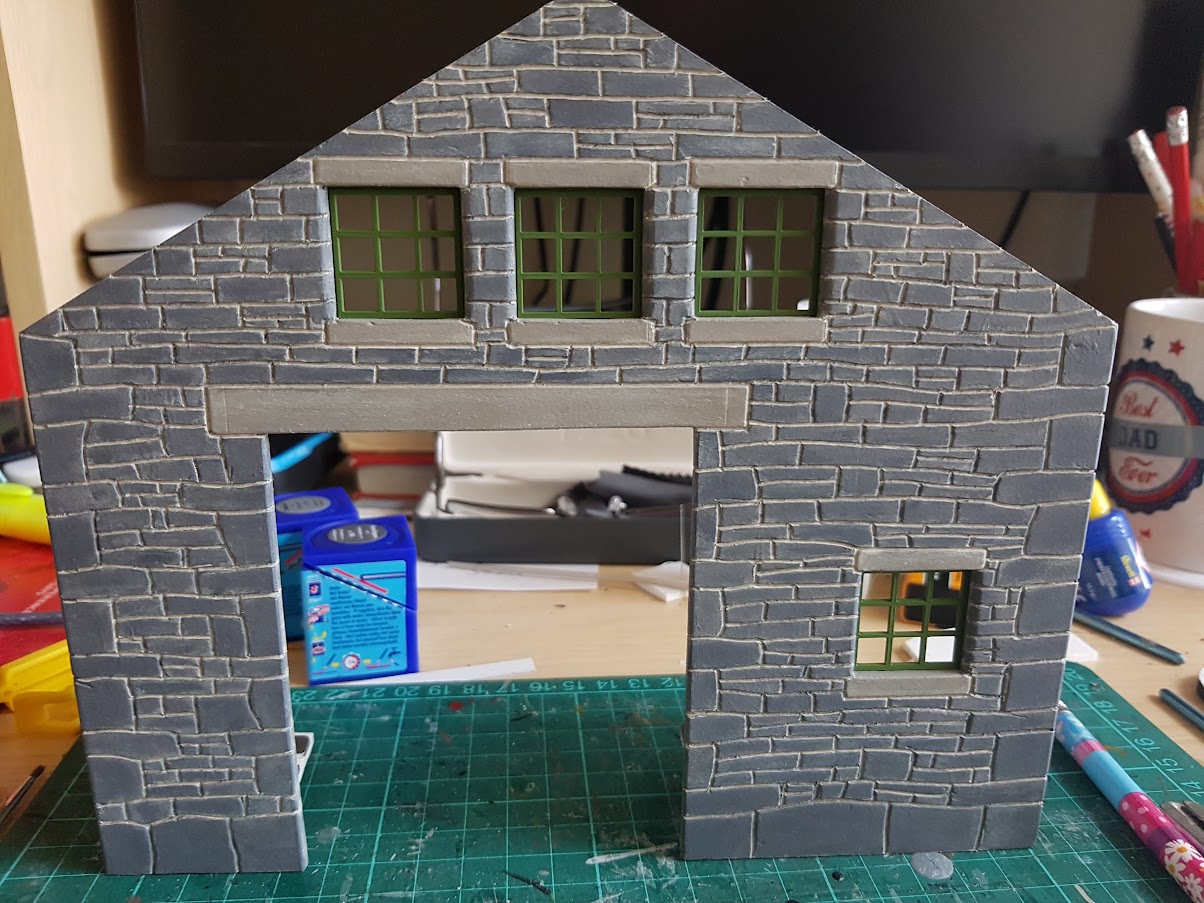
Then I applied a wash of Camouflage which both coloured in the mortar, and toned down the stonework. Window frames (unglazed) were also fitted at this stage. In the photo below you can just see a hint of "servo-ness" behind - to be used to open the doors
Onward and upward . . .
I gave the whole thing a coat of Gunship Grey and then gently scraped the paint out of the mortar courses. Lintels and window sills were picked out in a lighter Stone Grey:
Then I applied a wash of Camouflage which both coloured in the mortar, and toned down the stonework. Window frames (unglazed) were also fitted at this stage. In the photo below you can just see a hint of "servo-ness" behind - to be used to open the doors
Onward and upward . . .
-
PinkNosedPenguin
- Posts: 1683
- Joined: Tue Oct 01, 2013 10:23 pm
- Location: Wiltshire
Re: PNP's O-16.5 Workbench
Some progress, including roof, windows, door rail and some general weathering

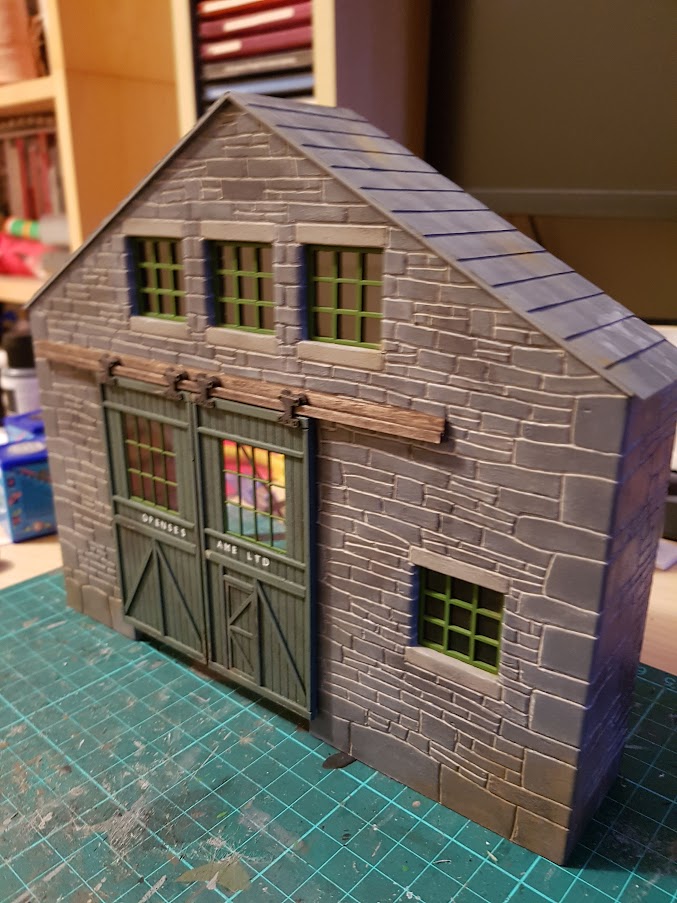
Next is to properly hang, and mechanise, the doors. Plus fitting of gutters and downpipe. . .
Next is to properly hang, and mechanise, the doors. Plus fitting of gutters and downpipe. . .

Re: PNP's O-16.5 Workbench
Very nice!
Modelling On A Budget ---》 https://www.newrailwaymodellers.co.uk/F ... 22&t=52212
Re: PNP's O-16.5 Workbench
I am liking the look of that too
Re: PNP's O-16.5 Workbench
Looking superb! Sadly I don't think they're still available.
-
PinkNosedPenguin
- Posts: 1683
- Joined: Tue Oct 01, 2013 10:23 pm
- Location: Wiltshire
Re: PNP's O-16.5 Workbench
Thanks guys
The doors are now working.

A servo controls each door via an actuator rod (paper clip!) that passes through a small metal bracket super-glued to the inside of the door at the top. Simple door stops are fitted at the 'closed' position; the brackets butt up against the stone sides effectively creating the 'open' position stops. These were necessary to put the servos slightly in-tension at each end of the movement, to get the doors to always move fully.
This a back view:

They were a bit fiddly to get working reliably but I think I have managed it now! Although they are a bit jerky ! One problem was that the doors tended to move out, away from the building, at the bottom - and this stopped them from sliding properly. In the end I fitted little black 'rollers' at the door bottoms, which seemed to do the trick!
Anyway, here is a short video of them (slightly jerkily!) opening and closing...
https://youtu.be/nAVp-_zh9gM
Now I wonder if some grease applied to the slider rail will make them run smoother . . .
The doors are now working
A servo controls each door via an actuator rod (paper clip!) that passes through a small metal bracket super-glued to the inside of the door at the top. Simple door stops are fitted at the 'closed' position; the brackets butt up against the stone sides effectively creating the 'open' position stops. These were necessary to put the servos slightly in-tension at each end of the movement, to get the doors to always move fully.
This a back view:
They were a bit fiddly to get working reliably but I think I have managed it now! Although they are a bit jerky
Anyway, here is a short video of them (slightly jerkily!) opening and closing...
https://youtu.be/nAVp-_zh9gM
Now I wonder if some grease applied to the slider rail will make them run smoother . . .
Re: PNP's O-16.5 Workbench
Good idea, but a bit quick, going in the right direction though...
Colin James....
-
PinkNosedPenguin
- Posts: 1683
- Joined: Tue Oct 01, 2013 10:23 pm
- Location: Wiltshire
Re: PNP's O-16.5 Workbench
Yes I can adjust the speed to whatever I want, but I found that too slow a speed meant less momentum which meant the doors didn't travel their full extent!
-
PinkNosedPenguin
- Posts: 1683
- Joined: Tue Oct 01, 2013 10:23 pm
- Location: Wiltshire
Re: PNP's O-16.5 Workbench
Having completed the above building (gutters and downpipe added) I have moved on to the next one .
I am starting with an external staircase from Kitwood Hill Models:

Quite a lot of parts = enough to make three staircases, even though I only want one
Quite delicate to construct, but it all went together nicely. Here it is before handrails etc:
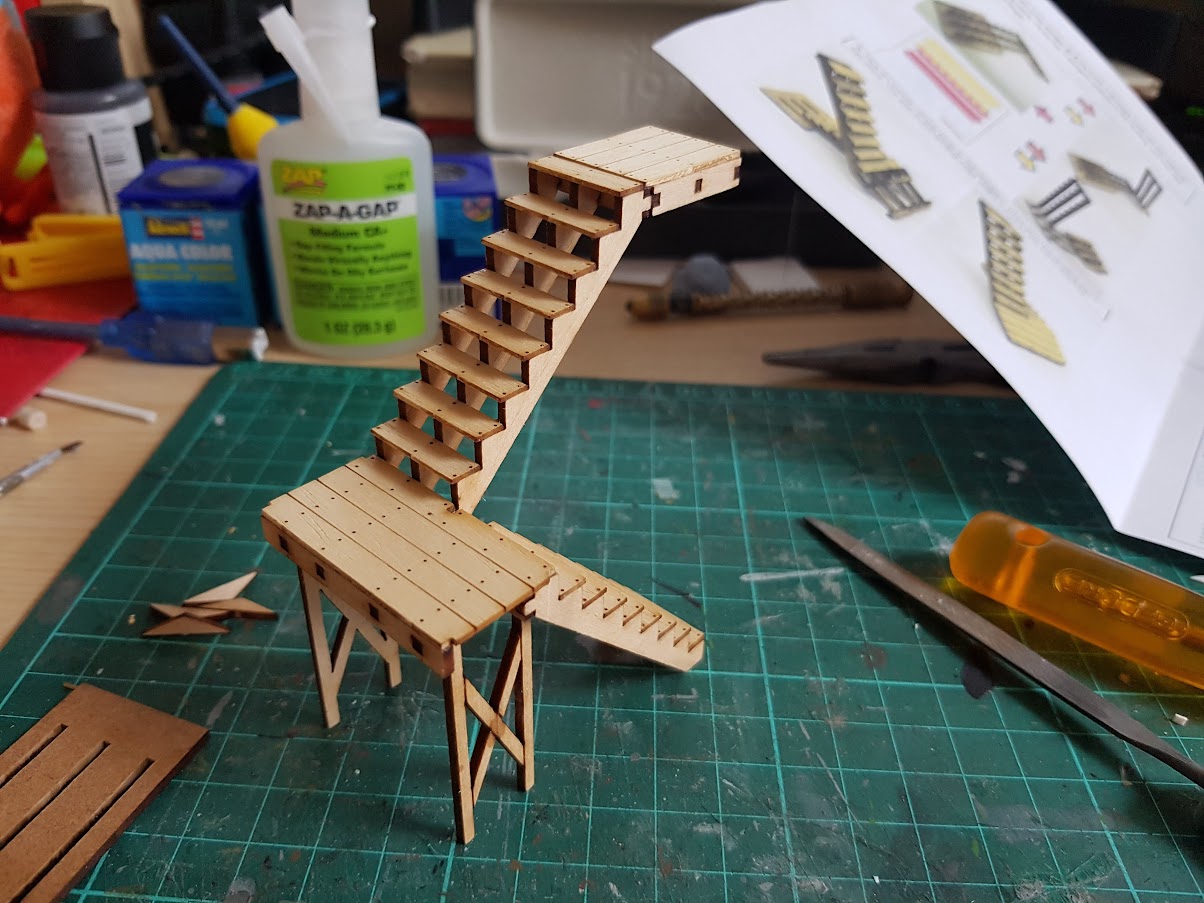
And completed (except for painting):

Here it is posed against the (mock-up) building it is destined for - note it will have to go in the orientation shown due to lack of depth:

I am starting with an external staircase from Kitwood Hill Models:
Quite a lot of parts = enough to make three staircases, even though I only want one
Quite delicate to construct, but it all went together nicely. Here it is before handrails etc:
And completed (except for painting):
Here it is posed against the (mock-up) building it is destined for - note it will have to go in the orientation shown due to lack of depth: