HOW TO--COACH LIGHTING.

Enter this forum if you wish to help the growth of New Railway Modellers.
waz
Posts: 1111
Joined: Sun Nov 20, 2005 11:33 am
Location: Isle of Man

HOW TO--COACH LIGHTING.

Post by waz »

Want to light a coach for the price of a bulb?? Here's How.

Things you will need. No description. The photo will give you a good idea.
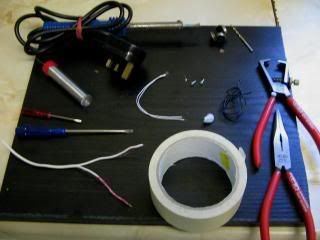
Image

Dismantle the coach ( I am using an LMS Hornby. The construction varies)
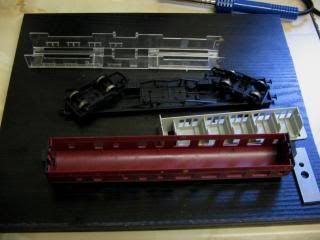
Image

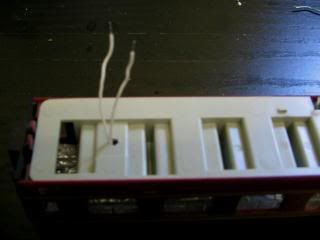
Into the roof glue a strip of alluminium foil (I used PVA glue) then replace the glazing.
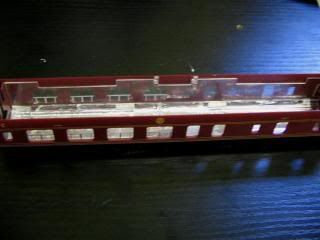
Image

Using a piece of masking tape, secure the bulb to the roof. PLEASE MAKE SURE THAT THE BULB IS NOT IN CONTACT WITH THE ROOF AS THIS COULD CAUSE MELTING OF THE PLASTIC. BEND THE BULB END DOWN FROM THE MASKING TAPE TO AVOID THIS. ( the bulb is a 12v 80mA grain of wheat. No resistor needed)
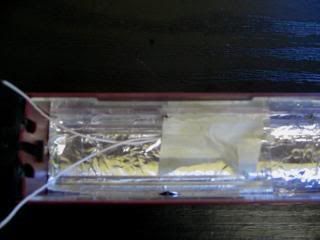
Image

Drill a hole in the interior to pass the wires through.
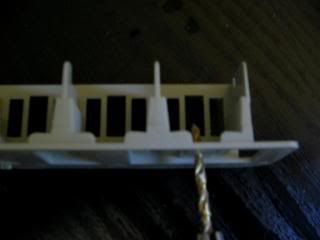
Image

Image

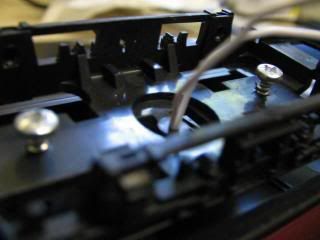
Now this is fiddly!! Assemble the coach, passsing the wires through the bogie pivot
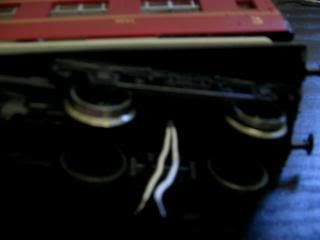
Image

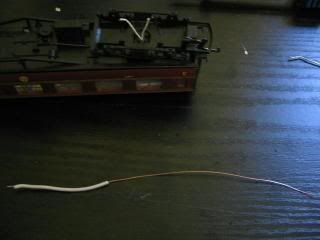
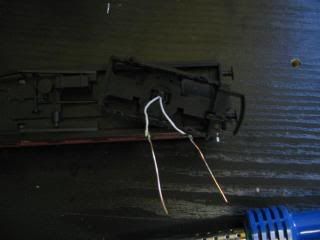
Now, strip some Bell Wire and cut off 2 lengths ( about 1 1/4'') and solder these to the two bulb wires.
Image
Image

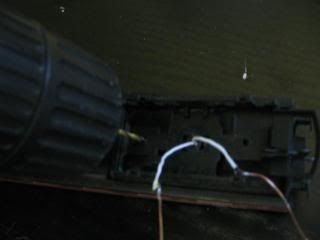
Drill two holes in the underside of the bogie as illustrated. (2mm I think. to take what is a 2BA self tapping screw. The type you use for Hornby couplings)
Image

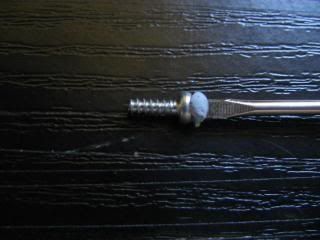
Use a bit of Blue Tack to stick the screw to the end of the screwdriver.
Image

Insert screws a little.

Image

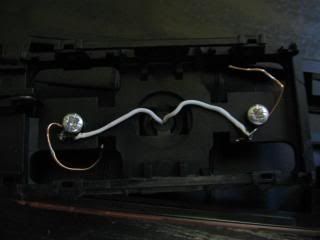
Wind copper contact wire around the screws and tighten.
Image

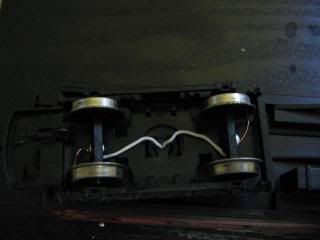
Now, replace the wheels so they sit on the contact wire. Note- they will not run a free as normal.
Image

It should be mentioned at this stage that the wheel on this coach are the plastic type with the steel tyre and rim. If your coach has ALL plastic wheel then these should be replaced whith Hornby all steel wheels. A NOTE TO MENTION---- If using the Hornby all steel wheels the contacts can be placed on the INSIDE of the wheel. If derailing is encountered because of the new wheels. Simply pull the wheels gently appart using pliers and situate them on the track so there is little sideways movement between the rails. This should do the trick.

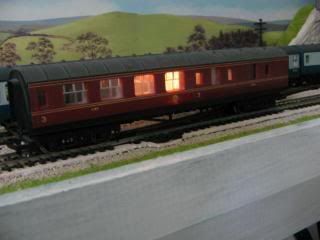
Now comes the tricky part. Put the coach on the track to check it works. It probably will. But will it flicker when running. YES, over points. Your next job is to put it behind a locomotive to see. If it flickers when running then alter the contacts with a small screwdriver. Keep trying. It may take a while to get it right but once right it will stay that way.
Image

GOOD LUCK!!!

Oh!! By the way. It will not light up ALL the coach but as I remember in the 50s. Coaches were never evenly lit due to the lack of working bulbs.

BILL.
Last edited by waz on Mon Jun 23, 2008 11:28 am, edited 2 times in total.
m8internet
Posts: 1640
Joined: Mon May 15, 2006 7:32 pm
Location: Cumbernauld, Scotland

Post by m8internet »

You really should use a resistor with the bulb
To light up the entire coach, wire up the bulbs in series
Glasgow Queen Street Model Railway layout : modern image N gauge using DCC
waz
Posts: 1111
Joined: Sun Nov 20, 2005 11:33 am
Location: Isle of Man

Post by waz »

Hi m8!!

Can you explain why I need to use a resistor on a grain of wheat bulb??

Best Regards

BILL.
dr5euss
Posts: 1022
Joined: Sun Dec 18, 2005 12:28 pm

Post by dr5euss »

Nice one Bill 8)

I have an idea for pickups; I'll take a picture of the pickups on my Mogul and see what you think.
waz
Posts: 1111
Joined: Sun Nov 20, 2005 11:33 am
Location: Isle of Man

Post by waz »

Hi George !!!

Thanks mate!!

I also have an alternative which I didn't use owing to the fact that I would have had to buy it ( £3 for 2 mtrs) but as you all know I'm a cheapskate. It's the spring contact wire used on Tri-ang locomotives. I know for sure that would be better.

Post the photos and thanks.

My best regards

BILL.
m8internet
Posts: 1640
Joined: Mon May 15, 2006 7:32 pm
Location: Cumbernauld, Scotland

Post by m8internet »

waz wrote:Can you explain why I need to use a resistor on a grain of wheat bulb??
The bulb is only rated at 80mA
You therefore need a resistor as the current supplied could be as high as 5A

Furthermore, if this were fitted to a train on DCC the current is always about 5A and there is a danger the bulb could overheat
Glasgow Queen Street Model Railway layout : modern image N gauge using DCC
User avatar
Ironduke
Posts: 1234
Joined: Mon Sep 26, 2005 12:04 am
Location: Ballarat Victoria Australia
Contact:

Post by Ironduke »

Cool Bill :^) so simple too.

Sorry M8 I think you are mistaken. The bulb will not use 5A just because the power supply is capable of it.. The current through the bulb depends solely on the resistance of the bulb and the voltage supplied (which will vary on a DC system from 0 up to about 16V at full speed).
If the bulb is rated at 12V then it should be ok. If it was DCC you might consider a resistor because DCC can be up to 16V at all times (it's limited to 12V on a digitrax Zephyr, though). Both the bulb and the resistor will get hot.
Alternatively you could try two bulbs in series. They won't be as bright but you could light more of the coach that way.
Regards
Rob
m8internet
Posts: 1640
Joined: Mon May 15, 2006 7:32 pm
Location: Cumbernauld, Scotland

Post by m8internet »

Numpty, numpty, numpty
Just put me back in my cage
Just read that it is a wheat bulb and not a LED

Forget any reference to a resistor!

Even with DCC no resistor would be required
Glasgow Queen Street Model Railway layout : modern image N gauge using DCC
andrewteenagemodeller
Posts: 57
Joined: Sat Jul 01, 2006 8:19 pm
Location: Stirling, Scotland

Post by andrewteenagemodeller »

You know how there is a flicker of the lights when going across points, well would putting wires into the other set of wheels on the coach solve this? I assumed that the flickering of points was due to the small amount of time when one wheel woud not be on an electrofied rail and thus the circuit would not be complete.

If this is all rubbish then just say I may just be being stupid :)
Andrew
Raider
Posts: 1085
Joined: Sun Oct 09, 2005 12:55 am
Location: Wolverhampton

Post by Raider »

Nope - that should solve the problem. It's the same thing with short wheeled locos which lose power on points
waz
Posts: 1111
Joined: Sun Nov 20, 2005 11:33 am
Location: Isle of Man

Post by waz »

Hi Chaps !!!

First up, thanks for the interest shown in my cheap and chearful lighting.

Next up--The question of resistors.
You did read it right m8, they are grain of wheat bulbs. I used these as I was given to understand that they didn't need resistors. ( I was also told that they ran hot) I am not realy into electronics but if a thing works, it works and as long as they keep on working I'm happy.

Rob--- Thanks, your explanation seems to ring true. They will only use what power is available.

Andrew ----- Yip !! that is the solution as was pointed out to me a little while ago in my thread but I chose not to go down that route as it will mean 2 more pickups and they take a little settling down. In other words I couldn't be arsed. All my points are mostly in one section then the trains have a good run before they cross them again.

If anyone trys this lighting method PLEASE let me know how you go with it either in this thread or my other.

Best Regards to you all

BILL.
m8internet
Posts: 1640
Joined: Mon May 15, 2006 7:32 pm
Location: Cumbernauld, Scotland

Post by m8internet »

Resistors are normally used to reduce current
The disadvantage is they dispate heat

WARNING :
There is a great risk the heat from these bulbs could melt the plastic, possibly even resulting in a fire risk
The risk is very low, but it is there

A safer option is to use a LED and resistor
With a resistor embedded in a plastic breadboard there risk is much lower

Grain of wheat bulbs should ONLY be used in open environments where the surrounding air can cool them down
Glasgow Queen Street Model Railway layout : modern image N gauge using DCC
waz
Posts: 1111
Joined: Sun Nov 20, 2005 11:33 am
Location: Isle of Man

Post by waz »

Hi m8 !!!

Thanks for the info.

At the outset of, not only lighting the coaches, but lighting the layout, I was very aware of the risks you mentioned. I have gone to great lengths to ensure that non of the bulbs are in contact with the item they are illuminating that includes the coaches. A gentle touch on buildings and coaches from time to time when in use confirms that there is no overheating.

As many hints and tips are given to use this type of bulb it would seen that it is in common use for their purpose. Meanwhile I will check the article to see if I have stated that the bulb should not touch the roof of the coach and will edit accordingly.

I do thank you for your concern and interest and all your help.

My Best Regards

BILL.
m8internet
Posts: 1640
Joined: Mon May 15, 2006 7:32 pm
Location: Cumbernauld, Scotland

Post by m8internet »

waz wrote:Secure the bulb to the roof
It would be better to create a cradle for the bulb, have the bulb sit in that, and then secure the cradle to the roof
That would be vastly safer

The good point is that for DC layouts the lights will switch off when the current is removed
From an effects point of view the light will increase in strength with speed!

The main danger is on layouts with DCC
This setup can also be used, but the bulb will be ON all the time
For this reason, I would STRONGLY recommend using LED rather than grain of wheat bulbs

I've heard too many stories of people getting distracted, leaving a layout unattended, only to come back and find a melted pile of plastic, or WORSE!
Glasgow Queen Street Model Railway layout : modern image N gauge using DCC
rmg1919
Posts: 231
Joined: Thu Aug 17, 2006 10:06 pm
Location: SE London

Post by rmg1919 »

Congratulations on getting your coaches lit.

I'm currently in the process of installing LEDs in:

Class 110 2-car DMU
Class 43 HST plus coaches
Class 08 shunter

The plan is to go down the DCC route - and so will also be taking the opportunity to install DCC decoders. As m8internet suggests I will be making use of LEDs... simply from the heat point of view. I'm also hoping to use capacitors or extra-pick-ups to help avoid flickering.

I'm also likely to install LDRs in the coaches - so that the lights will come on when the ambient light reduces - and when the coaches enter a tunnel... The only downside is that I will need to figure out what level of LDR I need... Kinda tricky, I fear - though at least with DCC the supply voltage will always be 16V which must (maybe?) make it easier to figure out...

Anyway, just thought i'd let you know what I'm hoping to do. Will be sure to drop back when I get it vaguely done!!!
Post Reply