Wow, so many comments - thank you all very much

alan_r wrote:What was the brand of PVA you used as I tried this once and it seemed to be slightly yellow when it dried very thick?
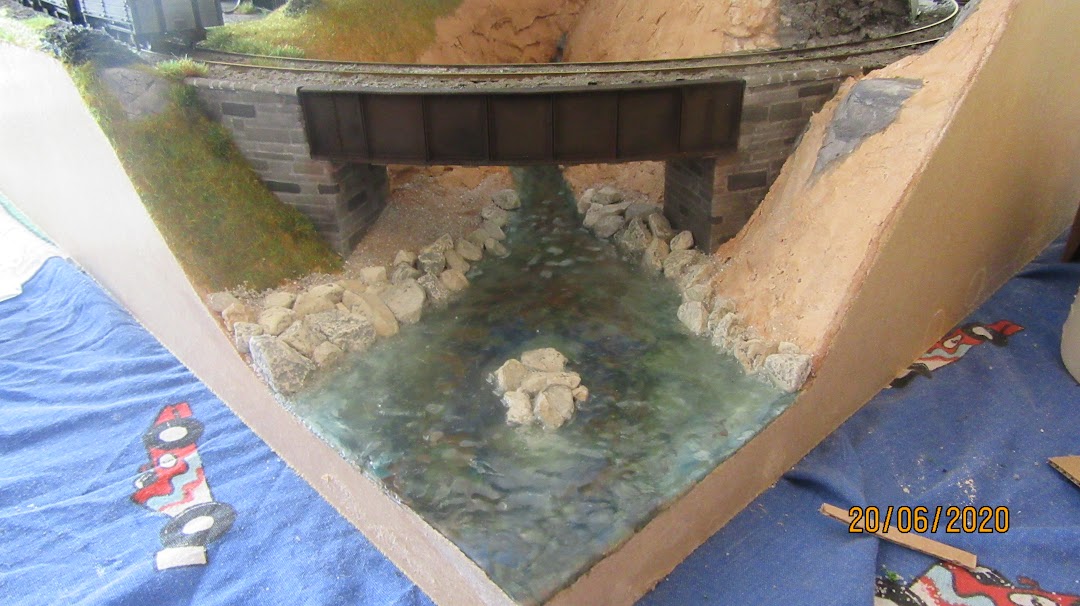
The undulations of your stream looks spot-on, especially as there would be broken water around the rocks. Well done!
It was Woodland Scenics 'Scenic Glue', so a bit more expensive than 'normal' PVA, but worth it because the PVA I normally use (bought cheaply in bulk) definitely does NOT dry transparent when ladled on thickly!
Mountain wrote:That looks great as it is. Don't be too tempted to do too much more to the water. It is good just as it is. I say this because it is easy to overdo things. It is looking great!
(Nice racing cars!
)
Thanks for the warning, but too late (!) I have dabbled with some 'Water Effects' now

. However I have been quite restrained . . .
Wasn't sure what you meant about the racing cars at first, and then realised they are on the old duvet cover of my son's that I am using to protect the table under the layout (he's a bit old for it now at 22!).
Anyway, so I 'planted' some (white metal) ducks and then added some of the Water Effects where I wanted waves, wondering how they would look once dry


This is how it looks when dry, and dry-brushed with a little white paint to represent white water. I though that, without that, the undulations were not very visible:


Hopefully it succeeds in suggesting movement of the water (esp. around the rocks and in the steeper area upstream) and the ducks