
Llwyndrissi Halt.

Re: Llwyndrissi Halt.
Making some nameplates and numberplates... Now I wait for the paint to dry! 
- Attachments
-
-
Last edited by Mountain on Wed Nov 25, 2020 7:49 pm, edited 1 time in total.
Modelling On A Budget ---》 https://www.newrailwaymodellers.co.uk/F ... 22&t=52212
-
Bufferstop

- Posts: 13819
- Joined: Thu Mar 11, 2010 12:06 pm
- Location: Bottom end of N. Warks line
Re: Llwyndrissi Halt.
Hi Mountain
I'm assuming that those plates are plastic tape done on a Dymo embossing machine, and not the ancient zinc ones from a coin in the slot machine somewhere on the Gower. If it is zinc you have a duty to tell us all where this dinosaur of a machine is located
I'm assuming that those plates are plastic tape done on a Dymo embossing machine, and not the ancient zinc ones from a coin in the slot machine somewhere on the Gower. If it is zinc you have a duty to tell us all where this dinosaur of a machine is located
Growing old, can't avoid it. Growing up, forget it!
My Layout, My Workbench Blog and My Opinions
My Layout, My Workbench Blog and My Opinions
Re: Llwyndrissi Halt.
One of those Dymo machines I guess. The plastic labelling things. Good for station nameplates as well but for loco nameplates they are better for 7mm scale.
I use fizzy drinks tins to make the nameplates out of. It may take a few tries, but the tins are free.
I use fizzy drinks tins to make the nameplates out of. It may take a few tries, but the tins are free.
Modelling On A Budget ---》 https://www.newrailwaymodellers.co.uk/F ... 22&t=52212
Re: Llwyndrissi Halt.
Hi Mountain
I have just gone through all 30 pages of this thread. It was pure delight!
I really like a lot your approach to modeling and think we have a lot in common at that.
I won't miss a single post from you now on.
Daniel
I have just gone through all 30 pages of this thread. It was pure delight!
I really like a lot your approach to modeling and think we have a lot in common at that.
I won't miss a single post from you now on.
Daniel
My new Flickr:
https://www.flickr.com/photos/158027525@N08/
My old Flickr:
https://www.flickr.com/photos/daniel_1_32_scale/page223
Being right is one thing, but being true is quite another.
https://www.flickr.com/photos/158027525@N08/
My old Flickr:
https://www.flickr.com/photos/daniel_1_32_scale/page223
Being right is one thing, but being true is quite another.
Re: Llwyndrissi Halt.
Thanks Daniel. Some of my photos have gone a little strange when this site did an update recently, but at least they are visible. I am glad you like it. It makes it worth it when it inspires others to give it a go. I personally find 7mm narrow gauge to be easier and cheaper for scratchbuilding, though I do like all scales and gauges... We all have our favourites! Something that I found did not work for me personally when I was concentrating in 00 gauge was trying to mix kit and scratchbuilt items wirh factory made models. I had no hope in matching their quality and so whatever I made stood out and looked odd, and I did not know why because if I viewed my scratch of kit built model on its own it looked ok. It was all about consistency. So with 7mm narrow gauge, if I buy a pre printed kit, I will always paint over the top so it does not make my other models look armaturish, and this I believe is the key. Consistency.
I have found that scratchbuilding is a lot easier then I had imagined once one learns what works and does not work, and I am still experimenting.
I tend to keep to simple kits like Peco (Their plastic kits. Not tried the whitemetal kits yet) and Smallbrook Studio (Resin kits). I am not an expert modeller. I just do my own thing and copy tried and tested methods. I am glad you like it.
Modelling On A Budget ---》 https://www.newrailwaymodellers.co.uk/F ... 22&t=52212
Re: Llwyndrissi Halt.
Good day Mountain
Thank you for your very interesting words.
You mention several essential points.
There is, of course, nothing wrong at building kits as they are intended to be built but my impatience would never allow me to read -lets stay follow- any instructions and, yes, all my attempts to build a kit as meant ended in fiasco.
A kit is for me at it's best a provocation to 'modeling cannibalism'.
For example: I bought half a dozen of these kits (for the price of one and a half!) just to get the wheels and the horses for modelling totally different carriages:
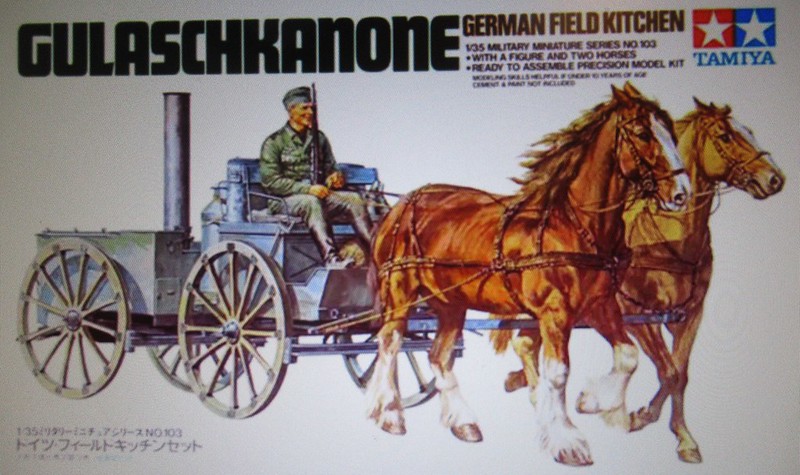 IMG_0001 (3) by Daniel Osvaldo Caso, on Flickr
I see kits as materials as any piece of plasticard, brass wire, wood or whatever.
Even my previous builds become often just materials after a while and I start stealling from them windows, doors, fences or whatever I can use now for a new project.
Nevertheless, building some kits may be also a good school.
In my case it gave me the kick I needed for let go following other's plans and go for what I only can know afterwards.
I see in your work a delightful joy of beeing alive. What could be more inspiring than that?
Just keep going and posting, I will certainly follow your thread.
B.t.w.: do you have any other threads?
Daniel
Thank you for your very interesting words.
You mention several essential points.
There is, of course, nothing wrong at building kits as they are intended to be built but my impatience would never allow me to read -lets stay follow- any instructions and, yes, all my attempts to build a kit as meant ended in fiasco.
A kit is for me at it's best a provocation to 'modeling cannibalism'.
For example: I bought half a dozen of these kits (for the price of one and a half!) just to get the wheels and the horses for modelling totally different carriages:
IMG_0001 (3) by Daniel Osvaldo Caso, on FlickrI see kits as materials as any piece of plasticard, brass wire, wood or whatever.
Even my previous builds become often just materials after a while and I start stealling from them windows, doors, fences or whatever I can use now for a new project.
Nevertheless, building some kits may be also a good school.
In my case it gave me the kick I needed for let go following other's plans and go for what I only can know afterwards.
I see in your work a delightful joy of beeing alive. What could be more inspiring than that?
Just keep going and posting, I will certainly follow your thread.
B.t.w.: do you have any other threads?
Daniel
My new Flickr:
https://www.flickr.com/photos/158027525@N08/
My old Flickr:
https://www.flickr.com/photos/daniel_1_32_scale/page223
Being right is one thing, but being true is quite another.
https://www.flickr.com/photos/158027525@N08/
My old Flickr:
https://www.flickr.com/photos/daniel_1_32_scale/page223
Being right is one thing, but being true is quite another.
Re: Llwyndrissi Halt.
Yes, but spread across a couple of other sites and will usually be roughly copies of this thread give or take a little as the thread varies. I will PM you with a few sites I am on.
As kits go, you would probably get on better with Smallbrook Studio resin kits as they are better described as a kit of parts rather then a more structured kit, and I find the kits and the material easier to adapt and adjust to fit ones own criteria. Example is how I built the diesel shunter which still needs finishing. Almost there! The 7mm narrow gauge kits are listed with Smallbrook Studio as 0e which is the European equivalent of 0-16.5 (American version is 0n30 though American prototypes are normally huge rather then the little things we tend to prefer in the UK).
Mike from Smallbrook Studios will also sell individual parts if desired.
Another small manufacturer of resin kits and parts is 422 Developments (I think I have that right). I have not tried them but Pinknosedpenguin who is also on this site has and they look nice.
I have also made my own parts via resin casting. I could do with getting back into that as it was fun! I ran out of resin a couple of years ago and I had already cast the parts I needed at the time, but I would like to start casting again.
Modelling On A Budget ---》 https://www.newrailwaymodellers.co.uk/F ... 22&t=52212
Re: Llwyndrissi Halt.
Smalbrook is not new to me but the enorme grow of their range is. Anyway, as far as my eyes allow me I prefer homemade.
Also at that front I have plenty of ongoing projects. The most recent and still waiting completion is an own interpretation of what should have been the only 500mm gauge Rowan steamr railcar ever.
'422 Developments' search gave me nothing but I am very curious.
I have done many silicone rubber simple molds but only plaster castings.
My first resin try is recent: a set of interior lamps for the Rowan using as pattern the little caps of the injection syringes that I was supposed to give myself when I had thrombosis for the first time:
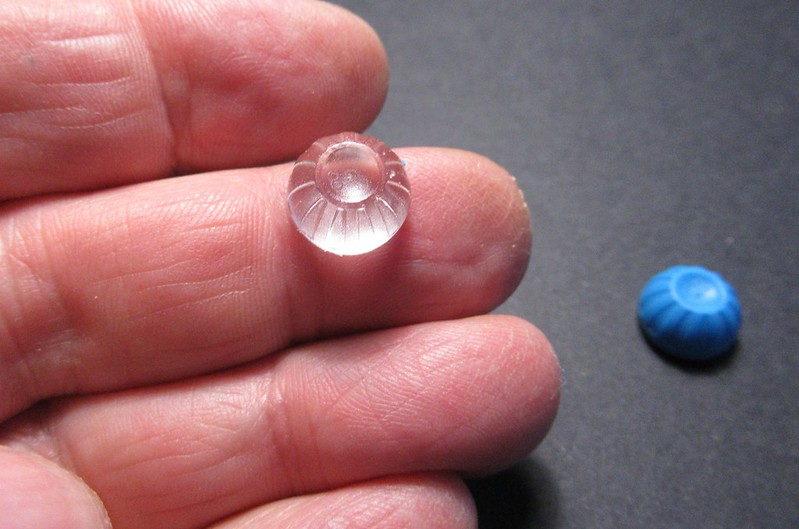 IMG_0004 (2) by Daniel Osvaldo Caso, on Flickr
I used this resin which is fantastic: incredibly fast, not really expensive and no smell at all
 IMG_0010 (2) by Daniel Osvaldo Caso, on Flickr
Not bad at all for a first time but it is, honestly, not my thing and I can't imagine how would I do to ensure the bottom surface of the casting (the expossed one at the mold) to be cast reasonably smooth...
Daniel
Also at that front I have plenty of ongoing projects. The most recent and still waiting completion is an own interpretation of what should have been the only 500mm gauge Rowan steamr railcar ever.
'422 Developments' search gave me nothing but I am very curious.
I have done many silicone rubber simple molds but only plaster castings.
My first resin try is recent: a set of interior lamps for the Rowan using as pattern the little caps of the injection syringes that I was supposed to give myself when I had thrombosis for the first time:
IMG_0004 (2) by Daniel Osvaldo Caso, on FlickrI used this resin which is fantastic: incredibly fast, not really expensive and no smell at all
IMG_0010 (2) by Daniel Osvaldo Caso, on FlickrNot bad at all for a first time but it is, honestly, not my thing and I can't imagine how would I do to ensure the bottom surface of the casting (the expossed one at the mold) to be cast reasonably smooth...
Daniel
My new Flickr:
https://www.flickr.com/photos/158027525@N08/
My old Flickr:
https://www.flickr.com/photos/daniel_1_32_scale/page223
Being right is one thing, but being true is quite another.
https://www.flickr.com/photos/158027525@N08/
My old Flickr:
https://www.flickr.com/photos/daniel_1_32_scale/page223
Being right is one thing, but being true is quite another.
Re: Llwyndrissi Halt.
Excellent work.
I have never cast the two part mould method. I have only cast the single part mould method which is how one usually casts with plaster. Using single part moulds the forming of bubbles is less likely, though it still takes place. I am a type of "Rough and ready" modeller who will say "That will do" and be happy with it, so as long as it looks the part and does what it is supposed to do I am happy.
I have only tried casting with Sylmasta G26 resin that comes with their casting kit. It lasts for ages and I recommend anyone wating to cast in resin, always have an extra mould or two ready as a little goes a long way, and do not worry if one only has enough resin left with the last few drops to half cast an item, as leave it in the mould, and the next time one wants to cast something, one simply fills the rest up to complete the casting. Rarely do they ever split into two parts and even if they do, one can simply use some runny superglue as superglue is the best bonding agent for the resin I use.
I would love to try some other types of resin. All in goot time.
Modelling On A Budget ---》 https://www.newrailwaymodellers.co.uk/F ... 22&t=52212
Re: Llwyndrissi Halt.
Thank you, Mountain.
This is the two components silicone rubber I use:
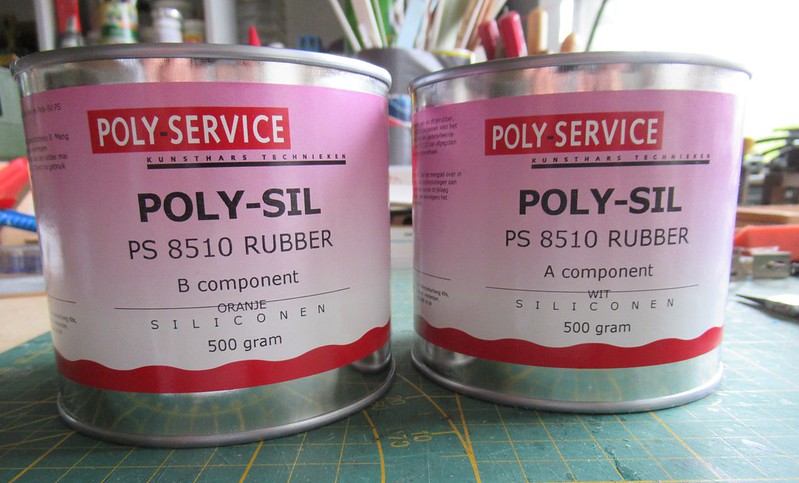 IMG_0012 (2) by Daniel Osvaldo Caso, on Flickr
Daniel
This is the two components silicone rubber I use:
IMG_0012 (2) by Daniel Osvaldo Caso, on FlickrDaniel
My new Flickr:
https://www.flickr.com/photos/158027525@N08/
My old Flickr:
https://www.flickr.com/photos/daniel_1_32_scale/page223
Being right is one thing, but being true is quite another.
https://www.flickr.com/photos/158027525@N08/
My old Flickr:
https://www.flickr.com/photos/daniel_1_32_scale/page223
Being right is one thing, but being true is quite another.
Re: Llwyndrissi Halt.
Ah. The rubber compound to make the moulds. I found the compound to make the moulds does not last long. For the odd job where I needed to cast single items I used playdough. It is not as asccurate but reusable and good for things that one does not want to spend money on a mould that one is not going to use more then once.
Modelling On A Budget ---》 https://www.newrailwaymodellers.co.uk/F ... 22&t=52212
Re: Llwyndrissi Halt.
[quote="Mountain"]Ah. The rubber compound to make the moulds. I found the compound to make the moulds does not last long.
Do you mean the components before use, after part of them has been used or the molds?
Daniel
Do you mean the components before use, after part of them has been used or the molds?
Daniel
My new Flickr:
https://www.flickr.com/photos/158027525@N08/
My old Flickr:
https://www.flickr.com/photos/daniel_1_32_scale/page223
Being right is one thing, but being true is quite another.
https://www.flickr.com/photos/158027525@N08/
My old Flickr:
https://www.flickr.com/photos/daniel_1_32_scale/page223
Being right is one thing, but being true is quite another.
Re: Llwyndrissi Halt.
I mean during use. I only just had enough to make two moulds, yet the resin itself has the opposite effect and is very "Tardis" like in that a little goes a long way. The mould making material I used from Sylmasta came in just the one pot, and I believe the other part was in a small tube? Sorry. It was a few years ago I last made a mould. The moulds take a day or two to cure before one can use them while the resin only takes a couple of hours to harden. It turns to a solid form in just 20 minutes or less, but it is a little soft and can be miss-shaped if one is impatient. A couple of hours is more then enough time for the resin I used to fully harden. The Sylmasta G26 resin itself is mixed in equal parts (50/50).
Modelling On A Budget ---》 https://www.newrailwaymodellers.co.uk/F ... 22&t=52212
Re: Llwyndrissi Halt.
The two components silicone rubber I use for the molds gives 15minutes for working and takes 2 hours to be ready for casting:
https://www.polyservice.nl/mallenrubber ... 0-set.html
It has been a serious development in the area of mold making and casting products during the last years and now again. It may be worth to see what is available now in your area.
Daniel
https://www.polyservice.nl/mallenrubber ... 0-set.html
It has been a serious development in the area of mold making and casting products during the last years and now again. It may be worth to see what is available now in your area.
Daniel
My new Flickr:
https://www.flickr.com/photos/158027525@N08/
My old Flickr:
https://www.flickr.com/photos/daniel_1_32_scale/page223
Being right is one thing, but being true is quite another.
https://www.flickr.com/photos/158027525@N08/
My old Flickr:
https://www.flickr.com/photos/daniel_1_32_scale/page223
Being right is one thing, but being true is quite another.
Re: Llwyndrissi Halt.
It is finished. The paint needs a day or two but I am happy.
Here it is next to Ruthy to compare. Also shows how the couplings reduce the coupling gap, and yet allow for sharp curves.
The new loco is called Sophy and will go to a new home.
Here it is next to Ruthy to compare. Also shows how the couplings reduce the coupling gap, and yet allow for sharp curves.
The new loco is called Sophy and will go to a new home.
- Attachments
-
-
-
Modelling On A Budget ---》 https://www.newrailwaymodellers.co.uk/F ... 22&t=52212