Improving 'teak' finish

Discuss model railway topics and news that do not fit into other sections.
User avatar
Lysander
Posts: 2349
Joined: Wed Aug 22, 2007 9:53 pm

Improving 'teak' finish

Post by Lysander »

Hattons recently sold Heljan's various-liveried Metropolitan Bo-Bo electrics at an extremely attractive half-price and I bought this one:

Image

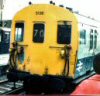
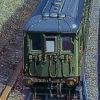
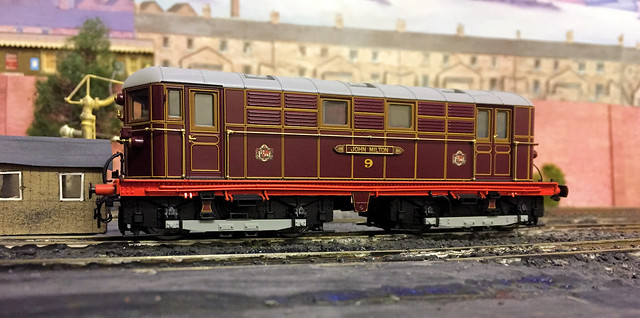
My problem was what to pull behind it however: no-one makes r-t-r Metropolitan coaches and whilst kits are available, they do tend to be rather expensive. On another site, in a discussion about these, I saw a photo of one with a rake of Graham Farish OO LNER teak suburbans. They are not correct of course, but I felt that they could be 'improved' and at least they'd be the right colour!

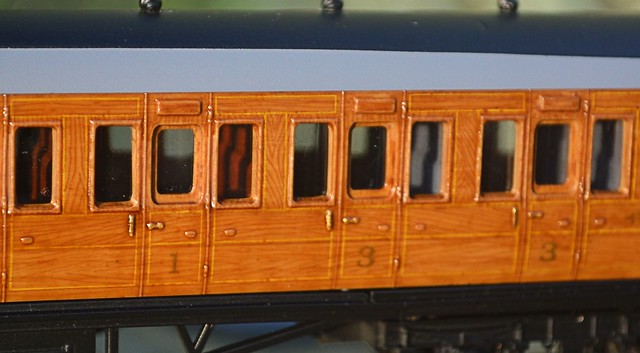
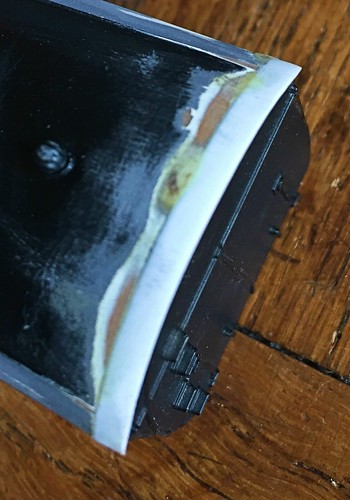
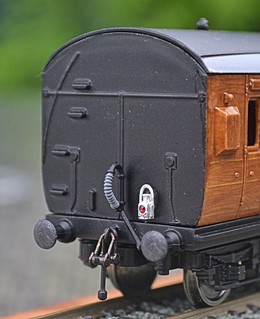
I managed to win a set of four of these coaches on eBay for £15.68. At that price they had to be worth working on but it became immediately apparent that their livery would have to change as it was far too light and the graining so obviously over-scale.

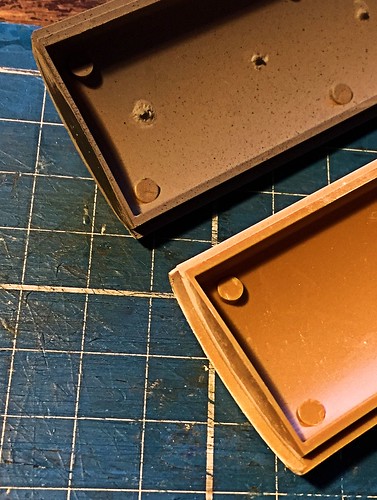
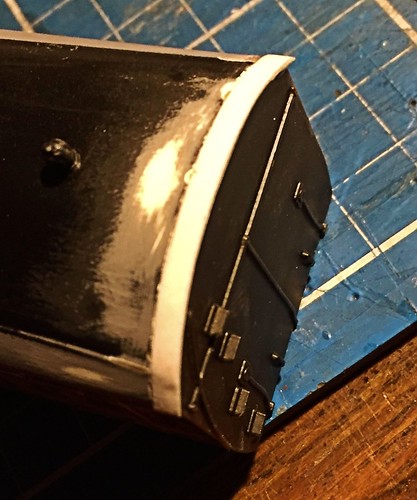
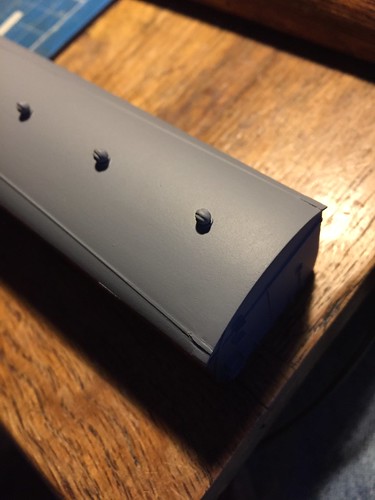
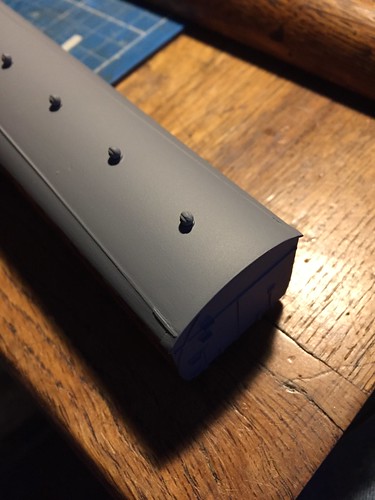
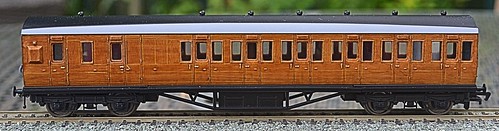
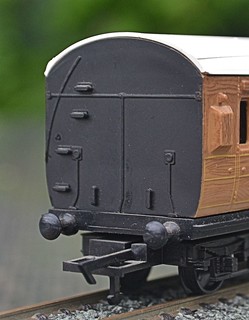
Talking to a fellow club member, he advised applying washes of Citadel 'Seraphim Sepia' to darken the finish and reduce the impact of the printed graining. Five coats later, the affect on the original colour was really noticeable. I also removed the original ventilators from the roof and applied more realistic ones, painted the roof, fitted metal wheels and painted the interior. The coach end was detailed and the Farish couplings replaced with closer-fitting ones.

Unfortunately, transfers for Metropolitan coaches are difficult to get and expensive [around £20 a sheet], so they have had to be omitted. Otherwise a cheap and cheerful transformation and when completed a reasonable rake for the Bo-Bo to pull. Not perfect by any means but it passes muster at three feet.

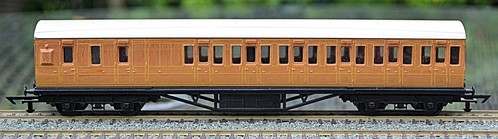
Before and after photos:

Image
Image

Image
]Image

Citadel 'Seraphim Sepia' costs a shade under a fiver for 24mls. I'll have 60% left at least after four coaches are done. It is water-based and washes off brushes easily. I have seen it used to very good effect on Hornby railroad LNER coaches also.

Tony
Men with false teeth may yet speak the truth.......
Bigmet
Posts: 10269
Joined: Tue Aug 14, 2007 2:19 pm

Re: Improving 'teak' finish

Post by Bigmet »

Good effect. These old Farish products were a pretty vital item when there was no other RTR and few kits to represent typical steam era non-gangwayed all compartment stock so common across the whole network.

The actual Metropolitan carriage livery was in a very attractive style, and there is by happy chance a good colour photo of part of a coach side published in 'The Big Four in Colour'. (This photo was taken just months before the LNER acquired the Metro's out of town steam operations, so the coach is effectively still in 'pre-group' ownership.)
User avatar
SRman
Posts: 1211
Joined: Fri Oct 03, 2008 2:26 am

Re: Improving 'teak' finish

Post by SRman »

Those have come up really nicely, Tony.

I was lazy and did mine in the overall brown LT used later in their lives. I do have plans to cut out some end windows on mine, eventually, but that job is not high in my priorities.

As I said originally, these Farish coaches are wrong in just about every detail, but they look the part for all that. I think it is partly the roof profile, which seems to better represent the Dreadnoughts than just about any other RTR coach that others have suggested at different times.

I got your PM about the transfers and agree that if one is on a budget, it is hard to justify the expense of the transfers, or even, the cost of a rake of proper Dreadnoughts in kit form (with no intention of impugning the manufacturer, who is filling a distinct gap in the available range of coaches).
User avatar
Lysander
Posts: 2349
Joined: Wed Aug 22, 2007 9:53 pm

Re: Improving 'teak' finish

Post by Lysander »

Well, without sufficient funds and, of course, a commensurate amount of time, it will always be about compromise. Transfers would have improved the overall appearance of these coaches but they may yet happen as they appear occasionally on eBay. Had I sufficient ventilators, a double row along each roof would have been preferable too, I had just sufficient for a single row along each however. And flush glazing would have been good. It is available via SouthEastern Finecast and I've used it on other coaches - to quite good effect - before. Each window has to be glazed individually though and on these coaches, the windows being so close to each other, neat fixing would be difficult as there is so little room for glue.

So we are where we are. Rule One steams happily along!

Thanks both for your comments.

Tony
Men with false teeth may yet speak the truth.......
Bigmet
Posts: 10269
Joined: Tue Aug 14, 2007 2:19 pm

Re: Improving 'teak' finish

Post by Bigmet »

I positively like the lack of flush glazing on models of earlier wooden construction coaches, as it emphasises a key difference between them and more modern steel flush panelled constructions, even though I know the glazing is typically too deeply recessed.

On the Metropolitan lining transfers, I don't know the product at all: but based on the photo mentioned above, the primary question I would have is whether the dimensions of the Farish coach side would be a close enough match for the length of the cartouches. Worth a try 'blind' if some can be got cheaply, but if the transfers are expensive I wouldn't risk it without specific prior advice that they will fit well.
Hymirl
Posts: 145
Joined: Sat Dec 22, 2007 3:35 pm
Location: UK

Re: Improving 'teak' finish

Post by Hymirl »

I really like the wash over the original plastic teak. Looks nice.

Can you find pictures to print for yourself onto transfer paper?
User avatar
Lysander
Posts: 2349
Joined: Wed Aug 22, 2007 9:53 pm

Re: Improving 'teak' finish

Post by Lysander »

I've yet to master the art of making your own transfers. I've always been dubious about them looking just a bit home-made, but I am probably wrong. I'll eventually get around to trying it.

Tony
Men with false teeth may yet speak the truth.......
User avatar
Lysander
Posts: 2349
Joined: Wed Aug 22, 2007 9:53 pm

Re: Improving 'teak' finish

Post by Lysander »

I've finished the two Brake Comps and have made a start on the two intermediate coaches. Close coupling and painted interiors have made a world of difference, as has ensuring that no two coaches are exactly the same shade and each coach has both darker and lighter panels.

Image

Image

It's extraordinary - four coaches for less than £16 plus paint.

Tony
Men with false teeth may yet speak the truth.......
User avatar
Mountain
Posts: 5889
Joined: Mon Oct 24, 2016 3:43 pm
Location: UK.

Re: Improving 'teak' finish

Post by Mountain »

Very nice Lysanda.
User avatar
SRman
Posts: 1211
Joined: Fri Oct 03, 2008 2:26 am

Re: Improving 'teak' finish

Post by SRman »

Brilliant!

Now, if I send you mine to do ....

:evil: :lol: :lol:
User avatar
Lysander
Posts: 2349
Joined: Wed Aug 22, 2007 9:53 pm

Re: Improving 'teak' finish

Post by Lysander »

Well thanks for the inspiration in the first place!

Tony
Men with false teeth may yet speak the truth.......
User avatar
Lysander
Posts: 2349
Joined: Wed Aug 22, 2007 9:53 pm

Re: Improving 'teak' finish

Post by Lysander »

One of the problems with these old Farish OO coaches is the plastic used for their construction. Whilst it is relatively stable [unlike that used for their even older Pullmans], it does become brittle with age: the coach ends often show signs of cracking and the roofs frequently turn up with their corners snapped off and overhangs damaged. The ends can be easily repaired by applying some form of liquid poly. The roofs are far more difficult to fix however and I always avoid buying any that are damaged.

This is all well and good of course but does not legislate against self-induced damage! Whilst putting the finishing paint touches to a roof, I dropped it on a concrete floor. Both ends were damaged and the overhangs shattered. Irreparable? I thought so, but had insufficient ventilators to start again with a replacement roof and so some sort of fix was called for.

Attaching a curve of plastic card to each end of the roof was not going to work as there was simply too little surface to glue it to. However, cutting all of the remaining roof overhang back, glueing the roof in place but inside the coach ends and then attaching the plastic card strip to the top of the coach body ends might. All that would then be required would be sanding and filler to achieve a reasonable profile.A lot of work though.

Anyway, the first photo shows the damage removed and the overhang sanded back. Both ends required this. Alongside, a perfect original roof.

Image

Next, although cleaned up, damage like this remained on the surface at both ends.

Image

And finally for this post, both ends after attaching plastic card strips and applying filler, and then sanding back the imperfections.

ImageImage

Next task is to reinstate the rain strips at each end, clean up the roof and spray with primer to check the result.

I could have done without this!

Tony
Men with false teeth may yet speak the truth.......
User avatar
Mountain
Posts: 5889
Joined: Mon Oct 24, 2016 3:43 pm
Location: UK.

Re: Improving 'teak' finish

Post by Mountain »

Mind you. You now have learnt that the roofs can be repaired so it may help you decide to take on any future Garish models as a rebuilding project.
User avatar
Lysander
Posts: 2349
Joined: Wed Aug 22, 2007 9:53 pm

Re: Improving 'teak' finish

Post by Lysander »

These will be definitely the last Mountain. Definitely the last....

Anyway, a flash of primer has shown largely acceptable results. Most of the two joins are invisible, only the corners show that some surgery has taken place and I can live with that. Further sanding down of the corners and the extended rain strips is risky because the Milliput used to fill the irregular gaps is attached to very little. Too much further interference could dislodge it completely. Once the rain strips are sprayed matt black it will look much better.

ImageImage

I'd have been well into the next coach by now if I hadn't had this unnecessary diversion. But that's life.

Tony
Men with false teeth may yet speak the truth.......
User avatar
Bigglesof266
Posts: 1026
Joined: Tue Feb 10, 2009 9:59 am
Location: Australia

Re: Improving 'teak' finish

Post by Bigglesof266 »

Quietly lurking in on the thread.

Superb work and results Tony :!:

Thanks for sharing such an interesting and detailed show and tell journey.
Post Reply