First the
coach is opened by squeezing the windows in from each side as they are connected to the roof as one piece of plastic.
Then bases are measured and made from balsa that will have everything glued onto them. I've cut a slot in each end of the bases for the wire to pass up vertically to the lighting bar.
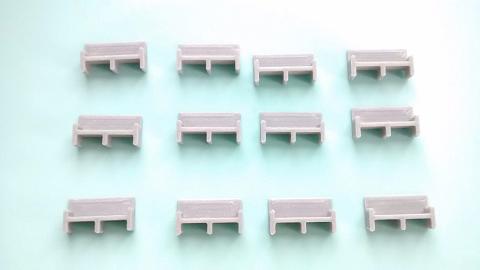
Here are the seats I am using from a seller on ebay.
The inner walls are then made also out of balsa and the seats are glued to these.
The walls, which at first I sanded to the rough profile of the roof but after painting and dry fitting into the
coach I decided to cut them off straight to give the lighting bar more room for clearance.
To get the correct height I used a sanding block on the inner walls in situ making sure not to sand so much that I would end up sanding down the top of the outer walls of the
coach.
Here they are in their rough unpainted state before I trimmed the walls straight
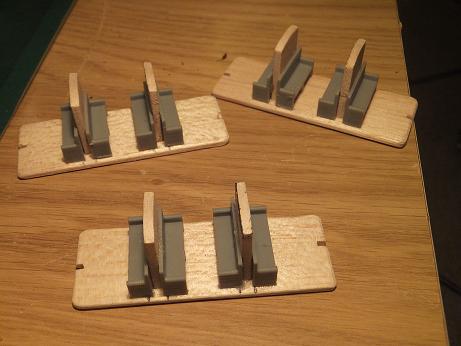
And now painted but unfettled with the curve on the inner walls still.

One thing glaringly obvious is the lack of seating at each end of the
coach. I ran out of them.

So will need to buy some more.
Next up is the lighting bar. This I cut from some vero board so this can carry the power rather than lots of wiring to make everything smaller.
A peice of 30 x
4 (holes) I envisioned to be enough with the 2 legs of each LED in the middle holes/tracks and the positive and negative power on the outer holes/tracks either side. I have already glued the LED's into thier positions last night so hopefully they should be fully dry to work on now.
Here is where I am upto now.
The straight topped inner walls (unpainted) and the vero lighting bar with the LEDs glued onto it.

- 4WCInteriors3SM.JPG (29.35 KiB) Viewed 3999 times
Thanks End2end