First off. Having started to bend up the rear of the cab I notice that the holes for the washout plugs aren't fully formed.
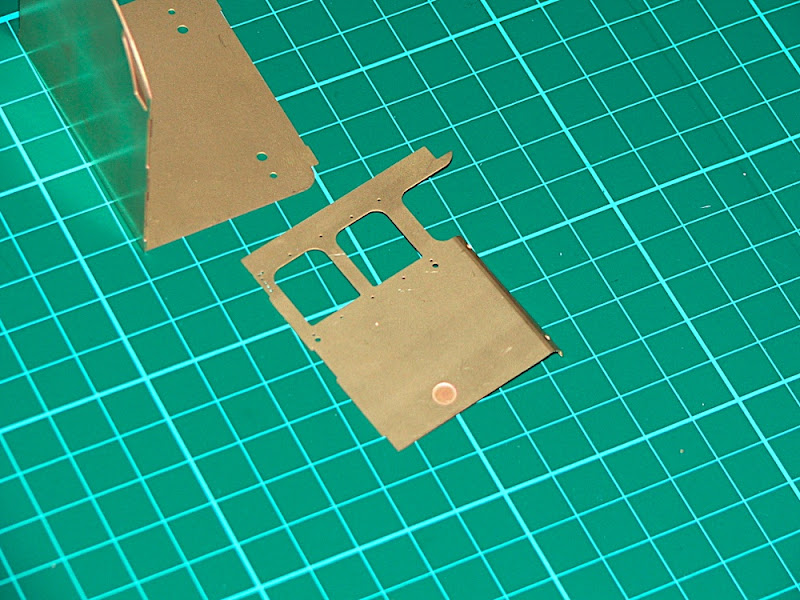
Poked some holes in it...

and opened out the hole and we're back on track

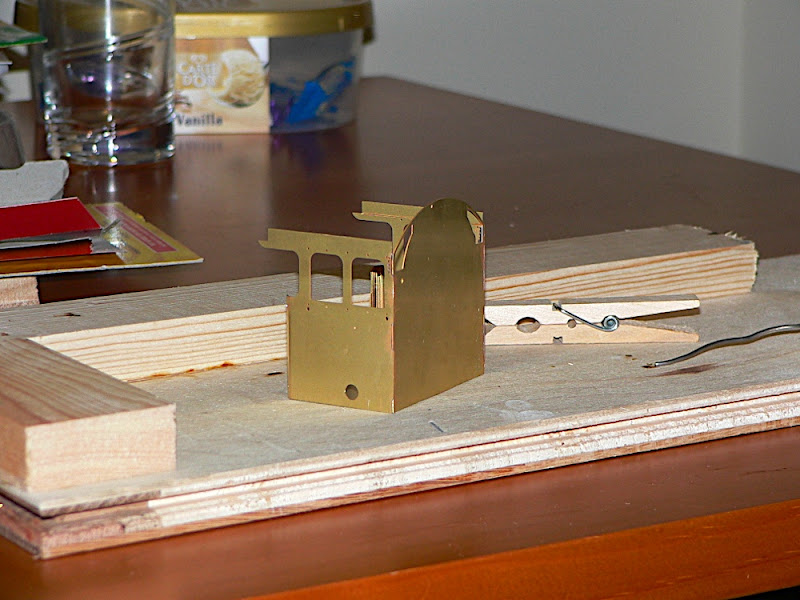
Now for the first bit of soldering. The wooden thing is a plank with a couple of battens stuck to it a right angles. That gives a variety of right angles to put parts up against. Thanks to RMweb for that tip.
A smear of flux on the edges and then running a bead of solder along the back gives a nice clean joint when viewed from the outside.

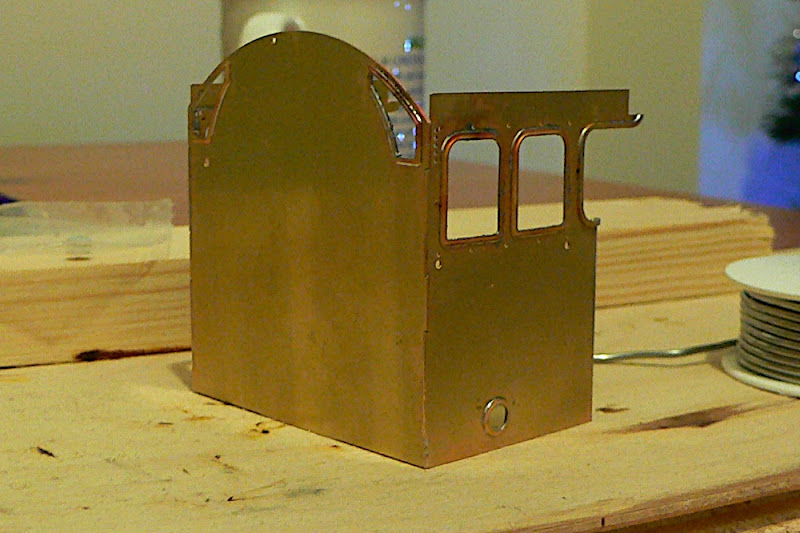
Here's the basic structure made up.
Now to add some of the details.
Lining up the frame as best I could I fixed it in place with a clothes peg. (another RMweb tip). A quick dab of solder from the inside tacks it in place.
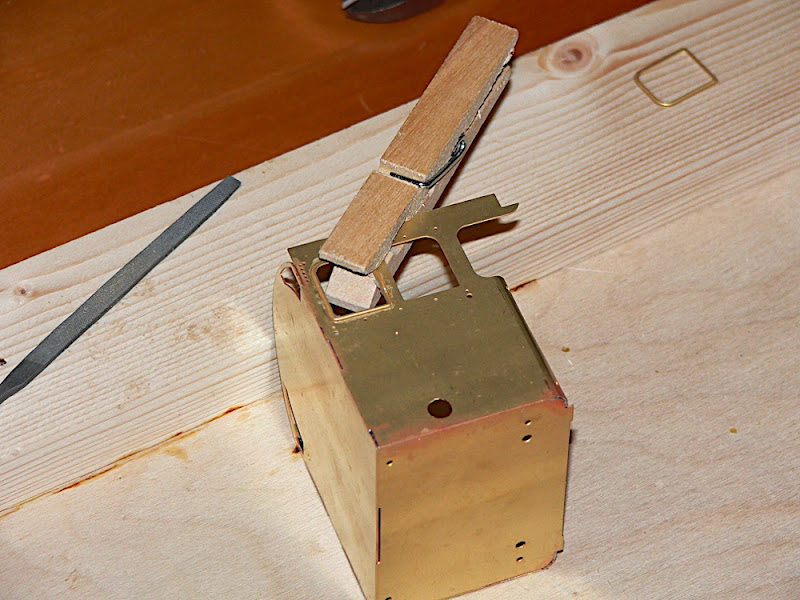
Before turning it over and soldering all the way round.

Repeating this for the rest of the frames and the beading round the rear of the cab.
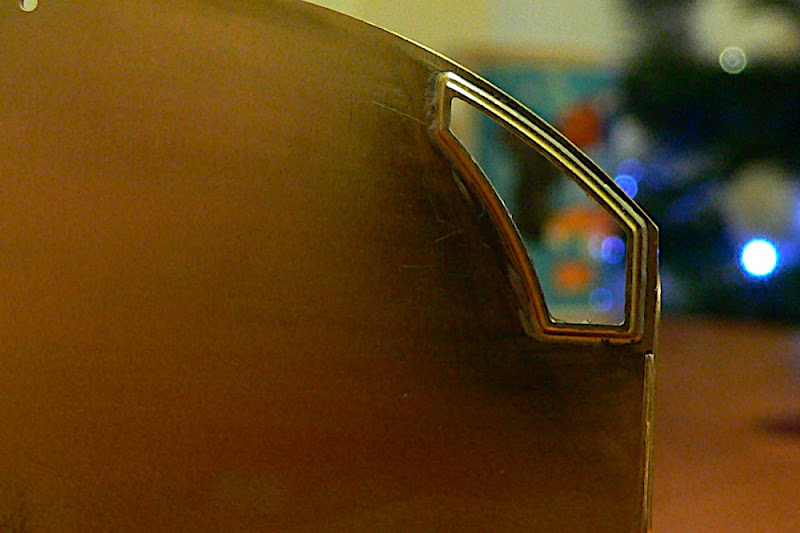
The instructions show the beading being bent in mid air to suit the curve of the cab, but I tack soldered to the cab and bent it round as I went.
Washout plugs are glued in. This is the only bit I glued as I don't have anything to solder white metal without melting it.

Finally the cab is washed and excess solder removed, mostly with a fibreglass brush.
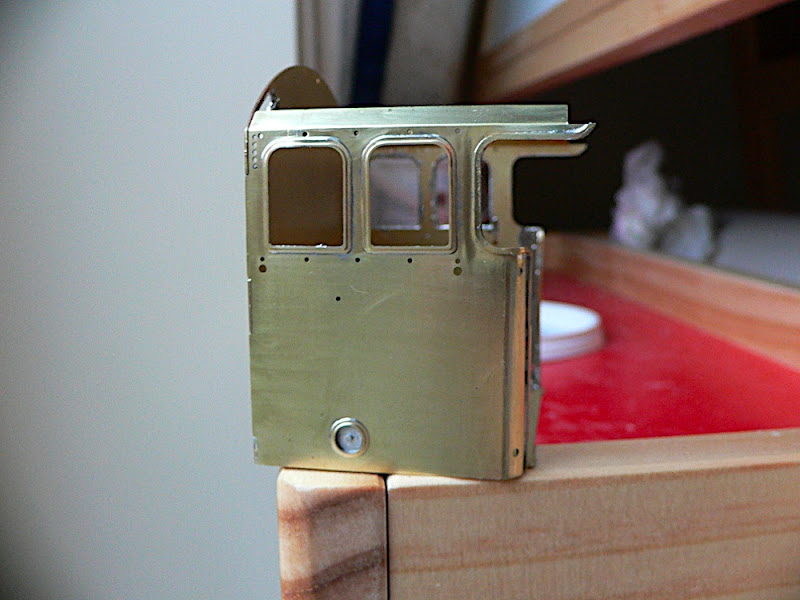
I'm quite happy with it for a first attempt at an etched kit. The window frames aren't quite level, but I can always do another one. It's certainly worth the 50p for the first issue just for the experience of making up the cab.
I have subscribed, but it's about another four issues before there are enough parts to make a start on building the frames