Hawick via Grantham, Inverness and SIAM (00 gauge DC)

Post pictures and information about your own personal model railway layout that is under construction. Keep members up-to-date with what you are doing and discuss problems that you are having.
Post Reply
Ex-Pat
Posts: 2201
Joined: Tue Feb 08, 2011 10:51 pm
Location: Newry Northern Ireland

Hawick via Grantham, Inverness and SIAM (00 gauge DC)

Post by Ex-Pat »

Advice to newcomers - by all means plan, but not for too long. How long is long-term planning?

Way back in the 1970’s it was always going to be a model of Grantham set in the late 1950’s (I’d even acquired an official BR track plan). Then a thunderbolt of reality and lack of budget/space hit home.

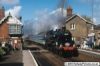
In the 1990’s things were toned down to thinking about a 1980’s era model of Inverness but this was scuppered by SIAM when they produced their Carlisle 1957 Traffic Control Simulation. I was fascinated by the Waverley Route traffic coming down to Carlisle from Edinburgh, and Hawick in particular.

Regular motive power was:
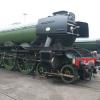
A3 (Hornby)
A1 (Bachmann)
B1 (Bachmann only at that time)
J39 (Bachmann)
K3 (Bachmann)
V2 (Bachmann)

Less frequent visitors were:

A2 (Bachmann)
V3 (Bachmann) (67606 from 64G Hawick)

A look at Hawick’s allocation revealed they also had an N2 69510 (Mainline/Hornby).

So that finally pushed me headlong into researching Hawick in detail.

A trip to Hawick found the residents fiercely nostalgic over “their” railway and most eager to help in any way, and I came away armed with an official BR plan, hand drawings/sketches of most of the long-since demolished station buildings, and various photographs.

I bought as many Waverley Route photographic books as I could find plus the superb “The District Controller’s View No. 8 - The Waverley Route”. This brought to light the relatively little known dark hours working of an A4 (Hornby/Bachmann) out on the 22.15 Edinburgh - Carlisle (relief to the 21.53 Edinburgh – St. Pancras but also including parcels vans for 3 destinations and fish vans for 10 destinations), and back on the 04.08 Carlisle – Edinburgh Postal (if only I could find a photo of these 2 trains!).
Official Plan-paint.jpg
A trip to the Scottish National Archives in Edinburgh produced a drawing of the loco shed, and I have sourced a mass of photos from the Internet, although most of them are commonly photographed areas.

No detailed planning construction-wise was done until we moved to Ireland in December 2007 and a room was requisitioned into which I could fit a layout measuring 16ft x 8ft 9”. I know that sounds large to many people but I really could have done with 24ft x 12ft because I realized that I would have to compromise so much, and that really hurt (and wasted more time in trying to fight it!).

My aim when drawing up the track plan was to follow the prototype as far as possible as my main interest will be in reproducing the traffic movements that existed circa 1953-1956. I had originally considered a “through” end to end layout but then decided if I made it continuous then I would be able to run in locos better and just play trains if I wanted to.

This is what I ended up with:
Hawick Track Plan.JPG
Hawick Track Plan.JPG (111.82 KiB) Viewed 8506 times
The original plan drawn up in Excel is much clearer, but Excel files can't be uploaded, so I had to save it as a JPEG and lost a lot of clarity! I didn't get round to showing the station buildings and platforms on the plan - but they will be on the left-hand side with the platforms spanning the River Teviot.

I decided to use SMP track (purchases of which had been built up over the years by acquisitions at various Exhibitions), with Peco Code 75 steel-sleepered track used in the fiddle yard only (thanks to a Hatton's offer of 25 yards for only £49), and Peco Code 75 Electro-frog points.

T.B.C.
Last edited by Ex-Pat on Tue Nov 17, 2020 11:30 am, edited 1 time in total.
User avatar
Bufferstop
Posts: 13821
Joined: Thu Mar 11, 2010 12:06 pm
Location: Bottom end of N. Warks line

Re: Hawick via Grantham, Inverness and SIAM (00 gauge DC)

Post by Bufferstop »

The original plan drawn up in Excel is much clearer, but Excel files can't be uploaded
If they were permitted they wouldn't make sense to phpBB unless it had been modified with an Excel viewer module. The same applies to all MS Office applications and other MS products because of their internal structure and the fact that they can contain executable code. You can only legally decode MS files, with an MS application unless you pay Microsoft, either up front or later via the courts. MS do supply a viewer for PowerPoint and most of the apps do allow some form of open standard export but it's the transfer of executable code via the bulletin board that is the problem here.
Growing old, can't avoid it. Growing up, forget it!
My Layout, My Workbench Blog and My Opinions
User avatar
flying scotsman123
Posts: 2233
Joined: Thu Jan 12, 2012 5:29 pm
Location: err, down there round the corner... not that one!!!

Re: Hawick via Grantham, Inverness and SIAM (00 gauge DC)

Post by flying scotsman123 »

Just goes to show that no matter how much space you have, your plan always needs about 1.5x as much! Very much looking forward to seeing this!
Image
Stone station in pre-grouping days, my layout. Workbench for other projects here.
Ex-Pat
Posts: 2201
Joined: Tue Feb 08, 2011 10:51 pm
Location: Newry Northern Ireland

Re: Hawick via Grantham, Inverness and SIAM (00 gauge DC)

Post by Ex-Pat »

Thanks for the explanation Bufferstop
flying scotsman123 wrote: your plan always needs about 1.5x as much!
Double or triple it I'd say!

Having decided on the basic track plan the next stage was to mark out the floor with masking tape to show the baseboard outlines.
First steps
First steps
Hawick planning 001.JPG (38.13 KiB) Viewed 8439 times
I then laid down cardboard templates of the various points and offcuts of old track and moved them around to find the optimum positions.
Playing with cardboard templates
Hawick planning 003.jpg (37.5 KiB) Viewed 8439 times
Nearly there! - Loco shed in centre and goods shed above.
Hawick planning 012.jpg (46.85 KiB) Viewed 8439 times
Because Hawick was a very “corner-orientated” layout in real life it was quite difficult to establish the position of baseboard joins without detracting from the flow of the trackwork. In particular there was a continuous ladder of points feeding the loco shed and goods shed sidings and I was not prepared to interrupt it for a baseboard join. So, before somebody points it out, that is why Baseboard 1 is a seemingly unwieldy 7ft3” x 3ft. As you would imagine it is also impossible to access the far corner of this baseboard as it is bordered by walls.

SWMBO will not let me introduce a serving type hatch in the walls so that’s where Baldrick comes in with his cunning plan. I have enough to keep me busy with other more accessible areas for the next year (or more) but sooner or later a move to a bungalow dictates that it must have a room large enough to accommodate not only the layout as it currently stands but also planned 2ft extension boards between Boards 2 & 9 (which will increase the length of the “Up” yard sidings), and between 6 & 7 (which will increase the length of the fiddle yard tracks). And naturally there will be access all round the outside of the layout.

Another complication with Board 1 was that the loco shed and goods shed were on a slightly lower level than the adjoining “Down” yard sidings and the Bay platform. This meant that I had to sandwich a large lower level “wedge” of baseboard down the centre of Board 1 to include its gradient change as well. (In fact in real life the track to Carlisle started rising at 1/100 somewhere near the northern end of the platforms and that is presumably why the bay platform has catch points.)

I've "tarted up" the Excel track plan with a few more details, and hopefully made it more legible.
Hawick Track Plan.JPG
Hawick Track Plan.JPG (115.83 KiB) Viewed 8439 times
T.B.C.
Last edited by Ex-Pat on Sun Jun 26, 2016 10:33 pm, edited 1 time in total.
Ex-Pat
Posts: 2201
Joined: Tue Feb 08, 2011 10:51 pm
Location: Newry Northern Ireland

Re: Hawick via Grantham, Inverness and SIAM (00 gauge DC)

Post by Ex-Pat »

So, on to baseboard construction.

There is much argument on this forum as to the best method, and I’m a firm believer in each to his/her own. I’d bought some of the now “deceased” Activity Media Right Track Series DVD’s and looked at “Right Track 5 Modelling Landscapes Part 1” and was more than pleasantly surprised to find it also included baseboard construction by Barry Norman.

His method is to use 2 x 4mm (actually 3.6mm) plywood skins sandwiching wooden blocks. I know most of the plywood talk is about 5mm or 12mm thickness, but I have found 3.6mm perfectly satisfactory and it is of course lighter and cheaper than the two latter. Thus my 7ft 3” x 3ft baseboard, although somewhat unwieldy, is by no means as heavy as you might think.

Baseboard 1 (as with the later ones) had its more or less unique design of framework. The positions of the supporting framework depended on the locations of point motors (all mounted underboard).

It was therefore necessary to firstly prepare the baseboard top and mark out the track positions with particular regard to where the point motors and the ashpits would be.
This photo shows the baseboard top marked out, with masking tape representing the track and black rectangles/oblongs showing where cut-outs are required for the point motors and ashpits.<br />The 2 thick lines show the outline of the lower level “wedge” mentioned previously.
This photo shows the baseboard top marked out, with masking tape representing the track and black rectangles/oblongs showing where cut-outs are required for the point motors and ashpits.
The 2 thick lines show the outline of the lower level “wedge” mentioned previously.
005 (2)paint.jpg (130.49 KiB) Viewed 8394 times
This photo shows the cutouts have been done and the skins and blocks are ready for glueing.  There are copious markings on each piece of wood to make sure that all goes together as intended.  The plywood skins were hand-sawn so the tops had to be perfectly level to ensure as near perfect contact with the baseboard top as possible (the bottoms didn’t matter as much).  In turn this meant that I had to construct the framework upside down i.e. lay the baseboard top down first and then lay the assembled individual pieces of framework with their “tops” upside down before drilling for screwing and glueing together .
This photo shows the cutouts have been done and the skins and blocks are ready for glueing. There are copious markings on each piece of wood to make sure that all goes together as intended. The plywood skins were hand-sawn so the tops had to be perfectly level to ensure as near perfect contact with the baseboard top as possible (the bottoms didn’t matter as much). In turn this meant that I had to construct the framework upside down i.e. lay the baseboard top down first and then lay the assembled individual pieces of framework with their “tops” upside down before drilling for screwing and glueing together .
Hawick Planning 020paint.jpg (156.87 KiB) Viewed 8394 times
Now the cross supports have been assembled (staples used to hold together whilst glue dries), and you can see the progressively widening and slightly deepening top cut outs to allow the “wedge” to rest at a lower level.
september2010 002paint.jpg (153.8 KiB) Viewed 8394 times
The framework has been screwed and glued together, turned the right way up and glued along the top edges in readiness for attachment of the baseboard top.
029paint.jpg (222.51 KiB) Viewed 8394 times
The baseboard is upside-down showing additional strengthening battens and 7 of the 8 legs attached.  (Further cross supports to the legs will be added.)
The baseboard is upside-down showing additional strengthening battens and 7 of the 8 legs attached. (Further cross supports to the legs will be added.)
034paint.jpg (166.68 KiB) Viewed 8394 times
T.B.C.
User avatar
luckymucklebackit
Posts: 3712
Joined: Mon Jul 18, 2011 7:05 am
Location: Eaglesham (Again)
Contact:

Re: Hawick via Grantham, Inverness and SIAM (00 gauge DC)

Post by luckymucklebackit »

Looking Good Ex-Pat!! Will be following with great interest, need to get the campaign for Hornby/Bachmann etc. to get that J36 in production back on track, Hawick had eight!

Jim
This Signature Left Intentionally Blank, but since I have written this and I intended to do it, this Signature is intentionally not blank. Paradox or What?
My layout - Gateside and Northbridge
Image
Ex-Pat
Posts: 2201
Joined: Tue Feb 08, 2011 10:51 pm
Location: Newry Northern Ireland

Re: Hawick via Grantham, Inverness and SIAM (00 gauge DC)

Post by Ex-Pat »

Thanks Jim - I keep meaning to contact Oxford Rail to see if it might be on their agenda - I tapped up Heljan at Warley a couple of years ago but doesn't look like it will happen there. Now, If I get round to constructing my long-held Crownline J36 kit, then no doubt one may be produced! Similarly my DJH J35 and Gem D30 kits.
Ex-Pat
Posts: 2201
Joined: Tue Feb 08, 2011 10:51 pm
Location: Newry Northern Ireland

Re: Hawick via Grantham, Inverness and SIAM (00 gauge DC)

Post by Ex-Pat »

The first board has now been completed
039paint.jpg (177.3 KiB) Viewed 8346 times
The plan was to complete (apart from scenery buildings etc.) one board at a time. So once the legs and further bracing had been completed I turned my attention to tracklaying. Again I resorted to the Activity Media Right Track Series DVD's and followed the methods used in “Right Track 10 Terrific Trackwork”.

I covered the board with PVA and on to which I laid 3mm closed-cell foam sheet in the areas where track was to be laid, giving it a good 48 hours to dry. The next step was to mask off the first area where track was to be laid, allowing the track width plus an extra amount to allow for the ballast shoulder.
Note the pieces of cardboard on the points (with a loose one lying there).
Area masked off for PVA.jpg (128 KiB) Viewed 8346 times

I started with the central ladder of points. Each point had a piece of cardboard sandwiched between it and its motor so that the whole of the cut-out area in the baseboard was covered and left no unsightly gaps.
Just a trial &quot;fit&quot; to ensure everything ok.
Just a trial "fit" to ensure everything ok.
Rough setting out of first section to be laid.jpg (124.77 KiB) Viewed 8346 times
PVA was then applied to the area (but excluding the vicinity of the actuating tie bar). The points were joined together and dropped in as a unit on to the PVA. Ballast was liberally applied and left for 10 to 15 minutes, after which time I used a Black & Decker Dustbuster to suck up the surplus dry ballast for further use. The masking tape was peeled away leaving a fairly straight and neat ballast line. Sometime later the tiebar area had PVA and ballast applied with a small brush taking great care to ensure that nothing interfered with the movement of the tie bar. Also care has to be taken not to use too much PVA as it can seep into the point actuating pivot area and gum up the point – I only did that once and thereafter stuck a small piece of masking tape to the underside of the point to cover the pivot area!
The excess ballast has been hoovered away.
First track down and ballasted, prior to removal of masking tape..jpg (136.92 KiB) Viewed 8346 times
Once everything was dry I moved on to lay the sidings emanating from the central ladder in similar fashion.
Many days later this stage had been reached.
054paint.jpg (229.9 KiB) Viewed 8346 times
The ballast still needs weathering and tarting up in places, but after so long thinking and not doing I felt I was at last getting somewhere - only another 8 boards to go!

T.B.C.
User avatar
carnehan
Posts: 1319
Joined: Mon Jan 07, 2013 9:44 pm

Re: Hawick via Grantham, Inverness and SIAM (00 gauge DC)

Post by carnehan »

This is incredible work Ex-pat. I love watching a layout being created out of nothing and the thought process as to why a particular plan is chosen. What sort of time line is on the work to date? I noticed a September 2010 date on one of those photos in your blurb so I'm assuming this is a retrospective commentary.

Keep it coming though. I'll be adding this to my layout builds to watch.

Paul
User avatar
flying scotsman123
Posts: 2233
Joined: Thu Jan 12, 2012 5:29 pm
Location: err, down there round the corner... not that one!!!

Re: Hawick via Grantham, Inverness and SIAM (00 gauge DC)

Post by flying scotsman123 »

carnehan wrote:I'm assuming this is a retrospective commentary.
I should bloody hope so with that amount of work done! Cracking stuff Ex-Pat.
Image
Stone station in pre-grouping days, my layout. Workbench for other projects here.
Ex-Pat
Posts: 2201
Joined: Tue Feb 08, 2011 10:51 pm
Location: Newry Northern Ireland

Re: Hawick via Grantham, Inverness and SIAM (00 gauge DC)

Post by Ex-Pat »

carnehan wrote: What sort of time line is on the work to date? I noticed a September 2010 date on one of those photos in your blurb so I'm assuming this is a retrospective commentary.

Paul
flying scotsman123 wrote:
I should bloody hope so with that amount of work done! Cracking stuff Ex-Pat.
Nah - it's just something I knocked out last week!

Seriously though - many thanks for your comments - yes, I must have started just before September 2010, and progress has been slow - too much time spent on the Quiz since I joined the Forum!

(If ever you're down this way Paul and want a look then PM me to arrange.)
Ex-Pat
Posts: 2201
Joined: Tue Feb 08, 2011 10:51 pm
Location: Newry Northern Ireland

Re: Hawick via Grantham, Inverness and SIAM (00 gauge DC)

Post by Ex-Pat »

Baseboard 2 (surprise, surprise!) was the next to be tackled, and it posed more split level problems in that the ramp up to the coaling stage commenced on the Down side and, on the Up side the “Back Railway” dropped down to river level. This was a fairly steep line alongside the Up sidings that went down to a relatively little known but very interesting complex serving the Gas Works and Abattoir. I simply couldn’t ignore it, but putting it in means that I have to make it “disappear” somehow – will eventually probably try to “paint it into the distance”.

This is how the board turned out after tracklaying.
The coaling ramp can be seen on the left and the&quot;Back Railway&quot; on the right.
The coaling ramp can be seen on the left and the"Back Railway" on the right.
2ndBaseboard 012paint.jpg (258.84 KiB) Viewed 8269 times
Incidentally the slots down the side edges of the baseboards are to accommodate the posts of future backscene boards.

So to the really testing Baseboard 3. Hawick station was not only on a vicious curve requiring check rails, but at the Carlisle end of the station buildings there was a curved viaduct over Mansfield Street, the River Teviot and Duke Street. What’s more, the platforms continued out over the viaduct as 'outrider" type appendages supported by large girders jutting out from the viaduct walls.

I therefore had to cope with a sudden drop in ground level from Baseboard 1. Also, as there was a steep roadway up from Mansfield Street to the cattle/goods dock siding I decided to try and cut out the roadway and station buildings support board in one piece.
Obviously resting temporarily at a much higher position than it will finally be - the Waverley Route was said to be one where locos did as much vertical work as horizontal but it wasn't this bad!
Main station baseboard under construction..jpg (149.67 KiB) Viewed 8269 times
The basic framework - shortly to undergo remedial work on the right hand side.
Baseboard 3, 11-08-2012.jpg (166.31 KiB) Viewed 8269 times
The station support board together with steep roadway to goods unloading dock awaits final trimming.  The markings on the board show the outline of the underlying framework,  I always put the framework on top of the board before screwing it down and draw round the framework as it helps to show where I can drill holes to screw it down.
The station support board together with steep roadway to goods unloading dock awaits final trimming. The markings on the board show the outline of the underlying framework, I always put the framework on top of the board before screwing it down and draw round the framework as it helps to show where I can drill holes to screw it down.
Baseboard top cut out..jpg (140.47 KiB) Viewed 8269 times
Some drastic surgery has been inflicted on the right hand side to accommodate the steep roadway.
All screwed down..jpg (186.99 KiB) Viewed 8269 times
T.B.C. in a few day's time.
User avatar
RailwayRobbo
Posts: 608
Joined: Tue Nov 10, 2015 1:32 pm
Location: Deepest, Darkest Northants.

Re: Hawick via Grantham, Inverness and SIAM (00 gauge DC)

Post by RailwayRobbo »

Looks like this is going to be a very interesting build. I'll be following your future posts. Looking good. Pete.
User avatar
carnehan
Posts: 1319
Joined: Mon Jan 07, 2013 9:44 pm

Re: Hawick via Grantham, Inverness and SIAM (00 gauge DC)

Post by carnehan »

Ex-Pat wrote:
(If ever you're down this way Paul and want a look then PM me to arrange.)
A kind gesture Ex-Pat and one I will avail of should I be travelling past your door. We will be as a family on the 10th July but will be hurtling past as we head to the airport for sunny climes. Of course, the invitation is reciprocated should you meander near The Middle Town.

Enjoyed the new update. I'm glad I caught this layout early as it would take some reading to catch up!

Paul
Ex-Pat
Posts: 2201
Joined: Tue Feb 08, 2011 10:51 pm
Location: Newry Northern Ireland

Re: Hawick via Grantham, Inverness and SIAM (00 gauge DC)

Post by Ex-Pat »

Thanks for your comments Pete - and have a good holiday Paul - I'm sure we'll meet some day.
Post Reply